Stealth Cam Ultimate DS4K - Scouting Camera Manual
- Firmware update (2 pages) ,
- Instruction manual (38 pages)
Advertisement
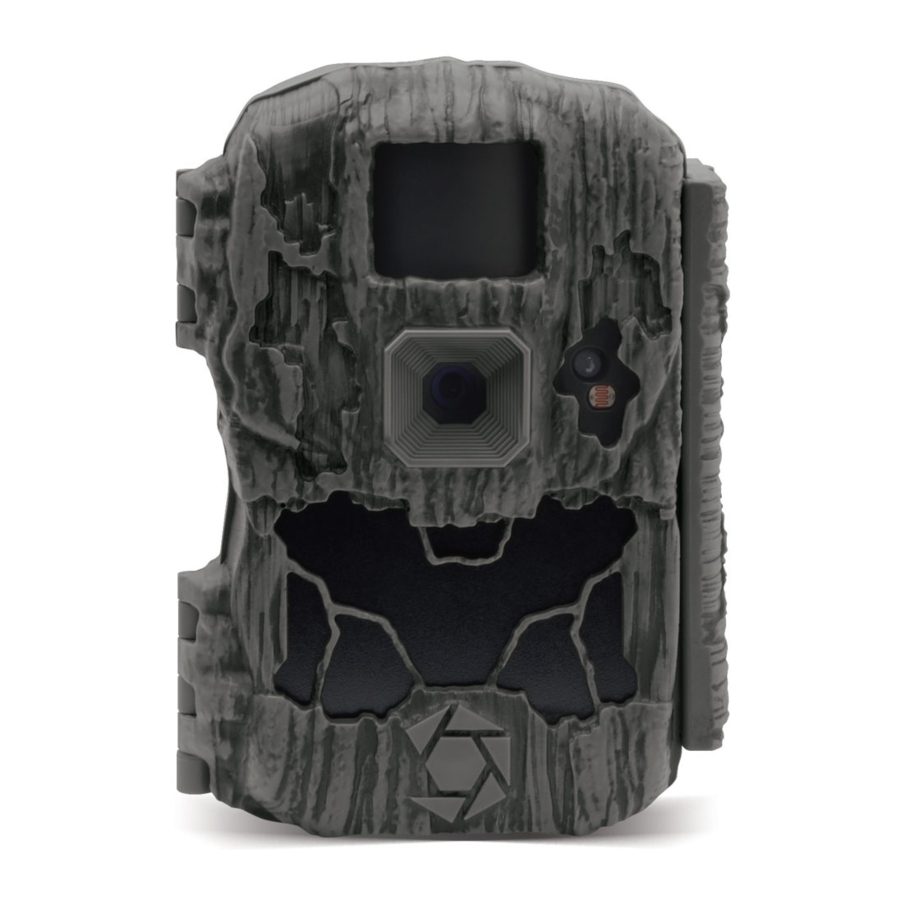
Camera Overview


Camera Accessories (Not included)
Pair these Stealth Cam accessories with your DS4K Ultimate™ camera to maximize your camera's utility.
Tree Screw Mounts: Versatile screw-in mount allows you to secure your trail camera in various heights and angles for desired field of view.

Solar Power Panel: Efficiently powers your camera in all weather conditions including cloudy days. The Solar Power Panel uses a built in rechargeable lithium-ion battery to provide maintenance free operation and prevent natural drain of batteries over time.

6' Python Lock Cable: Keep your trail camera safe from theft with this Master Python lock. The Cut-resistant 6' x 5/16" braided steel cable adjusts from 6" to 6' making it extremely versatile. Pick-resistant reliable pin tumbler locking mechanism. Velcro™ strap holds excess cable in place. Scratch-resistant finish.

About Your Camera
 | Retina Advanced Lowlight Sensitivity Enhanced low light performance for extended night time coverage and range. |  | Reflex < 0.2s Second Trigger Ultra-fast trigger speed, never miss a crucial moment. |
 | Matrix Blur Reduction Technology Advanced blur reduction dramatically reduces blur effects resulting in sharper, clearer images. |  | Geo-Tag GPS Meta-Tagging Track and recall all your favorite locations with optional GPS tagging. |
 | Burst Rapid-Fire Mode Rapid-fire Burst Mode, 1-9 exposures per triggering. | ||
 | Multi-Zone Detection Covers multiple zones of angle and distance, maximizing the camera's triggering accuracy. |  | PIR Combo Video & still image recording at once |
Camera Setup
![]() Battery Installation
Battery Installation
Open camera and lift out battery tray by top notch provided. With the tray removed, insert 12 new AA batteries, being careful to match orientation marked on tray. After batteries are inserted, align metal contacts and reinsert battery tray into camera. If you are using an external power source, ensure that it is 12V. Other voltage levels could damage your camera.
NOTE: Do not mix new and old batteries or alkaline and lithium batteries.

![]() SD Card Installation
SD Card Installation
The SD card slot is located on the left side of your camera. A class 10 SD card is required, use of a different card may produce unexpected results. Insert SD card with label facing you, as shown in diagram on the left. When inserting SD card you should only feel minimal resistance and a click when the card is fully inserted.
NOTE: For optimal performance use a Stealth Cam class 10 SD card.

Software Update Guide
- Clear all files from your SD card, download software upgrade fromwww.stealthcamcommand.com, and insert SD card into camera.
- Camera will automatically detect new software and begin the process as defined as above.
- If camera does not detect new software, remove SD card and verify that the only file present on your card is the software update file.
Screen Readout

- Current operation mode. Will display QSET if camera is in a QSET.
- Count of total number of photos and videos currently on SD card.
- Countdown from 30 sec until camera is armed. Will display RDY before screen powers off.
- Battery percentage.
Mounting Guide
With the included mounting strap, you are able to mount your DS4K Ultimate™ camera to a vertical surface. To ensure that you receive optimal performance with your DS4K Ultimate™ camera, use the following guide to set your camera up to our specifications.
An optimal camera will be set:

- 3 ft – 4 ft off the ground
- North Facing
- Angled slightly downward
The DS4K Ultimate™ camera has a Field of View of 52° diagonal, with a PIR sensing range of 100 ft.
Camera Configuration
To access camera configuration, press the Menu button on your camera. When you are finished adjusting camera settings, press Menu once again to return the camera to an active state.
We offer 3 Quick Setup options based off our most popular configurations.
| Name | Quality | Timeout Delay | Detail |
| QSET 1 | 8.0 MP | 30s | 3 Photos |
| QSET 2 | 8.0 MP | 30s | 1 Photos |
| QSET 3 | 1080P | 30s | 10s Video |
To set a QSET on the camera unit, power camera on and press Left and Right to navigate through the different QSETs.
You are not able to edit our provided QSETs. For alternate custom configurations, read on for more information.
The Camera Settings sections in your camera allows you to customize every setting to fit your exact needs. To begin, press the Menu button on the camera.
Once inside the settings menu, use the Up and Down arrows to scroll through the different settings. To change a setting that is highlighted, press the Enter key and the options for the setting will be displayed. At this point use the Up and Down arrows to change the setting. When finished press the Enter button to save the change or press Menu to cancel change.
When you are finished configuring your camera's settings, press the Menu button to return your camera to an active state
Camera Settings
- TIME ZONE: This setting allows you to set your camera to different time zones.
OPTIONS:
Eastern | Central | Mountain | Pacific | Alaskan | Hawaiian - TIME FORMAT: This setting is used by the camera to change the display format for the time in the Info Bar of the image.
OPTIONS:12 hr | 24 hr
NOTE: If 24 hour format is selected, previous SETUP TIME will be adjusted and AM/PM will be removed - OPERATION MODE: This setting will change the operation mode of the camera. Different operation modes will have different adjustment settings.
OPTIONS:
PIR Combo | PIR Photo | PIR Video | Time Lapse - PHOTO RES: This setting will determine the megapixel (MP) resolution of each image. A higher MP count will result in better photos and take more memory space.
OPTIONS: 4 MP | 8 MP | 16 MP | 32 MP - VIDEO RESOLUTION: This setting will determine the quality of each video. A higher quality will result in better videos and take more memory space.
OPTIONS: 4k (3840x2160) | QHD (2560x1440)
1920x1080 | 1280x720 - PIR DELAY: This setting is used to determine how long the camera will wait before reinitializing PIR sensor after taking a photo.
OPTIONS: 00m 03s – 59m 59s - PHOTO BURST: This setting determines how many photos are taken each time the camera is activated.
OPTIONS: 1 photo – 9 photos - BURST INTERVAL: This setting allows you to set the time interval between burst captures.
OPTIONS:1 sec - 5 sec - REDUCE BLUR: This setting is used to determine if the camera should use the MATRIX Blur technology to dramatically reduce the blur effect, resulting in more clear night time infrared shots.
OPTIONS:
STANDARD: Minimize blurring effect in images while retaining long-range night image capability.
ADVANCED: Enhanced blur reduction providing a balance between brightness and image sharpness.
PROGRESSIVE: Maximizes the blur reduction with the fastest shutter speed. This setting may have darker images with more defined subject detail. - CAMERA NAME: This setting is used to adjust the camera name. Camera name can be up to 13 characters long using alpha (A-Z) numeric (0-9) characters.
- DVR MODE: This setting allows you to continuously record new images. Turning this setting ON will continuously delete oldest recorded files to make space for new files. When turned OFF, the camera will stop recording new files when SD card reaches capacity.
OPTIONS: On | Off - TEMPERATURE: This setting is used to change temperature format on Info Bar.
OPTIONS: Fahrenheit | Celsius - LONGITUDE and LATITUDE: This setting allows you to manually enter the longitude and latitude of your camera.
- OPERATING HOURS: This feature allows you to designate a time for the camera to be active.
OPTIONS:
24/7: Camera is always on
SCHEDULED: Selecting this allows you to enter a time range for the camera to be active. Camera will not take photos outside of defined time range.
START TIME (HH:MM): Start time for camera to be active
END TIME (HH:MM): Time at which you want the camera to no longer be active - INFORMATION BAR: This setting is used to tell the camera whether the Info Bar should be displayed at the bottom of images.
OPTIONS: On | Off - VIDEO LENGTH: This setting is used to determine the length of time, in seconds, of a video recording.
OPTIONS: 10 sec - 180 sec - VIDEO AUDIO: This setting will determine if the video records with or without audio. Recording audio with each video will take additional memory space.
OPTIONS: Off | On - ERASE CARD: This setting is used to format the SD memory card installed. Formatting your SD card will ERASE ALL DATA PRESENT.
NOTE: After card is formatted it is impossible to restore data that was present on card. - TIME LAPSE (TL) DELAY: This setting will adjust the length of time between each photo taken during the time lapse.
OPTIONS: 00 min 05 sec - 59 min 59 sec - TL START: This setting is used to determine the start time of the time lapse.
- TL STOP: This setting is used to determine the end time of the time lapse.
- SECURITY KEY: This setting allows the owner of the camera to program a four (4) character alphanumeric code to prevent unauthorized access to their camera settings. Default code is 0000.
NOTE: The camera owner is responsible for remembering the code. Should the code be forgotten the owner must call in to Customer Service (877-269-8490) for directions on getting the unit restored to factory defaults. In order for the owner to be authorized for the reset, this camera must be registered with Stealth Cam.
Camera Care
![]() Operating Conditions
Operating Conditions
This camera is designed to function in 14°F – 104°F (-10°C - 40°C) 20%-85% relative humidity, non-condensing.
 Product Care
- When not in use, store camera in a cool, dust-free, environment.
- Handle camera with care.
- Camera is weather resistant only. Do not fully submerge camera in water or other liquid. Doing so will void camera warranty.
- Only use same type of batteries to power camera. Do not mix old and new batteries.
- Do not touch camera lens directly. Clean only with soft lens cloth.
- Use damp cloth to clean. DO NOT submerge camera.
- Remove batteries when camera is not in use for an extended time.
- Do not open camera housing to access internal parts. Doing so could damage camera and void warranty.
 Notice
Camera is an active electronic device. Attempting to service internal parts may expose you to dangerous voltages and other risks.
Frequently Asked Questions
General Troubleshooting
What does formatting my SD card do?
A: Formatting your SD card will PERMANENTLY ERASE all files present on your card. Formatting a card can resolve a variety of odd errors that may be preventing your camera from working properly and should be used as one of the first troubleshooting steps.
How do I format my SD card?
A: To format your SD card go to the Erase Card menu from within the camera settings. Once selected press yes to start Format.
Camera Hardware
Q: Will I lose my images and settings if the batteries die?
A: No, the images are stored on your external SD memory card so your images will be intact only on your card. Your settings are saved on your app.
Q: Why is my camera taking pictures with nothing in front of it?
A: This camera is powered by motion activation. This can cause objects, like a tree branch or moving water, within the camera frame to cause the camera to take a photo.
Is my camera waterproof?
A: No, your camera is weather resistant but not waterproof.
Q: Is there a warranty that comes with my camera or an extended warranty I can purchase?
A: Your Stealth Cam Camera comes with a Limited 1-year warranty. Please contact support at 1.888.508.5922 for more information.
Can I mix batteries together?
A: No, you should never mix batteries. After your camera batteries die, always install brand new batteries in your camera.
Can I use rechargeable batteries in the camera?
A: Rechargeable batteries will cause incorrect battery percentage for the camera in the app. We do not recommend using rechargeable batteries.
Notice
To ensure the product is being utilized to its full potential, we recommend checking Stealthcam.com for new product updates. If your camera is having an issue, please check Stealthcam.com to determine if you are using the latest software version.
Contact Us
TECHNICAL SUPPORT EMAIL:
wirelesstechsupport@gsmorg.com
Please allow 48 hours for email response. GSM, LLC P.O. Box 535189 Grand Prairie, TX 75053-9504
CUSTOMER SERVICE CONTACT & HOURS
Toll Free: 1.888.508.5922
CALL CENTER HOURS
Mon – Fri / 8 AM – 5 PM (CST)
WEBSITE
www.stealthcam.com
www.stealthcamcommand.com
Available on iOS and Android, or on the web at www.stealthcamcommand.com
Documents / Resources
References
![www.stealthcam.com]() Stealth Cam - The Leader In Trail Camera Technology
Stealth Cam - The Leader In Trail Camera TechnologyStealthCamCommand
![stealthcam.com]() Stealth Cam - The Leader In Trail Camera Technology
Stealth Cam - The Leader In Trail Camera Technology
Download manual
Here you can download full pdf version of manual, it may contain additional safety instructions, warranty information, FCC rules, etc.
Advertisement


Need help?
Do you have a question about the Ultimate DS4K and is the answer not in the manual?
Questions and answers