Samsung S27DM50 Series Product Manual
Hide thumbs
Also See for S27DM50 Series:
- Product manual (34 pages) ,
- Product manual (34 pages) ,
- Product manual (37 pages)
Table of Contents
Advertisement
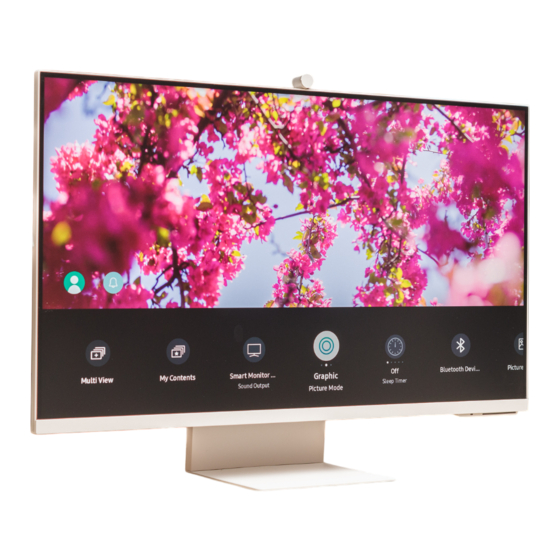
Product Guide
S27DM50* S32DM50* S32DM70* S43DM70* S32DM80*
The colour and the appearance may differ depending on the product, and the specifications are subject to change without prior
notice to improve the performance.
The contents of this manual are subject to change without notice to improve quality.
© Samsung
Samsung owns the copyright for this manual.
Use or reproduction of this manual in parts or entirety without the authorization of Samsung is prohibited.
Trademarks other than that of Samsung are owned by their respective owners.
An administration fee may be charged in the following situations:
(a) An engineer is called out at your request, but it is found that the product has no defect (i.e., where the user manual has
not been read).
(b) You bring the unit to a repair centre, but it is found that the product has no defect (i.e., where the user manual has not
been read).
You will be informed of the administration fee amount before a technician visits.
Advertisement
Table of Contents

Related Manuals for Samsung S27DM50 Series


Summary of Contents for Samsung S27DM50 Series
- Page 1 © Samsung Samsung owns the copyright for this manual. Use or reproduction of this manual in parts or entirety without the authorization of Samsung is prohibited. Trademarks other than that of Samsung are owned by their respective owners. An administration fee may be charged in the following situations: (a) An engineer is called out at your request, but it is found that the product has no defect (i.e., where the user manual has...
-
Page 2: Table Of Contents
Contents Before Using the Product Precautions and Notes Safety Precautions Read After Installing the product Electricity and Safety Picture sizes and input signals Supported Resolutions for UHD Input Signals Installation Operation If Input Signal Plus is set to Off Cleaning If Input Signal Plus is set to On Correct posture to use the product Read Before Connecting a Computer (Supported Resolutions) -
Page 3: Before Using The Product
Do not disconnect the power cord while the product is being used. ● Only use the power cord provided with your product by Samsung. Do not use the power cord with other products. ● Keep the power socket where the power cord is connected unobstructed. - Page 4 Be sure to consult Samsung Customer Service Centre if you want to install the product at such a place. –...
- Page 5 Be sure to power off the product and disconnect the power cord when water or other foreign substances have entered – the product. Then contact Samsung Customer Service Centre. ● Do not place objects containing liquid (vases, pots, bottles, etc) or metallic objects on top of the product.
- Page 6 Cleaning High-glossy models can develop white stains on the surface if an ultrasonic wave humidifier is used nearby. Contact your nearest Samsung Customer Service Centre if you want to clean the inside of the product (Service fee will be "...
-
Page 7: Installation
Preparations Installation Attaching the Stand Before assembling the product, place the product down on a flat and stable surface so that the screen is facing " downwards. Disassembly is the reverse order of assembly. " S27DM50* S32DM50* S32DM70* Put the stand base onto the stand neck Tightly fasten the connecting screw at As shown in the figure, remove the as the direction shown in the figure. - Page 8 S43DM70* Put the stand base onto the stand neck As shown in the figure, remove the product and foam cushion, and then place the as the direction shown in the figure. product on the table with its front side facing the floor. Check that the stand neck is firmly connected.
- Page 9 S32DM80* Put the stand base onto the stand neck Tightly fasten the connecting screw at As shown in the figure, remove the as the direction shown in the figure. the bottom of the stand base. product and foam cushion, and then Check that the stand neck is firmly place the product on the table with its connected.
-
Page 10: Connecting The Camera To The Product
Connecting the camera to the product S32DM80* Camera Specifications 1920 x 1080, 30 fps (FHD) Resolution Automatic light compensation Privacy Cover 85° Viewing angle USB Type-C (USB 2.0) Connection Before using the product, use a soft dry cloth to wipe the camera connector, to prevent malfunction due to foreign matter. "... -
Page 11: Precautions For Moving The Product
Precautions for moving the product The colour and shape of parts may differ from what is shown. " S27DM50* S32DM50* S32DM70* Hold the lower corners or edges of the Do not directly apply pressure on the Do not hold the product upside down product when moving it. - Page 12 S32DM80* Hold the lower corners or edges of the Do not directly apply pressure on the Do not hold the product upside down product when moving it. screen. only by the stand. Do not hold the screen when moving the product. Do not press down on the product.
-
Page 13: Checking The Space Around The Product
Checking the space around the product Make sure to have enough space for ventilation when placing the product. An internal temperature rise may cause fire and damage the product. Maintain enough space around the product as shown in the diagram when installing the product. The exterior may differ depending on the product. -
Page 14: Adjusting The Product Tilt And Height
Adjusting the Product Tilt and Height The colour and shape of parts may differ from what is shown. Specifications are subject to change without notice to " improve quality. S27DM50* S32DM50* S32DM70* ● The product tilt and height can be adjusted. - Page 15 Caution The Product shape may differ depending on the model. " S32DM80* model only. " ● Grasp the centre of the monitor and adjust the height. ● Do NOT hold the stand moving part with your hand when leveling the screen. Your hand may get hurt. ●...
-
Page 16: Rotating The Product
Rotating the Product The colour and shape of parts may differ from what is shown. Specifications are subject to change without notice to " improve quality. S32DM80* model only. " -92° (±2.0°) ~ +92.0° (±2.0°) You can rotate your product as shown below. ●... -
Page 17: Anti-Theft Lock
Anti-theft Lock An anti-theft lock allows you to use the product securely even in public places. " The locking device shape and locking method depend on the manufacturer. Refer to the manuals provided with your anti- " theft locking device for details. S27DM50* / S32DM50* / S32DM70* model only. -
Page 18: Wall Mount Kit Specifications (Vesa)
Samsung is not liable for these kinds of accidents. ● Samsung is not liable for product damage or personal injury when a non-VESA or non-specified wall mount is used or the consumer fails to follow the product installation instructions. ●... -
Page 19: Control Panel
Control Panel You can turn on the product with the Power button, and then use the Control menu. The Control menu appears when the " Power button is pressed while the product is On. S27DM50* / S32DM50* S32DM70* S32DM80* <Rear> S43DM70* Control menu S27DM50* / S32DM50* / S43DM70*... - Page 20 The colour and shape of parts may differ from what is shown. ● The screen may dim if the protective film on the SAMSUNG logo or the bottom of the product is not detached. Please remove the protective film. ●...
-
Page 21: Connections
Connections Using various connectors, you can also connect external devices. Ports The functions available may vary depending on the product model. The colour and shape of parts may differ from what is " shown. Specifications are subject to change without notice to improve quality. Refer to the actual product. S27DM50* / S32DM50* S32DM70* Port... - Page 22 ● Connects to a source device using a USB Type-C cable. When connecting a USB Type-C source device, make sure to use the USB Type-C 3.1 Gen2 10G cable so that the screen is displayed properly. Lower version cables do not support the video input function (Displayport ALT). "...
- Page 23 Camera Port S32DM80* HDMI DC **V Port Description ● Connects to a source device using a USB Type-C cable. When connecting a USB Type-C source device, make sure to use the USB Type-C 3.1 Gen2 10G cable so that the screen is displayed properly.
- Page 24 S43DM70* Port Description Connects to a source device using an HDMI cable. ● Connects to a USB device, such as a keyboard or mouse. This port does not support the USB hub function, and connects to the monitor. " ● Used to update the software.
-
Page 25: Connecting The Product To A Pc As A Usb Hub
Connecting the Product to a PC as a USB HUB The M5 series does not support this function. " Using the product as a hub, connect and use various source devices with the product at a time. The Product shape may differ depending on the model. "... -
Page 26: Tidying Up The Connected Cables
Tidying Up the Connected Cables S27DM50* S32DM50* S32DM70* S43DM70* Connect the corresponding cables. Pull the right side of the HOLDER-STAND CABLE to remove from the stand. The left side of the cable can be damaged when pulled forcibly. Put both cables in the cable holder on the stand (HOLDER-STAND CABLE) to organise the cables, as shown in the figure. Assembly is complete. -
Page 27: Precautions And Notes
Precautions and Notes You can get instructions and information that you must read after installation. Read After Installing the product Read this information after installing the product. Picture sizes and input signals Picture Size is applied to the current source. The applied Picture Size will remain in effect whenever you select that source unless you change them. -
Page 28: Supported Resolutions For Uhd Input Signals
Supported Resolutions for UHD Input Signals Check the supported resolution for UHD input signals. ● Resolution: 3840 x 2160p (M7/M8 series) If Input Signal Plus is set to Off Colour Depth / Frame rate (fps) RGB 4:4:4 YCbCr 4:4:4 YCbCr 4:2:2 YCbCr 4:2:0 Chroma Sampling 50 / 60... -
Page 29: Read Before Connecting A Computer (Supported Resolutions)
Read Before Connecting a Computer (Supported Resolutions) Check the resolutions supported for PC input signals. When you connect your product to a computer, set the computer's video card to one of the standard resolutions listed in the tables below or on the next pages. The product will automatically adjust to the resolution you choose. Note that the optimal and recommended resolutions are 1920 x 1080 at 60 Hz (M5 series), 3840 x 2160 at 60 Hz (M7/M8 series). -
Page 30: Vesa Cvt
VESA CVT Port Resolution Horizontal frequency Vertical frequency Clock frequency Polarity Display format (Dots x lines) (KHz) (Hz) (MHz) (horizontal / vertical) HDMI USB Type-C 1920 x 800 60 Hz 49.279 59.877 102.500 + / - **1920 x 800 50 Hz 27.885 49.883 58.000... -
Page 31: Supported Resolutions For Video Signals
Supported Resolutions for Video Signals Check the resolutions supported for video signals. CTA-861 Port Resolution Horizontal frequency Vertical frequency Clock frequency Polarity Display format (Dots x lines) (KHz) (Hz) (MHz) (horizontal / vertical) HDMI USB Type-C 720 x 576 50 Hz 31.250 50.000 27.000... -
Page 32: Specifications
Specifications General Model Name S27DM50* S32DM50* 27 Class 32 Class Size (27.0 Inches / 68.6 cm) (31.5 Inches / 80.1 cm) 597.888 mm (H) x 336.312 mm (V) 698.4 mm (H) x 392.85 mm (V) Display area 0.3114 mm (H) x 0.3114 mm (V) 0.36375 mm (H) x 0.36375 mm (V) Pixel Pitch 148.5 MHz... - Page 33 ● The specifications are subject to change without notice to improve quality. ● For detailed device specifications, visit the Samsung website. ● (Europe only) To access energy labelling information about this product on the European Product Registry for Energy Labelling (EPREL), go to https://eprel.ec.europa.eu/qr/******...
-
Page 34: Appendix
External impact or drop. ● Use of supplies or separately sold product unspecified by Samsung. ● Repair from a person besides an engineer of outsourcing service company or partner of Samsung Electronics Co., Ltd. ● Remodeling or repairing the product by customer. ●...
Need help?
Do you have a question about the S27DM50 Series and is the answer not in the manual?
Questions and answers
How do I raise the volume
Can you default the monitor to open in the home screen, note to look for an HDMI input