
Related Manuals for Canon imageFORMULA P-215II


Summary of Contents for Canon imageFORMULA P-215II
- Page 1 Please read this manual before operating this scanner. After you finish reading this manual, store it in a safe place for future reference.
-
Page 2: Table Of Contents
Contents Chapter 6 Scanning with CaptureOnTouch ........40 What is CaptureOnTouch? ............40 Contents ..................... 2 Chapter 7 Setting the Scanner Driver ..........41 Chapter 1 Introduction ................ 4 Configuration and Functions of the Scanner Driver ...... 41 About This Manual ................4 Scan Panel .................. - Page 3 When you want to rotate the images of a document placed horizontally to correct the orientation ..........62 Practical Examples ............... 63 How to scan both sides of a card as an image on one sheet of paper ..................... 63 Practical Examples ...............
-
Page 4: Chapter 1 Introduction
Chapter 1 Introduction About This Manual Manuals for the Scanner Thank you for purchasing the Canon imageFORMULA P-215II Document Scanner. Documentation for this scanner consists of the following manuals. In order to fully understand the features of this scanner and use them ... -
Page 5: Features Of The Scanner
The User Manual (electronic manual) will be registered to the following location. Indicates a clarification of an operation, or contains additional explanations for a procedure. Reading these notes is highly recommended. Features of the Scanner The main features of the P-215II document scanner are described below. - Page 6 Dedicated Card Slot Text Enhanced Mode The scanner includes a dedicated slot for scanning plastic cards. Advanced Text Enhancement II is provided to improve the readability when scanning documents in which the background is uniform and CaptureOnTouch both the text and background are light.
-
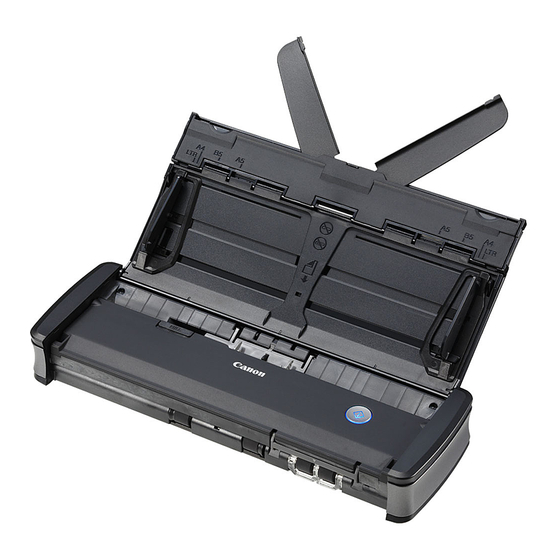
Page 7: Names And Functions Of Parts
Names and Functions of Parts (7) Card Slot Insert plastic cards here. This section describes the name and function of each part. Make (8) Card Guides sure to read this section and familiarize yourself with the parts of the These guides ensure that cards inserted in the card slot are fed scanner before using the scanner. -
Page 8: Power Supply
Back View Power Supply The power of the scanner is designed to turn ON when the feed tray is opened or closed. To turn the power ON or OFF, operate the scanner as described below. (1) Rear Card Slot Turning ON the Power When a plastic card is fed, a portion of the card protrudes from here momentarily. - Page 9 Extend the front panel of the feed tray before opening the entire feed Turning OFF the Power tray. If the feed extension plates and document guides are raised, lower The scanner turns ON, and the Start button lights. them. The Start button may blink slowly when the USB cable is connected and the feed tray is opened.
- Page 10 Close the feed tray. The scanner turns OFF. Push the section (front cover) at the front of the feed tray to close it. When not using the scanner, close the scanner's Document Feed Tray or disconnect the USB cable. ...
-
Page 11: Regulations
Regulations Canon U.S.A. Inc. One Canon Park, Melville, NY 11747, U.S.A. Tel. No. (800)652-2666 FCC REGULATIONS (For North America) Document Scanner, Model M111132 ® ENERGY STAR Office Equipment Program This device complies with Part 15 of FCC Rules and Industry Canada This program is for U.S.A and Canada. -
Page 12: Trademarks
This is not an exhaustive list. trademarks or trademarks of Microsoft Corporation in the United Canon is not responsible for how this scanner is used by an individual. States and other countries. Please note that certain intellectual property is protected by copyright law, ... -
Page 13: System Requirements
Computer interfaces, even if present as standard equipment on the • CPU: Intel Core 2 Duo 1.66GHz or faster computer. For details, consult your local authorized Canon Intel Core i7 2.3GHz or faster dealer. Scanning speeds are lower if your computer’s standard USB •... -
Page 14: Chapter 2 Important Safety Instructions
Chapter 2 Important Safety Installation Location Instructions The performance of this scanner is affected by the environment in which it is installed. Make sure that the location where the scanner is installed meets the following environmental requirements. To ensure the safe operation of this scanner, be sure to read the safety ... -
Page 15: Moving The Scanner
OFF, and disconnect plug is securely and completely inserted into the power connector. the USB cable. Then, contact your local authorized Canon dealer or Use only the USB cable supplied with the scanner. -
Page 16: Disposal
Do not allow water or flammable substances (alcohol, benzene, paint thinner, etc.) to spill inside the scanner, as this may result in a fire or electric shock. If you will not be using the scanner for an extended period of time, such as during consecutive holidays, disconnect the USB cable for safety. -
Page 17: Chapter 3 Connecting The Scanner
Chapter 3 Connecting the Scanner Connecting the Scanner to the Computer Connect the scanner to the computer. Connect the scanner to the computer and power outlet. Connecting the Scanner to the Computer Connecting the Scanner to the Computer........17 Turn OFF the Auto Start switch on the rear of the scanner, and use the Turning the Power ON................ -
Page 18: Turning The Power On
Turning the Power ON Auto Start Switch There is an Auto Start switch at the rear of the scanner for setting whether to operate the scanner as a storage device. Raise the feed tray slightly while pressing the feed tray release lever. Opening the scanner document feed tray switches on the power supply automatically. - Page 19 When the scanner is turned on for the first time, the balloon message shown below appears on the Windows task bar. If you wait a while, automatic scanner recognition will end and the scanner will become ready to use. When the scanner is properly connected to the computer, the (CaptureOnTouch) icon appears on the taskbar as follows.
-
Page 20: Chapter 4 Placing Documents
Chapter 4 Placing Documents Documents The scanner can scan documents ranging in size from business This section describes how to load a document for scanning. cards and checks to LTR/A4/LGL. The document sizes that this scanner can scan are shown below. Documents .................. - Page 21 Scanning the following types of documents can cause a paper jam or malfunction. To scan such a document, make a photocopy of the document and then scan the photocopy. A document must meet the following criteria to be scannable: Wrinkled or creased Carbon paper ...
-
Page 22: Loading A Document
Loading a document Align the document guides with both edges of the loaded document. • Press the document beneath the tabs of the document guides. • Up to 20 pages of plain paper can be loaded at the same time. Open the feed tray to turn ON the scanner. -
Page 23: Loading Cards
Loading cards Use the card slot when scanning plastic cards. Use the following procedure to scan the cards one by one. Open the document feed tray. Turn the card face up, and insert the card straight into the card slot. When the edge of the card touches the slot, the rollers will move automatically. -
Page 24: Setting The Long Document Mode
356 mm (14"), but you can scan documents up to 1,000 mm (39.4") long by setting the scanner to the Long Document mode. Click the Start button, and then click [All Programs], [Canon P-xxx], and [Canon imageFORMULA Utility]. imageFORMULA Utility starts. - Page 25 Click [OK]. Opens the scanner driver's Detail Settings screen. See "Select document settings" on page 35. Click to display the [Scanner Information] dialog box. The [Scanner Information] dialog box appears. Click [Maintenance]. The [Maintenance] dialog box appears. Select [Long Document mode (1,000 mm)]. Click to close the dialog box.
-
Page 26: Chapter 5 Scanning With Captureontouch Lite
Chapter 5 Scanning with Scanning with CaptureOnTouch Lite CaptureOnTouch Lite CaptureOnTouch Lite is a scanning application that comes pre- installed in the scanner. It can be used on a computer that does not have the scanner driver installed. This section describes how to scan when using CaptureOnTouch Lite. Scanning with CaptureOnTouch Lite.......... - Page 27 Open the feed tray, turn ON the scanner, and then load the document. For details, "Loading a document". When you open the document feed tray, the Start button on the scanner lights For details, "Loading a document". and the Finder window shown below opens automatically. When you open the feed tray, the Start button on the scanner lights and the If you click the [CaptureOnTouch Lite Launcher] icon, CaptureOnTouch Lite auto play screen appears.
- Page 28 Double-click the [CaptureOnTouch Lite Launcher] icon. The selected [Select document] panel will be displayed in orange. To edit the [Output] panel, see "Setting the output". Click the [SCAN] button. The selected [Select document] panel will be displayed in orange. To edit the [Select document] panel, see "Select document settings".
- Page 29 After confirming the scanned image, click the [Finish] button. If scanning continuously, set the next document, and click the [Scan more pages] button to start the document scan. To edit scan images, see ["Operations for the scanned image edit window"]. "Setting the output"...
- Page 30 When Using macOS macOS System Preferences In macOS, when you start CaptureOnTouch Lite for the first time, two If [Don’t Allow] is clicked on the message screen displayed when message screens appear before the application launches. Click [OK] on CaptureOnTouch Lite Launcher is launched for the first time, then both screens.
-
Page 31: Starting And Exiting Captureontouch Lite
Starting and Exiting CaptureOnTouch Lite To quit the residence of the CaptureOnTouch application Once you start CaptureOnTouch Lite it remains present in the system. Click (CaptureOnTouch Lite icon) in the taskbar, and then from menu select [Exit]. When the Auto Start switch on the rear of the scanner is not in the ON position, CaptureOnTouch Lite will not start. -
Page 32: Operations For The Scanned Image Edit Window
Operations for the scanned image edit window Click (CaptureOnTouch Lite icon) in the menu bar, and select When scanning has finished, a preview window of the scanned [Exit] from the menu. image will be displayed. To display the edit window in the preview window, click on the tool bar. - Page 33 [Color adjustment] (Easy settings) Changes the display magnification. Move the slider to + (plus) or - (minus) to enlarge or reduce the preview image. Click to make the display magnification of the preview enlarged to full-screen. Click to display or hide the preview area. Click to display or hide the Edit window.
- Page 34 [Color adjustment] (Manual settings) [Image alignment] Move the slider to the left or right to adjust the brightness and contrast of Click [Image alignment] to display. the image, checking the preview image. The preview image or the slider can be used for the straightening and the trimming.
-
Page 35: Select Document Settings
Select document settings [Rotate] By default, CaptureOnTouch Lite enables the [Full auto] scan setting, so shortcut scans saved to the folder are implemented using the scan conditions that match the document. To specify the document size, color mode, and other settings, set the desired scan condition by editing the scan mode panel. - Page 36 [Color mode] [Rotate image to match orientation of text] Select the color mode for scanning from below. Check [Enable] on to rotate the image in the same direction with the characters. Detect automatically Automatically determines the color mode based on the document content and scans accordingly. [Use advanced settings dialog box] 24-bit Color Scans the document in color.
-
Page 37: Setting The Output
Setting the output Name Enter the name to be displayed in the select document panel. By default, CaptureOnTouch Lite enables the settings to converts the scanned images to PDF file and save to a folder. Icon To specify the output method and save location, edit the output panel and You can change the select document icon displayed in the scan mode set the desired output. -
Page 38: Environmental Settings
Environmental Settings Save to folder Saves the scanned image to the specified folder. When this output method In the [Environmental settings] dialog box, you can configure settings is specified, set the save location folder. related to CaptureOnTouch Lite operations and perform scanner maintenance. - Page 39 Click [Preferences] in the [CaptureOnTouch Lite] menu. The [Environmental settings] dialog box appears. You can configure the following in this dialog box. [Maintenance]Tab [Initialize] Return all settings to their default condition.
-
Page 40: Chapter 6 Scanning With Captureontouch
Chapter 6 Scanning with What is CaptureOnTouch? CaptureOnTouch CaptureOnTouch is a scanning application that enables you to scan a document with a simple operation merely by selecting the screen panel. This section describes the scanning procedure when using CaptureOnTouch. What is CaptureOnTouch? ..............40 For details about the operations and functions, see the help of CaptureOnTouch. -
Page 41: Chapter 7 Setting The Scanner Driver
Chapter 7 Setting the Scanner Driver Configuration and Functions of the Scanner Driver When you load the driver for the first time, the selected scanner and a dialog for selecting the default paper size are displayed. Driver Dialog Box These settings will apply when [Default] is clicked in the ISIS driver dialog box. - Page 42 In addition, you can click the [Area] button and specify the area to be [Image processing] Tab scanned. Depending on the ISIS compatible application, the application may have its own screen for setting scanning conditions. If the scanner driver is opened in such an application, setting items related to the functions provided by the scanner driver other than scanning conditions will be displayed on the [Basic] tab.
- Page 43 [Others] Tab When the scanner driver is opened from CaptureOnTouch, the following settings screen of the scanner driver appears. Configure settings for specialized scanning and image processing.
-
Page 44: Scan Panel
Scan Panel Scan Panel When you access the settings screen of the scanner driver from a Scan Panel is software for controlling scanning operations such as feeding TWAIN compatible application, you can switch the settings screen documents and stopping scanning when scanning multiple documents between Simple Mode and Advanced Mode screens shown below. -
Page 45: Setting Basic Scanning Conditions
Setting Basic Scanning Conditions Color mode Select the scanning mode. This section provides an overview of the basic setting items that are the minimum requirements when configuring the scanner settings. [Advanced Text Enhancement II] remove or process the background color and background surrounding text to enhance the text for easy reading. - Page 46 Scanning Side Color mode Select which of the sides of the document to scan. Select the scanning mode. If the scanning side is set to [Skip blank page], the images of blank pages are deleted when images are saved. [Advanced Text Enhancement II] removes or processes the background color and background surrounding text to enhance the text for easy reading.
- Page 47 in the settings screen of the scanner driver is enabled only when [Detect automatically] is selected. Scanning Side Select which of the sides of the document to scan. If the scanning side is set to [Skip blank page], the images of blank pages are deleted when images are saved.
-
Page 48: Function Restrictions Depending On Mode Setting
Function Restrictions Depending on Mode [Image processing] tab Setting Prevent Bleed Edge Color Background Setting value Through / emphasis drop-out smoothing Remove Background Detect automatically Black and White Error Diffusion Some of the setting items in each of the driver tabs are disabled as Advanced Text follows depending on the setting for [Color Mode] on the [Basic] tab. - Page 49 [Image processing] dialog box Prevent Bleed Some of the setting items are disabled as follows depending on the Background Through / Setting value Edge emphasis setting for [Color Mode] in the settings screen of the scanner driver. smoothing Remove Background Simple Mode Detect automatically Setting value...
-
Page 50: Chapter 8 Special Scanning
Chapter 8 Special Scanning Practical Examples To scan unregistered size documents This section provides examples of scanning settings for different purposes. For details on setting options, see "Chapter 7 Setting the Scanner Driver" on p.41. Practical Examples Configuring the following settings allows you to scan a document of an unregistered page size. -
Page 51: Practical Examples
Practical Examples Select the [Set Scanning Area] check box and then specify the area of the When you want to specify the scan area document to be scanned. Specify the area of the document to be scanned in the [Scan Area] dialog box, which is opened from the [Area] button on the [Basic] tab. -
Page 52: Practical Examples
Practical Examples Set the scanning side setting to [Skip blank page] to delete the images of When you want to delete the images of the blank pages in the blank pages in the document. two-sided documents Set the scanning side setting to [Skip Blank Page] on the [Basic] tab to delete the images of the blank pages in the document. -
Page 53: Practical Examples
Practical Examples Click [Image processing] and specify the color (red, blue, or green) to be When you do not want to scan colored lines and text ignored (dropped out) in the dialog box which appears, and that color will not be scanned. Specify the color (red, blue, green or Color Elimination) to be ignored (dropped out) in the color drop-out settings on the [Image processing] tab, and that color will not be scanned. -
Page 54: Practical Examples
Practical Examples Click [Image processing] and specify [Red Enhance] for [Color dropout] in When you want to enhance the color red the dialog box that appears to enhance the color red in the document. Specify [Red Enhance] for [Color drop-out] on the [Image processing] tab to enhance the color red in the document. -
Page 55: Practical Examples
Practical Examples Click [Image processing] and adjust the edge emphasis settings in the When you want to enhance contours in images dialog box which appears. Adjust the edge emphasis setting on the [Image processing] tab. -
Page 56: Practical Examples
Practical Examples Click [Image processing], and in the dialog box that appears adjust letter When you want to make lines or characters in the scanned and line thickness settings. images thicker Drag the slider for [Character Emphasis] on the [Image processing] tab to make the lines and characters that appear in the scanned image thicker. -
Page 57: Practical Examples
Practical Examples Click [Image processing], and in the dialog box [Apply corrections suitable How to produce a picture quality scan for photographs] that appears, select [ON]. In the [Image processing] tab, click [Apply corrections suitable for photographs] checkbox to ON. ... -
Page 58: Practical Examples
Practical Examples Select [Advanced Text Enhancement II] in the [Color mode] setting. The When you want to enhance text that is difficult to read background behind the text is removed or processed so that the text is because of factors such as the background of the scanned emphasized for better readability. -
Page 59: Practical Examples
Practical Examples Click the [Deskew] check box to ON. You can select either [Straightens To correct tilted documents and images with angle of fed documents] or [Straightens with angle & contents of fed documents]. Place a check in [Automatically straightens skewed] under the [Basic] tab, and then click [Setting] to display the [Deskew Settings] screen. -
Page 60: Practical Examples
Practical Examples Select the [Double Feed Detection] check box. When you want to detect multiple pages fed at the same time Select the [Double Feed Detection] check box on the [Feeding] tab. You can enable the [Detect by Length]. -
Page 61: Practical Examples
Practical Examples Select the [Text Orientation Recognition] check box. The text orientation When you want to match the orientation of images to the text on each page is detected, and the scanned image is rotated in 90-degree when scanning a mixture of pages with different text increments to correct the orientation. -
Page 62: Practical Examples
Practical Examples Click [Image processing] and specify the rotation angle in [Document When you want to rotate the images of a document placed Orientation] in the dialog box which appears. horizontally to correct the orientation Specify the rotation angle in [Document Orientation] on the [Others] tab. -
Page 63: Practical Examples
Practical Examples How to scan both sides of a card as an image on one sheet of paper For a landscape card, the image is oriented so that the lettering on both sides is in the same direction. If you want to scan the front and back of a card in a single scan, in the [Feeding] tab, click the [Combine Front &... -
Page 64: Practical Examples
Practical Examples Set [Full Automatic Mode] in [Favorite Settings] to scan with scanning When you want to set the scanner conditions automatically conditions that match the document. Set [Full Automatic Mode] in [User Preference] to scan with scanning conditions that match the document. When [Full Automatic Mode] is selected, [Color mode], [Page Size], and [Dots per inch] are all detected automatically. -
Page 65: Practical Examples
Practical Examples When you want to specify different scanning conditions for the front and back pages of a document, select [Skip blank page] or [Duplex] for [Scanning Side] on the [Basic] tab in advance. When you want to use multistream settings for scanning Specify the number of scanning conditions to apply in [Stream count of Front]. -
Page 66: Practical Examples
Practical Examples When you finish configuring a setting, select [Add/Delete] of [Favorite When you want to save a scanner driver setting Settings] to save the setting. When you finish configuring a setting, click the [Save] button of [User Preference] to save the setting. Clicking the [Add] button registers the current setting to [Favorite Setting List]. -
Page 67: Chapter 9 Regular Maintenance
Chapter 9 Regular Maintenance Cleaning the Scanner To clean the exterior of the scanner, dampen a cloth with water or a Clean the scanner and perform maintenance on a regular basis as mild detergent, wring the cloth out thoroughly, and then wipe the dirt described below to maintain peak scanning quality. -
Page 68: Cleaning The Scanning Glass And The Rollers
Use compressed air to remove dust and paper particles from the Scratches on the sensor glass may cause marks on the images, as well inside of the scanner. as feeding errors. If there are scratches on the sensor glass, contact your local authorized Canon dealer or service representative. -
Page 69: Chapter 10 Detaching And Attaching The Feed Roller And Separation Pad
Detaching and attaching the Feed Roller ......... 71 Detaching and attaching the separation pad ........72 Resetting the Counters ..............73 Contact your local authorized Canon dealer or service representative for detailed information about the replacement parts. Feed Roller: 100,000 sheets... - Page 70 This message only serves as a rough guide for when to replace the feed roller and separation pad. They may wear out sooner if, for example, a lot of pages with rough surfaces are scanned. Separation Pad: 10,000 sheets Furthermore, the counter in the scanner that records the number of pages fed also needs to be reset when you replace the rollers.
-
Page 71: Detaching And Attaching The Feed Roller
Detaching and attaching the Feed Roller Slide the feed rollers to left. To remove or attach the feeding roller, follow the procedure below. Detaching the Feed Roller Open the feed tray. Remove the feed rollers. Open the feeder cover. Attaching the Feed Roller Use the following procedure to replace the feed roller. -
Page 72: Detaching And Attaching The Separation Pad
Slide the feed rollers to right. Detaching and attaching the separation pad When replacing the separation pad, perform the following steps to detach it from and attach it to the unit. Detaching the separation pad Open the feed tray. Completely close the roller cover so that it clicks into place. Make sure to close the roller cover so that it clicks into place. -
Page 73: Resetting The Counters
Close the feeder cover. In this case, you can reset the counter from CaptureOnTouch Lite. Log on to Windows as an Administrator. Click the Start button, and then click [All Programs], [Canon P-xxx], and [Canon imageFORMULA Utility]. imageFORMULA Utility starts. - Page 74 Click [CANON P-xxx USB] and click [Properties]. Click the [Maintenance] tab, and reset the counters. If you replaced the feed rollers, click [Reset] for [Current Rollers]. Opens the scanner driver's Detail Settings screen. If you replaced the separation pad, click [Reset] for [Current Pad].
-
Page 75: Chapter 11 Uninstalling The Software
Chapter 11 Uninstalling the Software Uninstallation If the scan driver, CaptureOnTouch is not operating normally, follow the procedure below to uninstall them. Then, re-install the software. For details, refer to the Setup Guide. Uninstallation ..................75 Log on to Windows as an Administrator. From the Windows task bar, click the [Start] button, and then [Control Panel]. -
Page 76: Chapter 12 Troubleshooting
Chapter 12 Troubleshooting Clearing a Paper Jam When paper jams occur during scanning, use the following Clearing a Paper Jam ................. 76 procedure to clear them. Common Problems and Solutions ............ 78 Software Troubleshooting ..............80 Useful tips ................... 81 Be careful when removing jammed paper. - Page 77 Remove the jammed document from the feed side or eject side. When a paper jam or other problem occurs while [Rapid recovery system] is enabled in the scanner driver, the image of the last document that was scanned properly is saved before scanning is stopped.
-
Page 78: Common Problems And Solutions
If you have a problem that is not solved by the following, contact your local Align the document guides to fit the documents as closely as authorized Canon dealer. possible, and load the documents so that they feed straightly. Enable [Automatically straightens skewed] (or [Deskew]) in The scanner does not turn ON. - Page 79 Contact your local authorized documents. To finish the operation and send the scanned images Canon dealer. to the application, press the [STOP] button (Windows) / [Finish] button (macOS) on the operating panel.
-
Page 80: Software Troubleshooting
Software Troubleshooting There is a display glitch on the UI screen of CaptureOnTouch Depending on the computer that you are using, a display glich may occur on the UI screen when there are too many Scan mode panels, Select This section describes troubleshooting problems and solutions for output panels, or Scanning Shortcut panels. -
Page 81: Useful Tips
Useful tips What rules apply to scanned image file names? CaptureOnTouch Here are some useful tips for scanning documents. For both Standard Scanning and Scanning Shortcut, the file names of scanned images are set based on the settings in the [Select Where are scanned images saved? Can the save destination output] panel. - Page 82 What's the best way to scan business cards or photos? I want to save to other folders Set [Page Size] to [Match original size] on the scanner driver settings CaptureOnTouch screen, then scan. Alternatively, register the size of the cards or photos to •...
-
Page 83: Chapter 13 Appendix
Chapter 13 Appendix Specifications Main Unit Specifications ..................83 Replacement parts................84 Type Desktop sheetfed scanner Scanning Document Size Option ....................84 Plain paper Width 50.8 to 216 mm (2 to 8.5") External Dimensions ................85 Length 70 to 356 mm (2.756 to 14") Up to 1,000 mm (39.4") in Long Document mode Thickness 52 to 128 g/m... -
Page 84: Replacement Parts
300 × 300 dpi 15 pages/min. Duplex 200 × 200 dpi 30 images/min. Contact your local authorized Canon dealer or service representative for 300 × 300 dpi 30 images/min. detailed information about the replacement parts. 24-bit Color Simplex 200 × 200 dpi 10 pages/min. -
Page 85: External Dimensions
External Dimensions... - Page 86 For more information regarding return and recycling of WEEE associées aux équipements électriques et électroniques. Parallèlement, products, please visit www.canon-europe.com/sustainability/approach/. votre entière coopération dans le cadre de la mise au rebut correcte de ce produit favorisera une meilleure utilisation des ressources naturelles. Pour Only for the United Kingdom plus d'informations sur les points de collecte des équipements à...
- Page 87 Rifiuti di Apparecchiature Elettriche ed Elettroniche, Verordnung des Elektro- und Elektronikgerätegesetzes beschriebenen consultare la Direttiva RAEE, rivolgersi alle autorità competenti, oppure Bedingungen abgegeben werden. visitare il sito www.canon-europe.com/sustainability/approach/. Als Endbenutzer und Besitzer von Elektro- oder Elektronikgeräten sind Español Sie verpflichtet: •...
- Page 88 Du finner mer informasjon om retur og resirkulering apparatuur (AEEA) raadplegen. Ga voor meer informatie over het av WEEE-produkter på www.canon-europe.com/sustainability/approach/. inzamelen en recyclen van afgedankte elektrische en elektronische apparatuur naar www.canon-europe.com/sustainability/approach/.
- Page 89 Para mais informações sobre a devolução e reciclagem de www.canon-europe.com/sustainability/approach/. produtos REEE, vá a www.canon-europe.com/sustainability/approach/. Svenska Česká Endast för Europeiska unionen och EES (Norge, Island och Pouze Evropská unie a EHP (Norsko, Island a Liechtenstein) Lichtenštejnsko)
- Page 90 Więcej informacji o zwracaniu i od miestneho úradu, úradu životného prostredia, zo schváleného plánu recyklingu zużytego sprzętu elektrycznego i elektronicznego znajduje się OEEZ alebo od spoločnosti, ktorá zaisťuje likvidáciu komunálneho w witrynie www.canon-europe.com/sustainability/approach/. odpadu. Viac informácií nájdete aj na webovej stránke: www.canon- europe.com/sustainability/approach/.
- Page 91 повече информация относно връщането и рециклирането на porabi naravnih virov. Če želite več informacij o tem, kje lahko odložite продукти от излязло от употреба ЕЕО посетете www.canon- odpadno opremo za recikliranje, pokličite občinski urad, komunalno europe.com/sustainability/approach/. podjetje ali službo, ki skrbi za odstranjevanje odpadkov, ali si oglejte načrt OEEO.
- Page 92 Per a més informació sobre la devolució i el reciclatge de apmeklējiet tīmekļa vietni www.canon-europe.com/sustainability/ productes RAEE, visiteu www.canon-europe.com/sustainability/approach/. approach/. Eesti Lietuvių Üksnes Euroopa Liit ja EMP (Norra, Island ja Liechtenstein) Tik Europos Sąjungai ir EEE (Norvegijai, Islandijai ir...
- Page 93 Gradsku čistoću. Za više informacija o vraćanju i recikliranju WEEE proizvoda, posetite stranicu www.canon- europe.com/sustainability/approach/. Српски Ovaj simbol označava da ovaj proizvod ne sme da se odlaže sa ostalim kućnim otpadom, u skladu sa WEEE Direktivom (2012/19/EU) i...
- Page 94 607, TEHERAN-RO, GANGNAM-GU, SEOUL, KOREA CANON INDIA PVT. LTD 7TH FLOOR, TOWER B DLF CYBER TERRACES DLF PHASE III GURGAON - 122002 HARYANA, INDIA CANON EURASİA GÖRÜNTÜLEME VE OFİS SİSTEMLERİ ANONİM ŞİRKETİ KOZYATAĞI,DEĞİRMEN SOK.NİDA KULE İŞ MERKEZİ NO.18 KADIKÖY PUB. CE-IM-0942-E1.60...
Need help?
Do you have a question about the imageFORMULA P-215II and is the answer not in the manual?
Questions and answers