Advertisement
Introduction
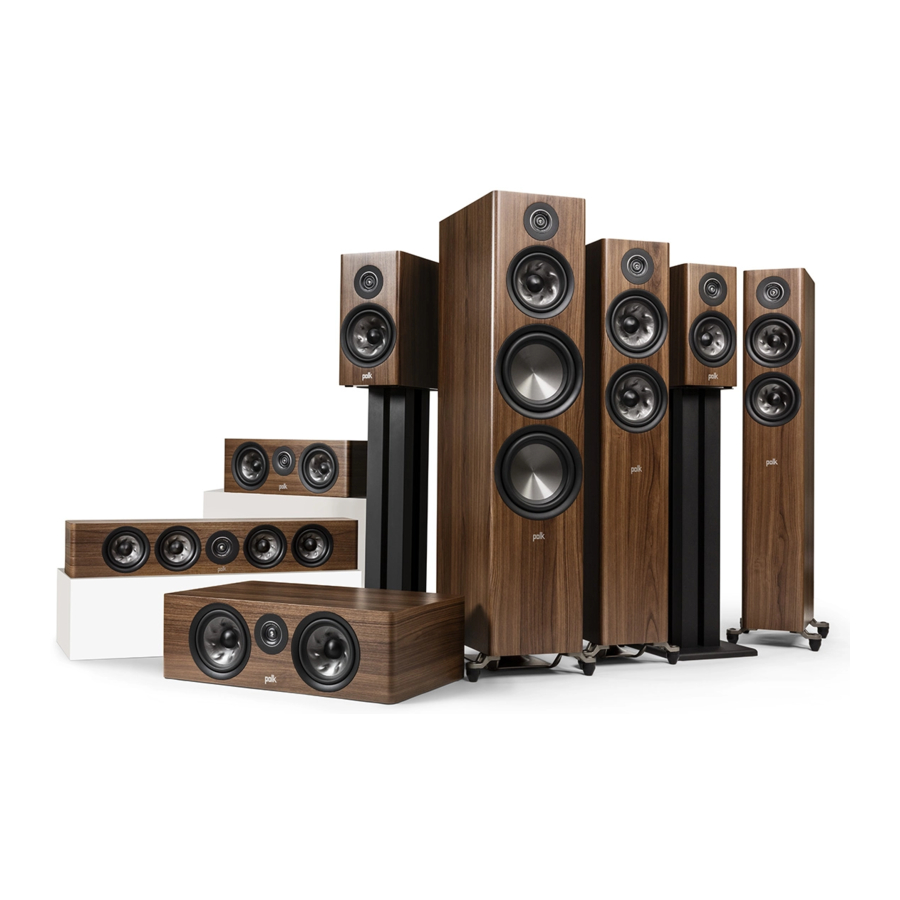
Modern styling combined with Polk's premium Pinnacle tweeter and Turbine mid-range driver deliver high-resolution detail and imaging. With our detailed, deep effortless bass, you will enjoy a whole new listening experience. Pure and minimalist, the Polk Reserve Series is engineered and designed with your entertainment in mind.
Technical Assistance or Service
Thank you for your Polk purchase! If you have a question or comment, please feel free to contact us. Please visit www.polkaudio.com for support contact information.

Listen Carefully
Polk Audio loudspeakers are capable of playing at extremely high volume levels, which could cause serious or permanent hearing damage. Polk Audio, Inc. accepts no liability for hearing loss, bodily injury, or property damage resulting from the misuse of its products. Keep these guidelines in mind and always use good judgment when controlling volume:
- Limit prolonged exposure to volume levels that exceed 85 decibels (dB). For more information about safe volume levels, take a look at the Occupational Health and Safety Administration (OSHA) guidelines at http://www.osha.gov/.
What's in the Box
Each box contains:
- Loudspeaker(s)
- Owner's Manual
- Registration Card
- Magnetic grilles
(Speaker cable not included)
How to Connect Your System
To get the best sound quality, it's important to wire your speakers correctly.
Wire Preparation
Follow the hookup directions included with your receiver/ amplifier. Strip 0.5" (12.7mm) of insulation from each of the two conductors of the wire to expose the bare metal and twist each of the individual conductors into single un-frayed strands. Note that one of the terminals on the rear of each speaker is marked red (+) and the other is black (–). Make sure that you connect the wire from the positive (+) terminal of your amplifier or receiver to the red (+) terminal on your speaker and the wire from the negative (–) terminal of your amplifier or receiver to the black (–) terminal on your speaker. Most wire has some indicator (such as color-coding, ribbing or writing) on one of the two conductors to help you maintain consistency.
These recommendations are for all connections from the amplifier/receiver to each speaker:
| Runs | Minimum Wire Gauge |
| Lengths up to 25' (5 m) | 16 |
| Lengths greater than 25' (5 m) but less than 50' (15 m) | 14 |
| Lengths greater than 50' (15 m) but less than 75' (25 m) | 12 |
| Lengths greater than 75' (25 m) | 10 |
Binding Posts
To connect wire to the binding post, unscrew the binding post cap and insert the bare wire into the hole near the base of the binding post. Do not insert the insulated part of the wire into the hole as this will not give you a good connection. Tighten the binding post cap until it seats firmly with the wire, but do not over tighten.

Connectors
You have several options when choosing connectors for your speaker wires, and it's really a matter of personal preference. Three of the more commonly used are banana plugs, spade lugs and bare wire. If you know where you want to locate your speakers and plan to set up your system and leave them there, then bare wire will work fine. Just make sure there are not stray strands of wire that could come into contact. If you like to experiment with different speaker locations, spade lugs or banana plugs offer more convenient options when it comes to disconnecting and reconnecting wires.
Basic Floor-Standing/Center/Bookshelf and Height Module Unit Hookup

Make sure that the red (+) and black (-) connectors on your amplifier or receiver connect to the red (+) and black (-) connectors on your speakers. If your speakers sound "thin," with little bass and little or no center image, odds are that one of the speaker wires is connected backwards. Double check all connections.
Bi-Wiring
(R700 only)
Bi-wiring can provide noticeable improvements in the overall transparency of your loudspeakers. After removing the jumpers, run separate speaker wires to the low and high frequency drivers from a single amplifier (the upper set of binding posts are for the high frequency drivers, the lower set of binding posts are for the low frequency drivers). Connect one set of speaker wires to the upper terminals on each speaker and one set of wires to the lower terminals. Connect the other ends of both wire sets to the same amplifier outputs. See amplifier/AV receiver user manual for configuration instructions (Figure 1).

Bi-Amping
(R700 only)
Bi-amping allows you to use separate amplifiers for the high and low frequency sections of your loudspeaker for greater dynamic range and lower distortion. We recommend that your separate amplifiers have identical gain to preserve the speaker's voicing balance. After removing the jumpers, connect the speaker wires from the high frequency amplifier outputs to the upper set of terminal posts on each speaker. Follow the same procedure for connecting the low frequency amplifier outputs to the lower set of terminals (Figure 2). Remember to maintain correct wiring polarity (+ to +, – to –) in all connections. See amplifier/AV receiver user manual for configuration instructions.

Bass Management
When using your Reserve Series loudspeakers with a receiver or processor employing bass management in a home theater, we recommend the following settings:
R500, R600 and R700: set to "small" when using a subwoofer and set the crossover frequency between 40-80Hz. If no subwoofer is present in the system, set these to "large".
R100 and R200: set to "small" when using a subwoofer and set the crossover frequency between 50-80Hz.
R300, R350, R400: set to "small" when using a subwoofer and set the crossover frequency between 60-80Hz.
Rubber Feet and Adjustable Floor Spikes
Rubber feet and floor spikes are included with your Reserve floor-standing loudspeakers to anchor and stabilize the speaker on any type of floor. In order to expose the spike, simply pull the rubber feet off. The floor spikes can be adjusted from below and require two hands.
Note: If the speaker is stable on the floor, no adjustment is necessary. If the speaker is unstable, follow these steps:
- The speaker will be inclined to settle on three of the four spikes leaving one spike slightly off the floor.
- Determine which spike needs to be adjusted.
- Use the included Allen wrench to turn the spike clockwise to lower it and counterclockwise to raise it.
![]()
- As the spike contacts the floor, it will become more difficult to turn. At that point the speaker should be stabilized.
- Tighten the lock ring to prevent the spike from loosening over time.

Caring for Your Product
Enclosure Finish
Your Reserve loudspeakers are finished with a premium vinyl. To clean the panels, use a soft dry cloth. You may use furniture polish if needed. Never use harsh detergents or cleaning fluids.
Note: Do not use any petroleum-based cleaners or solvents on the loudspeaker cabinets.
- Do not use furniture polish on black gloss lacquer.
- Clean black lacquer veneer with a damp cloth.
Dusting the Baffle
Use a can of compressed air for the grille and/or baffle to dust. Use a "computer keyboard" vacuum (only on the grille, not the baffle).
Unit Positioning
Placement Recommendations for the R300, R350, and R400
Center Channel Units
The most popular placement for your center channel speaker is below your TV. You may also place your center channel above your TV should you choose. The R400 center channel is very heavy, and we do not recommend wall mounting it. The R350 supports wall-mount via built-in keyhole slots, or it can be placed on a table or center channel stand. The R350 can also be utilized as the front left and right stage. If you would like to use these as lefts and rights, you will need to mount each R350 speaker vertically and put them on either side of your TV. Use the included wall mount template (R350 only) for assistance mounting the speakers. To maximize the sound quality of your speaker system, correct placement is important.
The logo for the R350 speaker is magnetically attached and can be moved from the center channel position to the left or right end of the grille when used as a left or right front speaker. Use caution when removing the logo, as it can be a choking hazard.
Note: Your Reserve Series speakers are compatible with basic/advanced 2.0, 2.1, 3.1, 5.1, 7.1 and 9.1 surround setups (optional subwoofer shown in graphic) and all Atmos setups (ex. 5.1.2, 5.1.4, 7.1.4, 7.1.6).
Listening in 5.2 Surround
You can use the Reserve Series speakers as rear surround speakers in a Polk Audio home theater surround system. Ideal rear channel surround speaker placement is along a side wall, slightly behind and above the listening position. Note: If you cannot place rear surrounds along the side walls, position them along the rear wall above the listening position.

DOLBY ATMOS 5.2 Configuration
SPEAKER PLACEMENT IN LISTENING AREA
Primary Speakers
Front (L/R)
Surround Rear (L/R)


DOLBY ATMOS 5.2.4 Configuration
SPEAKER PLACEMENT IN LISTENING AREA
Primary Speakers
Front (L/R)
Surround Rear (L/R)

Stackable Height Option
Add R900 on top of Front (L/R) and Surround Rear (L/R)

Wall Mountable Height Option
Mount R900 above Front (L/R) and Surround Rear (L/R)

Listening in 7.1 Surround
Enjoy added depth to your surround sound experience with four rear surround speakers instead of two.

DOLBY ATMOS 7.2 Configuration
SPEAKER PLACEMENT IN LISTENING AREA
Primary Speakers
Front (L/R)
Surround (L/R )
Surround Rear (L/R)


DOLBY ATMOS 7.2.4 Configuration
SPEAKER PLACEMENT IN LISTENING AREA
Primary Speakers
Front (L/R)
Surround (L/R )
Surround Rear (L/R )

Stackable Height Option
Add R900 on top of Front (L/R), and Surrounds (L/R)

Wall Mountable Height Option
Mount R900 above Front (L/R), and Surrounds (L/R)

Specifications

Floor-Standing Loudspeakers*

Center Channel Speakers*

Bookshelf Speakers*
*Subject to change without notice.
IMPORTANT SAFETY INSTRUCTIONS

RISK OF ELECTRIC SHOCK
DO NOT OPEN
TO REDUCE THE RISK OF ELECTRIC SHOCK, DO NOT REMOVE COVER (OR BACK). NO USER-SERVICEABLE PARTS INSIDE. REFER SERVICING TO QUALIFIED SERVICE PERSONNEL.
 The lightning flash with arrowhead symbol, within an equilateral triangle, is intended to alert the user to the presence of uninsulated "dangerous voltage" within the product's enclosure that may be of sufficient magnitude to constitute a risk of electric shock to persons.
 The exclamation point within an equilateral triangle is intended to alert the user to the presence of important operating and maintenance (servicing) instructions in the literature accompanying the appliance.
- Read these instructions.
- Keep these instructions.
- Heed all warnings.
- Follow all instructions.
- Do not use this apparatus near water.
- Clean only with dry cloth.
- Do not block any ventilation openings. Install in accordance with the manufacturer's instructions.
- Do not install near any heat sources such as radiators, heat registers, stoves, or other apparatus (including amplifiers) that produce heat.
- Only use attachments/accessories specified by the manufacturer.
- Use only with the cart, stand, tripod, bracket, or table specified by the manufacturer, or sold with the apparatus. When a cart is used, use caution when moving the cart/apparatus combination to avoid injury from tip-over.
![]()
- Refer all servicing to qualified service personnel. Servicing is required when the apparatus has been damaged in any way, such as power supply cord or plug is damaged, liquid has been spilled, or objects have fallen into the apparatus, the apparatus has been exposed to rain or moisture, does not operate normally, or has been dropped.
![]()


Notes On Use
- Avoid high temperatures. Allow for sufficient heat dispersion when installed in a rack.
- Keep the unit free from moisture, water, and dust.
- Do not obstruct the ventilation holes.
- Do not let foreign objects into the unit.
- Do not let insecticides, benzene, and thinner come in contact with the unit.
- Never disassemble or modify the unit in any way.
- Ventilation should not be impeded by covering the ventilation openings with items, such as newspapers, tablecloths or curtains.
- Naked flame sources such as lighted candles should not be placed on the unit.
- Do not expose the unit to dripping or splashing fluids.
- Do not place objects filled with liquids, such as vases, on the unit.

Use caution when unpacking speaker. Tweeter has a pointed tip and may cause injury. Replace speaker grille when not in use.

#PolkAudio
Sound United, LLC
5541 Fermi Court
Carlsbad, CA 92008
U.S.A.
EU Contact:
Sound United Europe,
A division of D&M Europe B.V.
Beemdstraat 11, 5653 MA
Eindhoven, The Netherlands
UK Importer:
D&M Audiovisual Ltd
Dale Road, Worthing,
West Sussex, BN11 2BH
United Kingdom
Documents / Resources
References
Download manual
Here you can download full pdf version of manual, it may contain additional safety instructions, warranty information, FCC rules, etc.
Download Polk Reserve R700, R600, R500, R300, R5350, R400, R200, R100 - Speakers Manual
Advertisement


Need help?
Do you have a question about the Reserve R700 and is the answer not in the manual?
Questions and answers