Table of Contents
Advertisement
Quick Links
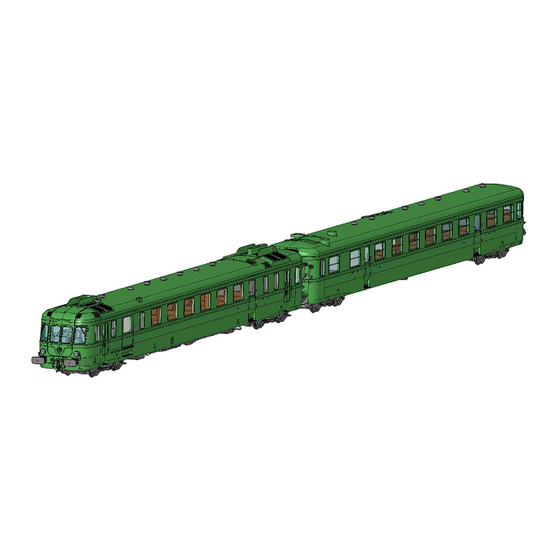
RGP 2 - X-2700 RAILCARS
OPERATING MANUAL
Table of contents
1. Generalities .............................................................................................................. 2
2. Couplings and accessories ........................................................................................ 4
Accessories bag ................................................................................................. 4
Coupler assembly .............................................................................................. 6
3. Body disassembly ................................................................................................... 10
4. Decoder installation/Replacement ........................................................................ 11
5. Electronics. ............................................................................................................. 14
Analog mode. .................................................................................................. 14
Digital DCC. ...................................................................................................... 15
6. Sound decoder functions ....................................................................................... 16
7. Tyres replacement and lubrication. ....................................................................... 17
8. Spare parts ............................................................................................................. 19
1
EN - Operating manual RGP-2 - V3
Advertisement
Table of Contents

Related Manuals for REE MODELES RGP 2 X-2700


Summary of Contents for REE MODELES RGP 2 X-2700
-
Page 1: Table Of Contents
RGP 2 - X-2700 RAILCARS OPERATING MANUAL Table of contents 1. Generalities ......................2 2. Couplings and accessories ..................4 Accessories bag ....................4 Coupler assembly ....................6 3. Body disassembly ....................10 4. Decoder installation/Replacement ................ 11 5. Electronics......................14 Analog mode. -
Page 2: Generalities
1. Generalities A REE product is a highly detailed model offering numerous functionalities. Therefore, one should follow some operating recommendations. First remove engine and trailer from their foam packing by using the protective film. It allows you to handle your model avoiding any breakage. Then, take in your hand your locomotive to set it on the track. - Page 3 WARRANTY Your model is covered by a two years parts and work warranty. This warranty will apply when presenting a purchase receipt with the date of purchase. EN – Operating manual RGP-2 – V3...
-
Page 4: Couplings And Accessories
2. Couplings and accessories The engine is delivered with the front plate completely detailed. As for the trailer, it is delivered with the transition door in place, concealing all the coupling and brake components of the front plate. There is no standard coupler’s support assembled on model. A. - Page 5 For the engine, a complete set of front plate accessories, shorten to make coupler movement possible, Rem: Depending on versions, detailing parts and quantity may vary a bit. For the trailer, a transition and its suspensions are provided to replace the transition door, just like in reality.
-
Page 6: Coupler Assembly
B. Coupler assembly To fit a standard coupler’s support on engine: First remove the complete front plate’s details, Put in place the shorter details, Remove the skirt under the front plate, It is simply inserted vertically, slightly in force, inside the body. EN –... - Page 7 Insert NEM support and coupler, Final look. EN – Operating manual RGP-2 – V3...
- Page 8 To fit a standard coupler’s support on trailer: First remove transition door, It is simply inserted horizontally, slightly in force, inside the body. Remove the skirt under the front plate, It is simply inserted vertically, slightly in force, inside the body. EN –...
- Page 9 Insert NEM support and coupler, Final look. EN – Operating manual RGP-2 – V3...
-
Page 10: Body Disassembly
3. Body disassembly Bodies are held in place on frames by several clips located between passengers’ doors. Lift up body: move apart body’s sides and let the frame slide down. Engine: Trailer: To make this operation easier, there is no electric connection between body and frame. EN –... -
Page 11: Decoder Installation/Replacement
4. Decoder installation/Replacement To convert the train set to DCC, it is necessary to install a decoder in both the locomotive and the trailer. In the engine, main electronic board is hidden between metallic frame and underframe. Remove body from frame as indicated on previous chapter, Disassemble the underframe, it is held in place on frame by 4 clips on each side, lever out those clips one by one with a small screwdriver, then remove the underframe,... - Page 12 To fit model with sound feature, remove the loudspeaker seal protection sheet. Stick the loudspeaker inside the sound box on the underframe. Be careful of how the loudspeaker is laid: the 2 loudspeaker’s contacts must be on indicated direction. Loudspeaker’s connection is automatic by putting in in place the underframe. Reassemble engine by following the reverse order: o Clip the underside of the chassis, o Insert the body on the frame.
- Page 13 In the trailer, main electronic board is located on the top of the interior. Remove body from frame as indicated on previous chapter, Remove, gently, the analog plug. Then place a Plux16 decoder at the right location, Reassemble trailer’s body on frame. EN –...
-
Page 14: Electronics
5. Electronics. A. Analog mode. By default, the following functions are activated: Inverted according running direction: white lights, red lights and cab lights, Constant: passengers’ area. By disassembling the model as previously indicated, you can access a switch on the analog plugs that allows you to turn off the lights and the cabin of the engine and of the trailer. -
Page 15: Digital Dcc
B. Digital DCC. DCC sound models are delivered with a ESU sound decoder Plux22 in the engine and a REE decoder Plux16 in the trailer. The complete train set, therefore, has two decoders. For any changes to CVs, especially when changing the address of the train, the procedure must be done in two steps: program the engine first and then the trailer. -
Page 16: Sound Decoder Functions
6. Sound decoder functions Only on DCC versions. N° Fonctions Cab 1 front lights - According to running direction F1 only: Motor sound On/Off – Normal start-up F8 + F1 : Cold start Stopped: short whistle Running: long whistle Trailer rear lights - According to running direction Stopped: double whistle Running: triple whistle Manual cab light - According to running direction... -
Page 17: Tyres Replacement And Lubrication
7. Tyres replacement and lubrication. To carry this work out, it is necessary to disassemble some parts of the model. If you are not familiar with this kind of work, we recommend you ask your dealer to perform this work or to direct you to a specialist. There are two traction tyres on one axle of motor bogie. - Page 18 Tyre replacement: remove the axle showing wheels with tyres and change the rubber tyres, Reassemble every parts. Be careful to correctly set the pickup! Note: To make a model with no tyre, specific axles with no tyre are available from our After-Sales-Service.
-
Page 19: Spare Parts
8. Spare parts In case of breakage, wear or loss of a component, REE provides a spare parts service that you can contact directly or through your dealer. In the following pages, you will find pictures, names and references of all the parts of this engine. - Page 20 PARTS REFERENCES EN – Operating manual RGP-2 – V3...
- Page 21 EN – Operating manual RGP-2 – V3...
- Page 22 EN – Operating manual RGP-2 – V3...
- Page 23 EN – Operating manual RGP-2 – V3...
- Page 24 EN – Operating manual RGP-2 – V3...
- Page 25 REE-MODELES - Sales Department After-Sales-Service 46 ROUTE DE PARIS - 77370 - NANGIS Tel : +33(0)1.64.00.31.20 Email : info@ree-modeles.com After-Sales-Service: Direct line: +33(0)1.60.58.60.60 Email : sav@ree-modeles.com Web : www.ree-modeles.com EN – Operating manual RGP-2 – V3...
Need help?
Do you have a question about the RGP 2 X-2700 and is the answer not in the manual?
Questions and answers