Advertisement
- 1 For Your Safety
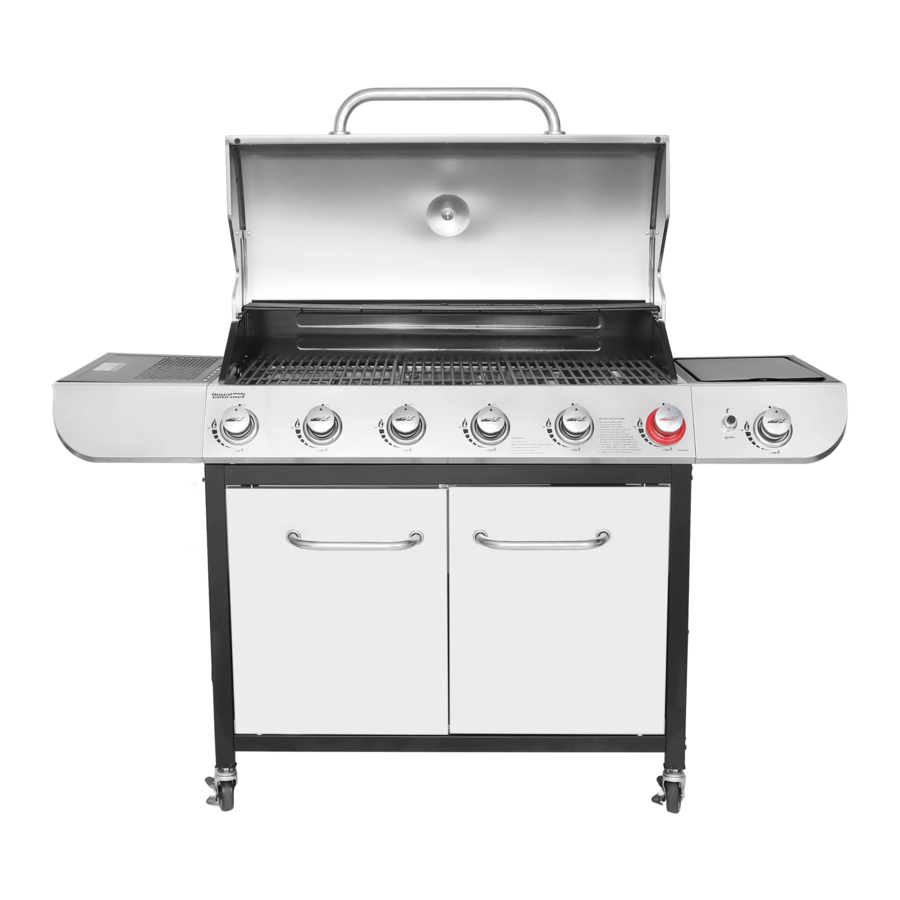
- 2 Parts Diagram
- 3 Parts and Hardware List
- 4 Preparation
- 5 Assembly Instructions
- 6 General Information and Instructions
- 7 Operating Instructions
- 8 Cleaning and Maintenance
- 9 Troubleshooting Guide
- 10 Grilling Recipes
- 11 Warranty and Customer Service
- 12 Documents / Resources
For Your Safety
Use outdoors only! Do not use it inside a building, garage, or any other enclosed space.
Read the instructions before assembling and using the appliance.
DO NOT use the grill unless it is completely assembled, and all the parts are securely fastened.
This grill will become very hot, do not move it during use. Keep away from children and pets.
- DO NOT store or use gasoline, or any flammable vapors and liquids within 8 meters (25 feet) of the grill.
- When cooking with oil/grease, do not allow the oil/grease to exceed 177°C (350°F). DO NOT store extra cooking oil in the vicinity of the grill.
![burn hazard]() The liquid propane (LP) tank (cylinder) not connected for use should be stored at a minimum of 3 meters (10 feet) distance from the grill or any appliance.
The liquid propane (LP) tank (cylinder) not connected for use should be stored at a minimum of 3 meters (10 feet) distance from the grill or any appliance.
Never fill the LP gas cylinder beyond 80 percent capacity. If the above instructions are not followed exactly, there is risk of fire that may cause serious injury or death.
 The liquid propane (LP) tank (cylinder) not connected for use should be stored at a minimum of 3 meters (10 feet) distance from the grill or any appliance.
In case of any issue, call us first! DO NOT return the grill to the retailer. This grill has been made to high quality standards. If you have any questions not addressed in this user's manual, or you need parts, please call our customer service hotline.
NOTE: The assembly and use of this grill must conform to local codes. In the absence of local codes, use the National Gas and Propane Instruction Code. Read all instructions prior to assembly and use.

- This grill is meant for use with propane gas only (propane gas cylinder not included).
- Never attempt to attach this grill to the self-contained propane system of a camper trailer, motor home, or house.
- Never use charcoal or lighter fluid with gas grills.
- DO NOT use gasoline, kerosene, or alcohol for lighting. The LP gas supply cylinder to be used must be constructed and marked in accordance with the specifications for LP Gas cylinder of the U.S. Department of Transportation (DOT) or the National Standard of Canada, CAN/CSA-B339, Cylinders, Spheres and Tubes for Transportation of Dangerous Goods and Commission. This grill is not intended to be used in or on recreational vehicles or boats.
- DO NOT attempt to move the grill while it is lit or hot.
- DO NOT use the grill unless it is completely assembled, and all parts are securely fastened and tightened.
- DO NOT use the grill or any gas products near unprotected combustible buildings and materials.
- DO NOT use in the presence of gases or vapors. Keep the grill area clear and free from combustible materials. gasoline, and other flammable vapors and liquids.
![]()
DO NOT touch metal parts of the grill until it has completely cooled (about 45 minutes) to avoid burns, unless you are wearing protective gear (oven mitts, potholders, etc.)- DO NOT alter the grill in any manner.
- Keep all combustible items and surfaces at least 91 cm (36 inches) from the grill at all times.
- Clean and inspect the hose before each use. If there is evidence of abrasion, wear, cuts, or leaks, the hose must be replaced before operating the grill. The replacement hose assembly must be as per the manufacturer specifications specified by the manufacturer.
- Move the gas hose as far away as possible from hot surfaces and dripping hot grease
- Never keep a filled LP gas cylinder in a hot car or truck. Heat will may cause the gas pressure to increase, which may open cause the relief valve to open and allow the gas to escape
- Keep the grill's valve compartment, burners, and circulating air passages clean. Inspect the grill before each use.

- This grill is for outdoor use only and should not be used inside a building, garage, or any other enclosed space.
- The consumption of alcohol, prescription, or non-prescription drugs may impair the operators' ability to properly assemble or safely operate the grill.
![]()
Always open the grill lid slowly and carefully as heat and steam trapped within the grill can cause severe burns.- Always place your grill on a hard and level surface far away from combustibles.
- Do not leave a lit grill unattended. ALWAYS keep children and pets away from the grill.
- Do not place the grill on any type of tabletop surface.
- DO not use the grill in high winds.
- Do not use the grill to cook excessively fatty meat or other fatty or greasy food where there is risk of flare-ups.

Liquid propane gas is flammable and hazardous if handled improperly. Understand the characteristics before using any propane product.
- Propane characteristics: Flammable, explosive under pressure, heavier than air, settles in pools and low areas.
- In its natural state, propane has no odor. For your safety, an odorant has been added.
![]()
Contact with propane can cause freeze burns to the skin.- This grill is shipped from the factory for use with propane gas only.
- Never use a propane cylinder with a damaged body, valve, collar, or footing.
- Dented or rusted propane cylinders may be hazardous and should be checked by your propane gas supplier.
FOR YOUR SAFETY
- The minimum distance around the grill that must be kept free of combustible materials is 90 cm (36 inches), which includes the walls of buildings or building features.

- Do not place the grill where there are combustible surfaces overhead.

Parts Diagram

Parts and Hardware List

Preparation
Before beginning assembly, make sure all parts are present. Compare parts with packaged contents list and diagram above. If any parts are missing or damaged, do not attempt to assemble the products. Contact customer service for replacement parts via telephone or email.
- Estimated assembly time: 40 minutes
- Tools required for assembly:
Phillips Screwdriver (not included) and Wrench (not included)

- Note: The right and left sides of the grill are designed as if you are facing the front of the grill.

 CALIFORNIA PROPOSITION 65 WARNING
- Fuels used in gas burning appliances and the combustion byproducts of such fuels, can expose you to chemicals including carbon monoxide, which is known to the State of California to cause birth defects or other reproductive harm.
- This product can expose you to chemicals including nickel, which is known to the State of California to cause cancer. Handling the brass material on this product can expose you to lead, a chemical known to the State of California to cause cancer, birth defects, or other reproductive harm
For more information visit: www.P65Warnings.ca.gov
Assembly Instructions
- Assemble the casters (1) to the side panels (2), (3) by twisting clockwise until tightened

- Assemble the side panels to the bottom shelf (4) with 8 bolts (A) as shown.

- Assemble the rear panel (6) by attaching it to the side panels and the bottom shelf, then secure it with 5 bolts (B).

- Fasten one end of the LP tank barrier bar (5) to the right panel (2) as shown, and secure the other end to the bottom shelf (4) with 2 bolts (B)

- Assemble the cart front beam (7) to the side panels with 4 bolts (A).
Fasten the magnet (E) to the bottom shelf with 2 bolts (C) as shown.

- Insert the sleeves (D) into holes at the bottom shelf as shown.

- Assemble the door handles (10) and door sleeves (11) to the doors (8), (9) with 4 bolts (F).

- Install the doors to the cart by inserting one end of the door axles (12) into the holes on the cart front beam, and the other end into the sleeves on the bottom shelf.

- Assemble the thermal baffle (13) to the left side panel with 2 bolts (G)

- Please note: Do not detach three straps here.

- Remove the packaging film from the hose and the regulator under the control panel (cut by scissors). Place the main body (14) on the cart, and secure with 4 bolts (B)

- Assemble the lid handle (15) to the lid with 2 bolts (F)
![]()
- Assemble the side table decoration board (17) to the side table (16) with 3 bolts (B)

- Assemble the side burner decoration board (19) to the side burner shelf (18) with 2 bolts (B)

- Fasten the thermal baffle (13) to the cart front beam with 1 bolt (B).

- Attach the parts assembled in step 13 to the four holes on the left side of the grill, and secure from inside of the main body with 4 washers (H) and 4 bolts (B).

- Secure the parts from outside of the main body with another 5 bolts (B) under the shelf.

- Attach the parts assembled in step 14 to the four holes on the right side of the grill, and secure it from the inside of the main body with 4 washers (H) and 4 bolts (B).

- And secure the parts from outside of the main body with another 5 bolts (B) under the shelf.

- Assemble the knob base (20) to the side burner decoration board with 2 bolts (C), then insert the knob (21).


- Unscrew the igniter cap and the nut from the igniter by twisting anticloskwise.
- Insert the igniter into the hole from the back of the side burner decoration board. Fasten the igniter by twisting the nut clockwise from the front.
- Insert the battery into the igniter and cover it by twisting the igniter cap clockwise.

- Unscrew the side burner valve below the side burner shelf.
- Insert the side burner (22) through the side burner shelf, and tighten it with 2 bolts (C) beneath the shelf.
- Connect the side burner orifice with the valve.
- Place the side burner grate (23) above the burner.
- Insert the ignition match into the electrode port as shown.

- Slide in the grease tray (25) underneath the main body. Slide in the grease cup (24) underneath the grease tray as shown.

- Place the flame tamer (26) into the firebox.
Place the flame tamers (27) into the firebox by attaching the slots of them to the buckles in the firebox as shown.

- Place the cooking grates (28), (29) into the grill body.

- Attach the warming rack to the relative holes on the main body as shown.

- Place the LP tank into the nesting hole located in the bottom shelf.
Pass the regulator through the hole on the left panel and connect it to the LP tank valve by twisting anticlockwise.


General Information and Instructions
Your new grill has been designed and manufactured to high quality standards.
It will provide you with many years of fun grilling time, however, it requires a minimal amount of maintenance.
Please keep in mind the following FOR YOUR SAFETY.
Operation
- Your gas grill requires reasonable care during operation. It will be hot during cooking and cleaning.
Never leave the grill unattended or move the grill when in use. - Children should never use your gas grill. Keep younger children and pets away when in use.
- Only use your gas grill outside in a well-ventilated area. Never use indoors, including inside any building, garage, shed or under any type of flammable canopy or overhang.
- Ensure your grill is on level ground and the locking casters are locked before use.
- Turn all gas valves off if the burners flame out while cooking
![burn hazard]() Turn off the burners and shut off the LP tank in case of a grease fire
Turn off the burners and shut off the LP tank in case of a grease fire - Keep the grilling area clear and free from combustible materials, gasoline, and other flammable vapors and liquids.
- Keep the ventilation openings of the tank enclosure free and clear from debris.
- Do not lean over the grill or touch the edges of the firebox, air vent, or griddle top when in use.
- Do not obstruct the flow of air for combustion and ventilation.
- Do not use charcoal briquettes, lava rock, or any type of ceramic product in the gas section of this grill.
- Do not install or use in a recreational vehicle or boats.
LP Gas and Cylinder Information
Your new gas grill operates on LP (Liquified Petroleum) Gas. It is odorless, colorless, and non-toxic when produced. You can smell LP gas as it has been given an odor similar to rotten eggs, for your safety.
Your grill uses the newest and safest LP gas cylinder (tank) which includes two features:
- An OPD (Overfill Protection Device) - prevents accidental gas leaks caused by overfilling of the tank. Each tank contains a float that closes the input valve when the tank is 80% full. This allows room for the propane gas to expand in hot temperatures. A triangular hand wheel distinguishes this type of tank.

- An OCC1 Type1 Quick Connect Valve that provides fast tank hook-ups and requires only to be tightened by hand.

TRANSPORTATION AND STORAGE
- The propane tank must include a collar to protect the gas supply valve.
- Do not store a spare propane tank under or near the grill.
- Never fill the propane tank beyond 80% capacity.
![burn hazard]() If the warnings in 2 and 3 above are not heeded exactly, a fire causing death or serious injury may occur.
If the warnings in 2 and 3 above are not heeded exactly, a fire causing death or serious injury may occur. - Always transport in an upright position.
- Do not smoke when transporting your propane tank.
- Place a dust cap on the tank gas valve outlet whenever the tank is not in use. Use only the type of dust cap that is provided with the tank valve when purchased. Other types of cap or plugs may result in leakage of propane.
![]()

CYLINDER SPECIFICATIONS
Tank purchased or exchanged for your gas grill must be manufactured and marked in accordance with the specifications for LP Gas cylinders of the U.S. Department of Transportation (DOT) or the National Standard of Canada, CAN/CSA -B339, Cylinders, Spheres and Tubes for Transportation of Dangerous Goods and Commission, be equipped with a listed over-filling prevention device (OPD), and be equipped with a cylinder connection device compatible with connection for outdoor cooking appliances.
The cylinder must also be equipped with:
- A shut-off valve terminating in a Type 1 gas cylinder valve outlet
- A Type 1 valve that prevents gas flow until a positive seal is made
- A collar to protect the cylinder shut-off valve
- A safety relief device that is directly linked with the vapor space of the cylinder
A frosty cylinder valve indicates possible gas overfill. Close the LP valve and call your LP dealer immediately.
LP GAS CYLINDER
(NOT SUPPLIED WITH THIS GRILL)
- The LP (Liquid Propane) gas tank specifically designed to be used with this grill must have a 20 lb. (9.1 kg) capacity incorporating a Type 1-cylinder valve and an over-filling protection device (OPD).
- This grill is designed to fit Worthington, Manchester, or SMPC brand 20 lb. (9.1 kg) cylinders. Other brands may fit this grill if the top collar and bottom support ring have similar dimensions.
- DO NOT connect this grill to an existing #510 POL cylinder valve with left-hand threads.
The Type 1 valve can be identified by the large external threads on the valve outlet. - DO NOT connect to a propane cylinder exceeding this capacity.
- DO NOT connect to a cylinder that uses any other type of valve connection device.
LP CYLINDER LEAK TEST
A leak test should be conducted each time a propane tank is refilled or exchanged.
Do not smoke or use any type of flammable material in the area during this leak test.
Do not use an open flame to check for leaks.
- Test outside in a well-ventilated area.
- Use a paintbrush and a solution of liquid dish detergent and water as needed. Do not use cleaning products because they can damage the fuel supply parts.
- Brush the detergent solution onto the areas indicated by the arrows, in the diagram below.
![]()
- If bubbles appear, it indicates a gas leak.

Regulator and LP Cylinder Connections
Only use the gas pressure regulator provided with this outdoor cooking appliance. This regulator is set for an outlet pressure of 11 inches water column.
Your regulator is equipped with a QQC Type 1 quick connect system. It does not allow gas to flow until a positive seal has been made. It has a thermal element that will shut off the gas flow if the temperature reaches 115°C (240°F). It also has a flow-limiting device that restricts the flow of gas to 0.28 cubic metrics per hour (10 cubic feet per hour). Before each use, check the gas hose for excessive abrasion, wear, or cuts. Replace a damaged hose assembly with the one specified in the parts list before using the grill.
TO CONNECT THE CYLINDER TO THE REGULATOR AND HOSE
- Make sure the LP tank is OFF by turning the hand wheel clockwise until it stops.
- Place the tank on the hook under the grill body with the valve facing outward. See Assembly instructions to secure the tank into the nesting hole located in the bottom shelf of the grill body
- Be sure all burner controls are turned to the OFF position.
- Remove the safety cap from the cylinder valve.
- Center the regulator nipple into the cylinder valve

- Turn the black nut clockwise until it stops. Hand tighten Only. Do not use a wrench.

Always keep the gas cylinder in the upright position at all times.
If you smell gas:
- Shut off gas supply to the grill.
- Extinguish any open flame.
- Open the lid.
- If odor remains, keep away from the grill and immediately call your fire department.

Failure to follow these instructions could result in fire, explosion, or burns, which could cause property damage, personal injury, or death.
- Do not connect this grill to any unregulated sources of propane.
- Before each use, check the gas hose for excessive abrasion, wear, or cuts. Replace a damaged hose assembly with the one specified in the parts list before using the grill.
- Always perform the Leak Test listed below before using your grill for the first time, if the cylinder has been changed, if any gas supply components have been changed, if the regulator flow-limiting device has been activated, or after a long period of non-use.
- Do not attempt to connect this grill to the LP system of a motor home or trailer.
LEAK TESTING THE REGULATOR/VALVES/HOSES AND CONNECTIONS
- Ensure the LP cylinder valve and all burners are OFF.
- Ensure the LP cylinder is connected to the regulator.
![burn hazard]() If the warnings 1 and 2 above are not strictly followed, there is risk of fire that may lead to serious injury or death.
If the warnings 1 and 2 above are not strictly followed, there is risk of fire that may lead to serious injury or death. - Mix water and liquid dish washing detergent as required. Do not use any household cleaner solution.
- Open the LP tank valve by turning the hand wheel counterclockwise one turn. If you hear a rushing sound, turn the gas off immediately. In that case, there could be a leak at the connection. Reconnect the cylinder to the regulator.
- Spray or brush on the dishwashing detergent solution covering the following areas: regulator and cylinder connection, gas hose connections to the regulator, all gas hoses, and all gas connections to the burner, including the side burner.
- Bubbles that develop on any of the parts and connections listed above indicate a gas leak Immediately shut off the LP tank valve by turning the valve clockwise. Retighten the connections or order replacement parts as needed. Continue to test as necessary until no leaks are detected.
- Close the LP tank valve by turning the hand wheel clockwise.
- DO NOT USE THE GRILL. If there are leaks. Be sure the LP cylinder valve is closed. If the LP cylinder is still leaking, contact your LP dealer or call 911.
- Do not use any matches, open flames, or smoke during leak testing.
- Do not light any burners during leak testing.
- Replacement parts including the hose assembly, must be as per the specifications in the parts list.
Failure to comply with these instructions may result in serious bodily injury.
Operating Instructions
Always visually inspect your grill before lighting. Replace any hose that is frayed or cracked. Look for anything that could block ventilation and remove such a blockage or move the grill.
After lighting, check the flame pattern to ensure you have even heat distribution for each burner. If burners don't light up, or if the flame pattern is uneven, see the Troubleshooting section.
IMPORTANT! BEFORE LIGHTING...
- Read the instructions before lighting
- If ignition does not occur in 5 seconds, turn the burner control(s) off, wait 5 minutes and repeat the lighting procedure.
- Inspect the gas supply hose prior to turning the gas "ON". If there is evidence of cuts, wear, or abrasion, it must be replaced prior to use. Do not use the grill if the odor of gas is present. Only use the pressure regulator and hose assembly supplied with the unit. Never use regulators and hose assemblies other than those supplied with the grill If a replacement is necessary, contact the manufacturer to get the proper replacement. The replacement must be as per the specifications in the Owner's Manual. DO NOT LEAVE THE GRILL UNATTENDED WHILE COOKING.
LIGHTING THE MAIN BURNERS USING ELECTRONIC IGNITION
- Ensure all burner control knobs are in the OFF position.
- Turn on the propane gas by turning the hand wheel counterclockwise on the cylinder valve.
- Push in the selected burner control knob and turn it anti-clockwise to the HI position marked with a flame.
- Press and hold the electronic ignition button. You should hear a clicking sound, which indicates the electronic ignition is working
- If the burner does not light within 5 seconds, turn the burner control knob to the OFF position. Wait 5 minutes for the gas to clear, and repeat the above steps. Refer to the Troubleshooting section, if it still does not light.
- When lit, turn the control knob to desired cooking temperature settings required for your food.
MANUALLY LIGHTING THE BURNERS WITH MATCH STICK
- Ensure all burners are in the OFF position.
- Slowly turn on the gas at the LP tank valve.
- Insert a match in the Match Holder which is located in the top-center drawer of the grill cabinet underneath the right main burner.
- Place the lit match close to the burners ports between the heat tents through the cooking grates for the burner you want to light.
- Compress and turn the burner control knob to the HI position. Continue to push in and hold up to 5 seconds or until the burner lights
- If the burner does not light within 5 seconds, turn the burner control knob to the OFF position. Wait 5 minutes for the gas to clear and try again.
- When lit, turn the control knob to the desired heat setting.
TURNING OFF YOUR UNIT
- Turn off the gas supply at the propane tank by turning the valve clockwise.
- Turn all burner control knobs to the OFF position.
Do not use spirit or petrol for lighting or re-lighting!
Cleaning and Maintenance
- Do not clean any part of your barbecue grill in a self-cleaning oven.
- Do not use oven cleaners, abrasive kitchen cleaners, cleaners that contain citrus products, or mineral spirits.
![burn hazard]() Clean your grill regularly to prevent grease buildup, grease fires or excessive flare-ups.
Clean your grill regularly to prevent grease buildup, grease fires or excessive flare-ups. - Always allow the grill to cool down prior to cleaning.
Grease is flammable. Let hot grease cool down before attempting to handle it. Avoid letting grease deposits collect in the bottom of the grill bowl assembly and the grease tray at the bottom of the grill's firebox.
Remove the grease from the bottom of the grill bowl assembly and grease tray regularly.
STAINLESS STEEL
Clean with multipurpose, low-abrasion, non-phosphorous metal or stainless steel polish and a soft cloth. Always polish in the direction of the finish. Do not allow grease and dirt to accumulate. In addition, several products and naturally occurring substances will damage all stainless-steel finishes. These include, but are not limited to, swimming pool chemicals (chlorine and bromine), lawn and garden fertilizers, ice-melting products, sea or other salt water, urine, bird droppings, and tree sap. Upon contact with these substances, immediately wash and dry the stainless-steel surface and be careful to avoid burns.
OTHER EXTERIOR SURFACES
Wash with a mild dishwashing detergent and warm water. You can use a cloth, soft brush (non-metallic), or plastic cleaning pad. Rinse thoroughly and wipe dry.
COOKING GRATES AND HEAT DIFFUSERS
Use a stiff brass brush. Wash with warm water and mild dishwashing detergent, rinse and dry.
GREASE PAN/TRAY
Check after each use. Remove and empty the tray when half full Remove and clean the pan as grease builds up. Both can be washed with warm water and mild dishwashing detergent.
BURNERS
We recommend you clean your burners at least twice a year, or before use if the grill has not been used in over one month
Small insects and spiders may enter the burner tubes. Sometimes they will build nests or spin webs that can block or reduce the amount of gas flowing through the burner. You will usually see a smaller flame, or a flame that is mostly yellow rather than blue, coming from the burner when this happens. Other signs include the grill generating uneven or low heat, or difficulty in igniting the burners. In cases of severe blockage, this can cause the flame to burn backwards, and outside of the burner tubes, which can damage your grill and/or cause personal injury. IMMEDIATELY SHUT OFF THE FLOW OF PROPANE GAS AT THE TANK BY TURNING THE HAND WHEEL CLOCKWISE SHOULD THIS HAPPEN. Wait for the grill to cool and then clean all burners.
CLEANING THE BURNERS
- Ensure the gas is turned off at the propane tank.
- Remove the cooking grates and flame tamers.
- Lift each burner up and out.
- Clean the inside of the burner using a stiff wire. A straightened coat hanger will work.
An alternative is to use compressed air. Always wear protective gear for your eyes when using this method.
Never enlarge the burner ports during cleaning. - Brush the outer surface of the burner.
- Ensure all ports (holes) are free of debris.
- Inspect the burners. Replace any that have cracks or enlarged ports.
- Replace flame tamers and cooking grates.
- Perform the Leak Test described earlier in this Owner's Manual.
Proper placement of the burner and valve is vital to ensure safety.
BURNER FLAMES
Always check the burner flame patterns after lighting. A good flame should be primarily blue with a yellow tip and have a minimal amount of flicker. Some yellow tips are OK if they are smaller than 2.5 cm (1"). New burners sometimes have oil residue, which will cause yellow flame when burning off. Variations in gas supply, altitude, weather, and other factors can all impact burner performance. Older grills can also show more yellow flame due to food deposit, oil, and fat buildup.

ALWAYS
- Keep the grilling area clear and free from combustible materials, gasoline and other flammable vapors and liquids.
- Do not obstruct the air flow for combustion and ventilation
- Keep the ventilation openings of the cylinder enclosure free and clear from debris.
PRODUCT STORAGE
- Clean your grill before storage.
- Storage of a gas grill indoors is permissible only if the propane tank is disconnected and removed from the gas grill.
- Cover the grill
- Perform a Leak Test before using the grill after it has been kept in storage for some time.
Troubleshooting Guide
| Emergencies | Possible cause | Prevention/Solution |
| Gas leaking from cracked/cut/ burned hose | Damaged hose | Turn off gas at LP tank, if hose is cut or cracked, replace hose. Conduct LP tank leak test and check regulator connection to the LP tank. |
| Gas leaking from LP tank | Mechanical failure due to aging or mishandling | Turn off LP tank valve. |
| Gas leaking from LP tank valve | Failure of tank valve due to mishandling or mechanical failure | Turn off LP tank valve. Return LP tank to gas supplier. |
| Gas leaking between LP tank and regulator connection | Improper installation, loose connection, failure of rubber seal | Turn off LP tank valve, remove regulator from cylinder and visually inspect the rubber seal for damage. Conduct LP tank leak test and check regulator connection to the LP tank. |
| Fire coming through control panel | Fire in burner tube section of the burner due to partial blockage | Turn off control knobs and LP tank valve. After the fire is out and grill is cold, remove the burner and inspect for spider nests or rust. See natural hazards and cleaning the burner assembly pages. |
| Troubleshooting: Problem | Possible cause | Prevention/Solution |
| Grease fire or continuous excessive flame above cooking surface | Too much grease buildup in burner area | Turn off LP tank. Leave lid open to allow the flames to die down. After cooling, clean food particles and excess grease from inside the firebox area, grease cup/pan/tray, and other surfaces. |
| Burner will not light when using the ignitor | Gas issues
|
|
| Burner will not light using the ignitor | Electrical issues:
|
|
| Burner will not light with matchstick |
|
|
| Sudden drop in gas flow or low flame |
|
|
| Flame blows out | High or gusting winds/Low Lp gas/Excess flow valve tripped | Turn front of grill to face wind or increase flame height. Refill LP tank. Refer to "sudden drop in gas flow" above. |
| Persistent grease fire | Grease trapped by food buildup around the burner system | Turn knobs to OFF. Turn gas off at the LP tank. Leave lid in position and let the fire burn out. After the grill cools, remove and clean all parts. |
| Flashback.. (fire in burner tube(s) | Burner and burner tubes are blocked | Turn knobs to OFF. Clean burner and/or burner tubes. See burner cleaning section in use and care. |
| Flare-up |
|
|
| Unable to fill LP tank | Some dealers have older fill nozzles with worn threads. | When turning worn nozzles, they don't have enough "bite" to engage the valve. Try a different LP dealer. |
| One burner does not light from other burner(s) | Grease buildup or food particles in end of carryover tube | Clean carry-over tube with wire brush. |
If your problem is not resolved from the information above, please contact your local gas dealer.
Notes:
- Turn the burner on for 15 to 20 minutes in medium to low heat. Spray down water on hot surface of the griddle and scrape spots away into the grease cup Make sure the appliance is cool enough to clean and wear protective gloves as griddle will be warm to touch
- Grids should be cleaned periodically by soaking and washing in soapy water.
- The interior surfaces of the grill should also be cleaned by using a wire brush, steel wool, or a scouring pad to remove stubborn spots
- Periodically check the burner to see that it is free from insects and spiders that may clog the gas system, deflecting gas flow. Clean the venturi pipes on the burner very carefully and ensure that there are no obstructions We recommend that you use a pipe cleaner to clean the venturi pipe area.
- Any modification of this appliance may be dangerous and is not permitted
Safety Reminders
Stand your gas grill on a safe level surface, away from inflammable items such as wooden fences or overhanging tree branches. Never use your gas grill indoors!
Once lit, do not move your gas grill or leave it unattended.
Keep children and pets at a safe distance from the gas grill
Keep a fire extinguisher handy.
The gas grill will become hot when in use, so cook with barbecue utensils or protective gear to avoid burns.
Ensure that the appliance has completely cooled down before storage
Grilling Recipes
DIRECT HEAT
| BEEF INTERNALTEMPERATURE CHART | |||
| Cooking Degree | Internal Core Temperature | Internal Description | Firmness |
| Rare | 125°F | Center is bright red, pinkish toward the outer portion, and warm throughout | Soft to the touch |
| Medium Rare | 130-135°F | Center is very pink, slightly brown toward the outer portion and slightly hot | Yields only slightly to the touch |
| Medium | 140-145°F | Center is light pink, outer portion is brown and hot throughout | Beginning to firm to the touch |
| Medium Well | 150-155°F | Mostly brownish gray throughout with a hint of pink in the center | Firm to the touch |
| Well Done | 155°F and above | Steak is brownish gray throughout | Firm or hard to the touch |
| POULTRY INTERNAL TEMPERATURE CHART | |||
| Whole Chicken | 165°F | Cook until the juices run clear | Firm to the touch |
| Dark Meat | 165°F | Cook until white throughout but still moist | Firm to the touch |
| Breast Meat | 165°F | Cook until white throughout but still moist | Firm to the touch |
| Thigh, Wings and Legs | 165°F | Mostly brownish gray throughout with a hint of pink in the center | Firm to the touch |
| PORK INTERNAL TEMPERATURE CHART | |||
| Medium | 150°F | Pink in the center | |
| Well Done | 160°F and above | Pork is uniformly white/brown throughout | |
| Pork Ribs | 180-200°F | Pale white. Cook medium to well done | |
| Raw Sausage | 160°F | No longer pink | |
| Sausage (Pre-cooked) | 140°F | No longer pink | |
STEAK & ALL MEATS
- Cook food on the charcoal side of the unit, directly above coals/ heat
- To grill meats, raise fire grate to high position (hot) and sear for one minute on each side with the lid open to seal in flavor and juices. -Then lower the fire grate to the medium position with lid closed and cook to desired degree.
- Control heat with dual dampers and adjustable fire grate.
Tip:
Place grilled meat back in the marinade for several minutes before serving - it will be tastier and juicier.
Boil extra marinade first to kill bacteria remaining from the raw meat.
MARINATED FLANK STEAK
- Mix marinade ingredients in a nonmetal dish
- Let steak stand in marinade for no less than 4 hours in the refrigerator.
- Brown each side for 5 minutes, but center should remain rare
- Cut steak diagonally across the grain into thin slices before serving
- Grill with fire grate in high(hot) position with lid open or closed.
Meat Marinade
1/2 cup vegetable or olive oil
1/3 cup soy sauce
1/4 cup red wine vinegar
2 tbsp lemon juice
1 tsp dry mustard
1 minced clove garlic
1 small minced onion
1/4 tsp pepper
QUAIL OR DOVES
- Cover the birds with good amount of seasoning and marinate overnight
- Pour remaining dressing and cover with Texas Pete Hot Sauce for 6 hours.
- Wrap birds in thick bacon secured by a toothpick.
- Place on grill. Keep turning until bacon is black
- Grill for 20 minutes. Sear with lid open and fire grate in high (hot) position for 1 minute on each side before lowering the grate and closing the lid.
- To smoke the birds, place them in the center of the grates with fire in both ends of the fire box
HOT DOGS
- Grill with lid up and cooking grates in high (hot) position for approximately 6 minutes
- Turn every few minutes.
SWEET CORN IN HUSKS
- Trim excess silk from end and soak in cold salted water 1 hour before grilling
- Grill 25 minutes - turning several times.
KABOBS
- Alternate any combination of meat, onions, tomatoes, green peppers, mushrooms, zucchini, circular slice of corn-on-the-cob, or pineapple on skewers. Meat could consist of shrimp, scallops, lobster, chicken, sausage, pork, beef, etc.
- Marinate the meat in refrigerator for several hours Grill each side approximately 7 minutes, turning occasionally while basting with marinade
- Leave a small amount of room between pieces in order to cook faster. Grill with lid up and the cooking grates in the lowest position.
Kabob Marinade:
1 cup soy sauce
1/2 cup brown sugar
1/2 cup vinegar
1/2 cup pineapple juice
2 tsp salt
1/2 tsp garlic powder
- Mix all ingredients in a saucepan and bring to boil.
- Allow marinade to cool before marinating your meat in it.
- Marinate beef in the mixture a minimum of 4 hours.
HAMBURGERS
See meat marinade above.
You may also marinate by allowing to stand in marinade for 1 or 2 hours at room temperature before cooking or let it stand in a covered dish in the refrigerator for up to 24 hours.
- Bring to room temperature before cooking.
- Mix in chopped onions, green peppers, salt, sear 3/4 inch patties on each side, with cooking grates in high position for a few minutes.
- Lower fire grate to medium position and grill with lid down to avoid flare-ups.
- Cook each side 3 to 7 minutes according to desired degree.
- Cook ground meat to 150°F internal temperature or until juice runs clear (free of blood) to prevent E-coli infections.
- Burgers can be basted with marinade when turning and/or other ingredients can be mixed in with the ground beef such as chili sauce or powder.
PEELED SHRIMP & CRAYFISH
- Place on skewers.
- Coat with melted butter and garlic salt.
- Grill 4 minutes on each side or until pink. Cocktail sauce optional.
BAKED POTATOES
- Rub with butter and wrap in foil and cook on grill with lid down for 50 minutes.
- Turn after 25 minutes (no need to turn if smoked).
- Squeeze to check if it is cooked.
Warranty and Customer Service
Please do not hesitate to contact our customer service when you have any questions regrading assembly, warranty, or accessories. We will be happy to offer any replacement parts you need during the warranty period.
1-800-618-6798
service@royalgourmetusa.com
Mon - Fri, 8:30 AM- 5:30 PM, EST


Learn more at:
www.royalgourmetcorp.com
Documents / Resources
References

Download manual
Here you can download full pdf version of manual, it may contain additional safety instructions, warranty information, FCC rules, etc.
Advertisement


Need help?
Do you have a question about the SG6002 and is the answer not in the manual?
Questions and answers