Advertisement
Quick Links
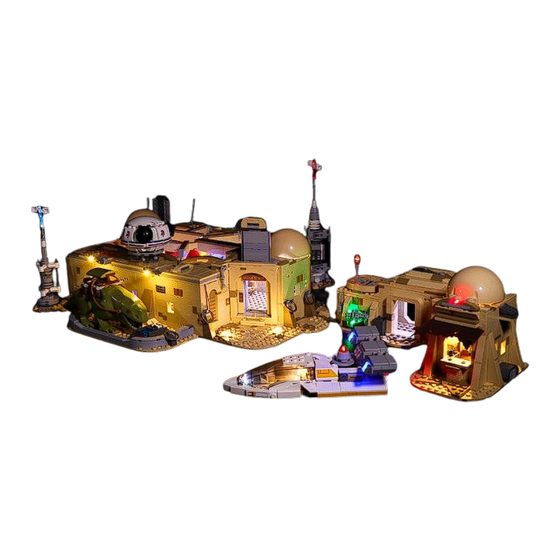
Mos Eisley Cantina™ #Lego Light Kit for 75290 Sound and Light Version
Thank you for choosing our lighting products. We are committed to LEGO product study and lighting development, we're
always trying our best to provide LEGO fans with the best products and the best installation ideas.
Must be careful observation, imagination can be infinite.
We provide basic parts to support your imagination.
DO IT YOURSELF .that's what LEGO is .
As always, Lego has been adhering to the DIY philosophy from product selection, research and development to sales.
Consumers buy the parts, you will assemble them by yourself, and you can experience every step from picking up the first
piece to installing the last one. Besides, LEGO has different answers for the installation form and method of each part.
Vonado lighting also does not want to kill your unlimited creativity, we will try our best to make products with high
variability, high playability and unlimited play. If you have any dissatisfaction or your own ideas on the parts such as the
color of the lights, the length of the cables, the installation position of the product, and the final effects of each module,
you can make your own arrangement, and we will cooperate with you to replace or repurchase.
LETS MOVE!
Package contents:
4 x 15cm Warm White Dot Lights
4 x 15cm Red Dot Lights
5 x 15cm Warm White Dot Lights
1 x 15cm Green Dot Light
2 x 30cm Blue Dot Lights
1 x 30cm White Dot Light
1 x 30cm Warm White Dot Light
1 x 15cm Flashing Red Dot Light
1 x 15cm Flashing Green Dot Light
4 x 15cm Flashing Yellow Dot Light
3 x LED White Strip Lights
3 x LED Warm White Strip Lights
2 x LED Blue Strip Lights
2 x LED Red Strip Lights
1 x 30cm Blue Lightsaber
1 x 30cm Red Lightsaber
2 x 15cm Head Lights
1 x Rotating Light
8 x 5cm Connecting Cables
7 x 15cm Connecting Cables
2 x 50cm Connecting Cables
1 x 2 -port Expansion Board
1 x 4 -port Expansion Board
2 x 6 -port Expansion Boards
3 x 8 -port Expansion Board
1 x Flat Coin Cell Battery Pack
1 x USB Cable
1 x Acousto-optic Control Switch Board
Advertisement

Related Manuals for LIGHT MY BRICKS Mos Eisley Cantina 75290


Summary of Contents for LIGHT MY BRICKS Mos Eisley Cantina 75290
- Page 1 Mos Eisley Cantina™ #Lego Light Kit for 75290 Sound and Light Version Thank you for choosing our lighting products. We are committed to LEGO product study and lighting development, we're always trying our best to provide LEGO fans with the best products and the best installation ideas. Must be careful observation, imagination can be infinite.
- Page 2 Extra pieces Note: Place wires on the surface or under the building blocks. The wire can be place between the building blocks or under the block, but they should be placed between the studs correctly. Insert the connectors to the ports. Be careful when you are operating, there’s only one correct way to insert, make sure the expansion board is upward, find the soldered “=”...
- Page 3 At this point, use the tweezers to straighten the bent pins. When installing dot lights, make sure they are correctly placed (Yellow LED package is exposed). You can put they either on the top of the studs or between studs. Connecting cable connectors to Strip Lights Take extra care when inserting connectors to ports on the Strip Lights.
- Page 4 Finally, please pay attention to the positive and negative terminals of the battery when installing the battery case. Installation instructions for the kit: There’s much more pieces in this Mos Eisley Cantina Kit, please be careful when you are installing. You can test all the lights before you get started, if there’s any broken pieces,...
- Page 5 please contact customer service in time. OK, Let’s Begin! (You can use the tweezer if necessary.) (Tips: the tweezer is sharp, you should be careful when using it, do not hurt yourself or scratch the pieces; be gentle and do not wear the cables.) Instructions for installing this kit:...
- Page 6 Take a 15cm white dot light. Disconnect the white ladder-shaped piece. With lighting part facing up, place the cable as per below.
- Page 7 Reconnect the white ladder-shaped piece to secure the cable. Take a 15cm head light, an adhesive square. With lighting part facing up, stick the adhesive square to the back of the light.
- Page 8 Turn the cover to its back. Thread the cable through the following hole at the tail, place the light at the hole. Remove the following white piece.
- Page 9 Thread the cable from the cover through the white piece as per below. Reconnect the white piece and the cover as per below. Turn to the back of the spaceship.
- Page 10 Remove the following gray spoiler. Remove the following gray round piece. Take a 15cm red flashing dot light, a trans red `1x1 round plate.
- Page 11 With lighting part facing up, place the cable on the gray round piece, reconnect the trans red round plate as per below. Disconnect the black slope plate and the white piece as per below. Reconnect the gray round piece, place the cable as per below.
- Page 12 Reconnect the black slope plate and the white piece to secure the cable. Disconnect the following piece with the tool. Place the cable as per below, reconnect the piece.
- Page 13 Turn to the gray spoiler. Remove the gray pieces from both sides. Take 2 blue 30cm dot lights, 2 trans white slope bricks.
- Page 14 With lighting part facing up, connect the trans white slope brick over. Install the light to the other side in the same way. Turn the gray spoiler to its back.
- Page 15 Disconnect the following 2 gray pieces. Take 2 gray 1x1 plates with hole. Connect the 1x1 gray round plates to the following places, place the cables as per below.
- Page 16 Reconnect the gray piece to secure the cable. Reconnect the gray spoiler. Turn to the back.
- Page 17 Disconnect the following 2 black pieces. Place the cable as per below. Reconnect the black piece to secure the cable.
- Page 18 Disconnect the following black plates from both sides. Take 2 red 15cm dot lights, 2 trans red 1x2 plates. With lighting part facing up, stuck the light to the following place.
- Page 19 Connect the trans red 1x2 plate over. Install the light to the right side in the same way. Turn the spaceship over.
- Page 20 Remove the following trans round piece. Secure the cables from the spoiler as per below, reconnect the trans round piece, Disconnect the following pieces.
- Page 21 Place the cables from both sides as per below. Reconnect the pieces. Remove the following 2 white plates.
- Page 22 Place the cable from the gray round piece as per below . Reconnect the 2 white plates. Turn to the head, remove the following trans round piece.
- Page 23 Place the cable as per below, reconnect the trans round piece. Remove the following 2 trans round pieces. Place the cable as per below, reconnect the trans round pieces.
- Page 24 Put the right wing up as per below. Take the cable from the cover. Thread the cable through the following space at the wing.
- Page 25 Reconnect the right wing. Take an 8-port expansion board. Place the expansion board at the following place, and connect all the cables to it, tuck excess cables around the expansion board.
- Page 26 Take a Flat Coin Cell Battery Pack. Connect the cable from the battery pack to the expansion board. Secure the expansion board at the following place.
- Page 27 This completes installation of this part. You can turn the power on to verify the lights. Continue to install lights for the B part. Remove the following plate.
- Page 28 Take a red 15cm dot light, a trans red 1x2 plate. With lighting part facing up, connect the trans red 1x2 plate over. Turn to the back, and open it.
- Page 29 Open the half ball. Remove the following plate. Take a 15cm head light.
- Page 30 With lighting part facing down, stuck the light in between pieces as per below. Thread the cable through the following space to the back. Place the 2 cables as per below.
- Page 31 Reconnect the plate to secure the cable. Remove the following 2 gray pieces. Remove the following base plate.
- Page 32 Place the 2 cables as per below, reconnect the 2 pieces to secure the cables. Reconnect the base plate. Remove the following piece.
- Page 33 Take a 15cm warm white dot light, an adhesive square. Thread the cable through the following space. Stick the adhesive square to the back of the light.
- Page 34 Stick the light to the following place. Straighten the cable, reconnect the piece to secure the cable. Take a 4-port expansion board.
- Page 35 Connect all the cables to it, tuck excess cables around the expansion board. Take a 15cm connecting cable, 2 adhesive squares. Connect the cable to the expansion board, stick the adhesive squares to the back of the expansion board.
- Page 36 Stick the expansion board at the following place. Remove the following piece. Place the cable as per below, reconnect the piece.
- Page 37 Create a gap at the following place, straighten the cable. Reconnect the base plate. Move onto installing lights for the following part.
- Page 38 Remove the whole roof. Remove the following base plate. Place the cable as per below, reconnect the piece.
- Page 39 Turn to the following place. Disconnect the following piece. Take a 15cm green flashing dot light, a trans green 1x1 round plate.
- Page 40 With lighting part facing up, connect the trans green round plate over as per below. Thread the cable through the following place, pull it out as per below. Reconnect the piece.
- Page 41 Turn to the front. Continue to install lights for the following part. Disconnect the following piece.
- Page 42 Take a red 15cm dot light, a trans red 1x1 round plate. Connect the round plate to the bottom of the following piece. With lighting part facing up, reconnect the piece as per below.
- Page 43 Disconnect the following piece. Place the cable as per below, reconnect the piece. Turn to the following place.
- Page 44 Take a 30cm rotating light, a 1x1 trans red column brick. Place the light at the following place, connect the trans red column brick over. Thread the cable through the following space.
- Page 45 Remove the following piece. Take a 30cm connecting cable, a 5cm connecting cable, a white strip light, assemble them as per below. Thread the 5cm connecting cable through the wall, place the strip light as per below.
- Page 46 Place the cable underneath the following piece. Thread the cable through room, reconnect the piece as per below. Take a 6-port expansion board.
- Page 47 Connect all the cables to it, tuck excess cables around the expansion board. Take the roof, turn it over, and stick the strip light to the following place. Take 2 adhesive squares.
- Page 48 Stick them to the back of the expansion board. Stick the expansion board to the following place. Reconnect the whole roof.
- Page 49 Turn to the following place. Take an adhesive square. Place the cable as per below and secure it with the adhesive square.
- Page 50 This completes installation of lights for the pub of B part. Continue to install lights indoor. Remove the support over the pub.
- Page 51 Open the pub as per below. Make the inside of the pub toward yourself. Start from installing lights for the right side.
- Page 52 Disconnect the roof. Continue to disconnect the roof. Take a 15cm connecting cable, a white strip light, assemble them as per below.
- Page 53 Stick the strip light to the following place, place the connecting cable outside. Remove the lamp#1. Disassemble it.
- Page 54 Take a 15cm yellow flashing dot light. With lighting part facing up, place the light at the top of the post as per below. Reconnect the other pieces.
- Page 55 Reconnect the lamp back on the wall. Remove the tower at the right. Pull the top out.
- Page 56 Disconnect the following 3 pieces from the top. Take a red lightsaber. Connect the following 3 white pieces with claw to the lightsaber.
- Page 57 Connect the lightsaber to the top. Remove the following piece underneath the tower. Pull the cable down and straighten the cable.
- Page 58 Reconnect the piece. Remove the following piece from the base. Press the cable underneath, reconnect the piece.
- Page 59 Place the tower behind the pub, connect the cable to the strip light on the wall as per below. Turn to the back of the pub. Remove the following piece.
- Page 60 Disassemble it. Take a 15cm green flashing dot light. Bend the light a bit, and place it at the piece as per below. r...
- Page 61 Reconnect the piece. Reconnect the other half of the piece. Take a trans white 2x2 round plate.
- Page 62 Connect it over the light. Disconnect the following piece. Pull the cable up and straighten the cable.
- Page 63 Reconnect the light yellow piece. Remove the following piece. Straighten the 3 cables as per below.
- Page 64 Reconnect the piece. Reconnect the roof. Remove the lamp#2.
- Page 65 Disassemble the lamp. Take a 15cm yellow flashing dot light. With lighting part facing up, place the light at the top of the post as per below.
- Page 66 Reconnect the other pieces. Reconnect the wall lamp. Disconnect the following piece.
- Page 67 Disconnect the following trans round plate from the top. Take a 15cm white dot light, a trans blue round plate. With lighting part facing up, place the light on the following piece.
- Page 68 Connect the round plate over to secure the light. Reconnect the following piece back to the building. Press the cable on the sofa.
- Page 69 Take an 8-port expansion board. Connect the cables to the expansion board. Take a blue strip light, two 5cm connecting cables, assemble them as per below.
- Page 70 Connect the 5cm connecting cable to the expansion board. Stick the strip light to the wall. Disconnect the following 2 pieces.
- Page 71 Place the cable as per below. Reconnect the pieces to secure the cable. Take a warm white 15cm dot light, a light gray plate with claw, a gray hinge plate with handle, an adhesive square.
- Page 72 Assemble the light gray plate with claw and the gray hinge plate with handle together as per below. Stick the adhesive square to the bottom of the gray piece. Stick the light to the adhesive square.
- Page 73 Take the second roof piece. Disconnect the following dark yellow piece. Connect the piece we assembled to the following place.
- Page 74 Connect the cable to the expansion board. Take 2 adhesive squares. Stick the adhesive squares to the back of the expansion board.
- Page 75 Stick the expansion board to the wall. Reconnect the roof. Turn to the inside.
- Page 76 Take an adhesive square. Stick the cable on the roof. Take a 15cm connecting cable, a red strip light, assemble them as per below.
- Page 77 Connect the connecting cable from the roof to the strip light. Stick the strip light to the wall. Disconnect the following piece.
- Page 78 Place the cable as per below. Reconnect the piece. Open the half ball as per below.
- Page 79 Reconnect the third roof piece. Take a 15cm connecting cable, a white strip light, assemble them as per below. Connect the connecting cable to the strip light, stick the strip light to the following place.
- Page 80 Turn to the following place. Remove the following whole piece. Disconnect the following trans bottle.
- Page 81 Take a 30cm warm white dot light. With lighting part facing up, reconnect the trans bottle as per below. Lift the whole part, place the cable as per below.
- Page 82 Reconnect the piece. Take a 15cm connecting cable, a white strip light, assemble them as per below. Connect the previous connecting cable to the strip light.
- Page 83 Place the cable as per below. Press excess cable behind the strip light. Stick the strip light to the following place.
- Page 84 Disconnect the following piece. Place the cable as per below. Reconnect the piece.
- Page 85 Turn to the following place. Open the half ball. Take a 15cm connecting cable, a white strip light, assemble them as per below.
- Page 86 Stick the strip light to the following place. Disconnect the top of the half ball piece as per below. Turn to the following place.
- Page 87 Disconnect the whole top piece as per below. Remove the following piece. Place the cable as per below, reconnect the piece.
- Page 88 Reconnect the piece back to the top of the half ball as per below. Turn to the back of the pub. Take a warm white 30cm dot light, a trans white 1x1 slope brick.
- Page 89 With lighting part facing up, connect the trans white 1x1 slope brick over as per below. Lift the pub up, place the cable underneath as per below. Remove the following piece.
- Page 90 Place the cable as per below, reconnect the piece. Take a warm white 15cm dot light, a trans white 1x1 slope brick. With lighting part facing up, connect the trans white 1x1 slope brick over as per below.
- Page 91 Remove the following base plate. Place the cable as per below, reconnect the plate. Turn to the following place.
- Page 92 Remove the 2 roofs. Turn to the following place, disconnect the wall lamp. Disassemble the lamp.
- Page 93 Take a 15cm yellow flashing dot light. Place the light as per below. Connect the round plate over.
- Page 94 Reconnect the wall lamp. Pull the cable inside the house. Take a warm white strip light, two 5cm connecting cables, assemble them as per below.
- Page 95 Stick the strip light to the following place. Take a 6-port expansion board. Connect the cables from the left side to the expansion board.
- Page 96 Wind the cable from the right wall lamp around the following place. Connect the cable to the expansion board. Take a 15cm connecting cable, a blue strip light, assemble them as per below.
- Page 97 Connect the 5cm connecting cable from the left to the strip light. Stick the strip light to the following place. Disconnect the following desk piece.
- Page 98 Disconnect the following trans plate from the desk. Take a white 15cm dot light, a trans blue round plate. With lighting part facing up, place the light as per below.
- Page 99 Connect the round plate over. Reconnect the desk. Pull the cable to the inside.
- Page 100 Stuck the cable to the side of the sofa as per below. Disconnect the following piece. Place the 2 cables as per below.
- Page 101 Reconnect the pieces. Take the following roof piece. Disconnect the following piece from the top left corner.
- Page 102 Take a warm white 15cm dot light, a light gray plate with claw, a gray hinge plate with handle, an adhesive square. Assemble the light gray plate with claw and the gray hinge plate with handle together as per below. Stick the adhesive square inside the hinge plate.
- Page 103 With lighting part facing up, stick the light to the adhesive square as per below. Stick the pieces to the following place at the roof. Disconnect the following piece.
- Page 104 Connect the cable from the light at the roof to the expansion board. Place the cables as per below. Reconnect the piece, press the 2 cables underneath.
- Page 105 Reconnect the roof. Take 2 adhesive squares. Stick the adhesive squares to the back of the expansion board, stick the expansion board to the following place.
- Page 106 Take the roof piece we removed before. Reconnect the it. Remove the following wall lamp.
- Page 107 Disassemble it. Take a 15cm yellow flashing dot light. With lighting part facing up, place the light as per below.
- Page 108 Connect the round plate over. Reconnect the wall lamp. Pull the cable to the inside.
- Page 109 Disconnect the desk piece inside the room. Disconnect the following trans plate from it. Take a 15cm white dot light, a 1x1 orange round plate.
- Page 110 With lighting part facing up, place the light as per below. Connect the orange round plate over. Reconnect the desk.
- Page 111 Pull the cable from the desk to the left side inside the house. Stuck the cable to the side of the sofa as per below. Take a 30cm connecting cable, a 5cm connecting cable, a red strip light.
- Page 112 Assemble them as per below. Stick the strip light to the following place (place the 30cm connecting cable rightward). Disconnect the top from the tower.
- Page 113 Disassemble it. Take a blue lightsaber. Connect the white pieces to the lightsaber.
- Page 114 Connect the lightsaber to the tower. Tie a knot of the cable from the lightsaber as per below. Tighten it up.
- Page 115 Disconnect the following piece. Press the cable underneath the following piece. Take an 8-port expansion board.
- Page 116 Connect the cables from the house to the expansion board. Disconnect the following 2 pieces. Take the 30cm connecting cable from the right side of the strip light.
- Page 117 Place the cable as per below. Reconnect the pieces we removed before. Disconnect the following pieces.
- Page 118 Place the cable as per below. Reconnect the pieces we removed before. Remove the following white piece.
- Page 119 Place the cable as per below, reconnect the piece we removed before. Take the following roof piece. Disconnect the following plate from the top left corner.
- Page 120 Connect the plate to the following place. Take a warm white 15cm dot light, a light gray plate with claw, a gray hinge plate with handle, an adhesive square. Assemble the light gray plate with claw and the gray hinge plate with handle together as per below.
- Page 121 Stick the adhesive square inside the hinge plate. With lighting part facing up, stick the light to the adhesive square as per below. Connect them to the following place.
- Page 122 Connect the cable from the light at the roof to the expansion board. Take 2 adhesive squares. Stick the adhesive squares to the back of the expansion board, stick the expansion board to the following place.
- Page 123 Reconnect the roof. Close the whole pub. Turn to the left, close the roof as per blow.
- Page 124 Connect the following part to it. Take a 50cm connecting cable, a 2-port expansion board. Assemble them as per below. Connect the connecting cable from the left to the expansion board.
- Page 125 Pull the cable up, and press it underneath the pub. Continue to pull the cable rightward, and press it underneath the pub. Pull the cable to the following place.
- Page 126 Thread the cable through the window to the inside. Take a 6-port expansion board. Connect the 4 cables from the house to it.
- Page 127 Take a 15cm connecting cable. Connect it to the expansion board. Take the Acousto-optic control Switch Board, a USB cable...
- Page 128 Connect the 15cm connecting cable from the expansion board to the OUT port. Thread the USB cable through the window to the inside. Connect the USB cable to the input port on the Acousto-optic control Switch Board.
- Page 129 Take 8 adhesive squares. Stick 2 adhesive squares to the back of the expansion board, stick the expansion board to the following place. Stick 2 adhesive squares to the back of the Acousto-optic control Switch Board, stick the it to the following place.
- Page 130 Stick 3 adhesive squares to the back of the speaker, stick the speaker to the following place. Stick an adhesive square to the back of the signal receiver, stick it to the following place. Close the roof. This completes installation of this LED Lighting Kit. ENJOY!
- Page 131 This completes installation of this LED Lighting Kit. ENJOY! The above are ideas and instructions provided by our designers. Please move on: 1: Do you have any suggestions about the material and quality of our products? 2: Do you have any suggestions on the installation instructions and the degree of difficulty of the installation? 3: If you have better installation method and ideas, please contact us in time.
Need help?
Do you have a question about the Mos Eisley Cantina 75290 and is the answer not in the manual?
Questions and answers