Table of Contents
Advertisement
Quick Links
Advertisement
Table of Contents
Troubleshooting

Subscribe to Our Youtube Channel
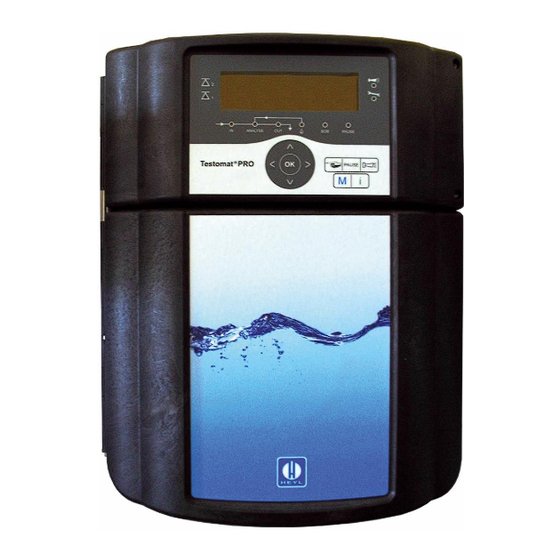
Related Manuals for Heyl Testomat PRO FE


Summary of Contents for Heyl Testomat PRO FE
- Page 1 1.1.1.1.1 Operating Instructions ® Testomat PRO FE Process Photometer for Iron (Dissolved) 0 – 1.0 mg/l Gebr. Heyl Analysentechnik GmbH & Co. KG Orleansstr. 75 b D 31135 Hildesheim www.heylanalysis.de Testomat_Pro_FE_EN_240125 Original manual...
-
Page 2: Table Of Contents
Content General information .......................... 1 Use and storage of the instruction manual ................1 Symbols ........................... 1 1.2.1 Warnings and safety instructions in this manual ..............1 1.2.2 Pictograms ........................... 2 1.2.3 Typographical highlights ...................... 2 Limitation of liability ......................... 2 1.3.1 Failure to comply with the instructions................. - Page 3 4.6.4 Measuring point switch-over ....................16 Current interface 0/4 – 20 mA ....................16 4.7.1 Calculation of output currents .................... 16 Serial interface ........................17 Description of the SD card functions ..................19 Prepare the product for use ......................21 Installation ..........................
- Page 4 Set limit value monitoring ...................... 42 6.10 Input operating mode of LV1 and LV2 limit value outputs ............. 42 6.10.1 Switching functions, multiple limit value exceedance ............ 43 6.11 Set programmable switching output AUX ................44 6.12 Input flush time ........................44 6.13 Select water meter .........................
- Page 5 8.3.2 Manual firmware update ....................59 8.3.3 Firmware update Ethernet converter ................. 60 Troubleshooting and repair ....................60 8.4.1 Further possible errors....................... 63 8.4.2 Error messages after self-test ................... 64 8.4.3 Firmware update error list ....................65 Troubleshooting network connection ..................67 Servicing and maintenance ......................
-
Page 6: General Information
General information - Use and storage of the instruction manual 1 General information Use and storage of the instruction manual The operating instructions form part of the equipment. Therefore, observe the following principles: Read the operating instructions carefully and in full before working with the device. -
Page 7: Pictograms
General information - Limitation of liability Note indicates a potentially harmful situation. If not avoided, the equipment itself or something in the vicinity may become damaged. 1.2.2 Pictograms The following pictograms are used in these operating instructions: Danger signs for ESD-hazardous components: Electrostatic discharges (ESD) are voltage punctures caused by large potential differences. -
Page 8: Qualification Of Personnel
Use of non-approved spare parts The equipment’s trouble-free operation is only guaranteed when using ® original Heyl Testomat PRO reagents and original Heyl spare parts. The use of other reagents or spare parts will invalidate the equipment’s guarantee. 1.3.5 Unauthorised conversions Do not make any changes (or otherwise manipulate the equipment in any way) that go beyond the handling described in these instructions;... -
Page 9: Your Safety
Your safety - Personal injury 2 Your safety The following safety instructions are intended to help you avoid hazards to yourself and bystanders when handling the equipment. They also serve to prevent material damage to the equipment. The measures to avert any and all dangers always apply, irrespective of specific actions. -
Page 10: Property Damage
This can potentially invalidate the warranty! • Only use original Heyl reagents that are specially adapted to the requirements for the measuring equipment, and thus guarantee perfect measuring results. -
Page 11: Technical Data
Technical Data - Property damage 3 Technical Data specifications 100 – 240 VAC Power supply: ± 10%, 50/60 Hz Complete protection T4A including user power supply Power consumption: 230 V (100-240 V) / 4 A max. 230 V (100-240 V) / 1 A without external load Protection class: Protection type:... -
Page 12: Available Reagents
The concentrations of disruptive ingredients can be determined with ® colorimetric TESTOVAL test kits from Gebr. Heyl. may lead to erroneous evaluations Careful handling of the device enhances the operational safety and the service life! With this in mind, perform a visual inspection of the... -
Page 13: Setup And Function
Setup and function - Internal structure of Testomat® PRO FE 4 Setup and function ® Internal structure of Testomat PRO FE Figure 1 Description Terminal strip for inputs/outputs Terminal strip for mains inlets and outlets Terminal strip relay outputs Dosing pumps Water connections, intake and outlet (funnel) Controller/filter housing Measuring chamber... -
Page 14: Product Description
Setup and function - Product description Product description The process photometer Testomat ® PRO FE is used for automatically monitoring the dissolved iron content (II)+(III) from 0 to 1.0 mg/l using a colorimetric analysis principle. Analysis is carried out by adding two reagents. -
Page 15: Functions Of The Control And Display Elements
Setup and function - Functions of the control and display elements Functions of the control and display elements The operating modes and measurement values are shown on the display of the Testomat ® PRO FE. The input keys for the programming (cursor block) and function keys are underneath the display. -
Page 16: Display Functions
Setup and function - Functions of the control and display elements 4.3.2 Display functions Figure 2 Colour Name Description of LED Limit value When the limit values 1 are exceeded, indicator LV1 lights up in red. Falling status red/green under the limit value results in the indicator LV1 lighting up in green. The indications same function applies to limit value 2 and indicator LV2. -
Page 17: Control And Function Keys
Setup and function - Functions of the control and display elements 4.3.3 Control and function keys Figure 3 Name Description Manual The Manual button is used to start manual analysis The Pause button puts the device into standby mode. There will be no automatic analysis performed: analysis stop. -
Page 18: Meaning Of The Symbols In The Menu
Setup and function - Control elements on the control board 4.3.4 Meaning of the symbols in the menu In the menu, symbols are shown on the first line at the right-hand edge. These represent the function keys, which can be used to facilitate navigation at this point in the menu. -
Page 19: Relay Outputs
Setup and function - Relay outputs Relay outputs Danger of destruction due to excessive load! The relay outputs are designed for a defined maximum load (see chapter Technical Data on page 6). • Note the load capacity of the relay outputs. •... -
Page 20: External Delete (External Acknowledge)
Setup and function - Signal inputs and signal outputs STOP: Terminals 20, 21 Function Contact type Test Action period Stop Programmable: none There are no analyses while the contact at the External analysis break contact or input is open or closed stop (e.g. -
Page 21: Measuring Point Switch-Over
Setup and function - Current interface 0/4 – 20 mA 4.6.4 Measuring point switch-over M1/2: Terminals 22, 23 The “Measuring point” input is only queried if, under the basic program menu Measuring points the function 2 measuring points via input is activated (see chapter 6.14 Measuring points on page 45). -
Page 22: Serial Interface
Setup and function - Serial interface The current for a given measured value is calculated as follows: Figure 5 Measurement value = display value in the selected hardness unit Maximum value = final value 1.0 mg/l Serial interface The serial interface transfers measurement data and alarms/notifications in plain text/ASCII in CSV format. - Page 23 Setup and function - Serial interface The baud rate can be set to 2400, 9600, 19200, 38400 and 115200 baud. For Ethernet, 9600 must be set! Alarms are transmitted via the serial interface. In the case of alarms that cannot be acknowledged because the device generates them automatically, the end of the alarm is also reported (alarm inactive).
-
Page 24: Description Of The Sd Card Functions
Setup and function - Description of the SD card functions Description of the SD card functions The SD card can be used to record measurement values and errors as well as for importing and exporting the device settings. Error and measurement value files are separately placed in subfolders arranged by year and month: In the year folder, files including measurement values and errors are... - Page 25 Setup and function - Description of the SD card functions Transferring settings onto other devices Configuring multiple devices with identical settings Remote maintenance / support via transfer of the basic programming data The filename is preset to "bdata00.ini" (for "Basic Data" / basic programming data).
-
Page 26: Prepare The Product For Use
Prepare the product for use - Installation 5 Prepare the product for use Installation 5.1.1 Remove the packaging material Remove the packaging material completely before starting assembly. Separate packaging materials according to type and size and send for further use or recycling if no other arrangements have been made with your distributor. - Page 27 Prepare the product for use - Installation Jamming of the cores with incorrectly selected cross-section! If cores with the wrong cross-section are used, there is a risk of them becoming jammed when they are released from the terminal strip. • Our recommendation to prevent jamming is, that you only use wires with cross-sections greater than 0.5 mm².
-
Page 28: Connecting The Water Intake
Prepare the product for use - Installation 5.1.5 Connecting the water intake Damage due to measuring water that is too warm! Water above 40°C can cause burns and damage to the parts of the ® Testomat PRO FE that come into contact with water. •... -
Page 29: Connecting The Water Drain
Prepare the product for use - Installation The test water is extracted from the sampling pipe and channelled to the ® supply nozzles of the Testomat PRO FE The device comes with a plug connection for plastic hoses 6/4 x 1 as standard (external diameter 6 mm/ internal diameter 4 mm, wall thickness 1 mm). -
Page 30: Connect Mains Voltage
Testomat PRO FE. • Close all taps in the vicinity of the Testomat PRO FE and secure them against being opened accidentally. It is essential to avoid any and all contact between power lines and water! Damage from assembly when voltage present! You risk destruction of the product or damage to system components, unless you disconnect the power supply before commencing assembly. - Page 31 Prepare the product for use - Installation • If you use other ducts, the cable diameters must correspond to the ducts. • The terminal strips on the circuit board require core cross- sections of between 0.08 mm and 2.5 mm according to the manufacturer.
-
Page 32: Connect System Components
Prepare the product for use - Installation ® Block diagram of Testomat PRO FE Illustrated position of relays: Device without current, mains: 230 V Figure 10 5.1.9 Connect system components Danger to life due to electric shock! If you connect system components that do not operate using the device voltage, you can apply external voltages to the relay contacts. - Page 33 Prepare the product for use - Installation 7. For components with a protective conductor connection, connect them to the PE connection. 8. Ensure that the cores in the terminals are securely in place. Supply terminals Controller board with serial and Inputs Relay outputs network interface...
-
Page 34: Connect Inputs And Outputs
Prepare the product for use - Installation 5.1.10 Connect inputs and outputs Possible damage to the equipment due to incorrect connection of the inputs and outputs! Incorrect connection of inputs and outputs will damage the equipment. • Do not expose the connections to any external voltage! •... - Page 35 Prepare the product for use - Installation Connect relay outputs Terminal Function designation Alarm Fault signal output – root c Fault signal output – closing contact no Fault signal output – break contact nc Limit value output LV1 – root c Limit value output LV1 –...
-
Page 36: Connect Current Interface
Prepare the product for use - Installation 5.1.11 Connect current interface Screw Connection Clamp I1OUT- I1OUT+ I2OUT- I2OUT+ RS232 GND RS232 RX RS232 TX Table 16 View from the front, as the card is inserted The plug-in card provides two (including opposed) potential-separated 20mA current outputs, as well as an additional RS232 interface. -
Page 37: Commissioning
Interrupted operation possible when using unapproved reagents! ® Flawless operation of the Testomat PRO FE device is only guaranteed when Heyl reagents are used! The use of external reagents may invalidate the guarantee. • Use only original Heyl reagents. Testomat_Pro_FE_EN_240125... -
Page 38: Open Water Intake
Prepare the product for use - Commissioning Insert the reagent bottle as follows. Consider figure 17. 1. Open the lower housing door by pulling on the right side 2. Remove the closing cap of the reagent bottle 3. Remove the plastic bag from the inner side of the lower housing door. It contains the screw cap with hole (1) and the insert (2) for the screw cap. -
Page 39: Instrument Setting And Data Entry
Instrument setting and data entry - Enter program values 6 Instrument setting and data entry In chapter 4.3 Functions of the control and display elements on page 10 the operating elements and displays required for the equipment settings are explained. Enter program values Since no settings in the programming menu can be configured while the analysis is underway, press the Pause button once the venting is... - Page 40 Instrument setting and data entry - Enter program values Figure 19 Reagent level (3) Input the new fill level for each refill or when changing the bottle of the reagent. If you select the menu item for the filling level entry Reagent with OK, you can select the reagent that was switched out.
- Page 41 Instrument setting and data entry - Enter program values Language (4) Select the desired language for the display. Diagnosis (5) The diagnosis menu allows you to perform an automatic comparison for the amplifier of the receiver diode and the LEDs. You can also switch and reset EV, AV and all outputs as well as test the current loop.
-
Page 42: Structure Of The Information Menu I
Instrument setting and data entry - Enter program values 6.1.2 Structure of the Information menu i Select the information menu by pressing i. In this menu, you can query the current settings and states of the equipment. The following query options are available: Operating and program values, such as software status, operating mode, maintenance/operating hours counter (see figure 20). - Page 43 Instrument setting and data entry - Enter program values Figure 21 Testomat_Pro_FE_EN_240125...
-
Page 44: Set Up Password Protection
Independently thereof, a four-digit password can be set in the Basic Program on the equipment for data entry and settings. If you have have forgotten your password, contact your Heyl service partner or water supplier. Note that in exporting settings, the password is not saved. Set your desired password as follows: Press the M button. -
Page 45: Select Language
Instrument setting and data entry - Select Language 6. Move with the arrows r/l to the desired position in the time/date field. 7. Select the desired figure by confirming with the arrows u/d. 8. Confirm the newly configured values for the time and date with OK. If you do not wish to change the values, press no buttons for 30 seconds. -
Page 46: Configure Interval Pause
Instrument setting and data entry - Configure interval pause Longest pause = 99 minutes. The analysis interval (interval between two analyses) is determined by the configured purge cycle, the programmed pause time (interval) and the duration of analysis. The duration of analysis is directly dependent on the measurement value. -
Page 47: Select Measurement Value Unit
Instrument setting and data entry - Select measurement value unit Select measurement value unit You can program the unit of the value shown. Your selection options include mg/l and ppm. All the following inputs and displays will then be shown in the programmed unit. 1. -
Page 48: Switching Functions, Multiple Limit Value Exceedance
Instrument setting and data entry - Input operating mode of LV1 and LV2 limit value outputs Range: Relays switch when leaving the preset range between LV1 and LV2: If the value falls below LV1, relay LV1 switches and the LED “LV1” lights up red. If LV2 is exceeded, relay 2 switches and LED LV2 lights up red. -
Page 49: Set Programmable Switching Output Aux
Instrument setting and data entry - Set programmable switching output AUX limit value. Only after the limit value has been exceeded twice is the corresponding output switched. When the limit value has been exceeded “3” times, the corresponding output only switches after the limit value has been exceeded three times consecutively. -
Page 50: Select Water Meter
Instrument setting and data entry - Select water meter 3. Confirm all entries with OK. 6.13 Select water meter For quantity-based analytical trigger, a water meter must be connected to the WM input (WM = water meter). 1. Select in the menu Basic program => Water meter. 2. -
Page 51: Program Alarm (Fault Signal Output)
Instrument setting and data entry - Program alarm (Fault signal output) 6.15 Program alarm (Fault signal output) The device includes a relay Alarm output to notify faults. A error is signalled via the LED alarm and the corresponding error message is shown on the display. -
Page 52: Set Up Current Interfaces 0/4 - 20 Ma
Instrument setting and data entry - Set up current interfaces 0/4 – 20 mA 6.17 Set up current interfaces 0/4 – 20 mA Set the desired current interface as follows: 1. Select in the menu Basic program => current interface type. -
Page 53: Restore Factory Default Setting
Do not dispense cleaning solution by hand. • Only use cleaning solution that has been approved by Gebr. Heyl. By selecting Clean the measuring chamber is first rinsed and then the agent is added to the water in the measuring chamber After the set application time, the contents of the measuring chamber are drained. -
Page 54: Set Up The Cleaning Mode (Optional)
Instrument setting and data entry - Set up the cleaning mode (optional) Adjust the settings as follows: 1. In the menu, select Basic program => Cleaning. 2. Under , select the quantity after which cleaning should take place. Cleaning the measuring chamber with the Self-Clean solution can be set after 1-99 analyses 3. -
Page 55: Connect To Network
Connect to network - Perform network settings 7 Connect to network No network with incorrect setting on the control board In order for the data of the serial interface to be passed on to the network module, the correct setting of the plug-in field on the control board is necessary. - Page 56 Connect to network - Perform network settings This corresponds to the state on delivery; no settings are required. Often the IP address can be linked to a MAC address by the server so that the device is always reachable under the same IP address. The MAC address is printed on the module with the network connection under the barcode.
-
Page 57: Web Interface Configuration Menus
Is not required for function; relevant as a safety feature for remote access. Syslog System log messages. Inactive. System For restart. Do not use the firmware update because the Heyl network logger process runs differently! To export and import settings. Testomat_Pro_FE_EN_240125... -
Page 58: Addresses Of The Web Interface
Connect to network - Web interface configuration menus 7.2.1 Addresses of the web interface If 192.168.0.10 is set as the IP address of the Ethernet converter, the web interface can be reached at the following addresses: http://192.168.0.10 Ethernet converter setting The links below relate to the following pages. -
Page 59: Set Up E-Mail Dispatch
Connect to network - Set up e-mail dispatch Set up e-mail dispatch The Ethernet converter does not send e-mails The Ethernet converter only supports dispatch via so-called open SMTP servers that do not require a password. Authentication is not used! •... -
Page 60: File Access With Web Interface
Connect to network - File access with web interface 1. Enter the ftp://<IP address of the Testomat Pro>. 2. A window Anmelden als appears. Enter the username and password for FTP access (Standard: “admin”, “PASS”). 3. Afterwards, the file system of the Ethernet converter with the directory “http”... -
Page 61: Perform Network Logger Maintenance
Connect to network - Perform network logger maintenance o The settings for Gap Timer and Threshold need not be changed. Perform network logger maintenance Check the available storage space every six months. 1. In the menu Filesystem → Statistics select the menu item Clean Space. -
Page 62: Operation
Operation - Normal operation 8 Operation Normal operation The device has no power switch. Use an external power switch to turn the unit on and off. The switch must be installed next to the device and must be marked as power switch for the device - for example with a label. -
Page 63: Firmware Update
Implement the firmware update as follows: ® 1. Download the firmware update for the Testomat PRO FE from the Heyl website. 2. Save the firmware in the root directory of the SD card to be inserted ® into the Testomat PRO FE. -
Page 64: Manual Firmware Update
Operation - Firmware update Obtain the settings after the firmware update After a firmware update, the device may be in an undefined state. After a firmware update, basic programming should therefore always be performed. If the settings have been preserved, it is advisable to export the settings onto the SD card before the firmware update and after the firmware update, to import the saved settings. -
Page 65: Firmware Update Ethernet Converter
To update, you need a PC with network access to the Testomat and its IP address. The process is as follows: 1. Download the update in the download section of the Heyl website. 2. Unzip the zip archive on the PC. 3. Start the executable program. - Page 66 Operation - Troubleshooting and repair card with the start and end times of the error. Regardless of the case, the analyses are continued. Access the error history as follows: Select Service => Error History to call up error history. 2. Select Show(OK), to show the list of error messages. 3.
- Page 67 36 Fault analysis • Insufficient mixing for damage • reagent expiry date exceeded − Replace stirring bar • Foreign reagent in the device − Replace reagent, only use Heyl ® Testomat reagent − Check reagent fill level 97 Reagent A <10% •...
-
Page 68: Further Possible Errors
− Download the firmware file from The device does not function immediately after being switched on. firmware file was found on the the Heyl website and copy the file No display indication. inserted SD card onto the SD card. Two red LEDs on the control card flash quickly •... -
Page 69: Error Messages After Self-Test
Operation - Troubleshooting and repair 8.4.2 Error messages after self-test ® When switched on, the Testomat PRO FE performs a self-test automatically and then monitors its own state continuously. If the LEDs on the control card flash quickly after switching on, one of the errors in table 18 has occurred and can be identified by the LED signal. -
Page 70: Firmware Update Error List
Operation - Troubleshooting and repair 8.4.3 Firmware update error list Firmware update error und error after self test can be distinguished using the red LED next to the SD card. If the LED lights up, the bootloader is active, and the error concerned occurred during the firmware update. If the LED is inactive, it is an error after the self-test. - Page 71 Operation - Troubleshooting and repair Error number/text in LED1 LED2 LED3 LED4 LED5 Solution, troubleshooting measures update.txt on SD card ☼ ○ ○ ○ ○ 900 No SD-Card inserted Insert SD card, restart firmware update Confirm write-protect tab on the side of the card, ○...
-
Page 72: Troubleshooting Network Connection
Operation - Troubleshooting network connection Troubleshooting network connection Error pattern Possible causes Solution, troubleshooting measures • Wrong user or wrong password − The factory set username “admin” has The network connection via web the password “PASS”. browser works, but it asks for an unknown login: •... -
Page 73: Servicing And Maintenance
Servicing and maintenance - Leak resistance test 9 Servicing and maintenance Risk of (chemical) burns from cleaning agents! Contact with the cleaning agents used may cause (chemical) burns. • Ensure to observe the safety instructions when handling the cleaning agents! Danger of soiling! The surface of the equipment is untreated. -
Page 74: Replacing Reagents
Servicing and maintenance - Replacing reagents Replacing reagents Risk of (chemical) burns from reagents! Contact with the reagents used may cause (chemical) burns. • Use protective goggles and gloves before handling reagents containing acids and alkalis. With the error message Reagent low or if the maximum shelf life of the reagent is exceeded, it must be replaced. -
Page 75: Cleaning The Filter Housing
Servicing and maintenance - Cleaning the filter housing 7. Remove the film on the sight glasses with isopropanol. 8. Clean the measuring chamber with 10 percent hydrochloric acid. 9. Rinse the measuring chamber thoroughly. 10. Reinsert the sight glasses after cleaning. 11. - Page 76 Servicing and maintenance - Replacing fuses Device fuses (internal) ® These fuses protect the Testomat PRO FE device or outputs against overload and short circuit. All fuses are pluggable. The main fuses F1 (1) and F6 (2) (4 A MT) for outputs and equipment are located on the motherboard (see figure 39).
- Page 77 Servicing and maintenance - Replacing fuses Exchange If not all three green LEDs on the motherboard light up, at least one fuse is defective (see figure 36). The supply voltage unit is next to the LED, which indicates its status. You will need the following to switch out a fuse: A Phillips-tip screwdriver Flat-tip screwdriver 24 V...
-
Page 78: Replacing The Backup Battery
Servicing and maintenance - Replacing the backup battery Step LED / lamps Action − Disconnect device from the mains! 24V does not light up − The fuse F4 is located at the top edge of the power supply board. Change the plug-in fuse F4 (T2A). −... -
Page 79: Accessories, Consumables, Spare Parts
Accessories, consumables, spare parts - Spare parts 10 Accessories, consumables, spare parts 10.1 Spare parts Art. no. Pressure regulator Art. no. Bottle connection/suction device 40125 Controller / filter mounting, complete 40131 Screw cap with Insert T2000 40120 Controller / filter mounting 40130 Screw cap GL32 - hole 40129... -
Page 80: Accessory
100490 Standard SD card 2GByte 040123 Conversion kit for water intake *) 270337 Maintenance case T2000 Heyl 270440 Automatic cleaning function, self-clean option Table 26 *) Conversion kit for water intake, Art. No. 040123 When using fabric pressure hoses (e.g. for existing installations), replace the plug connection on the controller and filter housing for a plug for the quick-release coupling (not included in the delivery scope). -
Page 81: Information On The Repair Of Products And Exchange Of Parts
Information on the repair of products and exchange of parts - Consumables 11 Information on the repair of products and exchange of parts The repairing of defective equipment is – regardless of the warranty period – only possible in a dismantled state and with a description of the fault. -
Page 82: Required Information When The Product Is No Longer Needed
Required information when the product is no longer needed - Consumables 12 Required information when the product is no longer needed Dispose of the device in accordance with the regulations of your country. Batteries The unit contains a removable lithium battery (CR2032 / 3V) from VARTA or an equivalent. -
Page 83: Check List Testomat Pro Fe
Check list Testomat® PRO FE ® Check list Testomat PRO FE Dear customers and service technicians, The following checklist is no substitute for your expertise and experience applied to the process of troubleshooting. It should assist you and facilitate swifter and more systematic detection and logging of errors. No claim of completeness may be inferred from this list. We are grateful to receive supplementary feedback at any time. -
Page 84: Device Settings Testomat
Check list Testomat® PRO FE ® Device settings Testomat PRO FE Caution! Your settings may be deleted in the event of a repair. There are several ways to save the settings: • Export your equipment settings to an SD card before sending the equipment to our service team for repair. The settings can be imported again after the repairs have been completed •... -
Page 85: Conformity Declaration
Conformity Declaration Conformity Declaration Testomat_Pro_FE_EN_240125... - Page 86 © Gebr. Heyl Analysentechnik GmbH & Co. KG...
Need help?
Do you have a question about the Testomat PRO FE and is the answer not in the manual?
Questions and answers