
Subscribe to Our Youtube Channel
Related Manuals for Heyl Testomat EVO TH series


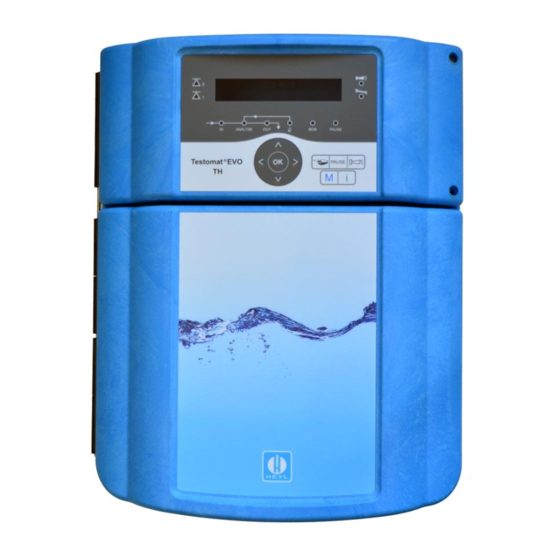
Summary of Contents for Heyl Testomat EVO TH series
- Page 1 Operating Instructions ® Testomat EVO TH Online analysis instrument for residual total hardness (water hardness)
-
Page 2: Table Of Contents
Content Content Content ....................2 Important safety information ............. 5 Intended use ..................5 Qualification of personnel ..............5 Warnings in this manual ..............6 Additional documentation ..............6 Special attention is required at this point ..........6 General Information ................. 6 Requirements for the installation site.......... - Page 3 Content Select quantity control ..............32 Select quantity control/time priority ..........33 Configure interval (interval pause) ............33 Select indicator type and container size ..........34 Select measurement value unit............34 Limit value monitoring ................. 35 Input operating mode of LV1 and LV2 limit value outputs ..... 35 Switching functions of the LV1 and LV2 limit value outputs ..
- Page 4 Content Description of the maintenance work ..........66 Replacing indicator ................ 66 Setting indicator fill level ..............67 Cleaning of the measuring chamber and the viewing windows ..67 Cleaning the filter housing ............. 67 Care instructions ................. 68 Replacing the backup battery ............. 68 Replacing fuses ..................
-
Page 5: Important Safety Information
Observe the safety precautions and safety recommendations when using reagents, chemicals and cleaning agents. Observe the relevant safety data sheet! For reagents we supply, the relevant safety data sheets are available online at http://www.heyl.de. Intended use ® The scope of use of the Testomat... -
Page 6: Warnings In This Manual
Important safety information Warnings in this manual These instructions include warnings against specified actions that involve the risk of injury or property damage. Warnings are structured as follows: Description of the type or source of danger SIGNAL WORD! Description of the consequences of non-compliance Hazard prevention indications. -
Page 7: Requirements Of Cable For Mains Voltage And System Components And Installed Lines
Dielectric strength 30 V … 260 V according to the nominal voltage (see specification plate) The cable ducts installed by Gebr. Heyl in the device have a clamping range of 4.5 mm – 10 mm. This means that the external diameter of the laid cable must remain within the range of 4.5 mm... -
Page 8: During Assembly
Important safety information During assembly Always disconnect the relevant system component from the power source before assembling the device or connecting it to the power WARNING supply or disconnecting it from the same. Prevent any inadvertent reactivation of the device. ... -
Page 9: During Cleaning
Important safety information During cleaning Only use a dry and lint-free cloth. Maintenance and care instructions are included in the section ® maintenance” and in the Testomat "Servicing and EVO TH maintenance manual Malfunctions/repairing a defective device A defective device, regardless of the guarantee period, can be serviced only when the device is dismantled and the error is de- scribed. -
Page 10: Operating Requirements
Problem-free operation of the Testomat ® device is only possible when using Heyl Testomat indicators and only within the pH range CAUTION of 4 – 10.5! Using external indicators may invalidate the guarantee. Only operate the device within the scope of parameters specified under "Technical... -
Page 11: Delivery Includes
Delivery includes: Delivery includes: 1 Testomat® EVO TH 1 plastic bag with: Screw cap including hole and an insert for the screw cap of the indicator bottle 1 package with: 1 plastic bag with • Drain funnel • 2 screws for mounting power supply unit Power supply 1 User manual Attention! -
Page 12: Available Indicators For Testomat Evo Th Devices
This may invalidate the guarantee! At Heyl, we always strive to ensure the consistently high quality of our indicators. They are specially tailored to the requirements of our... -
Page 13: Assembly
Assembly Assembly Hazard due to defective assembly! WARNING ® Assemble the Testomat EVO TH device in a location shielded from drips and splashes of water, dust and aggressive substances – e.g. in a switching cabinet or on a suitable wall. Notes for problem-free operating procedures ... -
Page 14: Connecting The Water Intake And Discharge
Assembly Connecting the water intake and discharge When using a cooler CAUTION Water exceeding 40°C may lead to burns and may damage the ® parts of the Testomat EVO TH exposed to the water. Notes for problem-free operating procedures ... -
Page 15: Water Drain
Assembly Water drain The water is conveyed through the measuring chamber via an open funnel and the drain hose installed on the same and into the duct. Remove the supplied funnel and accommodate it underneath, in the recess of the housing designated for that purpose. -
Page 16: Block Diagram Of Testomat Evo Th
Assembly ® Block diagram of Testomat EVO TH Illustrated position of relays: Device without current, mains: 230 V... -
Page 17: Internal Structure Of Testomat Evo Th
Assembly ® Internal structure of Testomat EVO TH Terminal strip for inputs/outputs Terminal strip for mains inlets and outlets Terminal strip relay outputs Dosing pump Water connections, intake and outlet (funnel) ... -
Page 18: Cable Ducting
Assembly Cable ducting To guarantee IP protection, the device is supplied with cable ductings and blanking plugs. If you wish to use a relay output, you must re- move the blanking plug from the cable ducting. Proceed as follows in this instance: ... -
Page 19: Connect System Components
Assembly Terminal designa- Type Function Note tion Mains protective conductor Only for mains supply of Mass/PE 230 V and 100 – 240V! (5x) Grid, N=Neutral conductor N (U) Power input 50-60 Hz (U=24V) L (V) 24 V / 100-240 V / 230 V Grid, L=Phase (V=24V) Neutral conductor, secured Grid for consumers, max. - Page 20 Assembly Terminal Type Function Note designation Limit value output 1 – root c Limit value output 1 – closing contact Floating relay output, max. 240 VAC, 4 A (limit value) Limit value output 1 – break contact NC Limit value output 2 – root c Limit value output 2 –...
-
Page 21: Connect Inputs And Outputs
Assembly Connect inputs and outputs ® The Testomat EVO TH device has the following sockets for control and monitoring functions. Proceed as follows for connection: Loosen the strain relief of the cable ducting (union nut). Take out the blanking plugs of the corresponding cable ductings. ... -
Page 22: Rs232 Interface Terminal Assignment
Assembly RS232 interface terminal assignment Sub-D 9 poles Terminal Function designation Data reception Output of measured values/alarms Ground... -
Page 23: Connect Indicator Bottle
® Flawless operation of the Testomat EVO TH device is only CAUTION ® guaranteed when Heyl Testomat 2000 indicators are used! The use of external indicators may invalidate the guarantee. Insert indicator bottle Open the lower housing door by pulling on the right side ... -
Page 24: Device Settings And Data Input
Functions of the control and display elements Device settings and data input Before you configure the required settings and inputs to facilitate operation of the device, please read the following information. Functions of the control and dis- play elements The operating modes and measurement values are shown on the ®... -
Page 25: Display Functions
Functions of the control and display elements Display functions All error and warn- ing messages are shown in rotation with the standard display in line 1! 1 Limit value status indications (red/green) When the limit values 1 are exceeded, indicator 1 lights up in red. Falling under the limit value results in the indicator 1 lighting up in green. -
Page 26: Control And Function Keys
Functions of the control and display elements 10 Pause (green) The flashing LED indicates the activated pause. 11 Service (yellow) The yellow LED indicates that the maintenance period has elapsed. 12 Alarm (red) Indicates a functional error/error message or warning message. Handling of error messages/warning messages NOTE ... -
Page 27: Operating System
Functions of the control and display elements Input programming data If you configure settings or wish to input data or when changes are required, you can call up the programming menu with the "M" button. Pressing this button in the menu brings you to the higher-level menu item or you can leave the programming menu. - Page 28 Functions of the control and display elements Inputting date and time Press the "M" button Basic program "Ser- The following selection appears: " " or vice" PROGRAM MENU Service Using the cursor block , select the menu option " "...
- Page 29 Functions of the control and display elements Inputting of data (Example: interval pause/quantity interval) Interval Using the menu option " " you can program the interval pause between two analyses. To adjust the interval pause, proceed as follows: Press the "M"...
-
Page 30: Control Elements On The Control Board
Control elements on the control board Battery holder : The battery holder houses a CR2032 lithium battery to retain the time setting even if the device is switched off. Plug-in slot for SD card : SD or SDHC cards with a maximum capacity of 32GByte are suitable. -
Page 31: Getting Started
Getting started Getting started Once you have completed the steps in the section Connecting indica- tor, you can switch on the device. Automatic venting NOTE After the device is switched on the indicator lines are automatically vented and the measuring chamber purged, until indicator is detected in the measuring chamber. -
Page 32: Input Basic Programming Data
Input basic programming data Input basic programming data Delayed reaction NOTE During analysis, the response to any key presses may be delayed. Select operating mode "Operating mode" Under the menu option you can select the ® type of analytical control. The Testomat EVO TH gives you scope to control timing or quantity via water meter or a combination of both. -
Page 33: Select Quantity Control/Time Priority
Input basic programming data Select quantity control/time priority The analysis is performed once the programmed quantity of water Quantity control Time priority has passed. An analysis is always prioritized once the programmed interval pause has elapsed. MODE OF OPERATION Select the function Time controlled ... -
Page 34: Select Indicator Type And Container Size
Input basic programming data Select indicator type and container size Press the "M" button "Basic program" This brings you to the basic menu for Basic program BOTTLE SIZE Confirm " " with "OK" 500ml bottle Keep pressing the button until the menu option 100ml bottle Bottle size... -
Page 35: Limit Value Monitoring
Input basic programming data Limit value monitoring You can program the limit values to be stepless. The limit value range is specified by the indicator type and programmed unit used. You can monitor two limit values. For this purpose, each limit value output is available. -
Page 36: Switching Functions Of The Lv1 And Lv2 Limit Value Outputs
Input basic programming data Operating mode range The relays switch when the predefined range between LV1 to LV2 is exited: If GW1 is not attained, relay 1 switches If GW2 is exceeded, relay 2 switches Switching functions of the LV1 and LV2 limit val- ue outputs ... -
Page 37: Input Purge Cycle
Input basic programming data Diagram of the switching functions Input purge cycle To guarantee that the sample being analyzed is current, the sampling line must be sufficiently purged over its entire length. When the sys- tem is unused for an extended period and when the analysis interval is considerable, a purge cycle of more than 60 seconds should be selected. -
Page 38: Select Water Meter
Input basic programming data Select water meter For quantity-based analytical trigger, a water meter must be connect- WATER METER ed to the WM input (WM = water meter). 1 l/Impulse All settings are configured in the 2,5 l/Impulse Basic program Water meter =>... -
Page 39: Description Of The Relay Outputs
Input basic programming data Description of the relay outputs All relay outputs are designed as neutral contacts. This means the full range of connection options is available to you. This facilitates the switching of mains power, external power and direct switching of inputs, e.g. -
Page 40: Aux (Programmable Functional Output)
Input basic programming data AUX (programmable functional output) Function Contact Action Isolated change-over Programmable with Terminals 7,8,9 contact time interval, see below Programmable Terminal 7: c / central contact function output Terminal 8: no / closing contact dependent on Terminal 9: nc / break contact the analytical sequence This isolated relay output lets you set various switching functions set,... -
Page 41: Alarm/Message - How To Proceed When Errors Occur
Input basic programming data Functions of the alarm output The “Alarm" output is an isolated relay changeover contact. During Alarm normal operation, the contact between terminals 10 - 11 is closed Terminals 10,11,12 and opened between 10 - 12. In the event of voltage failure, the con- tact between terminals 10 - 12 is closed and opened between 10 - The device includes a whole range of monitoring functions with fol- lowing functions/performance of the "Alarm"... -
Page 42: Water Shortage
Input basic programming data Water shortage The water shortage error is a special case, since one further setting can be configured for this error. In the menu, under Basic program Waterlow count => => the number of consecutively occurring errors before the alarm is trig- gered can be set. -
Page 43: Description Of The Signal Inputs/Outputs
Input basic programming data Description of the signal inputs/outputs Switching of the signal inputs CAUTION Switch the signal inputs "Stop", "WM" and "Ext. Ack" only with isolated contacts! Switching with external voltage will damage the device! Stop input The stop input is intended for short-term suspension of operation, e.g. -
Page 44: External Delete (External Acknowledge)
Input basic programming data External delete (external acknowledge) Function Contact type Testing Action duration External delete Programmable: none Proceed as for Ext. Ack. Deleting / ac- horn button break contact or Terminals 15,16 knowledging exist- closing contact ing errors / alarms (isolated) Via these terminals, all error messages can be acknowledged re- motely. -
Page 45: Calculation Of Output Currents
Input basic programming data Monitoring the measurement point Connecting a recorder allows the analytical results to be document- ed. For this purpose the device includes a programmable current output (optionally 0-20 mA or 4-20 mA). The following example indicates the course of the current within the range of 0-20 mA. -
Page 46: Serial Interface
Input basic programming data Serial interface The serial RS232 interface transfers measurement data and alarms/notifications in plain text/ASCII in CSV format. It is always active. The baud rate can be set to 2400, 9600, 19200, 38400 and 115200. Transmission is in the 8 bit format, 2 stop bits, no parity. A new measurement value is transmitted as soon as it has been de- termined. -
Page 47: Lcd Settings
Input basic programming data LCD settings The Testomat® EVO TH comes with a large-scale backlit graphic- enhanced LC display. Basic program Adjust brightness and contrast in the menu => LCD settings => LCD SETTINGS Brightness brightness contrast When you change a setting, Contrast adapted on the display for previewing purposes. -
Page 48: Storing Measurement Values
Input basic programming data Link between time and correct data NOTE To ensure that the naming of the file and the time and date details in the file are correct, the time function must work properly. If the battery drains, the date is automatically set to 1.1.2011, 12:00 and the data is stored. -
Page 49: Interim Storage For A Non-Inserted Sd Card
Input basic programming data Interim storage for a non-inserted SD card Even if no SD card is currently inserted, no measurement values and errors are lost, since the most recently error and measurement val- ues, which have not yet been written into storage, are saved on inter- nal interim storage (ring memory). -
Page 50: Import Basic Programming Data
Password protection For data input and settings in the basic program, a four-digit pass- word can be used. If you have forgotten your password, please con- tact your Heyl Neomeris service partner or water supplier. Password input Press the "M" button "Basic program"... -
Page 51: Change Password
Implement the firmware update as follows: ® Download the firmware update for the Testomat EVO TH from the Heyl website and save it in the root directory of the SD card to be Observe ESD safety ® inserted into the Testomat EVO TH precautions! See the ®... - Page 52 Input basic programming data The programming progress is indicated as bars with five LEDs on the control card: Initially, only LED1 flashes (in the vicinity of the plug connector to the motherboard) slowly (once every two seconds) and later permanent- ly, whereupon the next LED begins flashing.
-
Page 53: Manual Firmware Update
Input basic programming data Manual firmware update The manual firmware update facilitates the recovery of software after Observe ESD safety failed firmware updates. The indicator and device buttons are not precautions! See the used in the process. information on page 8 NOTE An SD card with a firmware file must be inserted in the device. -
Page 54: Information Menu "I
Information menu "i" Information menu "i" The information menu gives you scope to query current settings and states of the device. Call (1) Call (1) The button allows you to call up the information menu. Remote access in the infor- mation menu to check or query Scope for queries: Operating values and program values, such as the settings and operating... -
Page 55: Service Menu
Service menu Service menu Service (2) Call: (1) Indicator fill level (3) The button allows you to call up the program menu. Use the Input the new fill level for each Service refill or when changing the cursor keys to select the menu option " ". - Page 56 Service menu Language (9) English Deutsch Select the desired language for the indicator. The number of installed languages may vary. Français Nederlands Espanol Diagnosis (10) Türkçe The diagnosis menu allows you to perform an automatic comparison 中文 for the amplifier of the receiver diode and the LEDs. You can also Czech switch and reset EV, AV and all outputs as well as test the current loop.
-
Page 57: Structure Of Basic Programming
Structure of basic programming Structure of basic programming... -
Page 58: Error Messages/Troubleshooting
Error messages/troubleshooting Error messages/troubleshooting Errors will be recorded in the error history as far as capacity allows (after which the oldest message will be deleted). In addition, error messages can be stored on the SD card, if in the menu =>... - Page 59 Error messages/troubleshooting Error number/error message Description, possible Solution, troubleshooting measures causes 01 Power failure Prior power failure (also Check power supply when switching off) 02 Power failure 24V Failure of the internal Replace 24V fuse 24V power supply ...
- Page 60 Check suction and pressure hose for dam- Indicator expiry date exceeded Replace stirring bar Foreign indicator in the Replace indicator, only use Heyl Testomat ® device 2000 indicator 37 Indicator low Indicator minimum quan-...
-
Page 61: Further Possible Errors
Firmware update starts, but Download the firmware file from the mediately after being switched on. no firmware file was found Heyl website and copy the file onto No display indication. on the inserted SD card the SD card. Two red LEDs on the control card flash quickly ... - Page 62 Error messages/troubleshooting Error number/text Solution, troubleshooting measures LED1 LED2 LED3 LED4 LED5 in alarm log on SD card 500 CTRL-FRAM 1. Defective component. Repair/exchange ☼ ○ ○ ○ ○ required. ☼ 501 MB-IC12 See 1. ☼ ☼ ○ ○ ○ 502 HMI-IC1 See 1.
-
Page 63: Firmware Update Error List
Error messages/troubleshooting Firmware update error list Has any firmware update error or error occurred after the self- NOTE test? This error can be distinguished using the red LED next to the SD card (see figure on page 51Fehler! Textmarke nicht definiert.Fehler! Textmarke nicht definiert.): If the LED lights up, the bootloader is active and the error concerned occurred during the firmware update. - Page 64 Error messages/troubleshooting Error number/text LED1 LED2 LED3 LED4 LED5 in update.txt Solution, troubleshooting measures On SD card 900 No SD-Card in- ☼ ○ ○ ○ ○ Insert SD card, restart firmware update serted 901 SD-Card write Confirm write-protect tab on the side of ○...
- Page 65 Error messages/troubleshooting Error number/text in LED1 LED2 LED3 LED4 LED5 Solution, troubleshooting measures update.txt on SD card 916 UPD sec invalid Start info in update file defective: Re- ☼ ☼ start download 917 UPD sect invalid Length info in update file defective: Re- ☼...
-
Page 66: Servicing And Maintenance
Servicing and maintenance Servicing and maintenance Required maintenance measures To ensure problem-free function of the device, regular mainte- NOTE nance is required! Before sending the device in for maintenance or repair, package the power pack individually in the original box in which it was deliv- ered. -
Page 67: Setting Indicator Fill Level
Servicing and maintenance Setting indicator fill level The indicator fill level must be set when refilling the indicator bottle set or reset during a replacement. Select the menu REAGENT => Service => Reagent => Filling level Filling level 100% 100% ... -
Page 68: Care Instructions
Servicing and maintenance Remove the locking pin and pull it out of the flow regulator. Remove the flow governor core. Clean the filter housing with water or alcohol and reconstruct it. Ensure that you insert the filter sieve with the top facing down! ... -
Page 69: Replacing Fuses
Servicing and maintenance Remove both fixing screws of the upper and lower control card on the motherboard Remove the control card Using a non-conductive tool, carefully prise the used battery out of its mounting. Avoid damaging the circuit board with the sharp edge of a screwdriver. - Page 70 Servicing and maintenance Multi-range power supply board 100 – 240V 12V/3,3V Primary F2: 1 A/T F3: 0.5 A/T Secondary F4: 2 A/T F5: 2 A/T...
- Page 71 Servicing and maintenance Exchange If not all three green LEDs on the motherboard light up, at least one fuse is defective. The supply voltage unit is next to the LED, which indicates its status. Observe ESD safety You require: precautions! See the ...
- Page 72 Servicing and maintenance Step LED / lamps Action Primary fuse F1 od F6 on the Disconnect device from the mains! motherboard defective. Remove cable compartment cover (Phillips-tip screwdriv- er). Use a flat-tip screwdriver to turn and rotate the safety cov- Replace safety fuse 4A Put safety cover back in place.
-
Page 73: Checklist Testomat Evo Th
® Checklist Testomat EVO TH Dear customers and service technicians, The following checklist is no substitute for your expertise and experience applied to the process of troubleshooting. It should assist you and facilitate swifter and more systematic detection and logging of errors. No claim of completeness may be inferred from this list. We are grateful to receive supplementary feedback at any time. - Page 74 ® Device settings for Testomat EVO TH Caution! Your settings may be deleted in the event of a repair. Accordingly, export your device settings onto an SD card before sending the device for repair to our service team. The settings can be re-imported after the repair. Impuls Menu Setting...
-
Page 75: Spare Parts And Accessories For Testomat Evo Th
Spare parts and accessories for Testomat® EVO TH Spare parts and accessories for ® Testomat EVO TH Art. No Pressure regulator Art. No Device spare parts 40125 Controller / filter mounting, complete 31582 Fuse GS-M 5x20E 4A MT 40120 Controller / filter mounting 31655 Fuse T2A (24V) 40129... -
Page 76: Accessory
100490 Standard SD card 2GByte 040123 Conversion kit for water intake *) 270337 Maintenance case T2000 Heyl 100491 WLAN SD card 8GByte *) Conversion kit for water intake, Art. No. 040123 When using fabric pressure hoses (e.g. for existing installations),... -
Page 77: Technical Data
Technical Data Technical Data 230 VAC or 100 – 240 VAC Power supply: ± 10%, 50 - 60 Hz Complete protection T4A including user power supply Power consumption: max. 230V (100-240V) / 4A without external load 230V (100-240V) / 1A Protection class: Protection type: IP 44... -
Page 78: Equipment Options
Our user manuals are regularly updated. If you have an older version (see details of the version on the rear of the instruc- tions), you can find the most recent version of the operating instructions on our homepage www.heyl.de under Download. Equipment options ®... -
Page 79: Declaration Of Conformity
Declaration of conformity Declaration of conformity... -
Page 80: Nrtl Certificate
NRTL certificate NRTL certificate Valid for devices with wide-range power supply 100 – 240V! -
Page 81: Tüv Certificate
TÜV certificate TÜV certificate Valid for devices with wide-range power supply 100 – 240V! - Page 82 Gebrüder Heyl Analysentechnik GmbH & Co. KG Orleansstraße 75b D 31135 Hildesheim www.heyl.de Testomat_EVO_TH_GB_181106.docx Scan the code and visit us on our homepage!
Need help?
Do you have a question about the Testomat EVO TH series and is the answer not in the manual?
Questions and answers