
Related Manuals for Smeg K90X


Summary of Contents for Smeg K90X
- Page 1 Libretto di Istruzioni Instructions Manual Manuel d’Instructions Bedienungsanleitung Gebruiksaanwijzing Manual de instrucciones Manual de Instruções Bruksanvisning K90X...
-
Page 2: Table Of Contents
INDICE CONSIGLI E SUGGERIMENTI ...4 CARATTERISTICHE ...5 INSTALLAZIONE...6 USO ...9 MANUTENZIONE ...10 INDEX RECOMMENDATIONS AND SUGGESTIONS ...12 CHARACTERISTICS...13 INSTALLATION ...14 USE...17 MAINTENANCE...18 SOMMAIRE CONSEILS ET SUGGESTIONS ...20 CARACTERISTIQUES ...21 INSTALLATION ...22 UTILISATION...25 ENTRETIEN...26 INHALTSVERZEICHNIS EMPFEHLUNGEN UND HINWEISE...28 CHARAKTERISTIKEN...29 MONTAGE...30 BEDIENUNG...33 WARTUNG...34 INHOUDSOPGAVE ADVIEZEN EN SUGGESTIES ...36... - Page 3 ÍNDICE CONSELHOS E SUGESTÕES ...52 CARACTERÍSTICAS ...53 INSTALAÇÃO ...54 UTILIZAÇÃO...57 MANUTENÇÃO ...58 ...60 ...61 ...62 ...65 ...66 INNEHÅLL REKOMMENDATIONER OCH TIPS...68 EGENSKAPER ...69 INSTALLATION ...70 ANVÄNDING...73 UNDERHÅLL ...74...
-
Page 4: Recommendations And Suggestions
RECOMMENDATIONS AND SUGGESTIONS The Instructions for Use apply to several versions of this appliance. Accord- ingly, you may find descriptions of individual features that do not apply to your specific appliance. INSTALLATION • The manufacturer will not be held liable for any damages resulting from in- correct or improper installation. -
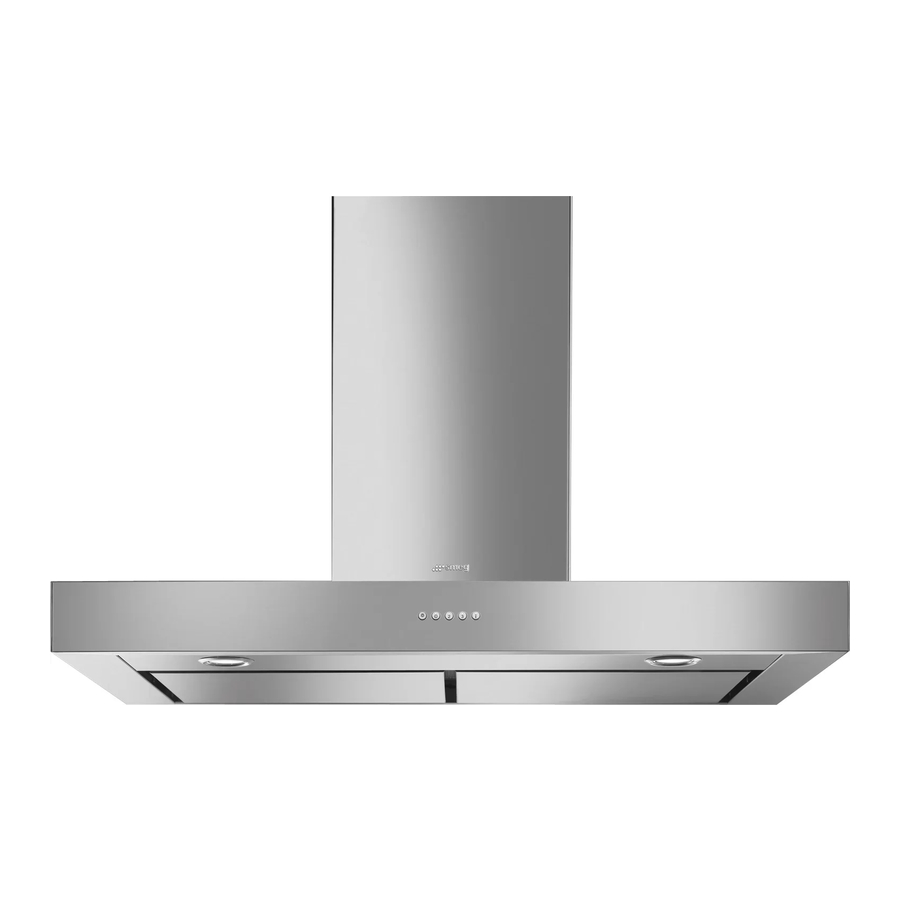
Page 5: Characteristics
CHARACTERISTICS Components Ref. Q.ty Product Components Hood Body, complete with: Controls, Light, Blower, Filters Telescopic Chimney comprising: Upper Section Lower Section Reducer Flange ø 150-120 mm Damper 14.1 Air Outlet Connection Extension Air Outlet Connection Ref. Q.ty Installation Components 7.2.1 Upper Chimney Section Fixing Brackets Wall Plugs Screws 4,2 x 44,4... - Page 6 INSTALLATION Wall drilling and bracket fixing Wall marking: • Draw a vertical line on the supporting wall up to the ceiling, or as high as practical, at the centre of the area in which the hood will be installed. • Draw a horizontal line at 650 mm above the hob. Place bracket 7.2.1 on the wall as shown about 1-2 mm from the ceiling or upper limit aligning the centre (notch) with the vertical reference line.
- Page 7 Mounting the hood body • Before attaching the hood body, tighten the two screws Vr lo- cated on the hood body mounting points. • Hook the hood body onto the screws 12a. • Fully tighten the support screws 12a. • Adjust the screws Vr to level the hood body. Connections DUCTED VERSION AIR EXHAUST SYSTEM When installing the ducted version, connect the hood to the...
- Page 8 ELECTRICAL CONNECTION • Connect the hood to the mains through a two-pole switch hav- ing a contact gap of at least 3 mm. • Remove the grease filters (see paragraph Maintenance) being sure that the connector of the feeding cable is correctly inserted in the socket placed on the side of the fan.
- Page 9 Button Function Press briefly to turn the lighting system on and off. Press and hold for approx. 2 seconds to turn the lighting system on and off at reduced intensity. Turn the suction motor on and off at speed one. If the filter saturation alarm is on, this resets it.
-
Page 10: Maintenance
MAINTENANCE Cleaning the Comfort Panels • Pull the Comfort Panel to open it. • Disconnect the panel from the hood canopy by sliding the fix- ing pin lever. • The comfort panel must never be washed in a dishwasher. • Clean the outside by using a damp cloth and neutral liquid de- tergent. -
Page 11: Installation
Activated Charcoal Filter (Recirculation Version) • This cannot be washed or regenerated, and must be changed when all the command LEDs start to flash, or at least once every 4 months. Activating the alarm signal • In Recirculation Version Hoods, the Filter Saturation Alarm must be activated on installation or at a later date.
Need help?
Do you have a question about the K90X and is the answer not in the manual?
Questions and answers