Table of Contents
Advertisement
Quick Links
Advertisement
Table of Contents

Subscribe to Our Youtube Channel
Related Manuals for Bosch HGX5G7W50S


Summary of Contents for Bosch HGX5G7W50S
- Page 1 Free standing cooker HGX5G7W50. User manual and installation instructions [en]...
-
Page 2: Table Of Contents
en Safety Table of contents ATTENTION: Observe the applicable regula- tions and only set up the appliance in well- ventilated rooms. Read through the instruc- INFORMATION FOR USE tions before setting up and using the appli- Safety .............. 2 ance. Warning: The appliance is only used for cook- Preventing material damage ...... 6 ing. - Page 3 Safety en Escaping gas may cause an explosion. If the been instructed on how to use the appliance gas pressure in your distributing pipes is safely and have understood the resulting dangers. more than 20% higher than the values spe- cified on the appliance's rating plate, a gas Do not let children play with the appliance.
-
Page 4: Safety
en Safety The appliance becomes very hot, fabrics and Accessories and cookware get very hot. other objects may ignite. ▶ Always use oven gloves to remove ac- ▶ Keep fabrics (e.g. garments or curtains) cessories or cookware from the cooking away from the flames. compartment. - Page 5 Safety en An ingress of moisture can cause an electric If you leave the appliance door open, people shock. may bump into it, resulting in injury. ▶ Do not use steam- or high-pressure clean- ▶ Always keep the appliance door closed ers to clean the appliance.
-
Page 6: Preventing Material Damage
en Preventing material damage 1.5 Plinth drawer WARNING ‒ Risk of electric shock! When changing the bulb, the bulb socket con- WARNING ‒ Risk of fire! tacts are live. The surfaces of the plinth drawer may be- ▶ Before replacing the bulb, ensure that the come very hot. appliance is switched off in order to pre- ▶... -
Page 7: Environmental Protection And Saving En- Ergy
Environmental protection and saving energy en The handles or grips on pots or pans may be dam- 2.2 Hob with gas aged. Follow the corresponding instructions when using the Place the pot or pan precisely in the centre of the ▶ appliance. steel grid of the burner. - Page 8 en Installation and connection For longer cooking times, you can switch the appli- Choose a burner roughly the same size as your pan. ance off 10 minutes before the cooking time ends. Centre the cookware on the hob. ¡ There is sufficient residual heat to finish cooking Tip: Cookware manufacturers often give the upper the dish.
-
Page 9: Installation And Connection
Installation and connection en ¡ On some appliances, you can connect the gas pipe Keep the hoses away from sharp edges. to the gas pipe or flexible safety gas hose on the Do not let the hoses come into contact with parts right-hand or the left-hand side of the appliance. - Page 10 en Installation and connection WARNING ‒ Risk of electric shock! There is a risk of electric shock if you touch live com- ponents. Hold the mains plug with dry hands only. ▶ Never pull out the mains plug from the socket while ▶ the appliance is in operation.
- Page 11 Installation and connection en ¡ You must check the alignment of the appliance once it has been installed in the intended location. Adjacent units Any adjacent units must not be made of flammable ma- terials. ¡ The fronts of any adjacent units must be heat-resist- ant up to at least 90 °C.
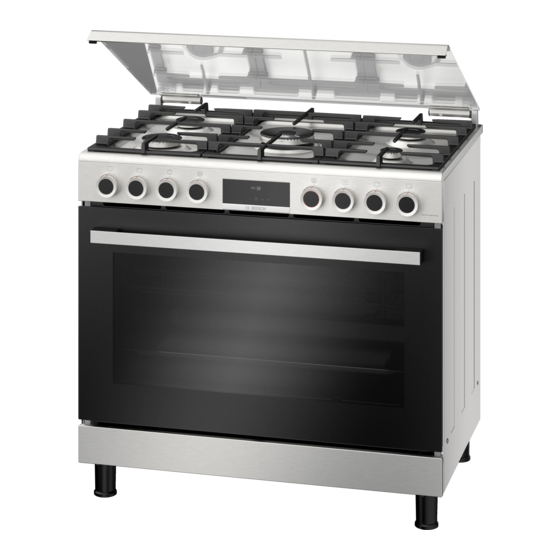
- Page 12 en Familiarising yourself with your appliance Familiarising yourself with your appliance 5 Familiarising yourself with your appliance 5.1 Your appliance Explanation Control panel You can find an overview of the parts of your appliance here. Appliance door Note: On certain models, specific details such as col- Plinth drawer our and shape may differ from those pictured.
-
Page 13: Familiarising Yourself With Your Appliance
Familiarising yourself with your appliance en Symbol Type of heating What it's used for and how it works Bottom heating Final baking or cooking food in a bain marie. 140-255 °C The heat is emitted from below. Gas grill Grill flat items such as steak, sausages, or toast. The whole area below the grill element becomes hot. - Page 14 en Familiarising yourself with your appliance Note: If you select hybrid mode without switching on the oven gas burner, a line appears with two incre- ments, which shows that the hybrid mode is not active. Control knob for the oven Turn the oven control knob for the oven temperature anti-clockwise or clockwise for the grill function.
-
Page 15: Accessories
Accessories en Rails ATTENTION! The shelf supports in the cooking compartment enable Covering the ventilation slots will cause the appliance to overheat. you to place accessories at different heights. Do not cover the ventilation slots. The cooking compartment has five shelf positions. The ▶... -
Page 16: Before Using For The First Time
You will find a comprehensive range of products for your appliance in our brochures and online: www.bosch-home.com Accessories vary from one appliance to another. When purchasing accessories, always quote the exact product number (E no.) of your appliance. -
Page 17: Cookware
Cookware en or to set the time. Set the type of heating and the temperature. Press . → "Basic operation", Page 20 a The set time is shown on the display. Type of heat- Lower oven gas burner/gas grill 7.2 Cleaning the appliance before using it Temperature Maximum for the first time... - Page 18 en Operating the hotplate 8.2 Tips for using a wok ¡ Never use multiple burners to heat up Note the following information to ensure the safe use of cookware. The build- a wok. up of heat that results from this will damage WARNING ‒ Risk of injury! the appliance.
- Page 19 Operating the hotplate en ¡ A slight whistling when operating the burner is nor- ATTENTION! mal. The burner may not ignite or the burner flame is not ¡ Odour formation during the first uses is normal. This even. does not indicate a risk or malfunction. It will stop Ensure that the hotplate burners are clean and dry.
-
Page 20: Basic Operation
en Basic operation ¡ ** Optional. Available for some appliances. Depend- Note: Information ing on the appliance type. (For frying on the wok ¡ * If you are using a pan with a lid, turn the flame burner, we recommend that you use a wok.) down as soon as the food starts to boil. -
Page 21: Rotary Spit
Rotary spit en To activate the safety pilot, press and hold the func- Check through the opening in the oven's bottom tion selector for 10 seconds. panel that the flame is burning. If the flame is not burning, repeat the steps. a This activates the safety pilot. If the gas flame goes Close the oven door carefully. -
Page 22: Time-Setting Options
en Time-setting options Release the handle and close the oven door. Open the top cover, if available. The top cover must remain open while the appli- ance is running. Turn on the main gas supply to the appliance. Insert the plug in the socket. Open the oven door. Press the oven selector and turn it to the grill set- ting ... -
Page 23: Childproof Lock
Childproof lock en Press . a The set time is shown on the display. Childproof lock 13 Childproof lock Secure the appliance to prevent children from accident- 13.1 Activating and deactivating the ally changing the settings. childproof lock Notes To activate the childproof lock, press and hold the ¡... - Page 24 en Cleaning and servicing Do not use cleaning products with a high alcohol Using oven cleaner in a hot cooking compartment ▶ content. damages the enamel. Do not use hard scouring pads or cleaning Do not use oven cleaner in the cooking compart- ▶...
-
Page 25: Cleaning And Servicing
Cleaning and servicing en Area Suitable cleaning agents Information Enamelled sur- ¡ Hot soapy water Soak any heavily soiled areas and use a brush or steel wool. faces Leave the appliance cover open so that the hob can dry after it has ¡... - Page 26 en Cleaning and servicing 15.7 Using cleaning gel for burnt-on dirt ATTENTION! If the self-cleaning surfaces are not cleaned regularly, For hard-to-remove, burnt-on dirt, you can order a the surfaces may be damaged. cleaning gel from our online shop, from your specialist If dark spots can be seen on the self-cleaning sur- ▶...
-
Page 27: Appliance Door
Rails en Rails 16 Rails To clean the rails and cooking compartment thor- 16.2 Attaching the rails oughly, you can remove the shelf supports. First insert the rail into the rear socket, press it to the back slightly 16.1 Unhooking the rails WARNING ‒ Risk of burns! The rails can be very hot. - Page 28 en Appliance door When the locking levers are open in order to detach Detach the oven door. the oven door, the hinges are secured. Position it on a cloth with its handle pointing down- wards. To remove the upper cover of the oven door, press in the tabs on the left and right using your fingers.
-
Page 29: Top Cover
Top cover en The notch on the hinge must engage on both sides. WARNING ‒ Risk of injury! The oven door might accidentally fall or a hinge may suddenly snap shut. In this case, do not hold onto the hinge. Call cus- ▶ tomer service. - Page 30 en Troubleshooting WARNING ‒ Risk of injury! WARNING ‒ Risk of electric shock! Improper repairs are dangerous. Improper repairs are dangerous. Repairs to the appliance should only be carried out Repairs to the appliance should only be carried out ▶ ▶ by trained specialist staff. by trained specialist staff.
- Page 31 Troubleshooting en Fault Cause and troubleshooting All dishes prepared in The thermostat is faulty. the oven burn within Call customer service. ▶ a short period of time. The fan position is The grill selector is switched on. not working. Ensure that the grill selector is switched off. ▶...
-
Page 32: Transportation And Disposal
en Transportation and disposal Transportation and disposal 20 Transportation and disposal You can find out here how to prepare your appliance 20.2 Transporting the appliance for transportation. You will also find out how to dispose Keep the original appliance packaging. Only transport of old appliances. -
Page 33: How It Works
How it works en Gas designation Gas mixture in % WARNING ‒ Risk of scalding! Hot steam may escape when you open the appli- =100 ance door. Steam may not be visible, depending on =86, N the temperature. =50, i-C Open the appliance door carefully. ▶... - Page 34 en How it works Meal Accessory/cookware Shelf posi- Type of Temperature Cooking tion heating in °C time, minutes Sponge cake Vienna ring tin/loaf tin 2 50-60 and Sponge flan, 6 eggs Springform cake tin 30-35 Ø 28 cm and Apple pie Springform cake tin, 80-90...
- Page 35 How it works en Recommended settings Bread and bread rolls Meal Accessory/cookware Shelf posi- Type of Temperature Cooking tion heating in °C time, minutes Bread Universal pan and Bread rolls Universal pan 20-25 and Preheat the appliance for 10 minutes. Never use the rapid heating function for preheating. 22.6 Pizza, quiche and savoury cakes Here, you can find information about pizza, quiche and savoury cakes.
- Page 36 en How it works Meal Accessory/cookware Shelf posi- Type of Temperature Cooking tion heating in °C time, minutes Goulash Ovenproof dish 60-70 and Meatballs with potatoes, in sauce Ovenproof dish 70-80 Potato gratin, raw ingredients, 4 cm Ovenproof dish 40-50 deep Potato gratin, raw ingredients, 4 cm Ovenproof dish 30-40...
- Page 37 How it works en Stir 30 g yoghurt into the milk. 22.9 Yoghurt Pour the mixture into small containers, e.g. small You can also use your appliance to make your own jars with lids. yoghurt. Cover the containers with film, e.g. cling film. Place the containers on the cooking compartment Making yoghurt floor.
-
Page 38: Installation Instructions
en Installation instructions Recommended settings Cooking more than one dish at a time Meal Accessory/cookware Shelf pos- Type of Temperature Cooking ition heating in °C time, minutes Bread, 500 g Ovenproof dish Sponge cake Vienna ring tin/loaf tin Meatballs with potatoes, in sauce Ovenproof dish Sponge cake Vienna ring tin/loaf tin... - Page 39 Installation instructions en Note: Use a torque wrench when connecting the ap- ¡ After working on the gas connection, al- pliance. ways check that the connection is not leak- Secure the gas connecting piece to the appliance ing. The manufacturer accepts no respons- using a 22 mm spanner and place the blind plug ibility for a gas leak at a manipulated gas onto the connecting piece using a 24 mm spanner.
- Page 40 en Installation instructions Secure the gas connecting piece to the appliance Secure the connecting piece using a 24 mm span- using a 22 mm spanner and place the connecting ner. Use a 24 mm spanner to place the threaded fit- piece into the connecting piece using a 24 mm ting of the gas pipe or safety gas hose on the con- spanner.
- Page 41 Installation instructions en Fit the safety gas hose and use a pipe union or Note: cable clamp to tighten it securely. The accessories supplied may differ depending on the appliance model. ¡ The gas connecting piece may vary depending on the gas type and the country-specific regulations. ¡...
- Page 42 en Installation instructions If your appliance features a wok burner with side ac- For ovens – converting the appliance from cess, remove the burner nozzle as shown below. natural gas to liquid gas If the appliance was set to natural gas at the time of delivery (factory setting) (NG: G20, G25) and is now being converted to liquid gas for the first time (LPG: G30, G31):...
- Page 43 Installation instructions en Remove the pan support grids or the pan support Remove the screws from the corners of the front racks and the burner parts. panel. If burner connection screws are present on the hob, Remove the screws that become visible after you re- remove all of these.
- Page 44 en Installation instructions Insert the screws that were removed from the front At this stage, it is important to test for leaks. You ‒ panel. can find additional information about this in the Insert the screws into the corners of the front section entitled ‒...
- Page 45 Installation instructions en Press on the tap spindle and turn it anti-clockwise. Checking the correct burner behaviour of the Gas therefore comes to the nozzle. cooker burner a If dispersions and bubbles occur on the foamy sur- Ignite the gas cooker burners in accordance with face and these indicate that gas is escaping, follow the instructions in the operating manual.
- Page 46 en Installation instructions Nozzle (mm) Bypass Burner type Power (kW) Min. Max. consump- power (kW) tion G30 (g/h) 1.00 0.59 Wok burner ≤ 1.7 291 (g/h) 0.95/0.44 0.57/0.30 Dual-flame wok burner ≤ 2.6 306 (g/h) 0.90 0.56 Oven burner 306 (g/h) 0.85 Grill burner 226 (g/h) Liquid gas, butane, propane, G30/50 mbar...
- Page 48 Expert advice for your Bosch home appliances, help with problems or a repair from Bosch experts. Find out everything about the many ways Bosch can support you: www.bosch-home.com/service Contact data of all countries are listed in the attached service directory.
Need help?
Do you have a question about the HGX5G7W50S and is the answer not in the manual?
Questions and answers