Table of Contents
Advertisement
Quick Links
Advertisement
Table of Contents

Related Manuals for Bosch WTWH761BY/07


Summary of Contents for Bosch WTWH761BY/07
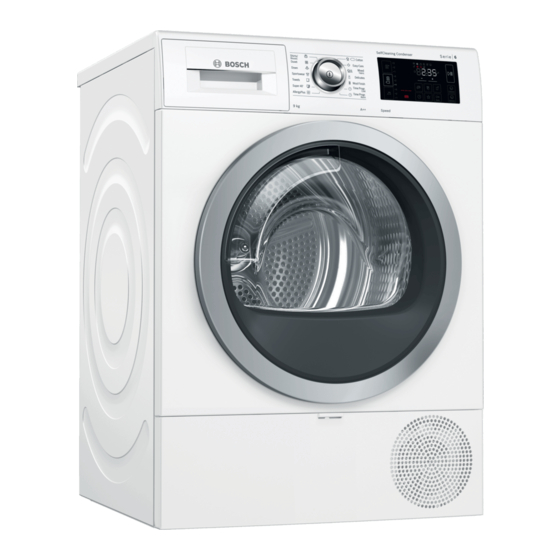
- Page 1 Tumble dryer WTWH761BY Installation and operating instructions...
- Page 2 Caution! To meet the high quality demands required by Bosch, every tumble dryer This signal word indicates a possibly that leaves our factory is carefully dangerous situation. Not heeding the checked to ensure that it functions caution can cause property and/or correctly and is in perfect condition.
-
Page 3: Table Of Contents
Table of contents e n I n s t a l l a t i o n a n d o p e r a t i n g i n s t r u c t i o n s Intended use. -
Page 4: Intended Use
Intended use Œ Draining the condensation Intended use water ..... 44 This appliance is intended for private ■ Cleaning and maintenance . . . 47 I n t e n d e d u s e domestic use only. -
Page 5: Safety Instructions
Safety instructions Do not allow children to Safety instructions ■ clean or maintain this appliance unsupervised. T he following safety information Keep children under 3 years S a f e t y i n s t r u c t i o n s and warnings are provided to ■... -
Page 6: Installation
Safety instructions Warning Installation Risk of suffocation! Warning If allowed to play with the Risk of electric shock/fire/ packaging/plastic film or material damage/damage to packing components, children the appliance! may become caught in these or If the appliance is not installed pull them over their heads and properly, this may lead to a suffocate. - Page 7 Safety instructions The mains plug must be Warning ■ freely accessible at all times. Risk of electric shock/fire/ If this is not possible, in material damage/damage to order to comply with the the appliance! relevant safety regulations, a If the appliance's mains cable is switch (all pole altered or damaged, this may disconnection) must be built...
- Page 8 Safety instructions If you take hold of any of the Warning ■ appliance's protruding parts Risk of injury/material (e.g. the appliance door) in damage/damage to the order to lift or move it, these appliance! parts may break off and The appliance may vibrate or ■...
-
Page 9: Operation
Safety instructions If there is coal dust or flour in Operation ■ the air around the appliance, Warning this may cause an explosion. Risk of explosions/fire! Make sure that the area Laundry that has come into around the appliance is kept contact with solvents, oil, wax, clean when it is in operation. - Page 10 Safety instructions Do not switch off the Warning ■ appliance before the drying Risk of injury! cycle has finished unless you If you support your weight/sit ■ remove all items of laundry on the appliance door when from the drum immediately it is open, the appliance may and spread them out (to tip over, which may result in...
-
Page 11: Cleaning/Maintenance
Safety instructions If you operate the appliance If the appliance overheats, it ■ ■ without a fluff catcher (e.g. may not be able to operate fluff filter, fluff depot, properly, or this may result in depending on appliance material damage or damage specifications), or if the fluff to the appliance. - Page 12 Safety instructions Repairs and any other work Warning ■ on the appliance must only Risk of injury/material be conducted by our damage/damage to the customer service or by an appliance! electrician. The same applies The use of spare parts and for replacing the mains cable accessories supplied by other (when necessary).
-
Page 13: Energy-Saving Tips
Energy-saving tips Energy-saving tips Installing and connecting the Spin the laundry before drying. The ■ appliance E n e r g y - s a v i n g t i p s drier the laundry, the shorter the programme will be, in turn reducing S cope of supply energy consumption. -
Page 14: Installing The Appliance
Installing and connecting the appliance Remove any packaging and Warning protective covers completely from Risk of fire/material damage/damage the appliance. to the appliance! Open the door. The appliance contains R290, a Remove all the accessories from the refrigerant that is environmentally drum. - Page 15 Installing and connecting the appliance Warning Install the appliance as follows: Risk of injury! Place the appliance on a clean, The appliance is very heavy. Lifting it ■ even, solid surface. may result in injury. Check that the appliance is level Do not lift the appliance on your using a spirit level.
-
Page 16: Connecting The Appliance
Installing and connecting the appliance Connecting the appliance Warning Risk of electric shock/fire/material Warning damage/damage to the appliance! If the appliance's mains cable is altered Risk of electric shock/fire/material or damaged, this may result in electric damage/damage to the appliance! shock, short circuiting or fire due to If the appliance is not installed properly, overheating. -
Page 17: Before Using The Appliance For The First Time
Installing and connecting the appliance Optional accessories Connect the appliance as follows: Connecting the drain hose. Order optional accessories from the ~ Page 44 after-sales service: Basket for woollens: ■ Dry or air individual woollen items, sports shoes and soft toys in the basket for woollens. -
Page 18: Quick Reference Guide
Short introduction Quick reference guide The appliance must be correctly installed and connected. ~ Page 13 N ote: S h o r t i n t r o d u c t i o n Before starting the programme: Sort the laundry. Switch on the Select a appliance. -
Page 19: Familiarising Yourself With Your Appliance
Familiarising yourself with your appliance Familiarising yourself with your appliance Appliance overview F a m i l i a r i s i n g y o u r s e l f w i t h y o u r a p p l i a n c e ( Condensation container 0 Control panel 8 Drum interior lighting (depending on the model) -
Page 20: Fascia
Familiarising yourself with your appliance Fascia ( Programme selector Press to switch the appliance on/off ■ Turn to set a programme ■ 0 Programmes: ~ Page 24 8 Display: The display on this appliance responds to touch (touch display). Operate the appliance by pressing buttons in boxes ■... -
Page 21: Display
Display Display T he display on this appliance responds to touch (touch display).You can activate D i s p l a y settings by pressing lightly on the touch-sensitive buttons in boxes. The activated settings are illuminated particularly brightly to highlight them on the display. You can change or deactivate the activated settings by repeatedly pressing on the relevant buttons on the display. - Page 22 Display Selection buttons ˜ ª Start and Pause Detailed description of the programme settings from ~ Page 26 -------- Indicator/ Description Information symbol Programme status: Continuously lit: Status indicator Drying Š Dryness level: Iron Dry ö Dryness level: Cupboard Dry »...
- Page 23 Display Energy manager Lit: appliance is connected to the smart energy system ± (Energy manager) (not available in every country) Basic appliance care pro- Not a fault. After a certain period, the appliance will ’‘§“ gramme automatically recommend that you run the basic appli- ance care programme.
-
Page 24: Overview Of Programmes
Overview of programmes Overview of programmes O v e r v i e w o f p r o g r a m m e s Programme Maximum load Programme name Maximum load based on the dry Brief explanation of the programme and the items for which it is suitable. weight of the items ü... - Page 25 Overview of programmes Duvet 6 2.5 kg Clothing, pillows, quilts or bedspreads filled with synthetic fibres. Note: Dry large items individually. Follow the instructions on the care label. Down t 1.5 kg Clothing, bedspreads or eiderdowns stuffed with down. Notes Dry large items individually.
-
Page 26: Programme Settings
Programme settings Programme settings P r o g r a m m e s e t t i n g s Buttons Indicators/ Explanations and notifications symbols Note: Not all buttons and their functions can be activated in every programme. The activated settings are illuminated particularly brightly to highlight them on the display. - Page 27 Programme settings Adjust drying level If you think the laundry is still too damp when the drying pro- gramme has ended, you can adjust the degree of dryness to achieve a particular dryness level. To increase the dryness level, set the degree of dryness to between +1 and +3. This will extend the programme duration but the temperature will remain the same.
- Page 28 Programme settings â (Favourite Press â (Favourite programme) to save the settings and acti- programme) vate a programme with customised programme settings. Saving or overwriting a favourite programme: Set the programme you require. The programme settings will appear on the display. Adjust the programme settings if required.
-
Page 29: Laundry
Laundry Notes Laundry – When washing laundry to be tumble-dried, use the correct P reparing laundry amount of detergent and care L a u n d r y products as specified in the Warning manufacturer's instructions. Risk of explosions/fire! – Clean the moisture sensor Certain objects may ignite when drying regularly ~ Page 48. -
Page 30: Operating The Appliance
Operating the appliance When sorting the laundry to be dried, Operating the take the following points into account: appliance To achieve an even drying result, ■ only dry laundry of the same type of L oading laundry and fabric and texture together. O p e r a t i n g t h e a p p l i a n c e switching on the appliance If you dry thin, thick and multi-... -
Page 31: Setting A Programme
Operating the appliance Load the laundry unfolded into the Setting a programme drum. If you have activated the Note: childproof lock, you must deactivate it before you can set a programme. ~ Page 35 Set the programme you require. Close the appliance door. The programme settings will appear on the display. -
Page 32: Programme Progress
Operating the appliance Programme progress Press A (Start/Pause). The programme duration is Note: The programme status will be indicated updated on the display, depending on on the display. the load and on the residual moisture in When a programme is selected, Note: the laundry. -
Page 33: Emptying The Condensation
Operating the appliance Press # to switch off the appliance. Pour out the condensation water. Caution! Risk of harm to health and material damage Emptying the condensation Condensation water is not suitable container for drinking and may be contaminated with fluff. Condensation will form in the appliance Contaminated condensation water as it dries the laundry. -
Page 34: Removing The Fluff
Operating the appliance Removing the fluff Pull the two-part fluff filter apart. During drying, fluff and hair from Note: the laundry is trapped by the fluff filter. If the fluff filter is clogged or dirty, this reduces the flow of air, preventing the appliance from achieving optimal drying results. -
Page 35: Appliance Settings
Appliance settings Rinse off fluff under warm, running Appliance settings water. Y ou can activate/deactivate appliance A p p l i a n c e s e t t i n g s settings directly or alter them under œ. Childproof lock Activating the childproof lock prevents the settings from being accidentally... -
Page 36: Altering The Appliance Settings
Appliance settings Altering the appliance settings Adjusting the volume of the audible operating signals You can change the following appliance Set the programme to position 2. settings under œ: Volume of the audible operating ■ signals Display brightness ■ Volume of the audible notification ■... - Page 37 Appliance settings Adjusting the display brightness Adjusting the volume of the audible notification signals Set the programme to position 3. Set the programme to position 1. ’ and the current setting value will appear on the display. ‘ and the current setting value will Press and hold ˜...
-
Page 38: Home Connect
Home Connect Notes Home Connect Please observe the safety ■ precautions in this instruction T his appliance is Wi-Fi-capable and can manual and make sure that these H o m e C o n n e c t be remotely controlled using a mobile are complied with even when device. -
Page 39: Connecting To The Home Network And The Home Connect App
Home Connect Connecting to the home Activate the WPS function on your home network router within the next network and the Home 2 minutes. Connect app If the appliance has connected to your home network successfully, ™©Ÿ è and Connect your appliance to the home | appear in the display and light up network automatically or manually continuously. - Page 40 Home Connect Call up the Wi-Fi setting on the Connecting to the Home Connect app mobile device. Step 3 Connect the mobile device to the If your appliance is connected to your Home Connect Wi-Fi network and home network, you can connect it to the enter the password (key) Home Connect app.
-
Page 41: Activating/Deactivating Wi-Fi
Home Connect Activating/deactivating Wi-Fi Resetting your network settings If your appliance is already connected to your home network, you can activate You can reset all of the network or deactivate Wi-Fi on your appliance. settings. Ensure that you are in the Home Ensure that you are in the Home Connect menu. -
Page 42: Updating The Software
Home Connect Updating the software Energy management You can update the Home Connect You can connect your appliance to your software on your appliance. As soon as smart energy system (Energy manager). a new software update is available, a Once you have connected your note appears in the display: —˜š... - Page 43 Home Connect FlexStart Notes If the smart energy system (Energy Activate the FlexStart function to allow ■ manager) does not start your your smart energy system (Energy appliance, the programme will still manager) to start your appliance once be started before the set time period your home photovoltaic system is able ends.
-
Page 44: Information On Data Protection
Information on data protection can be accessed in the Home Connect app. Remove all items from the bag. Declaration of Conformity Robert Bosch Hausgeräte GmbH hereby declares that the appliance with Home Connect functionality meets the basic requirements and other relevant provisions of the Directive 2014/53/EU. - Page 45 Draining the condensation water Detach the condensation hose from Secure the other side of the drain the socket. hose using the remaining accessories, depending on the connection situation. Washbasin: The appliance comes Note: delivered with the condensation hose already fitted to the socket. Place the condensation hose in the Siphon: "parked"...
- Page 46 Draining the condensation water Turn the condensation container Floor drain: 180° onto its underside and remove the stopper that is fitted. Caution! Risk of material damage due to leaks or draining water. Turn the condensation container Secure the drain hose to prevent it 180°...
-
Page 47: Cleaning And Maintenance
Cleaning and maintenance Place the filter into the recess on the Cleaning and condensation container. maintenance C leaning the appliance C l e a n i n g a n d m a i n t e n a n c e Warning Risk of death! The appliance is powered by electricity. -
Page 48: Cleaning The Moisture Sensor
Cleaning and maintenance Clean the moisture sensor with a Warning rough sponge. Risk of electric shock/material damage/damage to the appliance! If moisture penetrates the appliance, this may cause it to short circuit. Do not use a pressure washer, steam cleaner, hose or spray gun to clean your appliance. -
Page 49: Cleaning The Base Unit
Cleaning and maintenance Remove the filter. Clean the base unit as follows: To open the maintenance flap, take hold of it at the top at both sides and pull it down. Clean the filter under warm, running water or in the dishwasher. Push the filter in until you feel it lock Clean the maintenance flap with a into place. - Page 50 Cleaning and maintenance Pull the heat exchanger cover out by Clean the opening in the appliance its grip. with a soft, damp cloth. Notes Use a soft brush to clean the heat – Be careful not to damage the heat exchanger, as it is exposed. exchanger cover.
-
Page 51: Appliance Care
Appliance care Lock the levers on the heat Ö Appliance care exchanger cover. T he appliance offers additional cleaning A p p l i a n c e c a r e programmes that you can run for the maintenance of the appliance: You can use the basic appliance ■... -
Page 52: Preparing The Appliance For Appliance Care
Appliance care Preparing the appliance for Press # to switch on the appliance. appliance care Preparing the appliance for appliance care The appliance must be prepared before you can run a basic or intensive appliance care programme. Prepare the appliance for appliance care as follows: Remove the laundry. -
Page 53: Running The Basic Appliance Care Programme
Appliance care Remove the stopper inserted in the If you are draining the Note: recess on the condensation condensation water from the appliance container. using the drain hose, reverse these steps after running the basic or intensive appliance care programme. Running the basic appliance care programme To remove any dirt deposits in the... - Page 54 Appliance care Set the programme to position 4. Pull out the condensation container horizontally and empty it. ’˜‚ and the programme duration will now alternate on the display. Pour approx. 1 ^ litre of warm tap Slide in the condensation container water into the condensation until it clicks into place.
-
Page 55: Running The Intensive Appliance Care Programme
Appliance care Running the intensive Run the appliance care programme as follows: appliance care programme Prepare the appliance for appliance You can run the intensive appliance care. ~ Page 52 care programme to remove any Set the programme to position 1. stubborn dirt deposits in the appliance and odours after a downtime of more than one month. - Page 56 Appliance care Pull out the condensation container Press A (Start/Pause). horizontally and empty it. The appliance care programme will start and an audible signal will sound. After approx. three hours, the appliance pauses the appliance care programme and the remaining programme duration flashes in the display.
- Page 57 Appliance care Carefully swing the condensation Slide in the condensation container container round horizontally and until it clicks into place. empty it to dispose of any remaining original appliance care product. Press # to switch off the appliance. Pour approx. another 1 ^ litre of warm tap water into the condensation container.
-
Page 58: Help With The Appliance
Help with the appliance Help with the appliance H e l p w i t h t h e a p p l i a n c e Faults Cause/Remedy Appliance does not start. Check the mains plug and the fuses. Creasing. - Page 59 Help with the appliance Laundry is not dried properly or After the programme has ended, warm laundry feels damper than it ■ is still too damp. actually is. Spread out the laundry and let it cool down. Adjust the drying time or increase the degree of dryness. This will ■...
- Page 60 Help with the appliance The appliance feels cold Not a fault. The appliance can dry effectively at low temperatures using a despite drying. heat pump. Drying programme is stopped. If the drying programme is stopped due to a power failure, restart the programme or remove the laundry and spread it out.
-
Page 61: Transporting The Appliance
Transporting the appliance Push the condensation container Transporting the back into the appliance until you feel it lock into place. appliance Warning T r a n s p o r t i n g t h e a p p l i a n c e Risk of injury/material damage/ damage to the appliance! If you take hold of any of the appliance's... -
Page 62: Consumption Values
Consumption values Consumption values C onsumption values table C o n s u m p t i o n v a l u e s Spin speed used for Duration** Energy consumption** Programme spinning the laundry (in min) (in kWh) (in rpm) ü... -
Page 63: Technical Data
Technical data Technical data Disposal D imensions: Dispose of packaging and the T e c h n i c a l d a t a D i s p o s a l 850 x 600 x 640 mm appliance in an (height x width x depth) environmentally responsible manner. -
Page 64: Customer Service
Customer Service Customer Service I f you cannot rectify the error yourself by C u s t o m e r S e r v i c e turning the appliance off and then on again, please contact our after-sales service.~ Enclosed after-sales service directory or cover page We will always find an appropriate... - Page 68 Free and easy registration – also on mobile phones: www.bosch-home.com/welcome Looking for help? You´ll find it here. Expert advice for your Bosch home appliances, need help with problems or a repair from Bosch experts. Find out everything about the many ways Bosch can support you: www.bosch-home.com/service Contact data of all countries are listed in the attached service directory.
Need help?
Do you have a question about the WTWH761BY/07 and is the answer not in the manual?
Questions and answers