Table of Contents
Advertisement
Quick Links
Advertisement
Table of Contents

Subscribe to Our Youtube Channel
Related Manuals for ADJ UBL9H


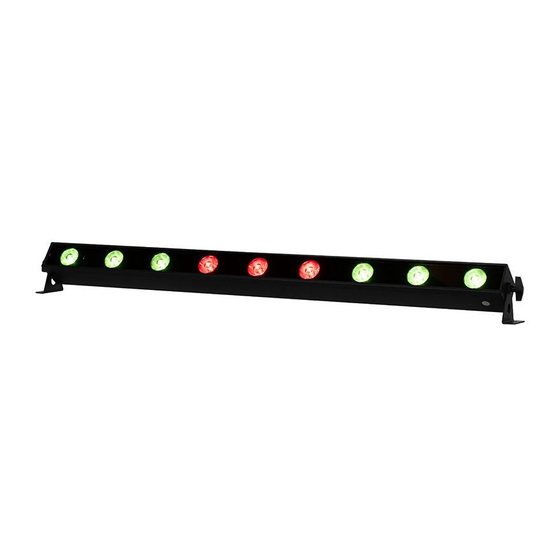
Summary of Contents for ADJ UBL9H
- Page 1 UBL9H User Manual...
- Page 2 ©2024 ADJ Products, LLC all rights reserved. Information, specifications, diagrams, images, and instructions herein are subject to change without notice. ADJ Products, LLC logo and identifying prod- uct names and numbers herein are trademarks of ADJ Products, LLC. Copyright protection claimed includes all forms and matters of copyrightable materials and information now allowed by statutory or judicial law or hereinafter granted.
-
Page 3: Table Of Contents
C O N T E N T S Introduction Limited Warranty (USA Only) Warranty Registration | Features Safety Precautions Overview Installation Wireless Operation IR Button Colors Remote Device Management (RDM) Control Panel System Menu DMX Set Up DMX Traits Pixel Grouping Color Macros Chart Dim Speeds Dim Modes... -
Page 4: Introduction
I N T R O D U C T I O N Unpacking: Thank you for purchasing the UBL9H by ADJ Products, LLC. Every device has been thor- oughly tested and has been shipped in perfect operating condition. Carefully check the shipping carton for damage that may have occurred during shipping. -
Page 5: Limited Warranty (Usa Only)
The sole responsibility of ADJ Products, LLC under this warranty shall be limited to the repair of the product, or replacement thereof, including parts, at the sole discretion of ADJ Products, LLC. All products covered by this warranty were manufactured after August 15, 2012, and bear identifying marks to that effect. -
Page 6: Warranty Registration | Features
Linear Color Temperature Control (2,300K to 9,900K) • Smooth RGBAL+UV color mixing • Horizontal Magnetic Alignment feature (Built-In) • Compatible with the ADJ UC-IR24 remote. Operates at a distance of up to 32.8 feet (10 meters) • RDM Compatible INCLUDED ITEMS • Power Cable (x1) •... -
Page 7: Safety Precautions
S A F E T Y P R E C A U T I O N S RISK GROUP 3 - RISK OF EXPOSURE TO ULTRAVIOLET UV RADIATION! FIXTURE EMITS HIGH INTENSITY WAVELENGTH OF ULTRAVIOLET UV LIGHT FROM THE UV COLOR FILTER. - Page 8 S A F E T Y P R E C A U T I O N S PROTECTION CLASS 1 - FIXTURE MUST BE PROPERLY GROUNDED. THERE ARE NO USER SERVICEABLE PARTS INSIDE THIS UNIT. DO NOT ATTEMPT ANY REPAIRS YOURSELF, AS DOING SO WILL VOID YOUR MANUFACTURER’S WARRANTY.
-
Page 9: Overview
O V E R V I E W Bracket Bracket Mode Adjustment Adjustment Button Button Knob Knob Safety Setup Down Mounting Display Power Cable Power Fuse Mounting Button Button Bracket Screen Loop (250V 3A) Bracket... -
Page 10: Installation
I N S T A L L A T I O N DO NOT INSTALL THE FIXTURE IF YOU ARE NOT QUALIFIED TO DO SO! Fixture MUST be installed following all local, national, and country commercial electrical and construc- tion codes and regulations. When installing the unit, the trussing or area of installation must be able to hold 10 times the weight of the unit and any attached accessories without any deformation. - Page 11 I N S T A L L A T I O N CLAMP MOUNTING This fixture features two mounting brackets for the attachment of mounting clamps. When mount- ing the fixture to a truss or any other suspended structure, be sure to secure an appropriate rated clamp (not included) to each mounting bracket.
- Page 12 I N S T A L L A T I O N The unit is fully operational in three different mounting positions: hanging upside-down from the ceil- ing or trussing, sideways on trussing, or set on a flat level surface. Be sure this fixture is kept at least 12m (40ft) away from any flammable materials (decorations, etc).
- Page 13 A C C E S S O R Y I N S T A L L A T I O N DIFFUSION FILTER A removeable 20-degree diffusion filter is included with the fixture. To install this filter, simply remove the retaining screw on the side of the fixture’s lens and slide the diffusion filter into the slot located in front of the lens.
-
Page 14: Wireless Operation
W I R E L E S S O P E R A T I O N To set up wireless control, follow the steps below: 1. Navigate to Personality > IR Remote in the system menu. Press SETUP to select this menu. 2. - Page 15 W I R E L E S S O P E R A T I O N The unit can only be controlled when it has been set to Primary mode. The unit will NOT re- spond to commands when it has been set to Secondary mode. UC IR24 CONTROLS •...
-
Page 16: Ir Button Colors
I R B U T T O N C O L O R S I R D E F A U L T V A L U E S BUTTON GREEN BLUE LIME AMBER E D I T I N G I R B U T T O N V A L U E S These fixtures allow the user to create custom RGBAL values and assign them to the numbered keys (0-15) on the remote control. -
Page 17: Remote Device Management (Rdm)
R E M O T E D E V I C E M A N A G E M E N T ( R D M ) R E M O T E D E V I C E M A N A G E M E N T ( R D M ) NOTE: In order for RDM to work properly, RDM enabled equipment must be used throughout the entire system, including DMX data splitters and wireless systems. -
Page 18: Control Panel
C O N T R O L P A N E L This unit features a display screen with a 4-button control pad, which can be used to easily adjust any device settings. Pressing the MODE button will cycle through the various Main Menu options. When the desired Main Menu option is displayed on the screen, press the SETUP button to enter the sub-menu, then use the UP and DOWN buttons to scroll through sub-menu options. -
Page 19: System Menu
S Y S T E M M E N U Set DMX starting 001 - 512 Address address 11Ch 13Ch Select DMX chan- Ch. Mode 16Ch nel mode 18Ch 25Ch 28Ch Unit holds last settings if DMX Hold signal is lost or DMX SET interrupted Unit defaults to... - Page 20 S Y S T E M M E N U Linear Square Dim Curve Select dim curve Inv. Squa. S. Curve Display goes into screen saver 1 - 10 Save Dlay mode after set period of inactivity Dispaly controls lock after set pe- riod of inactivity;...
- Page 21 S Y S T E M M E N U 000 - 255 Green 000 - 255 Blue 000 - 255 Amber 000 - 255 Manually set each Lime 000 - 255 system param- 000 - 255 eter; please note MANUAL that these settings Clr Macro...
-
Page 22: Dmx Set Up
D M X S E T U P DMX-512: DMX is short for Digital Multiplex. This is a universal protocol used as a form of commu- nication between intelligent fixtures and controllers. A DMX controller sends DMX data instructions from the controller to the fixture. DMX data is sent as serial data that travels from fixture to fixture via the DATA “IN”... - Page 23 2 and 3 of a male XLR connector (DATA + and DATA -). This unit is inserted in the female XLR connector of the last unit in your daisy chain to terminate the line. Using a cable terminator (ADJ part number Z-DMX/T) will reduce the risk of erratic behavior. DMX ADDRESSING.
-
Page 24: Dmx Traits
D M X T R A I T S CHANNEL FUNCTION VALUES 11Ch 13Ch 16Ch 18Ch 25Ch 28Ch All Red, 0% to 100% 000 - 255 All Green, 0% to 100% 000 - 255 All Blue, 0% to 100% 000 - 255 All Amber, 0% to 100% 000 - 255 All Lime, 0% to 100%... - Page 25 D M X T R A I T S CHANNEL FUNCTION VALUES 11Ch 13Ch 16Ch 18Ch 25Ch 28Ch Color Temperature Presets (contin- ued) 161 - 176 7000K 177 - 193 7500K 194 - 210 8000K 211 - 226 8500K 227 - 255 9900K Shutter / Strobe 000 - 031...
- Page 26 D M X T R A I T S CHANNEL FUNCTION VALUES 11Ch 13Ch 16Ch 18Ch 25Ch 28Ch Dim Mode 000 - 020 Default to Unit Setting 021 - 040 Standard 041 - 060 Stage 061 - 080 081 - 100 Architectural 101 - 120 Theatre...
-
Page 27: Pixel Grouping
P I X E L G R O U P I N G PIXEL FLIP OFF PIXEL FLIP ON... -
Page 28: Color Macros Chart
C O L O R M A C R O S C H A R T DMX VALUES COLORS DMX VALUES COLORS 000 - 003 128 - 131 G+B+L 004 - 007 132 - 135 G+B+A 008 - 011 Green 136 - 139 G+B+UV 012 - 015... -
Page 29: Dim Speeds
D I M S P E E D S DMX VALUES DELAY TIME 0.1 sec 0.2 sec 0.3 sec 0.4 sec 0.5 sec 0.6 sec 0.7 sec 0.8 sec 0.9 sec 1.0 sec 1.5 sec 2.0 sec 3.0 sec 4.0 sec 5.0 sec 6.0 sec 7.0 sec... -
Page 30: Dim Modes
D I M M O D E S DIMMER DIMMER 100% 100% Time (ms) Time (ms) Rise Time Down Time 0 Sec 0 Sec Rise Time Down Time 0 sec Fade Time 1 sec Fade Time 0 sec Fade Time 1 sec Fade Time Dimming Curve Dimming Curve... -
Page 31: Primary-Secondary Set Up | Multi Unit Power Linking
P R I M A R Y - S E C O N D A R Y S E T U P This function allows you to link units together to run in a Primary-Secondary set-up, in which one unit will act as the controlling unit and the others will react to the controlling unit’s built-in programs. -
Page 32: Maintenance Guidelines
Regular inspections are recommended to ensure proper function and extended life. There are no user serviceable parts inside this fixture. Please refer all other service issues to an authorized ADJ service technician. Should you need any spare parts, please order genuine parts from your local ADJ dealer. -
Page 33: Dimensional Drawings
D I M E N S I O N A L D R A W I N G S 86.5mm 65mm [3.4in] [2.6in] 103.8mm 98mm [3.9in] [4.1in] 106.7mm [4.2in]... -
Page 34: Specifications
Pixel Pitch: 113mm • Power Draw: 54W • Daisy-chain power link (Up to 22 UBL9H’s can Features: be linked @120V and up to 40 UBL9H’s can be • Linear Color Temperature Control (2,300K to linked @230V) 9,900K) Dimensions / Weight: •... -
Page 35: Optional Accessories | Fcc Statement
O P T I O N A L A C C E S S O R I E S ORDER CODE (US) ORDER CODE (EU) DESCRIPTION UBL912 1x40° Linear Diffusion Lens F C C S T A T E M E N T Please note that changes or modifications of this product is not expressly approved by the party responsible for compliance could void the user’s authority to operate the equipment.
Need help?
Do you have a question about the UBL9H and is the answer not in the manual?
Questions and answers