Table of Contents
Advertisement
Quick Links
Advertisement
Table of Contents

Related Manuals for NEFF B24CR71 0 Series


Summary of Contents for NEFF B24CR71 0 Series
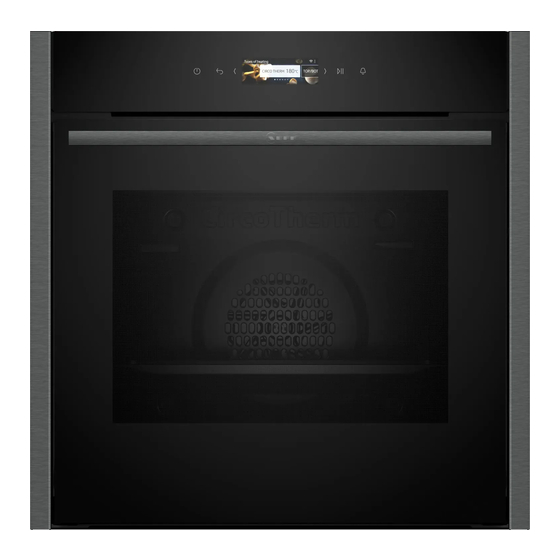
- Page 1 Oven User manual and installation instructions B24CR71.0...
-
Page 2: Table Of Contents
en Safety Further information and explanations are available online: Table of contents 1 Safety Observe the following safety instructions. INFORMATION FOR USE 1.1 General information Safety .............. 2 ¡ Read this instruction manual carefully. Preventing material damage ...... 4 ¡ Keep the instruction manual and the Environmental protection and saving en- product information safe for future refer- ergy .............. 5... -
Page 3: Safety
Safety en Hot steam may escape when you open the WARNING ‒ Risk of fire! appliance door. Steam may not be visible, de- Combustible objects that are left in the cook- pending on the temperature. ing compartment may catch fire. ▶ Open the appliance door carefully. ▶... -
Page 4: Preventing Material Damage
en Preventing material damage If the appliance or the power cord is dam- If the door seal is damaged, a large amount aged, this is dangerous. of heat is generated around the door. ▶ Never operate a damaged appliance. ▶ Do not scrub or remove the seal. ▶... -
Page 5: Environmental Protection And Saving En- Ergy
Environmental protection and saving energy en Objects on the cooking compartment floor at over Using oven cleaner in a hot cooking compartment 50 °C will cause heat to build up. The baking and damages the enamel. roasting times will no longer be correct and the enamel Never use oven cleaner in the cooking compartment ▶... -
Page 6: Familiarising Yourself With Your Appliance
en Familiarising yourself with your appliance Familiarising yourself with your appliance 4 Familiarising yourself with your appliance 4.1 Control panel You can use the control panel to configure all functions of your appliance and to obtain information about the operat- ing status. On certain models, specific details such as colour and shape may differ from those pictured. - Page 7 Functions en Symbol Name Right arrow Increases the adjustment values Start/stop Start or pause the appliance Timer Set the timer Lighting 4.4 Cooking compartment One or more oven lights illuminate the cooking com- Various functions in the cooking compartment provide partment. support when operating your appliance. When you open the appliance door, the light in the cooking compartment switches on.
- Page 8 en Functions Symbol Heating function Temperature Circo Therm hot air 30 - 230 °C Bake or roast on one or more levels. The fan distributes the heat from the ring-shaped heating ele- ment in the back wall evenly around the cooking compartment. Top/bottom heat 30 - 275 °C Traditionally bake or roast on one level.
-
Page 9: Accessories
Accessories en 5.3 Symbols You can find an overview of other symbols on the display here. Symbol Name SaveSave Save the setting Close Close the message Reset Reset the cooking time Information Display information Rapid heating Activate or deactivate the rapid heating function Home Connect ¡... -
Page 10: Before Using For The First Time
You will find a comprehensive range of products for your appliance in our brochures and online: www.neff-home.com Push the accessory all the way in, making sure that Accessories are appliance-specific. When purchasing it does not touch the appliance door. -
Page 11: Basic Operation
Basic operation en Wipe the smooth surfaces in the cooking compart- Heating up ment with a soft, damp cloth. Type of heating Circo Therm hot air Press to switch the appliance on. Temperature Maximum → "Switching on the appliance", Page 11 Set the required type of heating and temperature for Cooking time 1 hour the heat-up process and press... -
Page 12: Time-Setting Options
en Time-setting options Press "Information". Set the required operating mode. → "Heating functions", Page 7 a The information will be displayed for a few seconds. Set the required cooking time depending on the op- Press to close the information. erating mode. → "Setting the cooking time", Page 12 8.9 Keeping warm over an extended period → "Time-setting options", Page 12 You can use your appliance to keep meals warm for up... - Page 13 Dishes en Changing the cooking time Press Hours or Minutes. Use or to select the cooking time. Press . Press to confirm the setting. Press "Cooking time". Press "Ready at". Use or to change the cooking time. a The time at which your food will be ready will ap- Press to confirm the setting.
-
Page 14: Dishes
en Favourites Note: In the basic settings, you can regionally special- ¡ Baked potatoes, whole ise the displayed dishes. ¡ Stew with vegetables → "Basic settings", Page 15 Dishes 10.4 Setting a dish ¡ Pavlova Press "Dishes". ¡ Muffins Press the required dish. ¡ Scones Note: The setting options vary depending on the ¡... -
Page 15: Childproof Lock
Childproof lock en To change the favourites, you must use the ▶ Home Connect app. When your appliance is con- nected, follow the instructions in the app. Childproof lock 12 Childproof lock You can secure your appliance to prevent children ¡ You can also activate the appliance door lock. from accidentally switching it on or changing the set- → "Basic settings", Page 15 tings. -
Page 16: Rapid Heating
en Home Connect Display Selection Personalisa- Selection tion Clock ¡ Digital + date ¡ Digital Operation after ¡ Main menu switch-on ¡ Types of heating ¡ Analogue + date ¡ Dishes ¡ Analogue ¡ Favourites Adjustment Align the display horizontally and ver- tically Elapsed cook- ¡... -
Page 17: Basic Settings
Home Connect en ¡ In networked standby mode, the appliance requires 15.2 Setting up Home Connect a maximum of 2 W. Requirements ¡ The appliance is connected to the power supply and 15.1 Setting up the Home Connect app is switched on. ¡ You have a mobile device with a current version of Install the Home Connect app on your mobile the iOS or Android operating system, e.g. - Page 18 en Cleaning and servicing ¡ You can continue to use your appliance as normal Requirements ¡ The appliance is switched off. while updates are downloading. Depending on your personal settings in the app, software updates can ¡ The appliance is connected to the home network also be set to download automatically.
-
Page 19: Cleaning And Servicing
Cleaning and servicing en Using oven cleaner in a hot cooking compartment If different cleaning agents are mixed together, there damages the enamel. may be a chemical reaction between these. Never use oven cleaner in the cooking compartment Do not mix cleaning agents. ▶... - Page 20 en "Pyrolytic self-cleaning" cleaning function 16.2 Cleaning the appliance WARNING ‒ Risk of fire! Loose food remnants, fat and meat juices may catch In order to avoid damaging the appliance, you must fire. clean your appliance only as specified, and with suit- Before using the appliance, remove the worst of the able cleaning products.
- Page 21 "Easy Clean" cleaning aid en Select the higher cleaning setting if the cooking 17.3 Cancelling the cleaning function compartment is particularly dirty or has not been Note: You can no longer stop or change the cleaning cleaned for a while. function once it has started. You cannot change the duration of the cleaning function.
- Page 22 en Drying Remove limescale with a cloth soaked in vinegar. If there is any stubborn dirt that you are unable to Then wipe with clean water and rub dry with a soft remove, run the cleaning aid again once the cook- cloth (including under the door seal).
- Page 23 Appliance door en Appliance door 21 Appliance door To clean the appliance door thoroughly, you can disas- 21.2 Attaching the appliance door semble the appliance door. Note: Note: Ensure that the appliance door slides onto the Further information: hinges without any resistance. 21.1 Detaching the appliance door Note: The door handles are different depending on the appliance type.
- Page 24 en Appliance door Open the appliance door fully. Pull the first and second intermediate panels up- Open the locking levers on the left- and right-hand wards and out at an angle, and set them down care- hinges fully on a flat surface. a The locking levers are open.
-
Page 25: Troubleshooting
Troubleshooting en Slide the first intermediate pane into the lowest re- Note: The lettering "Pyro" must be legible at the top, tainer and fit it at the top. as shown in the picture. Slide the inner pane into the retainer at the bottom and fit it at the top. - Page 26 en Troubleshooting 22.1 Malfunctions Fault Cause and troubleshooting The appliance is not The circuit breaker in the fuse box has tripped. working. Check the circuit breaker in the fuse box. ▶ There has been a power cut. Check whether the lighting in your room or other appliances are working. ▶...
-
Page 27: Disposal
Next time, set lower or higher values. ▶ Tip: A lot of other information about the food preparation and corresponding adjustment values can be found in the Home Connect app or on our website www.neff-home.com. Disposal 23 Disposal 23.1 Disposing of old appliance... -
Page 28: Source Software
Directive 2014/53/EU. A detailed Declaration of Conformity can be found on- A detailed RED Declaration of Conformity can be found line at www.neff-home.com/uk among the additional online at www.neff-home.com among the additional documents on the product page for your appliance. -
Page 29: How It Works
Tip: A lot of other information about the preparation, corresponding adjustment values and recipes can be Shallow baked items/baking tray found in the Home Connect app or on our website www.neff-home.com. Baking on two or more levels Height 27.1 General cooking tips 2 levels Take note of the following information when cooking all ¡... - Page 30 en How it works ¡ Glass cookware is best. ¡ When grilling several food items, choose pieces that are of a similar weight and thickness. The grilled ¡ Follow the manufacturer's instructions for your roast- food will brown evenly and will remain succulent ing dishes.
- Page 31 How it works en Food Accessory/cookware Height Type of Temperature in Cooking time in heating °C mins Muffins Muffin tray 170-190 20-40 Small yeast cakes Baking tray 150-170 20-30 Biscuits Baking tray 140-160 15-25 Biscuits, 2 levels Universal pan 140-160 15-30 Baking tray Biscuits, 3 levels 4+3+1 140-160...
- Page 32 en How it works Food Accessory/cookware Height Type of Temperature in Cooking time in heating °C mins Leg of lamb, boned, medium, Uncovered cookware 2 170-190 70-80 1.5 kg Fish, grilled, whole, 300 g, e.g. Pan support 160-180 20-30 trout Preheat the appliance. Turn the dish between halfway and two-thirds through the cooking time.
- Page 33 How it works en Recommended settings for low-temperature cooking Food Accessory/cook- Height Searing Type of heating Temperature Cooking ware time in in °C time in mins mins Duck breast, medium Uncovered cook- 60-70 rare, 300 g each ware Fillet of pork, whole Uncovered cook- 75-100 ware...
-
Page 34: Installation Instructions
en Installation instructions Food Accessory/cookware Height Heating Temperature in Cooking time in function °C mins Small cakes, 3 levels 4+3+1 25-35 Baking tray Universal pan Hot water sponge cake Springform cake tin, 160-170 25-35 diameter 26 cm Hot water sponge cake Springform cake tin, 160-170 30-35... - Page 35 Installation instructions en 28.2 Appliance dimensions You will find the dimensions of the appliance here ¡ Wear protective gloves so that you do not cut yourself. Parts that are accessible dur- ing installation may have sharp edges. ¡ Dimensions of the figures in mm. 28.3 Installation below a worktop WARNING ‒ Risk of fire! Observe the installation dimensions and the installation...
- Page 36 en Installation instructions Hob type a raised in mm a flush in mm b in mm Induction hob Full-surface induction hob Gas hob Electric hob Observe different national installation instructions for the hob. ¡ Ensure that air exchange is guaranteed in accord- 28.5 Installation in a tall unit ance with the diagram.
- Page 37 Installation instructions en ¡ The appliance must only be connected using the Screw the appliance into place. power cable provided. ¡ The power cable must be plugged in at the rear of the appliance until you hear a clicking sound. A 3 m power cable can be obtained from the after-sales service.
- Page 38 en Installation instructions Secure the appliance using a suitable screw. 28.11 Removing the appliance Disconnect the appliance from the power supply. Undo the fastening screws. Lift the appliance slightly and pull it out completely.
- Page 40 Valid within Great Britain: Imported to Great Britain by BSH Home Appliances Ltd. Grand Union House Old Wolverton Road Wolverton, Milton Keynes MK12 5PT United Kingdom *9001896367* 9001896367 BSH Hausgeräte GmbH 040325 Carl-Wery-Straße 34 81739 München, GERMANY...
Need help?
Do you have a question about the B24CR71 0 Series and is the answer not in the manual?
Questions and answers