Table of Contents
Advertisement
Quick Links
Advertisement
Table of Contents

Related Manuals for NEFF B27CS24G0B


Summary of Contents for NEFF B27CS24G0B
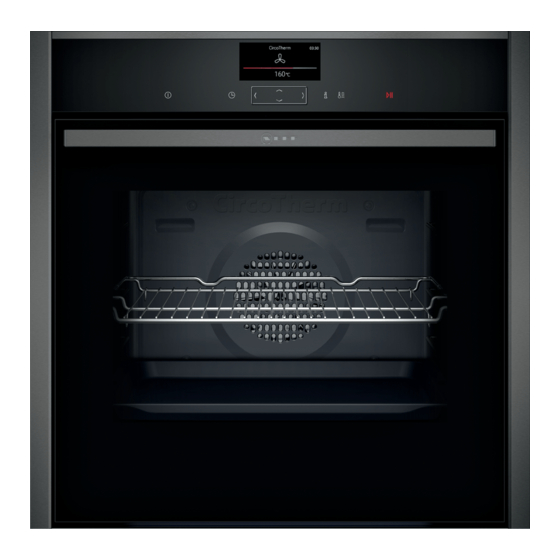
- Page 1 Oven [en] User manual and installation in- structions B27CS24G0B...
-
Page 2: Table Of Contents
en Safety Futher information and explanations are available on- line: Table of contents 1 Safety Observe the following safety instructions. 1.1 General information INFORMATION FOR USE ¡ Read this instruction manual carefully. Safety .............. 2 ¡ Keep the instruction manual and the Preventing material damage ....... -
Page 3: Safety
Safety en The telescopic shelves become hot when the 1.4 Safe use appliance is in use. Always place accessories in the cooking com- ▶ Allow hot telescopic shelves to cool down partment the right way round. before touching them. → "Accessories", Page 9 ▶ Only touch hot telescopic shelves with WARNING ‒ Risk of fire! oven gloves. - Page 4 en Safety 1.5 Cleaning function WARNING ‒ Risk of electric shock! Incorrect repairs are dangerous. WARNING ‒ Risk of fire! ▶ Repairs to the appliance should only be Loose food remnants, fat and meat juices carried out by trained specialist staff. may catch fire when the cleaning function is in ▶...
-
Page 5: Environmental Protection And Saving En- Ergy
Preventing material damage en The outside of the appliance gets very hot when the cleaning function is in progress. ▶ Never touch the appliance door. ▶ Allow the appliance to cool down. ▶ Keep children at a safe distance. 2 Preventing material damage Leaving the appliance to cool down with the door open 2.1 General will damage the front of neighbouring kitchen units over... - Page 6 en Familiarising yourself with your appliance Use dark-coloured, black-coated or enamelled baking If the cooking time is relatively long, you can switch tins. the appliance off 10 minutes before the cooking time ¡ These types of baking tin absorb the heat particu- ends.
-
Page 7: Familiarising Yourself With Your Appliance
Familiarising yourself with your appliance en 4.2 Buttons The buttons are touch-sensitive areas. To select a function, press the corresponding button. Symbol Name On/off Switch the appliance on or off Main menu Select operating modes and settings Time-setting options/ ¡ Set the "timer", "cooking time" or "Ready at" time for delayed starts childproof lock ¡... - Page 8 en Familiarising yourself with your appliance Function Name Baking and roasting Recommended settings for baking and roasting assistant MyProfile Individually adjust the appliance settings Home Connect Connect the oven to a mobile end device and remotely control it. → "Home Connect ", Page 17 EasyClean Clean less stubborn dirt from the cooking compartment Pyrolytic self-cleaning Clean the cooking compartment 4.6 Types of heating...
- Page 9 Accessories en Symbol Heating function Temperature Top/bottom heating 50 - 275 °C For gently cooking selected types of food. Heat is emitted from above and below. This type of heating is most effective between 150 and 250 °C. This type of heating is used to determine the energy consump- tion in the conventional mode.
- Page 10 en Accessories Accessories Wire rack ¡ Cake tins ¡ Ovenproof dishes ¡ Cookware ¡ Meat, e.g. roasting joints or steak ¡ Frozen meals Universal pan ¡ Moist cakes ¡ Baked items ¡ Bread ¡ Large roasts ¡ Frozen meals ¡ Catch dripping liquids, e.g. fat when grilling food on the wire rack.
- Page 11 You will find a comprehensive range of products for or baking your appliance in our brochures and online: tray www.neff-international.com Accessories vary from one appliance to another. When purchasing accessories, always quote the exact product number (E no.) of your appliance.
- Page 12 en Basic operation Press to switch off the appliance after 1 hour. Clean the smooth surfaces with soapy water and a dish cloth. → "Switching off the appliance", Page 12 Allow the appliance to cool down. Thoroughly clean any accessories you used with soapy water and a dish cloth.
- Page 13 Time-setting options en 8 Time-setting options Your appliance has different time-setting options, with Press . which you can control its operation. Select the default value. Button Default value 8.1 Overview of the time-setting options 10 minutes When you are setting a time, the time values will in- ...
- Page 14 en Baking and roasting assistant Use the or button to change the end time. Use the button to reset the end time. a The setting will then be applied. a The end time corresponds to the current time plus the set cooking time.
- Page 15 Childproof lock en 10 Childproof lock You can secure your appliance to prevent children Press to switch the appliance on and then start it from accidentally switching it on or changing the set- tings. 10.4 Deactivating the automatic childproof 10.1 Locks lock Your appliance has two different locks: Press and hold the...
-
Page 16: Sabbath Mode
en Sabbath mode 11.2 Activating the "Rapid heat-up" function 11.4 Activating the "PowerBoost" function Set Top/bottom heating and a temperature of at Place the food on a single level in the cooking com- least 100 °C. partment. Press to start. Set CircoTherm hot air ... -
Page 17: Home Connect
Home Connect en Use the button to navigate to the next row. Basic setting Selection Use the or button to change the setting. Lighting ¡ On during operation Press . ¡ Off during operation To save your settings, use the ... - Page 18 en Home Connect Download the Home Connect app. Open the Home Connect app and scan the follow- ing QR code. Follow the instructions in the Home Connect app. 14.2 Home Connect Settings You can adjust the settings and network settings for Home Connect by going to your appliance's basic settings. Which settings the display shows will depend on whether Home Connect has been set up and whether the appliance is connected to your home network.
- Page 19 Cleaning and servicing en Notes 14.6 Data protection ¡ You can continue to use your appliance as normal Please see the information on data protection. while updates are downloading. Depending on your The first time your appliance is registered on a home personal settings in the app, software updates can network connected to the Internet, your appliance will also be set to download automatically.
- Page 20 en Cleaning and servicing Appliance door Area Suitable cleaning agents Information Door panels ¡ Hot soapy water Do not use a glass scraper or a stainless steel wool. Tip: Remove the door panels in order to clean them thoroughly. → "Appliance door", Page 23 Door cover ¡...
-
Page 21: Cleaning Functions
Cleaning functions en 16 Cleaning functions You can use the cleaning functions to clean the appli- Note: Keep the kitchen ventilated while the cleaning ance. function is running. Press to start the cleaning function. 16.1 "Self-cleaning" function a The cleaning function will start. The duration will count down on the display. - Page 22 en Rails After using the cleaning aid, finish cleaning the Open the appliance door and remove the remaining cooking compartment. water with an absorbent sponge cloth. → "Wiping down the cooking compartment", Clean the smooth surfaces in the cooking compart- Page 22 ment with a dish cloth or a soft brush. Remove stub- born food remnants using a stainless steel scouring Wiping down the cooking compartment pad.
-
Page 23: Appliance Door
Appliance door en Pull the whole rail to the front and remove it. First, push the rail into the middle of the rear socket until the rail rests against the cooking compartment wall, and then push this back ... - Page 24 en Appliance door Close the locking levers on the left- and right-hand 18.2 Attaching the appliance door hinges. WARNING ‒ Risk of injury! The hinges on the appliance door move when the door is opened and closed, which could trap your fingers. Keep your hands away from the hinges. ▶...
- Page 25 Appliance door en Set the front pane down on a level surface with the Insert the intermediate pane into the retainer at door handle facing down. the bottom and push it in firmly at the top. Press the intermediate pane against the appliance Push the left- and right-hand retainer ...
-
Page 26: Customer Service
en Troubleshooting 19 Troubleshooting You can rectify minor faults on your appliance yourself. WARNING ‒ Risk of electric shock! Read the troubleshooting information before contacting Incorrect repairs are dangerous. after-sales service. This will avoid unnecessary costs. Repairs to the appliance should only be carried out ▶... - Page 27 Setting values, e.g. temperature or cooking time, depend on the recipe, quantity and food. Next time, set lower or higher values. ▶ Tip: A lot of information about the food preparation and corresponding setting values can be found on our website www.neff-international.com. 20 Disposal 20.1 Disposing of old appliance This appliance is labelled in accord- ance with European Directive Valuable raw materials can be reused by recycling.
-
Page 28: Declaration Of Conformity
2014/53/EU. A detailed Declaration of Conformity can be found on- A detailed RED Declaration of Conformity can be found line at www.neff-home.com/uk among the additional online at www.neff-international.com among the addi- documents on the product page for your appliance. -
Page 29: How It Works
How it works en General information about roasting in cookware Baking on two or more levels Shelf position ¡ Use heat-resistant, ovenproof cookware. 2 levels ¡ Place the cookware on the wire rack. ¡ Universal pan ¡ Glass cookware is best. ¡ Baking tray ¡... - Page 30 en How it works ¡ Distribute foods that are in the form of separate ¡ Follow the manufacturer's instructions on the pack- pieces, such as bread rolls and potato products, so aging. that they are spread out flat and evenly on the ac- cessory.
- Page 31 How it works en Food Accessory/cookware Shelf pos- Heating Temperature in Cooking time in ition function °C mins → Page 7 Chicken, whole Wire rack 170 - 180 25 + 15 Turkey, crown Wire rack 150 - 160 20 + 15 Turkey, whole, 4-8 kg Wire rack ...
- Page 32 en How it works To ensure that the climate in the cooking compart- Issue ment remains constant, keep the cooking compart- You want to slow ¡ Place the cold duck breast ment door closed during low temperature cooking. cook a duck breast. into a pan.
-
Page 33: 24.1 General Installation Instructions
Installation instructions en ¡ Shelf positions when baking on 3 levels: ¡ Hot water sponge cake – Baking tray: Shelf position 4 – When baking on two levels, place the springform – Universal pan: Shelf position 3 tins at diagonally opposite corners of the wire –... - Page 34 en Installation instructions with these installation instructions. The in- WARNING ‒ Danger: Magnetism! staller shall be liable for damages incurred Permanent magnets are used in the control as a result of incorrect installation. panel or in the controls. They may affect elec- ¡ Do not use the door handle for the trans- tronic implants, e.g.
- Page 35 Installation instructions en ¡ To ventilate the appliance, the intermediate floor 24.3 Installation below a worktop must have a ventilation cut-out. Observe the installation dimensions and the installation ¡ The worktop must be secured to the fitted unit. instructions when installing below a worktop. ¡...
- Page 36 en Installation instructions ¡ Ensure that air exchange is guaranteed in accord- 24.5 Installation in a tall unit ance with the diagram. Observe the installation dimensions and the installation instructions when installing in a tall unit. ¡ Only fit appliances up to a height that allows ac- cessories to be easily removed.
- Page 37 Installation instructions en ¡ Contact protection must be guaranteed by the in- Open the appliance door and unscrew the left and stallation. right-hand panels. Electrically connect the appliance with the protective contact plug Note: The appliance must only be connected to a pro- tective contact socket that has been correctly installed.
- Page 38 en Installation instructions Refit the panels and screw them in place, first at the top and then at the bottom. If required, the gap between the appliance door and the side panels can be adjusted using the screws at the top left and right. Note: The gap between the worktop and the appliance must not be closed by additional battens.
- Page 40 Valid within Great Britain: Imported to Great Britain by BSH Home Appliances Ltd. Grand Union House Old Wolverton Road Wolverton, Milton Keynes MK12 5PT United Kingdom *9001621174* 9001621174 BSH Hausgeräte GmbH Carl-Wery-Straße 34 020916 81739 München, GERMANY...
Need help?
Do you have a question about the B27CS24G0B and is the answer not in the manual?
Questions and answers