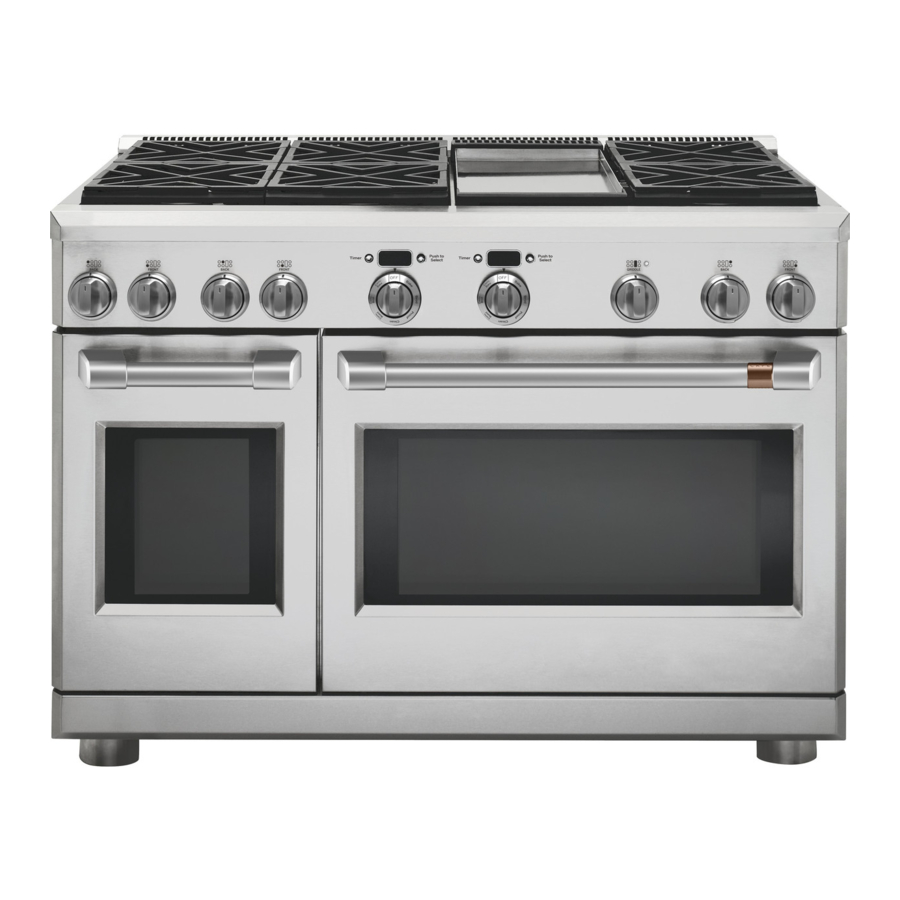
CAFE C2Y366, C2Y486 - Dual Fuel Professional Range Manual
- Installation instructions manual (20 pages) ,
- Installation instructions manual (60 pages) ,
- Owner's manual (133 pages)
Advertisement
- 1 Product Dimensions and Clearances
- 2 Installation Information
-
3
Installation
- 3.1 REMOVE PACKAGING
- 3.2 MOVE THE UNIT INDOORS
- 3.3 INSTALL ANTI-TIP DEVICE
- 3.4 CONVERTING TO PROPANE (LP) GAS OR CONVERTING BACK TO NATURAL GAS FROM PROPANE (LP)
- 3.5 GAS SUPPLY
- 3.6 ELECTRICAL CONNECTIONS
- 3.7 4-WIRE POWER CORD INSTALLATION
- 3.8 3-WIRE POWER CORD INSTALLATION
- 3.9 ROLL THE UNIT INTO POSITION
- 3.10 LEVEL THE UNIT
- 3.11 REPLACE OVEN DOOR(S)
- 3.12 CHECK BURNERS
- 3.13 CHECK SURFACE BURNERS
- 3.14 FINALIZE INSTALLATION
- 3.15 WHEN ALL HOOKUPS ARE COMPLETED
- 4 Accessory Installation
- 5 Safety Information
- 6 Documents / Resources
Product Dimensions and Clearances

48" Range Models

Installations without a hood require 48" minimum to combustibles. A custom hood installation with exposed horizontal combustible surfaces must have an Auto-On feature. Refer to hood installation instructions for specific hood clearances.
The surface of the entire back wall above the range and below the hood must be covered with a non-combustible material such as metal, ceramic tile, brick, marble or other stone.

To prevent drafts from affecting burner operation, seal all openings in floor under appliance and behind appliance wall.
** As defined in the National Fuel Gas Code (ANSI Z223.1/CSA B149.1 Current Edition). Clearances from non-combustible materials are not part of the ANSI Z21.1/CSA 1.1 scope and are not certified by CSA. Clearances less than 12" must be approved by local codes and/or the authority having jurisdiction.
ADDITIONAL CLEARANCES:
Allow 12" minimum clearance to an adjacent wall on each side.
Working areas adjacent to the rangetop should have 18" minimum clearance between countertop and the bottom of the wall cabinet.
For island installation, maintain 2-1/2 in. minimum from cutout to back edge of countertop and 3 in. minimum from cutout to side edges of countertop (see top view).


36" Range Models
Installations without a hood require 48" minimum to combustibles. A custom hood installation with exposed horizontal combustible surfaces must have an Auto-On feature. Refer to hood installation instructions for specific hood clearances.
The surface of the entire back wall above the range and below the hood must be covered with a non-combustible material such as metal, ceramic tile, brick, marble or other stone.
To prevent drafts from affecting burner operation, seal all openings in floor under appliance and behind appliance wall.
** As defined in the National Fuel Gas Code (ANSI Z223.1/CSA B149.1 Current Edition). Clearances from non-combustible materials are not part of the ANSI Z21.1/CSA 1.1 scope and are not certified by CSA. Clearances less than 12" must be approved by local codes and/or the authority having jurisdiction.
ADDITIONAL CLEARANCES:
Allow 12" minimum clearance to an adjacent wall on each side.
Working areas adjacent to the rangetop should have 18" minimum clearance between countertop and the bottom of the wall cabinet.
For island installation, maintain 2-1/2 in. minimum from cutout to back edge of countertop and 3 in. minimum from cutout to side edges of countertop (see top view).


48" and 36" Range Models
**As defined in the National Fuel Gas Code (ANSI Z223.1/CSA B149.1, Current Edition). Clearances from non-cumbustible materials are not part of the ANSI Z21.1/CSA 1.1 scope and are not certified by CSA. Clearances less than 12" must be approved by local codes and/or the authority having jurisdiction.
The 12" high stainless steel backsplash accessory must be installed in combination with a custom non-combustible backsplash.
The finished backsplash must cover the entire back wall up to the bottom of a hood, or when there is not hood, 48" to combustibles.
(12" high stainless steel backsplash accessory is only available for the 36" model)

Installation Information
INSTALLATION AT HIGH ALTITUDE
Over 6000ft, product configured for natural gas or propane requires installation of kit (WB28X39728 for natural gas and WB28X39729 for propane gas). Follow the instructions included with the kit.
MATERIALS PROVIDED

MATERIALS REQUIRED

MATERIALS REQUIRED (not provided)
NOTE: Purchase new flexible line; do not use previously used flexible gas line.
TOOLS REQUIRED

Installation
REMOVE PACKAGING
Stand clear. The ends of the cut metal banding may snap toward you.

- Cut the metal banding. Lift the carton straight up.
- Locate the two runner strips from the top of the packaging. These strips will be used to protect the kitchen floor during installation.
- Remove corner posts. Dispose of packaging materials.
- Remove grill/paddle covers, grill grate and burner grates.
- Lift out cast-iron griddle flue cover, grease troughs and pads.
- Cut the ties holding the grill grate to the grill frame.
![]()
- Lift off burner caps and remove foam pad, the lift off burner heads and remove foam pad.
![]()
- Open oven door(s) and remove packaging. Remove shelf holding broiler pan, tape, literature package, shelf lubricant and probe.
![]()


Doors and passageways leading to the installation location require at least 32" opening. If the opening is less than 32", the oven door(s) and control knobs must be removed.
REMOVE THE OVEN DOOR(S) ONLY IF NECESSARY to move the range through the doorways. To prevent damage to the sides of the range, it will be necessary to pad the corners beneath the straps on the hand-truck.

To remove the oven door(s):
- Fully open the door.
- Each hinge has a hinge lock. Pull the hinge.
- Firmly grasp the door at the top sides.
- Close the door to the near-vertical position.
- Lift the door up and pull straight out.
MOVE THE UNIT INDOORS
- Tilt the range forward on the skid.
![]()
- Lift the toekick out of the foam base.
![]()
- Drive the blade of the hand-truck beneath the foam block.


Do not remove the base foam block while the hand-truck is in use. Place the hand-truck blade underneath the base foam block and transport the range to the final location.
- Attach the hand-truck straps around the unit.
Place the hand-truck straps below the oven door handles. To avoid damaging the side panels, place a pad between the hand-truck and the range.
- Tilt the range to lower the hand-truck wheels off the skid.

- Place the appliance runners on the floor at the left and right sides in front of the opening.

The runners provide a surface for rolling the range into the final position and will protect the floor finish. The runners must be removed before leveling the range.
- Move the range indoors. Position the range in front of the installation location, onto the runners.
![]()

INSTALL ANTI-TIP DEVICE
Tip-Over Hazard

- A child or adult can tip the range and be killed.
- Install the anti-tip bracket to the wall or floor.
- Engage the range to the anti-tip bracket by sliding the range back such that the foot is engaged.
- Re-engage the anti-tip bracket if the range is moved.
- Failure to do so can result in death or serious burns to children or adults.
To reduce the risk of tipping the range, the range must be secured by a properly installed anti-tip bracket. See installation instructions shipped with the bracket for complete details before attempting to install.
To check if the bracket is installed and engaged properly, look underneath the range. The anti-tip bracket should be inserted into the opening on the anti-tip brace on the range. If the bracket arm misses the brace to the left or right, or the bracket arm is not protruding through the brace opening, the bracket must be reinstalled.
If the range is pulled from the wall for any reason, always repeat this procedure to verify the range is properly secured by the anti-tip bracket.
If your range has no anti-tip bracket, call 1.800.626.8774 to receive one at no cost.
If the anti-tip device supplied with the range does not fit this application, use the universal Anti-Tip Device WB2X7909.
Read the AHAM Anti-Tip Safety Brochure packed with the bracket.

Anti-Tip Parts Provided
- Attach the anti-tip brace onto the bottom of the range in the recessed area. Install 2 hex screws (provided) through the brace and into the range.
NOTE: This anti-tip device may be installed on the opposite side of the range.
![]()
- Measure and mark Dimension A (see table below) from the left (or right) side of the installation location. If the countertop has an overhang, add that dimension to Dimension A.
![]()
- Place the anti-tip bracket against the floor and back wall at the marked location. Mark screw holes for fastening the bracket to the wall sole plate and the floor.
- Drill 1/8" pilot holes at a 20° angle.
- Secure the bracket to the wall and/or floor with at least 2 wood screws (provided).


For Concrete or Cement Construction: You must use appropriate fastening hardware (not provided).
| Range | A |
| 30" | 5-1/16" |
| 36" | 5-1/16" |
| 48" | 8-1/4" |
CONVERTING TO PROPANE (LP) GAS OR CONVERTING BACK TO NATURAL GAS FROM PROPANE (LP)
This range leaves the factory set for use with natural gas. If you wan to convert to propane (LP) gas, the conversion must be performed by a qualified propane (LP) gas installer. The conversion orifices and instructions can be found on back of the range.
Keep these instructions and all orifices in case you want to convert back to natural gas.
NOTE: Location varies by model.

GAS SUPPLY

Fire Hazard: Do not use a flame to check for gas leaks.

Explosion Hazard: Do not exceed 25 ft-lbs of torque when making gas line connections.
Overtightening may damage the pressure regulator resulting in fire or explosion hazard.
Gas Pressure Regulator
You must use the gas pressure regulator supplied with this range. For proper operations the inlet
Natural Gas:
Minimum pressure: 6" of Water Column
Maximum pressure: 13" of Water Column
Propane (LP) Gas:
Minimum pressure: 11" of Water Column
Maximum pressure: 13" of Water Column
If you are not sure about the inlet pressure contact local gas supplier.
NOTE: A gas shutoff valve is shipped with this range and should be installed at the rear of the range near the floor with the handle facing downward. This shutoff valve is to be used in the event that service is required.
To access the shut-off valve, remove the toe-kick panel and reach under the range.
An optional 1/2" elbow is provided for connection to the range gas inlet.

Shut off the main gas supply valve before disconnecting the old range and leave it off until the new hook-up has been completed. Don't forget to relight the pilot on other gas appliances when you turn the gas back on.
Because hard piping restricts movement of the range, the use of a CSA International-certified flexible metal appliance connector is recommended unless local codes require a hard-piped connection.
If the hard piping method is used, you must carefully align the pipe; the range cannot be moved after the connection is made.
- Install a manual shut-off valve in the gas line in an easily accessed location outside of the range. Make sure everyone operating the range knows where and how to shut off the gas supply to the range.
- Install male 1/2" flare union adapter to the 1/2" NPT internal thread at inlet of the shut-off valve on the range. Use a backup wrench on the shut-off valve to avoid damage.
- Install male 1/2" or 3/4" flare union adapter to the NPT internal thread of the house shut-off valve, taking care to back-up the shut-off valve to keep it from turning.
- Connect flexible metal appliance connector to the adapter on the range. Position range to permit connection at the house shut-off valve.
- When all connections have been made, make sure all range controls are in the off position and turn on the main gas supply valve. Use a liquid leak detector at all gas connections to check for leaks in the system.
When using pressures greater than 1/2 psig to pressure test the gas supply system of the residence, disconnect the range and individual shut-off valve from the gas supply piping. When using pressures of 1/2 psig or less to pressure test the gas supply system by closing the individual shut-off valve.
When checking for proper operation of the regulator, the inlet pressure must be at least 1" greater than the operating (manifold) pressure as given on rating label of product.
ELECTRICAL CONNECTIONS
This appliance must be properly grounded.
All new constructions, mobile homes, recreational vehicles and installations where local codes do not allow grounding through neutral, require a 4-conductor UL-listed range cord.

To prevent fire or shock, do not use an extension cord with this appliance.
To prevent shock, remove house fuse or open circuit breaker before beginning installation.
We recommend you have the electrical wiring and hookup of your range connected by a qualified electrician. After installation, have the electrician show you how to disconnect power from the range.
You must use a single-phase, 120/208 VAC or 120/240 VAC, 60 hertz electrical system. If you connect to aluminum wiring, properly installed connectors approved for use with aluminum wiring must be used.
Effective January 1, 1996, the National ELetrical Code requires that new construction (not existing) utilize a 4-conductor connection to an electric range.
When installing an electric range in new construction, mobile hose, recreational vehicle, or an area where local codes prohibit grounding through the neutral conductor, refer to the section on four-conductor branch circuit connections.
Check with your local utilities for electrical codes which apply in your area. Failure to wire your oven according to governing codes could result in a hazardous condition. If there are no local codes, your oven must be wired and fused to meet the National Electrical Code, NFPA No. 70 - latest edition, available from the National Fire Protection Association.
This appliance must be supplied with the proper voltage and frequency, and connected to an individual, properly grounded, (minimum 50 amp for 48" ranges, minimum 30 amp for 36" and 30" ranges) branch circuit protected by a circuit breaker or time-delay fuse.
Use only a 3-conductor or a 4-conductor UL-listed range cord. These cords may be provided with ring terminals on wire and a strain relief device.
All 30", 36", and 48" Dual Fuel ranges are supplied with a 50 amp UL listed cord (NEMA 14-50).
NOTE: Use of automatic, wireless or wired external switches that shut of power to the appliances, are not recommended for this product.

4-WIRE POWER CORD INSTALLATION
NOTE: A 4-wire cord is connected to the range at the factory. Use the following steps to change an existing installation from a 3-wire cord back to a 4-wire cord.
The neutral wire of the supply circuit must be connected to the neutral terminal located in the lower center of the terminal block. The power leads must be connected to the lower left and the lower right terminals of the terminal block. The 4th grounding lead must be connected to the frame of the range with the ground plate and the ground screw.

- Remove the 3 lower terminal screws from the terminal block. Remove the ground screw and ground plate and retain them.
- Remove the ground strap.
DO NOT DISCARD THE GROUND STRAP OR ANY SCREWS. - Insert the one ground screw into the power cord ground wire terminal ring, through the ground plate and into the frame of the range.
- Insert the 3 terminal screws (removed earlier) through each power cord terminal ring and into the lower terminals of the terminal block. Be certain that the center wire (white/neutral) is connected to the center lower position of the terminal block. Tighten screws securely into the terminal block.
3-WIRE POWER CORD INSTALLATION
NOTE: A 4-wire cord is connected to the range at the factory. Use the following steps to change the range to a 3-wire cord.
The neutral or ground wire of the power cord must be connected to the neutral terminal located in the center of the terminal block. The power leads must be connected to the lower left and the lower right terminals of the terminal block.

- Remove the ground strap (located at the right side of the terminal block) and connect between the center lower portion of the terminal block to the frame of the range.
- Remove the 3 lower terminal screws from the terminal block. Insert the 3 terminal screws through each power cord terminal ring and into the lower terminals of the terminal block. Be certain that the center wire (white/neutral) is connected to the center lower position of the terminal block. Tighten screws securely into the terminal block.
DO NOT REMOVE THE GROUND STRAP CONNECTION.
ROLL THE UNIT INTO POSITION
The Anti-Tip Bracket must be properly installed to prevent tipping of the range. Failure to do so can cause serious damage or injury.

- Check to be sure the appliance runners are beneath the wheels.
- The range is shipped with the wheels in the position, being careful not to entangle or pinch the power cord and flexible gas tubing.
- Remove the runners beneath the range.
LEVEL THE UNIT
The range must be level and be supported by the legs—not the wheels. The range could move if the wheels make contact with the floor. Be sure all legs make contact with the floor in any installation.
- All legs must be leveled after the product is installed.
- Check to be sure the adjoining cabinets/countertops are level, front to back and left to right across the opening of the range.
- Measure the distance from the floor to the top of the countertop in the left and right rear corners.
- Adjust the height of the range to countertop height or higher.
This range should always be installed at countertop height or higher. DO NOT INSTALL THE RANGE LOWER THAN ADJACENT COUNTERTOP HEIGHT. The range must be supported by all 4 legs, regardless of countertop height.
FRONT LEG ADJUSTMENT
- A leveling leg wrench is supplied. Reach under the front of the range near the right leg. Locate and remove a thumb screw, then slide wrench out of the slot.
- Slide front cylinders up to access front leveling legs. Be careful not to damage cylinder.

- Use the supplied wrench to adjust the front leveling legs. Turn clockwise to extend the legs to lift and stabilize the range. Turn counterclockwise to retract the legs and allow the range to rest on its rollers.
- Be sure to return the wrench to its storage slot for future use.

REAR LEG ADJUSTMENT
To reduce the risk of fire or electric shock, always replace the spill plugs in the leveling rod holes.

- Remove two screws from rear vent trim. Slide vent trim forward, then lift up to remove.
- Remove the 2 spill plugs to locate the rear leg extension leveling rods. Use a 1/4" driver or socket wrench to adjust the left or right rear legs.
- Find the two rear leg extension rods. Use a 1/4" driver or wrench to adjust the left or right rear legs.
- Replace the 2 spill plugs and then replace the rear vent trim using the original screws.
REPLACE OVEN DOOR(S)
Skip this step if oven doors are in place.
Do not lift the door by the handle.
To replace the oven doors:
- Firmly grasp the door at the top sides. This is critical.
- Approach the range with the door angled in a vertical position.
- Guide the hinges into the slots.
![]()
- Push the door in firmly while opening.
- Once in position, open the door completely. Push the hinge locks back in toward the front frame.

Take care when replacing the oven doors. If the hinge latch is not securely locked, the hinge may snap back and separate. If the hinge separates, you must apply pressure (possibly with your foot) to press it back together and then engage the hinge latch.
CHECK BURNERS
Fire or Explosion Hazard: Do not operate the burner without all burner parts in place.
- Burners - Place surface burners into corresponding positions on cooktop.
- Caps - Place caps on proper size burner.
- Grates - The left and right grates are interchangeable. Place the grates on the cooktop.

CHECK SURFACE BURNERS
Push and turn a knob to the LITE position. A clicking sound indicates proper operation of the ignition system. When lighting any burners, sparks will appear at all burners but gas flows from only the one selected.
Once air is purged from the supply line, burner should light within 4 seconds. After burner lights, rotate the knob out of the LITE position. Try each burner in succession until all burners have been checked.
Quality of Flames
Determine the quality of flames visually. Normal burner flames should look like (A) or (B).
- Soft blue flames — Normal for natural gas
![]()
- Yellow tips on outer cones — Normal for propane (LP) gas
![]()


Long, bright yellow flames are not formal. Normal flames may show signs of an orange tint when well heated or signs of flickering orange due to particles in the gas or air.
FINALIZE INSTALLATION
Place the burner grates over the burners. The grates should be seated and should not rock.
The griddle is secured with screws. It is designed to be stationary and should not be removed.
The griddle has two leveling screws beneath the rear flue cover that can be used to adjust to the desired slope.

The two inner screws are clamping screws for securing the griddle in place. Loosen these two screws before leveling. Do not remove these two screws.
The two outer screws are leveling screws. Do not remove these two screws. They can be turned to level the griddle or to provide a forward slope to help grease and oils drain away from the food being cooked.
After levling the griddle, hand-tighten the clamping screws; do not over-tighten.
WHEN ALL HOOKUPS ARE COMPLETED
Make sure all controls are left in the off position. Make sure the flow of combustion and ventilation air to the range is unobstructed.
Check that all packing materials and tape have been removed. This will include tape on metal panel under control knobs (if applicable), adhesive tape, wire ties, cardboard, and protective plastic. Failure to remove these materials could result in damage to the appliance once the appliance has been turned on and surfaces have heated.
Accessory Installation
TOEKICK (purchased separately)
- Install the toekick after the range has been leveled.
- Measure the distance between the floor and the bottom of range.
- The toekick has 1.5" of total height adjustment. To adjust, loosen the two screws on each end and slide the upper and lower pieces apart to 1/8" less than the measured height.
NOTE: The top screw may be removed for maximizing the height of the toekick.
- Secure the top and bottom sections by tightening the 2 screws on each end.

- Push toekick against range leg until clip snaps to legs.


NOTE: Be sure the toekick snaps securely to the leg.
Safety Information
Have a question or need assistance with your appliance? Try the Café website 24 hours a day, any day of the year! You can also shop for more great Café products and take advantage of all our on-line support services designed for your convenience. In the US: cafeappliances.com. (In Canada, cafeappliances.ca.)
IN THE COMMONWEALTH OF MASSACHUSETTS
- This product must be installed by a licensed plumber or gas fitter.
- When using ball type gas shut-off valves, they shall be the T-handle type.
- A flexible gas connector, when used, must not exceed 5 feet.
FIRE OR EXPLOSION HAZARD
If the information in this manual is not followed exactly, a fire or explosion may result causing property damage, personal injury or death.
Installation must be performed by a qualified installer.
Read these instructions completely and carefully.
Installation of this range must conform with local codes, or in the absence of local codes, with the National Fuel Gas Code, ANSI Z223.1/NFPA.54, latest edition.
In Canada, installation must conform with the current Natural Gas Installation Code, CAN/CGAB148.2, and with local codes where applicable. This range has been design-certified by CSA International according to ANSI Z21.21, latest edition and Canadian Gas Association according to CAN/CGA-1.1 latest edition.
When installing a gas appliance the use of old flexible connectors can cause gas leaks and personal injury. Always use a NEW flexible connector.
Leak testing of the appliance shall be conducted according to the manufacturer instructions.
The range must be electrically grounded in accordance with local codes or, in the absence of local codes, in accordance with the National Eletrical Code (ANSI/NFPA 70, latest edition). In Canada, electrical grounding must be in accordance with the current CSA C22.1 Canadian Electrical Code Part 1 and/or local codes. See Electrical Connections in this section.
Do not install this product with an air curtain hood or other range hood that operates by blowing air down on the cooktop. This airflow may interfere with operation of the gas burners resulting in fire or explosion hazard.
FOR YOUR SAFETY
Tip-Over Hazard

- A child or adult can tip the range and be killed.
- Install the anti-tip bracket to the wall or floor.
- Engage the range to the anti-tip bracket by sliding the range back such that the foot is engaged.
- Re-engage the anti-tip bracket if the range is moved.
- Failure to do so can result in death or serious burns to children or adults.
If you did not receive an anti-tip bracket with your purchase, contact us at cafeappliances.com to receive one at no cost.
(In Canada, cafeappliances.ca.)
For installation instructions of the bracket, visit: cafeappliances.com (In Canada, cafeappliances.ca.)

Before beginning the installation switch power off at service panel and lock the service disconnecting means to prevent power from being switched on accidentally. When the service disconnecting means cannot be locked, securely fasten a prominent warning device, such as a tag, to the service panel.
BEFORE YOU BEGIN
Read these instructions completely and carefully.
![]()
Save these instructions for local inspector's use.![]()
Observe all governing codes and ordinances.-
![]()
Remove all packing material and literature from oven before connecting gas and electrical supply to range. -
![]()
To avoid damage to your cabinets, check with your builder or cabinet supplier to make sure that the materials used will not discolor, delaminate or sustain other damage.
This oven has been designed in accordance with the requirements of UL and CSA International and complies with the maximum allowable wood cabinet temperatures of 194°F (90°C). - Note to Installer — Be sure to leave these instructions with the consumer.
- Note to Consumer — Keep these instructions with your Owner's Manual for future reference.
- Servicer — The electrical diagram is in an envelope attached to the back of the range.
- Proper installation is the responsibility of the installer.
- Product failure due to improper installation is not covered under warranty.
- Before installing your range on linoleum or any other synthetic floor covering, make sure the floor covering can withstand 180°F without shrinking, warping or discoloring. Do not install the range over carpeting unless a sheet of 1/4" thick plywood or similar insulator is placed between the range and carpeting.
- For Cafe Parts and Accessories, visit our website at cafeappliances.com.
(In Canada, cafeappliances.ca.) - If your received a damaged range, you should contact your dealer.
IF SOLD OUTSIDE THE U.S. AND CANADA
If you wish to use this product with Liquefied Petroleum (LP) gas containing greater than 10% butane, you must purchase the HA Propane conversion accessory kit #CXBUPR01. To order, please call 1.888.664.8403 or 1.787.276.4051. Failure to do so may result in carbon monoxide or fire hazard.
VENT HOOD COMBINATIONS
A suitable overhead vent hood is required for models with a grill and is recommended for all other models. Due to the high heat capacity of this unit, particular attention should be paid to the hood and ductwork installation to assure it meets local building codes. Clearances to horizonal surfaces above the range, measured to the cooking surface are below. Failure to comply may result in fire hazard.
- Installations without a hood require 48" minimum to combustibles.
- A custom hood installation with exposed horizontal combustibles surfaces must have an Auto-On feature.
- For other installations with a hood, refer to hood installation instructions for specific hood clearances.
These ranges weigh up to 700 pounds. Some disassembly will reduce the weight considerably. Due to the weight and size of the range and to reduce the risk of personal injury or damage to the product.
TWO PEOPLE ARE REQUIRED FOR PROPER INSTALLATION OF 36" and 30" RANGES.
THREE PEOPLE ARE REQUIRED FOR PROPER INSTALLATION OF 48" RANGES.

READ AND SAVE THESE INSTRUCTIONS
Questions? Visit cafeappliances.com.
Documents / Resources
References
Download manual
Here you can download full pdf version of manual, it may contain additional safety instructions, warranty information, FCC rules, etc.
Download CAFE C2Y366, C2Y486 - Dual Fuel Professional Range Manual
Advertisement


Need help?
Do you have a question about the C2Y366 and is the answer not in the manual?
Questions and answers