
Related Manuals for Moes BAT-80A


Summary of Contents for Moes BAT-80A
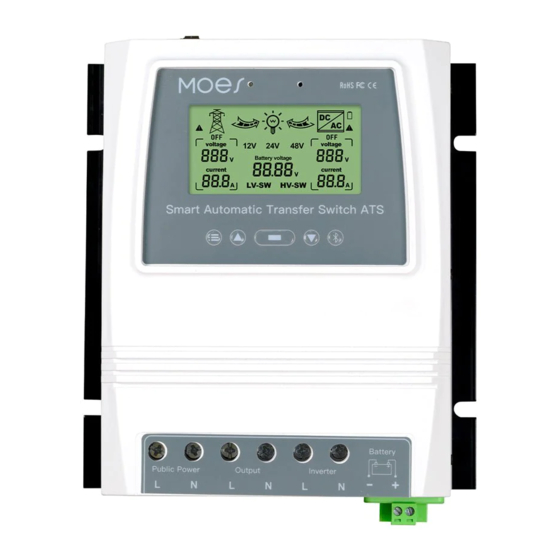
- Page 1 HOME,SMART MOES HOME User Manual S m a r t A u t o m a t i c T r a n s f e r S w i t c h A T S BAT-80A-MS-CM19...
- Page 2 English version Bitte scannen Sie den QR-Code, um das deutsche Handbuch, das Installationsvideo und die Funktionseinführung zu erhalten Escanee el código QR para obtener el manual en español, el video de instalación y la introducción de la función Veuillez scanner le code QR pour obtenir le manuel en français, la vidéo d'installation et l'introduction des fonctions Отсканируйте...
-
Page 3: Table Of Contents
English version Contents Product dimensions Connection diagram Installation notes Application Product introduction Installation Auto-select voltage range LCD display Model Button functions Error adjustment Display function selection LCD backlight Add devices Device reset Device pairing Safety recomendations Troubleshooting CE Declaration of conformity FCC Compliance Statement Service Recycling information... -
Page 4: Product Dimensions
English version Product dimensions Maximum Wire Gauge:AWG 14 (2.5mm²) Maximum Wire Gauge:AWG 6 (16mm²) -
Page 5: Connection Diagram
English version L+N Connection diagram Wind Generator Solar Panel Live+Neutral Solar&Wind Controller Utility Power Battery Note: Inverter The battery is a must for power supply. Load L1+L2+N Connection diagram Wind Generator Live1+Live2+Neutral Solar Panel Solar&Wind Controller Utility Power Battery Note: Inverter Load The battery is a must for power supply. -
Page 6: Installation Notes
English version Installation Notes... - Page 7 English version Model BAT-80A 8kw (Utility Power 100-120V) Rated Power 16kw (Utility Power 220-240V) Auto Selection: Input Voltage AC 100-120V or AC 220-240V Auto Selection: Output Voltage AC 100-120V or AC 220-240V Transfer time Battery voltage; Power source: Utility LCD Display power or battery-inverter.
-
Page 8: Application
English version Application The ATS power transfer controller provides reliable operation of an inverter and AC utility power in one compact device. The ATS switches automatically between the AC utility power and the inverter, while protecting the inverter against external voltages. Product introduction the Public Utilty Power Supply. -
Page 9: Lcd Display
English version LCD Display 1. When LV-SW is displayed, it is the function interface for setting battery low voltage switching voltage. 2. When HV-SW is displayed, it is the function interface for setting the battery low voltage recovery voltage. the system. The right arrow shows switching to the public power,and the internal grid to display the current output state, no display when no current output. -
Page 10: Button Functions
English version Inverter power supply status Utility power status Button Functions Front Panel Key Buttons: a. Mode button b. Plus button c. Function button d. Minus button a.Mode button: switch between automatic mode, grid power supply mode, and inverter power supply mode. b.The plus button is only valid for voltage setting (0.1V per trigger). -
Page 11: Lcd Backlight
English version LCD Backlight The LCD Display Backlight will Automatically Turn OFF if NO Button Activity is sensed after 60 Seconds. Pressing Any Button will again illuminate the LCD Display for 60 Seconds. ------------------------------------------------------------------- Please Note! The LCD Panel will NOT Display / Illuminate or Function until the ATS is Properly Connected to the Required DC Power Battery Source Circuit of Minimum Detected Voltage. -
Page 12: Add Devices
English version Add Devices Download MOES App on App store or scan the QR code MOES App is upgraded as much more compatibility than Tuya Smart/Smart Life App, functional well for scene controlled by Siri, widget and scene recommendations as the fully new customized service. - Page 13 English version Scan the QR code Please connect the device accord- Method two: 1.Make sure the device has been reset.
- Page 14 English version 2.Make sure your phone is connected to Wi-Fi and Bluetooth. 3.Open MOES App and Click “+”, then the prompt page will automatically show on the screen. Click “Go to add”. 4.Add the device successfully, you can edit the name of the device to enter the device...
- Page 15 English version 5. Open the Bluetooth gateway, click “Add devices”, click “Associate Bluetooth devic-...
-
Page 16: Safety Recomendations
The manufacturer manual and to the product. Troubleshooting If you have problems installing or operating your device, please review its product data sheet: https://www.moestech.com/blogs/news/bat-80a... -
Page 17: Ce Declaration Of Conformity
FCC Compliance Statement FCC Compliance Statement for BAT-80A This device complies with Part 15 of the FCC Rules. Operation is subject to the follow- ing two conditions: (1) This device may not cause harmful interference, and (2) this device must accept any interference received, including interference that may cause undesired operation. -
Page 18: Service
English version SERVICE Thank you for your trust and support to our products, we will provide you with a two-year worry-free after-sales service (freight is not included), please do not alter this warranty service card, to safeguard your legitimate rights and interests. If you need service or have any questions, please consult the distributor or contact us. - Page 19 Fault Content Principal Thank you for your support and purchase at we Moes, we are always here for your complete satisfaction, just feel free to share your great shopping experience with us. If you have any other need, please do not hesitate to contact us first, we will try to meet your demand.
- Page 20 versión en español Interruptor de transferencia automática inteligente ATS Manual de usuario...
- Page 21 versión en español Contenido Dimensiones del producto Diagrama de conexión Esquema de conexión Notas de instalación Especificaciones técnicas Solicitud Introducción del producto Instalación Rango de voltaje de selección automática Pantalla LCD Modelo Funciones de los botones Ajuste de errores Selección de función de pantalla LCD luz de fondo Especificaciones de trabajo del sistema de 12V Especificaciones de trabajo del sistema de 24V...
-
Page 22: Dimensiones Del Producto
versión en español Dimensiones del producto Calibre máximo del cable: AWG 14 (2.5 mm²) Calibre máximo del cable: AWG 6 (16 mm²) -
Page 23: Diagrama De Conexión
versión en español Diagrama de conexión L+N Generador de viento Panel solar Vivo+Neutral Controlador solar y eólico Energía de la red Batería Nota: Inversor La batería es imprescindible para el Carga suministro de energía. L1+L2+N Esquema de conexión Generador de viento En vivo1+En vivo2 Panel solar +Neutro... -
Page 24: Notas De Instalación
versión en español Notas de instalación... - Page 25 Modelo BAT-80A 8kw (Energía de red 100-120V) Potencia nominal 16kw (Energía de red 220-240V) Selección automática: Voltaje de entrada CA 100-120V o CA 220-240V Selección automática: Tensión de salida CA 100-120V o CA 220-240V Tiempo de transferencia Voltaje de la batería;...
-
Page 26: Solicitud
versión en español Solicitud inversor y la energía de la red pública de CA en un dispositivo compacto. El ATS cambia automáticamente entre la energía de la red pública de CA y el inversor, mientras protege al inversor contra voltajes externos. Introducción del producto El controlador de transferencia de energía dual se usa entre un sistema de energía fuera de la red y el suministro de energía de la red pública. -
Page 27: Pantalla Lcd
versión en español Pantalla LCD 1. Cuando se muestra LV-SW, se trata de la interfaz de funciones para ajustar la tensión de conmutación de baja tensión de la batería. 2. Cuando se muestra HV-SW, es la interfaz de funciones para ajustar la tensión de recuperación de baja tensión de la batería. -
Page 28: Funciones De Los Botones
versión en español Estado de la fuente de alimentación Estado de energía de la red pública del inversor Funciones de los botones Botones clave del panel frontal: a. Botón de modo b. botón más c. Botón de función d. Botón menos a.Botón de modo: cambia entre el modo automático, el modo de alimentación de red y el modo de alimentación del inversor. -
Page 29: Lcd Luz De Fondo
versión en español LCD luz de fondo La luz de fondo de la pantalla LCD se apagará automáticamente si NO se detecta Al presionar cualquier botón, se iluminará nuevamente la pantalla LCD durante 60 segundos. ------------------------------------------------------------------- Tenga en cuenta que el panel LCD NO mostrará/iluminará ni funcionará hasta que el CC requerido del voltaje mínimo detectado. -
Page 30: Agregar Dispositivos
• Descarga la aplicación “MOES”. • Ingrese a la interfaz Registrarse/Iniciar sesión, toque “Registrarse” para crear una tablecer contraseña”. Elija “Iniciar sesión” si ya tiene una cuenta de MOES. • Preparación: asegúrese de que el interruptor se haya conectado a la electricidad, Restablecimiento del dispositivo Mantenga presionado el botón durante aproximadamente 6 segundos, el indicador azul... - Page 31 versión en español Escanea el código QR Conecte el dispositivo de acuerdo 1. Asegúrese de que el dispositivo se haya reiniciado.
- Page 32 3. Abra la aplicación MOES y haga clic en “+”, luego la página de aviso se mostrará automáticamente en la pantalla. Haga clic en “Ir a agregar”. sar a la página del dispositivo haciendo clic en “Listo”.
- Page 33 versión en español 5. Abra la puerta de enlace Bluetooth, haga clic en “Agregar dispositivos”, haga clic en “Asociar dispositivos Bluetooth”, seleccione el dispositivo y haga clic en “Agregar...
-
Page 34: Recomendaciones De Seguridad
El tanto a este manual como a el producto. Solución de problemas Si tiene problemas para instalar u operar su dispositivo, revise su hoja de datos del producto: https://www.moestech.com/blogs/news/bat-80a... -
Page 35: Declaración De Conformidad Ce
EU, 2014/35/EU, 2014/30/EU, 2011/65/EU.El texto completo de la declaración UE de conformidad está disponible en la siguiente dirección de Internet: https://ww- w.moestech.com/blogs/news/bat-80a SERVICIO Gracias por su confianza y apoyo a nuestros productos, le proporcionaremos un servi- cio post-venta sin preocupaciones durante dos años (los portes no están incluidos), por favor no modifique esta tarjeta de servicio de garantía para salvaguardar sus... - Page 36 Deutsche Fassung Smart Automatic Transfer Switch ATS Benutzerhandbuch...
- Page 37 Deutsche Fassung Inhalt Produktabmessungen L+N Anschlussplan L1+L2+N Anschlussplan Installationshinweise Technische Spezifikationen Anwendung Produkteinführung Installation Spannungsbereich automatisch auswählen LCD Bildschirm Modell Tastenfunktionen Fehlerkorrektur Auswahl der Anzeigefunktion LCD-Rücklicht Arbeitsspezifkation des 12V-Systems Arbeitsspezifikation des 24V-Systems 48V-System-Arbeitsspezifikation Geräte hinzufügen Geräte-Reset Gerätepaarung Sicherheitsempfehlungen Fehlersuche CE-Konformitätserklärung Service Recycling-informationen Vielen Dank, dass Sie sich für unsere Produkte entschieden haben.
-
Page 38: Produktabmessungen
Deutsche Fassung Produktabmessungen Maximaler Drahtquerschnitt: AWG 14 (2.5 mm²) Maximaler Drahtquerschnitt: AWG 6 (16 mm²) -
Page 39: L+N Anschlussplan
Deutsche Fassung L+N Anschlussplan Windgenerator Sonnenkollektor Live+Neutral Solar- und Windregler Versorgungsstrom Batterie Notiz: Die Batterie ist ein Muss für die Wandler Stromversorgung. Belastung L1+L2+N Anschlussplan Windgenerator Live1+Live2+Neutral Sonnenkollektor Solar- und Windregler Versorgungsstrom Batterie Notiz: Die Batterie ist ein Muss für die Stromversorgung. Wandler Belastung... -
Page 40: Installationshinweise
Deutsche Fassung Installationshinweise... - Page 41 Deutsche Fassung Modell BAT-80A 8 kW (Nutzleistung 100–120 V) Nennleistung 16 kW (Netzstrom 220–240 V) Automatische Auswahl: Eingangsspannung AC 100-120V oder AC 220-240V Automatische Auswahl: Ausgangsspannung AC 100-120V oder AC 220-240V Transferzeit Batteriespannung; Stromquelle: Dienstprogramm LCD Bildschirm Power oder Batterie-Wechselrichter.
-
Page 42: Anwendung
Deutsche Fassung Anwendung Der ATS Power Transfer Controller stellt den zuverlässigen Betrieb eines Wechselrich- ters und des AC-Netzstroms in einem kompakten Gerät dar. Der ATS schaltet autom- atisch zwischen dem AC-Netzstrom und dem Wechselrichter um und schützt den Wechselrichter gleichzeitig vor externen Spannungen. Produkteinführung Der Dual Power Transfer Controller wird zwischen einem netzunabhängigen Stromver- verwendet. -
Page 43: Lcd Bildschirm
Deutsche Fassung LCD Bildschirm 1. Wenn LV-SW angezeigt wird, handelt es sich um die Funktionsschnittstelle zur Einstel- lung der Batterie-Unterspannungs-Schaltspannung. 2. Wenn HV-SW angezeigt wird, handelt es sich um die Funktionsschnittstelle zur Einstel- lung der Batterieunterspannungswiederkehrspannung. 3.12V, 24V, 48V sind die entsprechenden Anzeigespannungen, die vom System ermittelt wurden. -
Page 44: Tastenfunktionen
Deutsche Fassung Status der Stromversorgung des Netzstromstatus Wechselrichters Tastenfunktionen Tasten auf der Vorderseite: a. Modus-Taste b. Plus-Taste c. Funktionstaste d. Minus-Taste Modustaste: Umschalten zwischen Automatikmodus, Netzversorgungsmodus und Wechselrichterversorgungsmodus. Die Plus-Taste gilt nur für die Spannungseinstellung (0.1 V pro Auslösung). Funktionstaste: Legt die LV-SW-Spannung, HV-SW-Spannung und Batteriespannung fest, die beim Drücken der Taste durchlaufen werden. -
Page 45: Lcd-Rücklicht
Deutsche Fassung LCD-Rücklicht Die Hintergrundbeleuchtung des LCD-Displays schaltet sich automatisch aus, wenn nach 60 Sekunden KEINE Tastenbetätigung erkannt wird. Durch Drücken einer beliebigen Taste wird das LCD-Display erneut für 60 Sekunden beleuchtet. ------------------------------------------------------------------- Bitte beachten Sie: Das LCD-Panel wird NICHT angezeigt/beleuchtet oder funktioniert, bis der ATS ordnungsgemäß... -
Page 46: Geräte Hinzufügen
Deutsche Fassung Geräte hinzufügen Die MOES App ist viel kompatibler als die Tuya Smart/Smart Life App und funktioniert auch für die Steuerung von Szenen durch Siri, Widgets und Szenene- mpfehlungen als völlig neuer, maßgeschneiderter Service. Hinweis : Tuya Smart/Smart Life App funktioniert noch, aber MOES App ist sehr empfehlenswert) •... - Page 47 Deutsche Fassung Scannen Sie den QR-Code Bitte schließen Sie das Gerät gemäß Methode zwei: 1. Stellen Sie sicher, dass das Gerät zurückgesetzt wurde.
- Page 48 Deutsche Fassung 2. Stellen Sie sicher, dass Ihr Telefon mit Wi-Fi und Bluetooth verbunden ist. 4. Fügen Sie das Gerät erfolgreich hinzu. Sie können den Namen des Geräts bearbeit- en, um die Geräteseite aufzurufen, indem Sie auf “Fertig” klicken.
- Page 49 Deutsche Fassung auf “Bluetooth-Geräte zuordnen”, wählen Sie das Gerät aus und klicken Sie auf “Fertig stellen”.
-
Page 50: Sicherheitsempfehlungen
Luftfeuchtigkeit über 80%. f) Feuchtigkeitskontakt und/oder Spritzwasser jeglicher Art. ter Sonneneinstrahlung. Der Hersteller behält sich das Recht vor, Änderungen, Modi- nehmen das Produkt. Fehlersuche Wenn Sie Probleme bei der Installation oder Bedienung Ihres Geräts haben, lesen Sie bitte das Produktdatenblatt: https://www.moestech.com/blogs/news/bat-80a... -
Page 51: Ce-Konformitätserklärung
Typs [Bezeichnung des Typs der Funkanlage] mit den Richtlinien 2014/53/ EU, 2014/35/EU, 2014/30/EU, 2011/65/EU übereinstimmt. Der vollständige Text der EU-Konformitätserklärung ist unter folgender Internetadresse abrufbar: https://ww- w.moestech.com/blogs/news/bat-80a SERVICE Wir danken Ihnen für Ihr Vertrauen und Ihre Unterstützung für unsere Produkte. Wir bieten Ihnen einen zweijährigen sorgenfreien Kundendienst (Frachtkosten nicht inbe- griffen), bitte ändern Sie diese Garantiekarte nicht, um Ihre legitimen Rechte und... - Page 52 versão em português Comutador de Transferência Automática Inteligente ATS Manual do usuário...
- Page 53 versão em português Conteúdo Dimensões do produto Diagrama de conexão L+N Diagrama de conexão L1+L2+N Notas de instalação Especificacões técnicas Inscrição Introdução do produto Instalação Faixa de tensão de seleção automática Tela de LCD Modelo Funções do botão Ajuste de erro Seleção da função de exibição Luz de fundo do LCD Especificação de funcionamento do sistema de 12V...
-
Page 54: Dimensões Do Produto
versão em português Dimensões do produto Bitola Máxima do Fio: AWG 14 (2.5mm²) Bitola Máxima do Fio: AWG 6 (16mm²) -
Page 55: Diagrama De Conexão L+N
versão em português Diagrama de conexão L+N Gerador de energia eólica Ao vivo Painel solar +Neutro Controlador Solar e Eólico Energia Utilitária Bateria Observação: Inversor Carregar a fonte de alimentação. Diagrama de conexão L1+L2+N Gerador de energia eólica Ao vivo1+Ao vivo2 Painel solar +Neutro Controlador Solar... -
Page 56: Notas De Instalação
versão em português Notas de instalação... -
Page 57: Especificacões Técnicas
Modelo BAT-80A 8kw (Energia Utilitária 100-120V) Potência nominal 16kw (Energia Utilitária 220-240V) Seleção automática: Tensão de entrada AC 100-120V ou AC 220-240V Seleção automática: Voltagem de saída AC 100-120V ou AC 220-240V Tempo de transferência Tensão da bateria; Fonte de alimentação: Tela de LCD Utilitário energia ou inversor de bateria. -
Page 58: Inscrição
versão em português Inscrição tensões externas. Introdução do produto fora da rede e a fonte de alimentação de serviço público. O controlador ATS se conecta separadamente a 1) energia de serviço público 2) inversor 3) bateria 4) carga. A interface do usuário permite o monitoramento do Estado Operacional ATS e Ajuste de Tensão Setpoints A Chave Master ON/OFF está... -
Page 59: Tela De Lcd
versão em português Tela de LCD de baixa tensão da bateria. recuperação da bateria de baixa tensão. 3.12V, 24V, 48V são as tensões de visualização correspondentes após respectivamente A seta para a direita mostra a mudança para a alimentação pública,e a rede interna pisca para mostrar o estado de saída de corrente,sem visualização quando não há... -
Page 60: Funções Do Botão
versão em português Status da fonte de alimentação do Status de energia do utilitário inversor Funções do botão Botões das teclas do painel frontal: a. Botão de modo b. Botão de adição c. Botão de função d. Botão menos Botão de modo: alternar entre o modo automático, modo de alimentação de rede, e modo de alimentação do inversor. -
Page 61: Luz De Fundo Do Lcd
versão em português Luz de fundo do LCD A luz de fundo do visor LCD desliga-se automaticamente se a atividade do botão NÃO for detectada após 60 segundos. Pressionar qualquer botão iluminará novamente o visor LCD por 60 segundos. ------------------------------------------------------------------- conectado corretamente ao circuito de fonte de bateria de alimentação CC necessária de tensão mínima detectada. -
Page 62: Adicionar Dispositivos
• Baixe o aplicativo “MOES”. • Entre na interface Cadastro/Login, toque em “Registrar” para criar uma conta dig- Escolha “Login” se você já possui uma conta MOES. de que seu telefone esteja conectado ao Wi-Fi e seja capaz de se conectar à Internet. - Page 63 versão em português Digitalize o código QR Por favor, conecte o dispositivo de acordo...
- Page 64 3. Abra o aplicativo MOES e clique em “+”, então a página de prompt apa recerá automaticamente na tela. Clique em “Ir para adicionar”. 4. Adicione o dispositivo com sucesso, você pode editar o nome do dispositivo para...
- Page 65 versão em português 5. Abra o gateway Bluetooth, clique em “Adicionar dispositivos”, clique em “Associar dispositivos Bluetooth”, selecione o dispositivo e clique em “Adicionar acabamento”.
-
Page 66: Recomendações De Segurança
5. Não instale ou use o controlador ATS perto de fontes de ignição, fogo aberto ou outras fontes de calor, como aquecedores, fogões a gás ou radiação solar direta. o produto. Resolução de problemas Se tiver problemas na instalação ou no funcionamento do dispositivo, consulte a folha de dados do produto: https://www.moestech.com/blogs/news/bat-80a... -
Page 67: Declaração De Conformidade Ce
Diretiva 2014/53/ EU, 2014/35/EU, 2014/30/EU, 2011/65/EU. O texto integral da declaração de conformidade da UE está disponível no seguinte endereço Internet: https://www.moestech.com/blogs/news/bat-80a SERVIÇO Agradecemos a sua confiança e o seu apoio aos nossos produtos, iremos fornecer-lhe um serviço pós-venda de dois anos sem preocupações (o frete não está... - Page 69 製品の寸法 L+N接続図 L1+L2+N接続図 インストールに関する注意事項 技術仕様 応用 製品導入 インストール 電圧範囲の自動選択 LCDディスプレイ モデル 主な機能 エラー調整 表示機能の選択 LCDパックライト 12vシステムの動作仕様 24vシステムの動作仕様 48vシステムの動作仕様 デバイスを追加する デバイスのリセット デバイスのペアリング 安全に関する注意事項 トラブルシューティング CE適合宣言 サービス リサイクル情報...
- Page 73 BAT-80A NW / PC 2400-2483.5MHz 周波数範囲 RF出力パワー 20dBm...
- Page 77 -------------------------------------------------------------------...
- Page 82 トラブルシューティング デバイスのインストールや操作に問題がある場合は、製品データシート(https://ww- w.moestech.com/blogs/news/bat-80a)をご確認ください。...
- Page 83 CE適合宣言 これにより, Wenzhou NOVA New Energy CO., LTD 無線機器の型式[無線機器の型式の指 定]が指令2014/53/ EU, 2014/35/EU, 2014/30/EU, 2011/65/EU に適合していること を宣言します。EU適合宣言の全文は、次のインターネットアドレスで入手できます :https://www.moestech.com/blogs/news/bat-80a サービス 私達のプロダクトへのあなたの信頼そしてサポートに感謝しなさい、私達はあなたの正当 な権利および利益を保護するためにこの保証サービス・カードを、変えないで下さい2年 間の心配なしのアフターサービス(運賃は含まれていない)を提供する。あなたがサービス を必要とするか、または何か質問がある場合は、販売代理店に相談するか、または私達に 連絡してください。 製品の品質に問題が発生した場合、受領日から24ヶ月以内に、製品と包装を準備し、購 入したサイトまたは店舗でアフターサービスを申請してください。製品が個人的な理由で 破損した場合、修理のために一定額のメンテナンス料を請求するものとします。 以下の場合、保証サービスをお断りすることがあります: 1. 1.外観が破損している、ロゴがない、またはサービス期間を超えている製品。 2. 分解された製品、傷のある製品、個人で修理された製品、改造された製品、部品が不 足している製品。 3. 回路が焼けていたり、データケーブルや電源インターフェースが損傷しているもの。 4. 異物の侵入により破損した製品(各種液体、砂、塵埃、煤塵等を含むが、これらに限 定されない。) リサイクル情報 廃電気・電子機器分別収集のシンボルマーク(WEEE指令2012/19 / EU)が表示されて...
Need help?
Do you have a question about the BAT-80A and is the answer not in the manual?
Questions and answers