EWM alpha Q 330 Progress puls HP MM TKM Operating Instructions Manual
Hide thumbs
Also See for alpha Q 330 Progress puls HP MM TKM:
- Operating instructions manual (120 pages) ,
- Operating instructions manual (128 pages) ,
- Operating instructions manual (104 pages)

Related Manuals for EWM alpha Q 330 Progress puls HP MM TKM


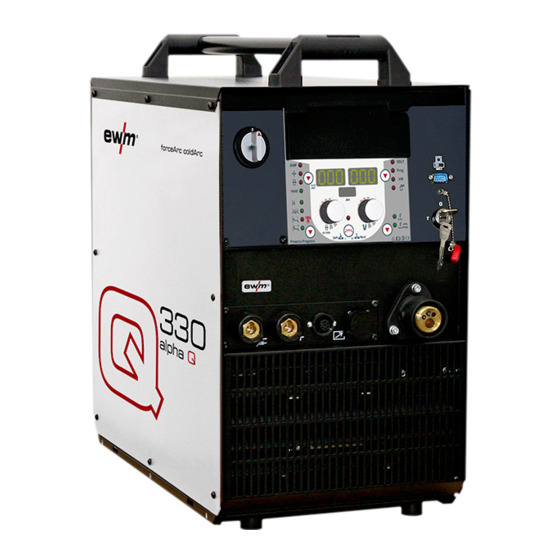
Summary of Contents for EWM alpha Q 330 Progress puls HP MM TKM
- Page 1 Operating instructions Welding machine alpha Q 330 Progress puls HP MM TKM 099-005402-EW501 Observe additional system documents! 29.06.2017...
- Page 2 +49 2680 181-0. A list of authorised sales partners can be found at www.ewm-group.com. Liability relating to the operation of this equipment is restricted solely to the function of the equipment.
-
Page 3: Table Of Contents
Contents Notes on the use of these operating instructions Contents 1 Contents ..............................3 2 For your safety ............................7 Notes on the use of these operating instructions ................7 Explanation of icons ........................8 Part of the complete documentation ....................9 Safety instructions .......................... - Page 4 Contents Notes on the use of these operating instructions 5.3.6 MIG/MAG operating point ..................... 43 5.3.6.1 Operating point setting via welding current, material thickness or wire feed speed ..................... 43 5.3.6.2 Arc length correction setting ................43 5.3.6.3 Accessory components for operating point setting ........43 5.3.7 coldArc / coldArc puls ....................
- Page 5 Wire feed rollers for aluminium wire ................107 10.1.3 Wire feed rollers for cored wire .................. 108 10.1.4 Wire guide ........................108 11 Appendix A ............................109 11.1 JOB-List ............................. 109 12 Appendix B ............................116 12.1 Overview of EWM branches ...................... 116 099-005402-EW501 29.06.2017...
- Page 6 Contents Notes on the use of these operating instructions 099-005402-EW501 29.06.2017...
-
Page 7: For Your Safety
For your safety Notes on the use of these operating instructions For your safety Notes on the use of these operating instructions DANGER Working or operating procedures which must be closely observed to prevent imminent serious and even fatal injuries. •... -
Page 8: Explanation Of Icons
For your safety Explanation of icons Explanation of icons Symbol Description Symbol Description Indicates technical aspects which the Activate and release/tap/tip user must observe. Switch off machine Release Switch on machine Press and keep pressed Switch Wrong Turn Numerical value – adjustable Correct Menu entry Signal light lights up in green... -
Page 9: Part Of The Complete Documentation
For your safety Part of the complete documentation Part of the complete documentation These operating instructions are part of the complete documentation and valid only in combination with all other parts of these instructions! Read and observe the operating instructions for all system components, especially the safety instructions! The illustration shows a general example of a welding system. - Page 10 For your safety Safety instructions WARNING Hazard when interconnecting multiple power sources! If a number of power sources are to be connected in parallel or in series, only a technical specialist may interconnect the sources as per standard IEC 60974-9:2010: Installation and use and German Accident Prevention Regulation BVG D1 (formerly VBG 15) or country-specific regulations.
- Page 11 For your safety Safety instructions CAUTION Smoke and gases! Smoke and gases can lead to breathing difficulties and poisoning. In addition, solvent vapour (chlorinated hydrocarbon) may be converted into poisonous phosgene due to the ultraviolet radiation of the arc! • Ensure that there is sufficient fresh air! •...
-
Page 12: Transport And Installation
For your safety Transport and installation CAUTION According to IEC 60974-10, welding machines are divided into two classes of electromagnetic compatibility (the EMC class can be found in the Technical data) > see 8 chapter: Class A machines are not intended for use in residential areas where the power supply comes from the low-voltage public mains network. - Page 13 For your safety Transport and installation CAUTION Risk of accidents due to incorrectly installed leads! Incorrectly installed leads (mains, control and welding leads or intermediate hose packages ) can present a tripping hazard. • Lay the supply lines flat on the floor (avoid loops). •...
-
Page 14: Intended Use
In case of unauthorised changes, improper repairs, non-compliance with specified deadlines for "Arc Welding Equipment – Inspection and Testing during Operation", and/or prohibited modifications which have not been explicitly authorised by EWM, this declaration shall be voided. An original document of the specific declaration of conformity is included with every product. -
Page 15: Service Documents (Spare Parts And Circuit Diagrams)
Intended use Documents which also apply 3.2.4 Service documents (spare parts and circuit diagrams) WARNING Do not carry out any unauthorised repairs or modifications! To avoid injury and equipment damage, the unit must only be repaired or modified by specialist, skilled persons! The warranty becomes null and void in the event of unauthorised interference. -
Page 16: Machine Description - Quick Overview
Machine description – quick overview Front view Machine description – quick overview Front view Figure 4-1 099-005402-EW501 29.06.2017... - Page 17 Machine description – quick overview Front view Item Symbol Description Transport bar Machine control > see 4.4 chapter Main switch, machine on/off 19-pole connection socket (analogue) For connecting analogue accessory components (remote control, welding torch control lead, etc.) Connection socket 7-pole (digital) For connecting digital accessory components (remote control, etc.).
-
Page 18: Rear View
Machine description – quick overview Rear view Rear view Figure 4-2 099-005402-EW501 29.06.2017... - Page 19 Machine description – quick overview Rear view Item Symbol Description Slide latch, lock for the protective cap Protective cap Cover for the wire feed mechanism and other operating elements. Depending on the machine series, additional stickers with information on the replacement parts and JOB lists will be located on the inside.
-
Page 20: Inside View
Machine description – quick overview Inside view Inside view Figure 4-3 099-005402-EW501 29.06.2017... - Page 21 Machine description – quick overview Inside view Item Symbol Description Welding torch function changeover switch (special welding torch required) Changing over programs or JOBs Infinite adjustment of welding performance. Wire spool holder Wire feed unit 099-005402-EW501 29.06.2017...
-
Page 22: Machine Control - Operating Elements
Machine description – quick overview Machine control – Operating elements Machine control – Operating elements Figure 4-4 Item Symbol Description Functional sequence > see 4.4.1 chapter Push-button, welding task selection (JOB) SP1/2/3 - Special JOBs (Phoenix Expert only). Pressing the push-button longer: special JOB selection. -
Page 23: Functional Sequence
Machine description – quick overview Machine control – Operating elements Item Symbol Description Rotary knob, welding parameter setting • ----------- Setting the welding task (JOB). With machines of the Phoenix Expert series, welding tasks are selected at the power source control. •... - Page 24 Machine description – quick overview Machine control – Operating elements Item Symbol Description Signal light, gas pre-flow time Setting range 0.0 s to 20.0 s Signal light, start program (P START • Wire speed:1% to 200% of the main program P •...
-
Page 25: Design And Function
Design and function Transport and installation Design and function WARNING Risk of injury from electric shock! Contact with live parts, e.g. welding current sockets, is potentially fatal! • Follow safety instructions on the opening pages of the operating instructions. • Commissioning may only be carried out by persons who have the relevant expertise of working with arc welding machines! •... -
Page 26: Workpiece Lead, General
Design and function Transport and installation 5.1.3 Workpiece lead, general CAUTION Risk of burning due to incorrect welding current connection! If the welding current plugs (machine connections) are not locked or if the workpiece connection is contaminated (paint, corrosion), these connections and leads can heat up and cause burns when touched! •... -
Page 27: Notes On The Installation Of Welding Current Leads
Design and function Transport and installation 5.1.5 Notes on the installation of welding current leads Incorrectly installed welding current leads can cause faults in the arc (flickering). Lay the workpiece lead and hose package of power sources without HF igniter (MIG/MAG) for as long and as close as possible in parallel. -
Page 28: Stray Welding Currents
Design and function Transport and installation 5.1.5.1 Stray welding currents WARNING Risk of injury due to stray welding currents! Stray welding currents can destroy protective earth conductors, damage machines and electronic devices and cause overheating of components, leading to fire. •... -
Page 29: Mains Configuration
Design and function Transport and installation 5.1.6.1 Mains configuration The machine may be connected to: • a three-phase system with four conductors and an earthed neutral conductor • a three-phase system with three conductors of which any one can be earthed, e.g. -
Page 30: Pressure Regulator Connection
Design and function Transport and installation 5.1.7.1 Pressure regulator connection Figure 5-7 Item Symbol Description Pressure regulator Shielding gas cylinder Output side of the pressure regulator Cylinder valve • Before connecting the pressure regulator to the gas cylinder, open the cylinder valve briefly to blow out any dirt. -
Page 31: Shielding Gas Volume Settings
Design and function Transport and installation • Connect crown nut of the shielding gas line to the G¼“ connecting nipple. 5.1.7.3 Shielding gas volume settings CAUTION Electric shocks! When setting the shielding gas quantity, high voltage ignition pulses or open circuit voltage are applied at the welding torch;... -
Page 32: Welding Data Display
Design and function Welding data display Welding data display To the left and right of the control displays are the "Parameter selection" buttons ( ). They are used to select welding parameters to be displayed. Each press of the button advances the display to the next parameter (LEDs next to the button indicate the selection). -
Page 33: Mig/Mag Welding
Design and function MIG/MAG welding MIG/MAG welding 5.3.1 Welding torch and workpiece line connection On delivery, the Euro torch connector is fitted with a capillary tube for welding torches with a steel liner. Conversion is necessary if a welding torch with a liner is used! •... -
Page 34: Wire Feed
Design and function MIG/MAG welding Item Symbol Description Welding torch hose package 19-pole connection socket (analogue) For connecting analogue accessory components (remote control, welding torch control lead, etc.) Welding torch connection (Euro or Dinse torch connector) Welding current, shielding gas and torch trigger integrated Workpiece "-"... - Page 35 Design and function MIG/MAG welding Standard D300 wire spool holder can be used. Adapters are required when using standardised basket coils (DIN 8559) > see 9 chapter. Figure 5-13 Item Symbol Description Carrier pin For fixing the wire spool Knurled nut For fixing the wire spool •...
-
Page 36: Changing The Wire Feed Rollers
Design and function MIG/MAG welding 5.3.2.3 Changing the wire feed rollers Figure 5-14 Item Symbol Description Tommy The tommy is used to secure the closure brackets of the wire feed rollers. Closure bracket The closure brackets are used to secure the wire feed rollers. Feed roll tensioner Fixing the clamping unit and setting the pressure. -
Page 37: Inching The Wire Electrode
Design and function MIG/MAG welding Wire feed roll overview table: Material Diameter Colour code Groove form mm inch .023 light pink monochrome .030 white .030 .035 white blue .040 bicolour .040 Steel blue .045 Stainless steel .052 green Brazing .060 black... - Page 38 Design and function MIG/MAG welding Figure 5-15 Item Symbol Description Welding wire Wire feed nipple Guide tube Adjusting nut • Extend and lay out the torch hose package. • Carefully unwind the welding wire from the wire spool and insert through the wire feed nipples up to the wire feed rollers.
-
Page 39: Spool Brake Setting
Design and function MIG/MAG welding 5.3.2.5 Spool brake setting Figure 5-17 Item Symbol Description Allen screw Securing the wire spool retainer and adjustment of the spool brake • Tighten the Allen screw (8 mm) in the clockwise direction to increase the braking effect. Tighten the spool brake until the wire spool no longer turns when the wire feed motor stops but without it jamming during operation! 5.3.3... -
Page 40: Choke Effect / Dynamics
(PB). This function is e.g. used for thin sheet welding to reduce the heat input in a controlled manner or for positional welding without the need for weaving. The combination of superPuls and other EWM welding processes offers a multitude of possibilities. For example, to enable the welding of vertical-up welds without the "Christmas tree" technique, when selecting program 1 >... -
Page 41: Burn-Back
Design and function MIG/MAG welding 5.3.4.4 Burn-back ENTER EXIT Figure 5-21 Display Setting/selection menu burn back Set burn back 5.3.5 Conventional MIG/MAG Welding (GMAW non synergic) It is only possible to change the JOB number when no welding current is flowing. 099-005402-EW501 29.06.2017... -
Page 42: Setting The Operating Point (Welding Output)
Design and function MIG/MAG welding Wire feed speed and welding voltage can be configured independently in two performance ranges: • For wire feed speeds below 8 m/min select JOB 188. • For wire feed speeds above 8 m/min select JOB 187. EXIT <... -
Page 43: Mig/Mag Operating Point
Design and function MIG/MAG welding 5.3.6 MIG/MAG operating point The operating point (welding power) is specified using the MIG/MAG one-knob operation principle, i.e. the user can specify either the welding current, the wire feed speed or the material thickness to define the operating point. -
Page 44: Coldarc / Coldarc Puls
Design and function MIG/MAG welding 5.3.7 coldArc / coldArc puls Heat-reduced, low-spatter short arc for high dimensional stability welding and brazing, plus root welding with excellent gap bridging capabilities. Figure 5-26 After selecting the coldArc process > see 5.3.4 chapter the following properties are available: •... -
Page 45: Forcearc / Forcearc Puls
Design and function MIG/MAG welding 5.3.8 forceArc / forceArc puls Low-heat, directionally stable and powerful high-performance arc with deep fusion penetration for the upper power range Unalloyed, low-alloy and high-alloy steels as well as high-tensile fine-grained steels. Figure 5-27 • Smaller included angle due to deep penetration and directionally stable arc •... -
Page 46: Rootarc/Rootarc Puls
Design and function MIG/MAG welding 5.3.9 rootArc/rootArc puls Short arc with perfect weld modelling capabilities for effortless gap bridging, especially for positional welding Figure 5-28 • Reduced spatter compared to standard short arc • Good root formation and secure sidewall fusion •... -
Page 47: Operating Modes (Functional Sequences)
Design and function MIG/MAG welding 5.3.11 Operating modes (functional sequences) There are optimum pre-sets for welding parameters such as gas pre-flow and burn back, etc. for numerous applications (although these can also be changed if required). 5.3.11.1 Explanation of signs and functions Symbol Meaning Press torch trigger... - Page 48 Design and function MIG/MAG welding Non-latched mode Figure 5-30 Step 1 • Press and hold torch trigger. • Shielding gas is expelled (gas pre-flows). • Wire feed motor runs at “creep speed”. • Arc ignites after the wire electrode makes contact with the workpiece; welding current flows. •...
- Page 49 Design and function MIG/MAG welding Non-latched operation with superpulse Figure 5-31 Step 1 • Press and hold torch trigger. • Shielding gas is expelled (gas pre-flows). • Wire feed motor runs at “creep speed”. • Arc ignites after the wire electrode makes contact with the workpiece; welding current flows. •...
- Page 50 Design and function MIG/MAG welding Special, non-latched Figure 5-32 Step 1 • Press and hold torch trigger • Shielding gas is expelled (gas pre-flows) • Wire feed motor runs at “creep speed”. • Arc ignites after the wire electrode makes contact with the workpiece, welding current is flowing (start program P for the time t START...
- Page 51 Design and function MIG/MAG welding Spot welding Figure 5-33 The ignition time t must be added to the spot time t start 1st cycle • Press and hold torch trigger • Shielding gas is expelled (gas pre-flows) • Wire feed motor runs at "creep speed" •...
- Page 52 Design and function MIG/MAG welding Special, non-latched with superpulse Figure 5-34 Step 1 • Press and hold torch trigger • Shielding gas is expelled (gas pre-flows) • Wire feed motor runs at “creep speed”. • Arc ignites after the wire electrode makes contact with the workpiece, welding current is flowing (start program P for the time t START...
- Page 53 Design and function MIG/MAG welding Latched mode Figure 5-35 Step 1 • Press and hold torch trigger • Shielding gas is expelled (gas pre-flows) • Wire feed motor runs at “creep speed”. • Arc ignites after the wire electrode makes contact with the workpiece; welding current flows. •...
- Page 54 Design and function MIG/MAG welding Latched mode with superpulse Figure 5-36 Step 1: • Press and hold torch trigger • Shielding gas is expelled (gas pre-flows) • Wire feed motor runs at “creep speed”. • Arc ignites after the wire electrode makes contact with the workpiece; welding current flows. •...
- Page 55 Design and function MIG/MAG welding Latched with changing welding method (process switching) To activate or set the function > see 5.3.16 chapter. Figure 5-37 1st cycle: • Press and hold torch trigger • Shielding gas is expelled (gas pre-flows) • Wire feed motor runs at "creep speed"...
- Page 56 Design and function MIG/MAG welding Latched special Figure 5-38 Step 1 • Press and hold torch trigger • Shielding gas is expelled (gas pre-flows) • Wire feed motor runs at “creep speed”. • Arc ignites after the wire electrode makes contact with the workpiece, welding current is flowing (start program P START Step 2...
- Page 57 Design and function MIG/MAG welding Special latched with changing welding method by tapping (process switching) To activate or set the function > see 5.3.16 chapter. Figure 5-39 1st cycle • Press and hold torch trigger. • Shielding gas is expelled (gas pre-flows) •...
- Page 58 Design and function MIG/MAG welding Special latched with changing welding method (process switching) To activate or set the function > see 5.3.16 chapter. Figure 5-40 1st cycle • Press and hold torch trigger • Shielding gas is expelled (gas pre-flows) •...
- Page 59 Design and function MIG/MAG welding Special, latched with superpulse Figure 5-41 Step 1 • Press and hold torch trigger • Shielding gas is expelled (gas pre-flows) • Wire feed motor runs at “creep speed”. • Arc ignites after the wire electrode makes contact with the workpiece, welding current is flowing (start program P for the time t START...
-
Page 60: Mig/Mag Program Sequence ("Program Steps" Mode)
Design and function MIG/MAG welding 5.3.12 MIG/MAG program sequence ("Program steps" mode) Certain materials, such as aluminium, require special functions in order to be able to weld them safely and at high quality. The latched special operating mode is used here with the following programs: •... -
Page 61: Mig/Mag Overview Of Parameters
Design and function MIG/MAG welding 5.3.12.2 MIG/MAG overview of parameters , and P are set as relative programs ex faxtory. They relate to percentages of the wire START feed value of the main program P . These programs can also be set in an absolute manner, if desired (see Setting of special parameter P21). -
Page 62: Example, Tack Welding (Non-Latched)
Design and function MIG/MAG welding 5.3.12.3 Example, tack welding (non-latched) Figure 5-45 Basic parameters Parameter Meaning / explanation Setting range GASstr Gas pre-flow time 0.0s to 20.0s GASend: Gas post-flow time 0.0s to 20s RUECK Wire burn-back length 2 to 500 "P "... -
Page 63: Example, Aluminium Welding (Latched Special)
Design and function MIG/MAG welding 5.3.12.5 Example, aluminium welding (latched special) Figure 5-47 Basic parameters Welding parameter Meaning / explanation Setting range GASstr Gas pre-flow time 0.0s to 20.0s GASend: Gas post-flow time 0.0s to 20.0s RUECK Wire burn-back length 2 to 500 "P "... - Page 64 Design and function MIG/MAG welding GASend: Gas post-flow time 0.0s to 20.0s RUECK Wire burn-back length 2 to 500 "P " start program START Welding parameter Meaning / explanation Setting range DVstart Wire speed 0% to 200% ustart Arc length correction -9.9V to +9.9V tstart Duration...
-
Page 65: Main Program A Mode
Design and function MIG/MAG welding 5.3.13 Main program A mode Different welding tasks or positions on a workpiece demand various welding performances (operating points) or welding programs. The following parameters are stored in each of the up to 16 programs: •... -
Page 66: Selecting Parameters (Program A)
Design and function MIG/MAG welding Example 1: Welding workpieces with different sheet metal thicknesses (non-latched) Figure 5-49 Example 2: Welding different positions on a workpiece (latched) Figure 5-50 Example 3: Aluminium welding of different sheet metal thicknesses (non-latched or latched special) Figure 5-51 Up to 16 programs (P... -
Page 67: Standard Mig/Mag Torch
Design and function MIG/MAG welding 5.3.14 Standard MIG/MAG torch The MIG welding torch trigger is essentially used to start and stop the welding process. Operating elements Functions • Torch trigger Start/stop welding Other functions are also possible by tapping the torch trigger, depending on the machine type and control configuration >... -
Page 68: Expert Menu (Mig/Mag)
Design and function MIG/MAG welding 5.3.16 Expert menu (MIG/MAG) The Expert menu has adjustable parameters stored that don’t require regular setting. The number of parameters shown may be limited, e.g. if a function is deactivated. 5.3.16.1 Selection EXIT ENTER NAVIGATION Figure 5-54 Display Setting/selection... - Page 69 Design and function MIG/MAG welding Display Setting/selection Setting JOB-dependent program limit/n-cycle The JOB-dependent program limit allows you to limit the number of programs that can be selected in the selected JOB to (2...9). This option can be set individually per JOB. In addition, a legacy option to set a "global program limit"...
-
Page 70: Tig Welding
Design and function TIG welding TIG welding 5.4.1 Welding torch and workpiece line connection Figure 5-55 Item Symbol Description Welding torch Welding torch hose package "-" welding current connection socket • TIG welding: Welding current connection for welding torch Welding torch connection (Euro or Dinse torch connector) Welding current, shielding gas and torch trigger integrated Workpiece Connection socket, "+"... -
Page 71: Welding Task Selection
Design and function TIG welding 5.4.2 Welding task selection EXIT Figure 5-56 5.4.2.1 Welding current setting Figure 5-57 5.4.3 TIG arc ignition 5.4.3.1 Liftarc Figure 5-58 The arc is ignited on contact with the workpiece: a) Carefully place the torch gas nozzle and tungsten electrode tip onto the workpiece and press the torch trigger (liftarc current flowing, regardless of the main current set). -
Page 72: Operating Modes (Functional Sequences)
Design and function TIG welding 5.4.4 Operating modes (functional sequences) 5.4.4.1 Explanation of signs and functions Symbol Meaning Press torch trigger Release torch trigger Tap torch trigger (press briefly and release) Shielding gas flowing Welding output Gas pre-flows Gas post-flows Non-latched Special, non-latched Latched... - Page 73 Design and function TIG welding Non-latched mode Figure 5-59 Selection • Select non-latched operating mode Step 1 • Press and hold torch trigger. • Shielding gas is expelled (gas pre-flows). The arc is ignited using liftarc. • Welding current flows with pre-selected setting. Step 2 •...
- Page 74 Design and function TIG welding Latched mode Figure 5-61 Selection • Select latched operating mode Step 1 • Press and hold torch trigger • Shielding gas is expelled (gas pre-flows) The arc is ignited using liftarc. • Welding current flows with pre-selected setting. Step 2 •...
- Page 75 Design and function TIG welding Latched special Figure 5-62 Selection • Select latched special mode Step 1 • Press and hold torch trigger. • Shielding gas is expelled (gas pre-flows). The arc is ignited using liftarc. • Welding gas flows at pre-selected setting in start program "P ".
-
Page 76: Tig Program Sequence ("Program Steps" Mode)
Design and function TIG welding 5.4.5 TIG program sequence ("Program steps" mode) Figure 5-63 Basic parameters Item Meaning/explanation Setting range Gas pre-flow time 0 s to 0.9 s START 0% to 200% Ignition current Duration (start program) 0 s to 20 s Slope duration from P to P 0 s to 20 s... -
Page 77: Mma Welding
Design and function MMA welding MMA welding CAUTION Risk of crushing and burns! When changing stick electrodes there is a risk of crushing and burns! • Wear appropriate and dry protective gloves. • Use an insulated pair of tongs to remove the used stick electrode or to move welded workpieces. -
Page 78: Welding Task Selection
Design and function MMA welding 5.5.2 Welding task selection EXIT Figure 5-65 5.5.2.1 Welding current setting Figure 5-66 5.5.3 Arcforce Figure 5-67 Setting: • Negative values: rutile electrode types • Values at zero: basic electrode types • Positive values: cellulose electrode types 5.5.4 Hotstart The hot start function improves the arc striking. -
Page 79: Antistick
Design and function Access control 5.5.5 Antistick Anti-stick prevents the electrode from annealing. If the electrode sticks in spite of the Arcforce device, the machine automatically switches over to the minimum current within about 1 second to prevent the electrode from overheating. Check the welding current setting and correct according to the welding task! Figure 5-69 5.5.6... -
Page 80: Power-Saving Mode (Standby)
Design and function Power-saving mode (Standby) Power-saving mode (Standby) You can activate the power-saving mode by either pressing the push-button > see 4.4 chapter for a prolonged time or by setting a parameter in the machine configuration menu (time-controlled power- saving mode ) >... -
Page 81: Automation Interface
Design and function Interfaces for automation 5.9.1 Automation interface WARNING No function of the external interrupt equipment (emergency stop switch)! If the emergency stop circuit has been set up using an external interrupt equipment connected to the interface for automated welding, the machine must be configured for this setup. -
Page 82: Remote Control Connection Socket, 19-Pole
Design and function Interfaces for automation 5.9.2 Remote control connection socket, 19-pole Figure 5-71 Signal form Short description Output Connection for PE cable screen Output Reference voltage for potentiometer 10 V (max. 10 mA) Control voltage specification (0 V–10 V) – wire feed speed Input Output Reference potential (0 V) -
Page 83: Pc Interface
Design and function PC interface 5.10 PC interface The manufacturer's warranty becomes void if non-genuine parts are used! • Only use system components and options (power sources, welding torches, electrode holders, remote controls, spare parts and replacement parts, etc.) from our range of products! •... -
Page 84: Selecting, Changing And Saving Parameters
Design and function Special parameters (advanced settings) 5.11.1 Selecting, changing and saving parameters ENTER EXIT NAVIGATION Figure 5-72 Display Setting/selection Ramp time for wire inching 0 = ------- normal inching (10s ramp time) 1 = ------- fast inching (3s ramp time) (Ex works) Block program "0"... - Page 85 Design and function Special parameters (advanced settings) Display Setting/selection Lat. and sp. lat. tapping start 0 = -------- no latched tapping start (Ex works) 1 = -------- latched tapping start possible One or two-wire feed operation 0 = -------- single operation (Ex works) 1 = -------- dual operation, this unit is the "master"...
-
Page 86: Reset To Factory Settings
Design and function Special parameters (advanced settings) Display Setting/selection Program settings for relative programs 0 = ------- Combined setting of relative programs possible (ex works). 1 = ------- Individual setting of relative programs possible (ex works). Correction or nominal voltage display 0 = ------- Correction voltage display (ex works). - Page 87 Design and function Special parameters (advanced settings) Special cycle in the operating modes special latched and non-latched (P5) With the special sequence activated, the start of the welding process changes as follows: Sequence for special non-latched mode/special latched mode: • Start program "P "...
- Page 88 Design and function Special parameters (advanced settings) Setting the correction range: • Activate the “correction operation” special parameter (P7=1) and save. > see 5.11.1 chapter • Key switch to position "1". • Set the correction range as follows: EXIT Figure 5-75 •...
- Page 89 Design and function Special parameters (advanced settings) Switching programs with the standard torch trigger (P8) Special latched (latched absolute program sequence) • Cycle 1: absolute program 1 is run • Cycle 2: absolute program 2 is run after completion of "tstart". •...
- Page 90 Design and function Special parameters (advanced settings) The number of programs (P ) corresponds to the cycle number specified under N cycle. 1st cycle • Press and hold torch trigger. • Shielding gas is expelled (gas pre-flows). • Wire feed motor runs at "creep speed". •...
- Page 91 Design and function Special parameters (advanced settings) JOB list switching (P12) Value Designation Explanation Task-oriented The JOB numbers are sorted by welding wires and shielding gases. JOB list JOB numbers may be skipped during selection where relevant. Actual JOB list JOB numbers correspond to the actual memory cells.
- Page 92 Design and function Special parameters (advanced settings) Lower and upper limits of the remote JOB changeover process (P13, P14) The highest and lowest JOB numbers which can be selected using accessory components, such as the PowerControl 2 torch. Avoids an accidental changeover into undesirable or undefined JOBs. Hold function (P15) Hold function active (P15 = 1) •...
- Page 93 Design and function Special parameters (advanced settings) Switching the operating mode and welding type using the wire feed control (P18) Selecting the operating mode (non-latched, latched, etc.) and welding type (MIG/MAG standard welding/pulse arc welding) at the wire feed unit control or the welding machine control. •...
-
Page 94: Aligning The Cable Resistance
Design and function Aligning the cable resistance 5.12 Aligning the cable resistance The resistance value of cables can either be set directly or it can be aligned using the power source. The factory setting of the power sources is 8 mΩ. This value correponds to a 5 m earth cable, a 1.5 m intermediate hose package and a 3 m water-cooled welding torch. -
Page 95: Machine Configuration Menu
Design and function Machine configuration menu 1 Preparation • Switch off the welding machine. • Unscrew the gas nozzle from the welding torch. • Trim the welding wire, so that it is flush with the contact tip. • Retract the welding wire a little (approx. 50 mm) on the wire feeder. There should now be no more welding wire in the contact tip. - Page 96 Design and function Machine configuration menu Display Setting/selection Lead resistance 1 Lead resistance for the first welding circuit 0 mΩ–60 mΩ (8 mΩ ex works). Lead resistance 2 Lead resistance for the second welding circuit 0 mΩ–60 mΩ (8 mΩ ex works). Only qualified service personnel may change the parameters! Only qualified service personnel may change the parameters! Time-based power-saving mode >...
-
Page 97: Maintenance, Care And Disposal
Maintenance, care and disposal General Maintenance, care and disposal General DANGER Risk of injury due to electrical voltage after switching off! Working on an open machine can lead to fatal injuries! Capacitors are loaded with electrical voltage during operation. Voltage remains present for up to four minutes after the mains plug is removed. -
Page 98: Maintenance Work, Intervals
A periodic test according to IEC 60974-4 "Periodic inspection and test" has to be carried out. In addition to the regulations on testing given here, the relevant local laws and regulations must also be observed. For more information refer to the "Warranty registration" brochure supplied and our information regarding warranty, maintenance and testing at www.ewm-group.com! 099-005402-EW501 29.06.2017... -
Page 99: Disposing Of Equipment
In addition to this, returns are also possible throughout Europe via EWM sales partners. Meeting the requirements of RoHS We, EWM AG in Mündersbach, Germany, hereby confirm that all products which we supply to you and that are subject to the RoHS directive comply with RoHS requirements (also see applicable EC directives on the Declaration of Conformity on your machine). -
Page 100: Rectifying Faults
Rectifying faults Checklist for rectifying faults Rectifying faults All products are subject to rigorous production checks and final checks. If, despite this, something fails to work at any time, please check the product using the following flowchart. If none of the fault rectification procedures described leads to the correct functioning of the product, please inform your authorised dealer. -
Page 101: Error Messages (Power Source)
Rectifying faults Error messages (power source) Error messages (power source) A welding machine error is indicated by an error code being displayed (see table) on the display on the machine control. In the event of a machine error, the power unit is shut down. The display of possible error numbers depends on the machine version (interfaces/functions). -
Page 102: Resetting Jobs (Welding Tasks) To The Factory Settings
Rectifying faults Resetting JOBs (welding tasks) to the factory settings Error Category Possible cause Remedy (Err) Machine incompatible Check machine used Software update required Inform Service. Categories legend (resetting the error) a) The error message will disappear once the error has been rectified. b) The error message can be reset by pressing a push-button: Welding machine control Push-button... -
Page 103: Resetting All Jobs
Rectifying faults Resetting JOBs (welding tasks) to the factory settings 7.3.2 Resetting all JOBs JOBs 1–128 and 170–256 will be reset. Custom JOBs 129–169 are maintained. ENTER RESET EXIT Figure 7-2 099-005402-EW501 29.06.2017... -
Page 104: Technical Data
Technical data alpha Q 330 Technical data Performance specifications and guarantee only in connection with original spare and replacement parts! alpha Q 330 MIG/MAG Setting range for welding current 5 A–330 A Setting range for welding voltage 14.3 V–30.5 V 20.2 V–33.2 V 10.2 V–23.2 V Duty cycle at 40 °C/40%... -
Page 105: Accessories
Accessories General accessories Accessories Performance-dependent accessories like torches, workpiece leads, electrode holders or intermediate hose packages are available from your authorised dealer. General accessories Type Designation Item no. Cool71 U42 Air cooling unit, heavy-duty pump and enhanced 090-008201-00502 cooling cool71 U43 Cooling unit with centrif. -
Page 106: 19-Pole Connection
Accessories Remote control/connecting and extension cable Type Designation Item no. FRV 7POL 0.5 m Extension/connecting cable 092-000201-00004 FRV 7POL 1 m Extension/connecting cable 092-000201-00002 FRV 7POL 5 m Extension/connecting cable 092-000201-00003 FRV 7POL 10 m Extension/connecting cable 092-000201-00000 FRV 7POL 20 m Extension/connecting cable 092-000201-00001 FRV 7POL 25M... -
Page 107: Replaceable Parts
Replaceable parts Wire feed rollers Replaceable parts The manufacturer's warranty becomes void if non-genuine parts are used! • Only use system components and options (power sources, welding torches, electrode holders, remote controls, spare parts and replacement parts, etc.) from our range of products! •... -
Page 108: Wire Feed Rollers For Cored Wire
Replaceable parts Wire feed rollers 10.1.3 Wire feed rollers for cored wire Type Designation Item no. FUEL 4R 0.8 MM/0.03 INCH Drive roll set, 37 mm, 4 rolls, V-groove/knurled for 092-002848-00008 WHITE/ORANGE flux cored wire FUEL 4R 1.0 MM/0.04 INCH Drive roll set, 37 mm, 4 rolls, V-groove/knurled for 092-002848-00010 BLUE/ORANGE... -
Page 109: Job-List
Appendix A JOB-List Appendix A 11.1 JOB-List JOB no. Processes Material Diameter [mm] Standard GMAW/pulse G3Si1/G4Si1 100% CO2 Standard GMAW/puls G3Si1/G4Si1 100% CO2 Standard GMAW/puls 100% CO2 G3Si1/G4Si1 Standard GMAW/puls 100% CO2 G3Si1/G4Si1 Standard GMAW/puls 100% CO2 G3Si1/G4Si1 Standard GMAW/puls G3Si1/G4Si1 Ar-82/CO2-18 (M21) Standard GMAW/puls... - Page 110 Appendix A JOB-List JOB no. Processes Material Diameter [mm] coldArc/coldArc puls Ar-97,5/CO2-2,5 (M12) CrNi 19 9/1.4316 coldArc/coldArc puls AlMg Ar-100 (I1) coldArc/coldArc puls Ar-100 (I1) AlMg coldArc/coldArc puls Ar-100 (I1) AlSi coldArc/coldArc puls AlSi Ar-100 (I1) coldArc/coldArc puls Ar-100 (I1) Al99 coldArc/coldArc puls Al99...
- Page 111 Appendix A JOB-List JOB no. Processes Material Diameter [mm] Brazing CuSi Ar-97,5/CO2-2,5 (M12) Brazing CuSi Ar-97,5/CO2-2,5 (M12) Brazing CuSi Ar-100 (I1) Brazing CuSi Ar-100 (I1) Brazing CuSi Ar-100 (I1) Brazing CuSi Ar-100 (I1) Brazing CuAl Ar-97,5/CO2-2,5 (M12) Brazing CuAl Ar-97,5/CO2-2,5 (M12) Brazing CuAl Ar-97,5/CO2-2,5 (M12)
- Page 112 Appendix A JOB-List JOB no. Processes Material Diameter [mm] Block 2/ JOB10 Block 3/ JOB1 Block 3/ JOB2 Block 3/ JOB3 Block 3/ JOB4 Block 3/ JOB5 Block 3/ JOB6 Block 3/ JOB7 Block 3/ JOB8 Block 3/ JOB9 Block 3/ JOB10 171* pipeSolution G3Si1/G4Si1...
- Page 113 Appendix A JOB-List JOB no. Processes Material Diameter [mm] Ar-82/CO2-18 (M21) Surfacing G3Si1/G4Si1 Surfacing Ar-82/CO2-18 (M21) G3Si1/G4Si1 Surfacing Ar-82/CO2-18 (M21) G3Si1/G4Si1 Surfacing Ar-82/CO2-18 (M21) G3Si1/G4Si1 Surfacing Ar-82/CO2-18 (M21) G3Si1/G4Si1 Ar-100 (I1) 220* coldArc - St/Al ZnAl coldArc - St/Al Ar-100 (I1) 221* ZnAl coldArc - St/Al...
- Page 114 Appendix A JOB-List JOB no. Processes Material Diameter [mm] Standard GMAW/puls Ar-70/He-30 (I3) NiCr 617 Standard GMAW/puls Ar-70/He-30 (I3) NiCr 617 Standard GMAW/puls Ar-70/He-30 (I3) NiCr 625 Standard GMAW/puls Ar-70/He-30 (I3) NiCr 625 Standard GMAW/puls Ar-70/He-30 (I3) NiCr 625 Standard GMAW/puls NiCr 625 Ar-67,95/He-30/H2-2 / CO2-0,05...
- Page 115 Appendix A JOB-List JOB no. Processes Material Diameter [mm] forceArc/forceArc puls CrNi 22 9 3a/1.4462 Ar-97,5/CO2-2,5 (M12) forceArc/forceArc puls CrNi 25 20/1.4842 Ar-97,5/CO2-2,5 (M12) forceArc/forceArc puls CrNi 25 20/1.4842 Ar-97,5/CO2-2,5 (M12) forceArc/forceArc puls CrNi 22 12/1.4829 Ar-97,5/CO2-2,5 (M12) forceArc/forceArc puls CrNi 22 12/1.4829 Ar-97,5/CO2-2,5 (M12) coldArc/coldArc puls...
-
Page 116: Overview Of Ewm Branches
Appendix B Overview of EWM branches Appendix B 12.1 Overview of EWM branches 099-005402-EW501 29.06.2017...
Need help?
Do you have a question about the alpha Q 330 Progress puls HP MM TKM and is the answer not in the manual?
Questions and answers