Table of Contents
Advertisement
Advertisement
Table of Contents

Subscribe to Our Youtube Channel
Related Manuals for Artillery Sidewinder X3 Pro


Summary of Contents for Artillery Sidewinder X3 Pro
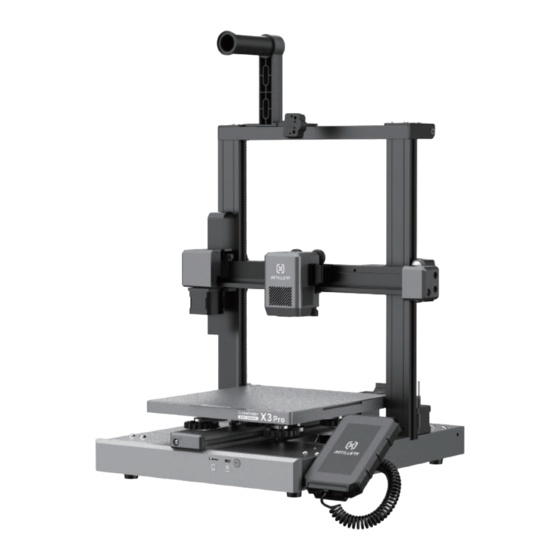
- Page 1 Sidewinder X3 Pro 3D Printer User Manual...
- Page 2 Concerning Thank you for you choosing ARTILLERY's products. For your convenience, please read this manual carefully before use, and strictly follow the instructions in the manual to operate. We are always ready to provide the excellent service to you. No matter what problems you encounter during use, please contact us according to the phone number and email address which provided at the end of the manual.
-
Page 3: Table Of Contents
CONTENTS 01.Device Information 01-03 1.1 Equipment introduction 01-01 1.2 Equipment parameters 02-02 1.3 Packing list 03-03 02.Unpacking operation 03-03 2.1 Product installation 04-05 03.Introduction to Device Screen Interface 06-08 3.1 Main interface 06-06 3.2 Common functions 07-07 3.3 Preparation for leveling 08-08 04.Printing for the first time 09-12... - Page 4 1. Device Information 1.1 Equipment introduction Material tube Material rack Broken material detector Extruder components Screw Couplings TF card interface Type-C interface Power socket Reset button Touch screen Power switch...
-
Page 5: Device Information
1.Device Information 1.2 Equipment parameters Basic parameters Product model Sidewinder X3 Pro Machine dimensions 425mm*450mm*507mm Print size 240mm*240mm*260mm The principle of printing Print speed 30-250mm/s Nozzle diameter 0.4mm Operation environment temperature 10-35 ℃ Extruder type Proximal extrusion Compatible material PLA/TPU/PETG/ABS/PET/Carbon Maximum nozzle temperature 300°C... -
Page 6: Packing List
1.Device Information 1.3 Packing list List of main parts and components List of accessories and tools Ziplock bag x2 Wrench and screwdriver x1 Teflon tube x1 Pedestal assembly x1 Gantry x1 Material tube x1 Material rack x1 Cutting pliers x1 Pass the needle x1 Metal blade x1 Nozzle x1... -
Page 7: Unpacking Operation
2. Unpacking operation 2.1 Product installation Assemble the material rack as shown in the following figure, install the Make the gantry align to the slot which on the base, and make sure roller onto the pre installed bearings on the sheet metal of the two the cable pins are correctly aligned with the slots. -
Page 8: Product Installation
2. Unpacking operation 2.1 Product installation Connect the ribbon cable (1 is the lighting port, 2 is the break When one wheel is not pressed against the aluminum profile, loosen detection port, and 3 is the motor port). 6 pieces screws which fix both side Z axes, then tightly twist again. Use a hex wrench to adjust the tightness of the eccentric wheel of the hot bed and nozzle slider. -
Page 9: Introduction To Device Screen Interface
3. Introduction of the device screen interface 3.1 Main interface Tools Print Hot bed Nozzle temperature temperature Fan speed Temperature Extrude Folder 1 Folder 2 Main Move Axis Filament Change Folder 3 Folder 4 Manual Leveling Auto Leveling 50/88° 50/88°C 100% Folder 5 Folder 6... - Page 10 3. Introduction of the device screen interface 3.2 Commonly used functions Temperature Linear Adv K = 0 . 1 Save Temperature Linear forward 50/88° 50/88°C Increase Decrease Se l e ct 1°C 10 °C 10 0 °C T em p . U p T e mp .
-
Page 11: Preparation For Leveling
3.Introduction of the device screen interface 3.3 Preparation for leveling Go to "Tools" → "Print Z-axis offset" and adjust the Z-axis offset Tools Manual Leveling value so that the height from the nozzle to the platform is approximately the thickness of A4 paper (0.08-0.1mm). Temperature Extrude First Point... -
Page 12: Printing For The First Time
4.Printing for the first time 4.1 Local printing This printer works with most slicing software, such as Slic3r, Cura, Simplify3D, etc. But we'll cover Cura software in detail and let you know how to set it up, convenient to your first time print. First, please download it from its official website. - Page 13 4.Printing for the first time 4.1 Local printing In "Add a non-networked printer", scroll down to Artillery and select Set X (width), Y (depth) to 240, Z (height) to 260. Make sure you Artillery Genius, then type the machine model in the "Printer Name".
- Page 14 4.Printing for the first time 4.1 Local printing Change "Compatible material diameter" to 1.75. Click the "Slice" button. Drag and drop STL files (or other supported formats) onto slicing software, or use File -> Open File (O)... Load the model file. From the You can click “Save to removable disk”...
- Page 15 4.Printing for the first time 4.1 Local printing Insert the TF card into the printer's interface. Click "Print" on the main menu and select "File" corresponding to "Print File". When the nozzle and heating bed reach the given temperature, the X, Y and Z axes will return to the zero position, and then printing will begin.
-
Page 16: Machine Function Description
5. Machine function description 5.1 Loading Pass the consumables through the Hang the consumables on the rack. In order to successfully complete broken material detection module printing, the end position of the along the extruder hole first then consumables should be incline insert into feed port location. -
Page 17: Return Material
5. Machine function description 5.2 Return material After preheating the nozzle, push the consumables forward a little, then pull out the consumables. Enter into "Tools→Extrusion→Return" to perform printer return material operation. Main Tools Extrude E:100 Temperature Extrude 50/88° 50/88°C 100% T: 200°... -
Page 18: Warmly Reminding And Daily Maintenance
6. Warmly reminding and daily maintenance 6.1 Printing Precautions 6.1.1 Lubrication maintenance 300 hours of regular maintenance: please regularly clean and lubricate the green area in the picture, grease just needs to be applied to the middle section, and automatic spreading evenly through movement. -
Page 19: Printing Precautions
6. Warmly reminding and daily maintenance 6.1 Printing Precautions 6.1.2 Flexible platform use and maintenance Wait for the printed model to cool down and pick out Remains of platform consumables can be When the first layer of the model does not from internal equipment with the flexible platform, scraped off with a blade. -
Page 20: Maintenance Projects
6.2 Maintenance projects In the process of use, if there is no solution to the problem: You can log in the official website of ARTILLERY (www.artillery3d.com) to find information on software and hardware, contact information, equipment operation, equipment maintenance, etc. - Page 21 As far as your use of this manual is concerned, even if Artillery has been advised of any possible cause in no event shall Artillery be liable to you for direct or indirect, economic, commercial, special, consequential, incidental, exemplary or consequential damages.
- Page 22 Shenzhen Yuntu Chuangzhi Technology Co., Ltd. Address: Room 1601-02, Building 11, Tianan Yungu Phase 2, No. 2018 Xuegang North Road, Bantian Community, Longgang District, Shenzhen Email: ytcz@artillery3d.com Website: www.artillery3d.com...
Need help?
Do you have a question about the Sidewinder X3 Pro and is the answer not in the manual?
Questions and answers
Hola. Quería saber dónde va el cable rojo