
Related Manuals for Astor-Bannerman Invincible


Summary of Contents for Astor-Bannerman Invincible
- Page 1 Astor Invincible Robust Height Adjustable Changing and Showering Table Installation and User Guide 50.154.08.0003 (Rev1)
-
Page 2: Table Of Contents
Contents Introduction ..............................3 Product labels............................4 Warranty ..............................5 Caution, safety information & checks ..................... 6 Standard symbols ........................6 General safety instructions ....................8 EMC declaration ........................9 Regular checks ......................... 10 Finding your way round the product ..................... 11 Quick guide to operation ........................ -
Page 3: Introduction
1 Introduction The Astor Invincible is believed by many experts to be the most robust height adjustable K K B B 3 3 0 0 0 0 0 0 A A d d j j u u s s t t a a b b l l e e H H e e i i g g h h t t C C h h a a n n g g i i n n g g S S t t a a t t i i o o n n... -
Page 4: Product Labels
2 Product labels 2 Product Labels The labels shown below are labels that will be placed on your Astor Invincible. An explanation of all symbols found on our products can be found in Section 4. The labels shown below are labels that will be placed on your Astor Invincible. -
Page 5: Warranty
Warranty 3 Warranty Once registered, this product has a 3 year warranty against all defects in manufacture of the product. This does not affect your statutory rights. To validate your warranty and for full terms and conditions, please register your product and your details immediately: online at: www.astorbannerman.co.uk/services email our support team: support@astorbannerman.co.uk... -
Page 6: Caution, Safety Information & Checks
Caution, safety information & checks 4.1 Standard symbols Below are some common symbols used throughout this document and on the product labelling. This product is UKCA Marked and is certifi ed to BS EN 60601-1:2006+A12:2014 Medical electrical Equipment General Requirements for Basic Safety and Essential Performance, and to BS EN 60601-1-2:2015 for EMC. It also complies with Supply of Machinery (Safety) Regulations 2008, Electrical Equipment (Safety) Regulations 2016, BS EN 349:1993+A1:2008 Minimum gaps to avoid crushing parts of the human body, ISO 10535 Hoists for the transfer of disabled persons, ISO 17966 Assistive products for personal hygiene that support users and BS EN 62262. - Page 7 Caution, safety information & checks 4.1 Standard symbols (cont.) Parts of this product can be recycled. Parts of this product must be separated when being disposed of. The battery used in this product contains Lead. Details of product manufacturer. Symbol indicated the date of manufacture. This product has been tested for water ingress in accordance with IPX4.
-
Page 8: General Safety Instructions
S S e e c c t t i i o o n n 4 4 . . 2 2 G G e e n n e e r r a a l l s s a a f f e e t t y y i i n n f f o o r r m m a a t t i i o o n n Caution, safety information &... -
Page 9: Emc Declaration
4.3 EMC declaration The Astor Invincible changing table has been tested for compliance to EN 60601-1-2:2015 and is intended for use in the elec- tromagnetic environments specified below. The responsible organisation should assure that it is used in such an environment. -
Page 10: Regular Checks
Caution, safety information & checks 4.4 Regular checks Please note that the cover must be removed to complete servicing tasks (this includes all annual tasks) which must only be done by a qualifi ed person. DO NOT carry out these checks or service this changing table when a person is lying on the stretcher. -
Page 11: Finding Your Way Round The Product
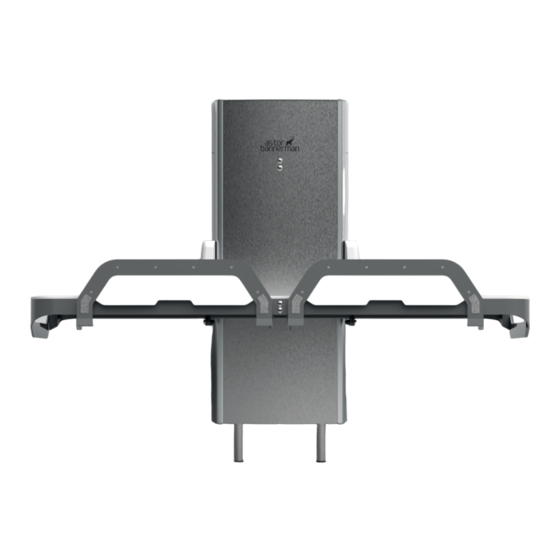
Finding your way around the product Astor Invincible 5 Finding your way round the product 5 Finding your way round the product Front cover label Front cover label Front cover Emergency Stop Raise / lower controls Gas spring cover Stretcher... -
Page 12: Quick Guide To Operation
Quick guide to operation 6.1 Daily checks Carry out the following checks daily before using the changing table: • Check the weight of the user and ensure the equipment is rated for the weight to be lifted. • Check the mains electrical supply is connected and turned on, see indicator light information Section 6.4. -
Page 13: How To Stow The Stretcher
Quick guide to operation 6.3 How to stow the stretcher The changing table is securely held in the stowed position by gas springs. There is no release mechanism to operate before deploying the stretcher. To move the bed from the stowed position: •... -
Page 14: Check The Status Of The Changing Table
Quick guide to operation Astor Invincible 6.4 Check the status of the changing table The changing table has two indicator lights at the side of the main unit. (Fig 6.4a) 6.3 Check the status of the changing table The top indicator light will illuminate green when there is power to the device. The light on the The changing table has two indicator lights at the side of the main unit (See figure 6.3 a) -
Page 15: Adjusting The Height Of Your Changing Table
Astor Invincible Astor Invincible Astor Invincible Astor Invincible Quick guide to operation 6 Quick guide to operation (cont.) 6 Quick guide to operation (cont.) 6.4 Adjusting the height of your changing table 6 Quick guide to operation (cont.) 6 Quick guide to operation (cont.) 6.4 Adjusting the height of your changing table... -
Page 16: Using The Guards
Quick guide to operation 6.6 Using the guards The Astor Invincible changing table has two separate front guards. These can be used together or independently. ACTION: Always deploy the guards before moving the guards before moving the changing table with a person changing table with a person on the stretcher. -
Page 17: Cleaning & Care
Cleaning & Care 7 Cleaning & Care The Astor Invincible changing table should be regularly cleaned and must be cleaned between users to prevent the risk of cross contamination of infection. Cleaning: • Before cleaning, try a small test fi rst in an inconspicuous area with the cleaning agent you are proposing to use. -
Page 18: Troubleshooting
Troubleshooting 8 Troubleshooting Problem: The stretcher won't move up or down Check if the emergency stop has been activated, to release turn the emergency Suggestion: stop button clockwise. Check that the mains power supply is switched on. Check that you are using the correct button for the direction of your choice. -
Page 19: Technical Specification
Technical specification 9 Technical specification 110VAC-240VAC, 50/60Hz, 382VA AC input Class I power supply Power supply Applied part type 'B' Applied part Lead acid battery/ "non-spillable" Input 30V - Output 24V Battery specification Supplier reference - TiMotion (TBB2-4307-001) TiMotion TBB2 1.2A Battery model 5Amp fuses (External to the device, part of the mains supply system) Fuses... -
Page 20: Overall Dimensions
Astor Invincible Astor Invincible Astor Invincible 10 Overall Dimensions 10 Overall Dimensions 10 Overall Dimensions Overall dimensions 10 Overall dimensions 75 1/4” (1911 mm) or 70 7/8” (1800 mm) 75 1/4” (1911 mm) or 70 7/8” (1800 mm) 75 1/4” (1911 mm) or 70 7/8” (1800 mm) 75 1/4”... -
Page 21: Pre-Installation
If the isolator is out of the view of personnel servicing the equipment then it shall be capable of being locked in the off position. • The Invincible is a wall-mounted, fl oor standing product. • This product must be connected to a suitable mains earth. - Page 22 Pre-installation Astor Invincible Astor Invincible Astor Invincible 11.1 Fixing requirement (cont.) 11.1 Fixing requirement (cont.) 11.1 Fixing requirement (cont.) Fig. 11.1 Preparing the wall Fig. 11.1 Preparing the wall Fig. 11.1 Preparing the wall Fig 11.1 Preparing the wall 50.154.08.0003 (Rev1)
-
Page 23: Fitting The Emergency Stop & Switched, Waterproof, Flex Outlet
Take care not to damage the connector at th Take care not to damage the connector · · · SBU later during installation. SBU later during installation. SBU later during installation. Astor Invincible Astor Invincible Astor Invincible Astor Invincible Astor Invincible Astor Invincible Astor Invincible Astor Invincible... -
Page 24: Finish The Pre-Installation & Checks
· This wall can then be blended/painted so to appear as a finished wall. blended / painted so to appear as a finished wall. Fig. 11.3 Fixing points of Invincible SBU Fig 11.3 Fixing points of Invincible SBU Checks Checks: The wall must be load bearing and strong enough to support 1250lbs / 566kg. -
Page 25: Installation
Installation Invincible 12 Installation ation The Invincible must be installed by a competent and qualified technician in compliance with local and national building code standards. Astor Invincible e must be installed by a competent and qualified technician in compliance d national building code standards. - Page 26 Installation stor Invincible 12.1 Preparing the standard build unit for installation (SBU) vincible Fig 12.1d • Each gas spring cover can then be removed by rotating up and away, as shown in Fig 12.1b. The front cover can now be removed.
- Page 27 Astor Invincible K K B B 3 3 0 0 0 0 0 0 A A d d j j u u s s t t a a b b l l e e H H e e i i g g h h t t C C h h a a n n g g i i n n g g S S t t a a t t i i o o n n...
-
Page 28: Connecting The Emergency Stop
Installation Astor Invincible Astor Invincible 12.2 Connecting the Emergency Stop 12.2 Connecting the Emergency Stop 12.2 Connecting the emergency stop Provision for the emergency stop should have been previously completed in accordance with Section 11. The cable should be hidden in the wall and at least 11 13/16” (300 mm) of cable is... -
Page 29: Connecting The Battery
Installation 12.3 Connecting the battery The product has been provided without the battery connected. • Looking at the rear of the product, locate the female connector, as shown in Fig 12.3a. • Locate the male connector of the emergency stop which should be coming from the SBU. •... -
Page 30: Connecting The Power Outlet
Installation Astor Invincible 12.4 Connecting the power outlet WARNING: Ensure the mains electrical supply is isolated from power while 12.3 Connecting the Power Outlet connecting the product to the mains electrical supply. connecting the product to the mains electrical supply. -
Page 31: Attaching The Standard Build Unit To The Wall
Astor Invincible Installation 12.4 Attaching the SBU to the Wall The wall must have been suitably prepared and reinforced as explained in Section 11 during · 12.5 Attaching the standard build unit to the wall the pre-installation phase. • The wall must have been suitably prepared and reinforced as explained in Section 11 during the pre-installation phase. - Page 32 Installation Astor Invincible 12.4 Attaching the SBU to the Wall 12.5 Attaching the standard build unit to the wall • With the product in place, mark out the five fixing holes, set the SBU aside and then pilot With the product in place, mark out the five fixing holes, set the SBU aside and then pilot drill ·...
-
Page 33: Connect The
Installation Astor Invincible 12.6 Connect the front cover The front cover has two buttons which need to be connected to the cables from the SBU. 12.5 Connect the Front Cover Care must be taken to ensure loose cable is left in a position where it will not become tangled. -
Page 34: Refit The
Installation K K B B 3 3 0 0 0 0 0 0 A A d d j j u u s s t t a a b b l l e e H H e e i i g g h h t t C C h h a a n n g g i i n n g g S S t t a a t t i i o o n n KB3000 Adjustable Height Changing Station I I n n s s t t a a l l l l a a t t i i o o n n 1 1 2 2 . -
Page 35: Fit The Stretcher
Astor Invincible Installation 12.7 Fit the Stretcher CAUTION: Take care when fitting the stretcher to the product. This is a heavy item and 12.8 Fit the stretcher we recommend two people fit the stretcher. CAUTION: Take care when fi tting the stretcher to the product. This is a heavy item and we recommend two people install the stretcher. - Page 36 Astor Invincible Installation 12.7 Fit the Stretcher Astor Invincible With two people, lift the stretcher vertically and slot the SBU arms in the middle of each 12.8 Fit the stretcher · stretcher bracket pair. • With two people, lift the stretcher vertically and slot the SBU arms in the middle of each...
-
Page 37: Connect The Stretcher
Astor Invincible Installation 12.8 Connect the Stretcher 12.9 Connect the stretcher The cable coming from the stretcher now needs to be connected to the SBU so that the stretcher The cable coming from the stretcher now needs to be connected to the SBU so that the buttons will function correctly. - Page 38 Installation 12.9 Connect the stretcher • Connect the four matching-coloured cables coming from the SBU and stretcher to each other. Fig 12.9c • The mains electrical supply can now be safely turned on. • Check that the buttons at the front of the stretcher now raise and lower the product. 50.154.08.0003 (Rev1)
-
Page 39: Fit The Cable Cover
Astor Invincible Installation 12.9 Fit the cable cover 12.10 Fit the cable cover To ensure the cable is not accessible a cable cover must now be installed to protect the con- · • To ensure the cable is not accessible a cable cover must now be installed to protect nection. -
Page 40: Refit The Gas Spring Covers
K K B B 3 3 0 0 0 0 0 0 A A d d j j u u s s t t a a b b l l e e H H e e i i g g h h t t C C h h a a n n g g i i n n g g S S t t a a t t i i o o n n K K B B 3 3 0 0 0 0 0 0 A A d d j j u u s s t t a a b b l l e e H H e e i i g g h h t t C C h h a a n n g g i i n n g g S S t t a a t t i i o o n n KB3000 Adjustable Height Changing Station KB3000 Adjustable Height Changing Station... -
Page 41: Testing
Installation K K B B 3 3 0 0 0 0 0 0 A A d d j j u u s s t t a a b b l l e e H H e e i i g g h h t t C C h h a a n n g g i i n n g g S S t t a a t t i i o o n n K K B B 3 3 0 0 0 0 0 0 A A d d j j u u s s t t a a b b l l e e H H e e i i g g h h t t C C h h a a n n g g i i n n g g S S t t a a t t i i o o n n K K B B 3 3 0 0 0 0 0 0 A A d d j j u u s s t t a a b b l l e e H H e e i i g g h h t t C C h h a a n n g g i i n n g g S S t t a a t t i i o o n n KB3000 Adjustable Height Changing Station... -
Page 42: Mounting The Wall Sign
Installation 12.13 Mounting the wall sign The wall sign provided must be securely fixed to the wall in a clear and visible position near to the changing table. • It is recommended that the wall sign be mounted next to and at a similar height as the emergency stop. -
Page 43: Moving & Transporting The Equipment
For further advice, please contact Astor Bannerman: email our support team: support@astorbannerman.co.uk or call us on: +44 (0)1242 820820 15 Replaceable parts The Astor Invincible is supplied for use with the following parts and accessories; • SBU (main unit) 10.154.01.0001 •... -
Page 44: Service Record
Service record 16 Service record Service engineer's name Date of service Actions undertaken Signature 50.154.08.0003 (Rev1) -
Page 45: Training Record
Training record 17 Training record Trainee's Date of Type of Trainee's Trainer's name training training signature signature 50.154.08.0003 (Rev1) - Page 46 Notes 50.154.08.0003 (Rev1)
- Page 47 Notes 50.154.08.0003 (Rev1)
- Page 48 Specialist Bathing Patient Handling Changing & Showering Astor Bannerman The Elephant Works, Andoversford Link, Cheltenham GL54 4LB Phone: +44 (0) 1242 820820 Website: www.astorbannerman.co.uk Email: sales@astorbannerman.co.uk support@astorbannerman.co.uk 50.154.08.0003 (Rev1)
Need help?
Do you have a question about the Invincible and is the answer not in the manual?
Questions and answers