
Related Manuals for MCZ RAAM COMFORT AIR 8 UP S2


Summary of Contents for MCZ RAAM COMFORT AIR 8 UP S2
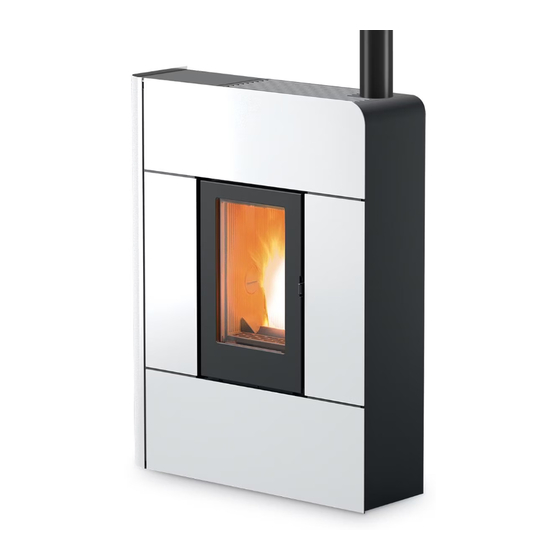
- Page 1 INSTALLATION GUIDE SEALED PELLET STOVE RAAM COMFORT AIR 8 S2 RAAM COMFORT AIR 8 UP! S2 PART 2 - OPERATION AND CLEANING Instructions in English...
-
Page 2: Table Of Contents
TABLE OF CONTENTS TABLE OF CONTENTS ....................II 12-FIRST IGNITION .....................3 13-CONTROL PANEL ....................5 14-MENU ITEMS AND OPERATION ................6 15-SAFETY DEVICES ....................15 16-ALARMS ......................16 17-RECOMMENDATIONS FOR SAFE USE ...............21 18-CLEANING ......................22 19-TROUBLESHOOTING .....................31 20-CIRCUIT BOARD ....................34... -
Page 3: 12-First Ignition
12-FIRST IGNITION WARNINGS BEFORE IGNITION GENERAL WARNINGS Remove any objects that may burn from the product and from the glass(manual, various adhesive labels or any polystyrene). Check that the brazier is positioned correctly and rests properly on the base. The first ignition may not be successful as the feed screw is empty and does not always manage to load the brazier with the required amount of pellets in time to light the flame. - Page 4 12-FIRST IGNITION During the disposal phase of the residual heat, the fans operate at about 80% of their output and the speed cannot be varied. This is determined by the need for all the accumulated heat to be evacuated safely and quickly. The switch-off phase can last 15 - 30 minutes depending on the heat stored in the structure, determined by the duration and the operating regime of the product throughout the day.
-
Page 5: 13-Control Panel
13-CONTROL PANEL 1. Stove start-up/shutdown 5. Decreases set temperature / programming functions. 2. Scrolling down through the programming menu. 6. Increases set temperature / programming functions. 3. Menu 7. Display. 4. Scrolling up the programming menu. Technical Dept. - All rights reserved - Reproduction prohibited... -
Page 6: 14-Menu Items And Operation
14-MENU ITEMS AND OPERATION MAIN MENU Press key 3 (menu) to access it. The options accessed are: • Date and Time • Timer • Sleep (only when stove is on) • Settings • Info Date and time configuration Proceed as follows to configure the date and time: •... - Page 7 14-MENU ITEMS AND OPERATION EXAMPLES OF PROGRAMMING 08:00 12:00 11:00 14:00 Stove on between 08:00 and 14:00 08:00 11:00 11:00 14:00 Stove on between 08:00 and 14:00 17:00 24:00 00:00 06:00 Stove on between 17:00 on Monday to 06:00 on Tuesday NOTES ON USE OF THE TIMER •...
- Page 8 14-MENU ITEMS AND OPERATION OPERATING MODE ADJUSTMENT MENU “Adjustments” menu settings determine the operating mode of the stove. To access the menu, proceed as follows: • Press the + - keys • Scroll by using the <> arrows and select “Set Amb. T” or “Set Ventilation T” or “Set Flame” •...
- Page 9 14-MENU ITEMS AND OPERATION SETTINGS MENU The SETTINGS menu enables to configure the stove operating modes: a. Language. b. Cleaning (only displayed when stove is off). Feed screw loading (shown only when stove is off). d. Tones. e. External thermostat (activation). Auto Eco (activation).
- Page 10 14-MENU ITEMS AND OPERATION d - Tones This function is disabled by default. To enable it proceed as follows: • Press the “menu” key. • Use the arrow keys to scroll through and select “Settings” • Press “menu” to confirm. •...
- Page 11 14-MENU ITEMS AND OPERATION h - Pellet Recipe This function is for adapting the stove to the type of pellet in use. As there are many types of pellets available on the market, operation of the stove can vary considerably according to the quality of the fuel. When the pellets clog up the brazier due to excess loading of fuel or when the flame is always high even at low power, or when the flame is low, it is possible to decrease/increase the amount of pellets in the brazier: The available values are:...
- Page 12 14-MENU ITEMS AND OPERATION • Use the arrow keys to scroll through and select ‘’Components test’’ • Press “menu” to confirm. • Use the + - keys to select the test to be carried out. • Press ‘’menu’’ to confirm and ‘’ e sc’’ to exit. k - Chimney sweeper function (for maintenance operators only) - This function can only be activated when the stove is on and power is supplied, and it forces heating operation at parameters P5, with fan (if present) in V5.
- Page 13 14-MENU ITEMS AND OPERATION EXTERNAL THERMOSTAT CONNECTION (optional) The room thermostat is not included with the stove and must be installed by a qualified technician. ATTENTION! The electrical wires must not come into contact with the hot parts of the stove. The temperature of the stove can also be controlled by an external room thermostat.
- Page 14 14-MENU ITEMS AND OPERATION Remote control (accessory - NOT SUPPLIED) LEGEND OF BUTTONS 1. Increase temperature set-point 4. Temperature/power switch and vice versa. 2.Decrease temperature set-point 5/6. Set power and ventilation 3. ON/OFF PLEASE NOTE Adjusting the temperature with the remote control has no effect if the external thermostat has been selected. Attention! Before using, remove the protection from the battery.
-
Page 15: 15-Safety Devices
15-SAFETY DEVICES SAFETY DEVICES The product is fitted with the following safety devices PRESSURE SWITCH Monitors pressure in the smoke duct. It is designed to shut down the pellet feed screw in the event of an obstructed flue or significant back-pressure (from wind). -
Page 16: 16-Alarms
16-ALARMS ALARM SIGNALLING When an operating condition other than the one expected for regular stove operation occurs, an alarm is triggered. The reason for the alarm is shown on the control panel. The sound signal is not enabled for alarms A01-A02 in order not to disturb the user when there is an absence of pellets in the hopper during the night. - Page 17 16-ALARMS NORMAL SHUTDOWN (on the panel: OFF with flashing flame) When the shutdown key is pressed, or when there is an alarm signal, the stove enters the thermal extinguishing stage which involves automatic execution of the following stages: • Pellet loading stop •...
- Page 18 16-ALARMS In the event that alarm A05 is triggered often, please note that: Smoke pressure switch triggered Check for chimney obstructions / door open Fuel loading hatch Close the hatch. Lower the fuel level in the hopper. Safety devices alarm Open stove door Close the door it is required to check some points to verify the cause of the problem and potentially operate on some adjustments and/or safety devices...
- Page 19 16-ALARMS Remembering that the draught recommended for the products to work properly is 10 Pa at maximum capacity and 5 Pa at minimum (according to the technical data sheet found in the user and maintenance manual), adjustments may be required in worse draught conditions (also due to the position of the flue in areas that are particularly subject to adverse weather such as prevailing winds, snow, northern exposure, etc.) so as to always guarantee the required negative pressure inside the hopper.
- Page 20 16-ALARMS NEGATIVE PRESSURE INSIDE THE HOPPER WITH FACTORY-SET PARAMETERS AND A DRAUGHT OF 5 Pa (MINIMUM RECOMMENDED) POWER VALUES 13.7/14.2 Pa 15.1/15.6 Pa 17.1/17.5 Pa 19.1/19.5 Pa 22.0/22.2 Pa Draught 6 kW 95°C 110°C 125°C 141°C 165°C Smoke temperature 13.8/14.3 Pa 15.6/16.1 Pa 17.8/18.0 Pa 21.7/22.2 Pa...
-
Page 21: 17-Recommendations For Safe Use
17-RECOMMENDATIONS FOR SAFE USE ONLY CORRECT INSTALLATION AND APPROPRIATE MAINTENANCE AND CLEANING OF THE APPLIANCE CAN GUARANTEE CORRECT OPERATION AND SAFE USE OF THE PRODUCT. We would like to inform you that we are aware of cases of malfunctioning of domestic pellet-fuelled heating products, mainly due to incorrect installation and use, as well as inadequate maintenance. -
Page 22: 18-Cleaning
18-CLEANING EXAMPLE OF A CLEAN BRAZIER EXAMPLE OF A DIRTY BRAZIER Only by properly servicing and cleaning the product is it possible to ensure its safety and correct operation. CAUTION! All the cleaning operations of all parts must be performed with the product completely cold and the plug disconnected. - Page 23 18-CLEANING REMEMBER THAT ONLY A CORRECTLY POSITIONED AND CLEAN BRAZIER CAN GUARANTEE SAFE IGNITION AND OPTIMAL OPERATION OF YOUR PELLET PRODUCT. IN CASE OF FAILED IGNITION AND AFTER ANY OTHER BLOCK STATE OF THE PRODUCT, IT IS ESSENTIAL TO EMPTY THE BRAZIER BEFORE EVERY RESTART For the brazier to be cleaned properly, remove it from its housing completely and thoroughly clean all the holes and the grate on the bottom.
- Page 24 18-CLEANING CLEANING THE STOVE CLADDING Below are a few indications to clean the metal cladding of the stove: • use only water, if necessary with the addition of neutral detergents (pH7) and characterised by light additives. • use only water on a cloth. There are electrical parts that could be damaged. •...
- Page 25 18-CLEANING • tilt deflector “M” to make it come out from its seat • remove the two plates “S” and “L” by simply sliding them out from their seats Technical Dept. - All rights reserved - Reproduction prohibited...
- Page 26 18-CLEANING Use a flexible brush, approximately 1 m long, to scrape the walls of the firebox (see arrow - under plates “L” and “S” just removed) to make the ash fall into the lower compartment. Then thoroughly clean the lower exchanger, replace any gaskets if needed, and reassemble.
- Page 27 18-CLEANING CLEANING THE SMOKE EXPULSION SYSTEM AND GENERAL CHECKS Clean the smoke outlet system, especially around the Tee fittings, elbows and any horizontal sections of the smoke duct. For information on periodically cleaning the flue, contact a skilled chimney sweep. Check the seal of the ceramic fibre gaskets on the door of the stove.
- Page 28 18-CLEANING TOP OUTLET CLEANING THE SMOKE BOX To remove ash from smoke box “A” remove the stove cladding (as indicated in the product manual), remove the four “x” screws, cap “V” and gasket “U”. Now, using the nozzle of a vacuum cleaner, remove any ash and soot that may have built up in box “A” (as indicated by the arrow).
- Page 29 18-CLEANING PERIODICAL CHECK OF THE DOOR CLOSURE Make sure the door closure ensures a correct sealing action (with the “paper sheet” test) and that when the door is closed, the closing block (X in the figure) does not protrude from the sheet metal to which it is secured. For some products it will be necessary to disassemble the cladding to be able to assess the anomalous protrusion of the block when the door is closed.
- Page 30 18-CLEANING SHUTDOWN (end of season) At the end of each season, before switching the product off, it is recommended to remove all the pellets from the hopper with a vacuum cleaner with a long pipe. We recommend removing the unused pellets from the hopper because they can retain moisture. Disconnect any combustion air ducting that can lead to moisture inside the combustion chamber but, above all, ask the specialised technician to refresh the paint inside the combustion chamber with the special silicone spray paints (available at any store or Technical Assistance Centre) during the necessary annual end of season scheduled maintenance operations.
-
Page 31: 19-Troubleshooting
19-TROUBLESHOOTING ATTENTION: All repairs must only be carried out by a specialised technician, with the product switched off and unplugged. ANOMALY POTENTIAL CAUSES SOLUTIONS The pellets are not fed into The pellet hopper is empty Fill the hopper with pellets. the combustion chamber. - Page 32 19-TROUBLESHOOTING ANOMALY POTENTIAL CAUSES SOLUTIONS Pellets accumulate in the brazier, the Insufficient combustion air. Clean the brazier and check that all the glass of the door gets dirty and the holes are clear. Perform a general cleaning flame is weak. of the combustion chamber and the smoke duct.
- Page 33 19-TROUBLESHOOTING ANOMALY POTENTIAL CAUSES SOLUTIONS Incorrect combustion adjustment. Check recipe. No increase in temperature with stove in operation. Set flame 1 setting (level too low) Increase power from the settings menu. Poor pellet quality. Use pellets from the manufacturer. Technical Dept. - All rights reserved - Reproduction prohibited...
-
Page 34: 20-Circuit Board
20-CIRCUIT BOARD LIVE ELECTRICAL CABLES DISCONNECT THE POWER SUPPLY CABLE 230V BEFORE CAR- RYING OUT ANY OPERATIONS ON THE ELECTRICAL BOARDS FUSE 10. REAR ROOM FAN (FAN 2) BOARD PHASE 11. SMOKE SENSOR BOARD NEUTRAL 12. EXTERNAL THERMOSTAT CONNECTION (TERMINAL BLOCK) SMOKE EXTRACTOR FAN 13. - Page 36 MCZ GROUP S.p.A. Via La Croce n°8 33074 Vigonovo di Fontanafredda (PN) – ITALY Telephone: 0434/599599 a.s. Fax: 0434/599598 Website: www.mcz.it e-mail: mcz@mcz.it 8902277400 REV.0 13/02/2023...
Need help?
Do you have a question about the RAAM COMFORT AIR 8 UP S2 and is the answer not in the manual?
Questions and answers