ZyXEL Communications ZyWall 35 Quick Start Manual
Internet security appliance
Hide thumbs
Also See for ZyWall 35:
- User manual (872 pages) ,
- Support notes (335 pages) ,
- Quick start manual (19 pages)
Table of Contents
Advertisement
Available languages
Available languages
Quick Links
See also:
User Manual
Advertisement
Table of Contents

Related Manuals for ZyXEL Communications ZyWall 35


Summary of Contents for ZyXEL Communications ZyWall 35
-
Page 1: Quick Start Guide
ZyWALL 35 Internet Security Appliance Quick Start Guide Version 4.03 10/2007 Edition 1 DEFAULT LOGIN IP Address http://192.168.1.1 User Name admin Password 1234 CONTENTS ENGLISH DEUTSCH ESPAÑOL FRANÇAIS ITALIANO РУССКИЙ 简体中文 繁體中文 Copyright © 2007. All rights reserved. -
Page 2: English
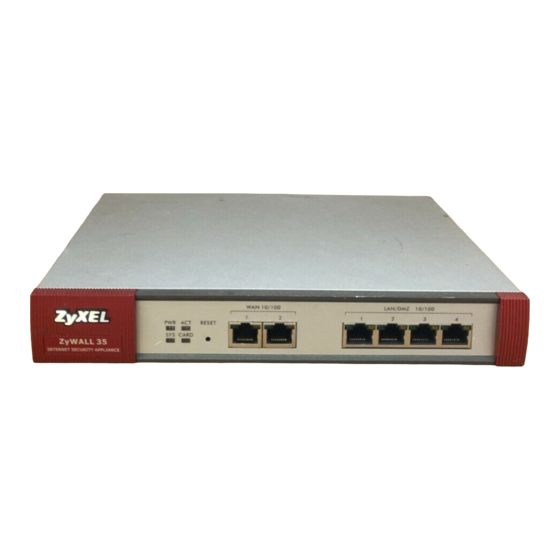
Overview The ZyWALL 35 is a load-balancing, dual WAN firewall with VPN, bandwidth management, content filtering, anti-spam, anti-virus, IDP (Intrusion Detection and Protection) and many other features. You can use it as a transparent firewall and not reconfigure your network nor configure the ZyWALL’s routing features. The ZyWALL increases network security by adding the option to change port roles from LAN to DMZ for use with publicly accessible servers. - Page 3 Do the following to make hardware connections for initial setup. 1 Use an Ethernet cable to connect the LAN/DMZ port to a computer. If you configure these ports as DMZ ports in the LAN or DMZ screen through the web configurator, you can also use Ethernet cables to connect public servers (web, e-mail, FTP, etc.) to the LAN/DMZ ports.
-
Page 4: Password
3 Change the login password by entering a new password and clicking Apply. 5 The HOME screen opens. The ZyWALL is in router mode by default. Continue to the next step if you want to use routing features such as NAT, DHCP and VPN. Go to Section 3 if you prefer to use the ZyWALL as a transparent firewall. -
Page 5: Bridge Mode
Check the Network Status table. If the WAN 1 status is not Down and there is an IP address, go Section If the WAN 1 status is Down (or there is not an IP address), click the Wizard icon and use Section 4 configure WAN 1. - Page 6 1 Click MAINTENANCE in the navigation panel and then Device Mode. 2 Select Bridge and configure a (static) IP address subnet mask and gateway IP address for the ZyWALL’s LAN, WAN, DMZ and WLAN interfaces. 3 Click Apply. The ZyWALL restarts.
- Page 7 • Ethernet Encapsulation Configure a Roadrunner service in the NETWORK WAN screens (use the WAN 1 tab). • PPP over Ethernet or PPTP Encapsulation Select Nailed-Up when you want your connection up all the time (this could be expensive if your ISP bills you for Internet usage time instead of a flat monthly fee).
- Page 8 2 Click Next to display the screen where you can register your ZyWALL with myZyXEL.com (ZyXEL’s online services center) and activate the free content filtering, anti-spam, anti-virus and IDP trial applications. Otherwise, click Skip and then Close to complete Internet access setup.
- Page 9 5 The following screen displays if the registration was not successful. Click Return to go back to the Device Registration screen and check your settings. 6 Click Close to leave the wizard screen when the registration and activation are done. Note: If you want to activate a standard service with your iCard’s PIN number (license key), use the...
- Page 10 1 Click NETWORK, DMZ in the navigation panel. 2 Specify an IP address and subnet mask for the DMZ interface. If you use private IP addresses on the DMZ, use NAT to make the servers publicly accessible (see Section A public IP address must be on a separate subnet from the WAN port’s public IP address.
- Page 11 LAN unless a request was generated on the LAN first. The ZyWALL allows access to the DMZ from the WAN or LAN, but blocks traffic from the DMZ to the LAN. If you are using the ZyWALL in router mode, continue with the next section. For bridge mode, skip to ENGLISH...
- Page 12 ENGLISH 8 VPN Rule Setup A VPN (Virtual Private Network) tunnel gives you a secure connection to another computer or network. A gateway policy identifies the IPSec routers at either end of a VPN tunnel. A network policy specifies which devices (behind the IPSec routers) can use the VPN tunnel.
- Page 13 2 Use this screen to configure the gateway policy. Name: Enter a name to identify the gateway policy. Remote Gateway Address: Enter the IP address or domain name of the remote IPSec router. ENGLISH 3 Use this screen to configure the network policy.
- Page 14 Note: Make sure that the remote IPSec router uses the same security settings that you configure in the next two screens. Negotiation Mode: Select Main Mode for identity protection. Select Aggressive Mode to allow more incoming connections from dynamic IP addresses to use separate passwords.
- Page 15 6 Check your VPN settings. Click Finish to save the settings. 8.1 Using the VPN Connection Use VPN tunnels to securely send and retrieve files, and allow remote access to corporate networks, web servers and e-mail. Services work as if you were at the office instead of connected through the Internet. For example, the “test”...
- Page 16 9 Anti-Spam Setup Use anti-spam to have the ZyWALL check for unsolicited commercial or junk e-mail (spam). Note: You must have already subscribed to the anti-spam service to use the feature (see page 6). 1 Click the Wizard icon in the HOME screen and then Anti-Spam Setup to open the anti-spam wizard. 2 Select the locations where you have e-mail servers.
-
Page 17: Troubleshooting
4 Use this screen to enable anti- spam and select which traffic flows the ZyWALL scans for spam. The recommended traffic flows are already selected. You generally only need to select traffic directions that have incoming e-mail from outside e-mail servers. 5 Click Apply. - Page 18 Internet gateway device (such as a DSL modem) is working properly. Click WAN in the navigation panel to verify your settings. Cannot establish Make sure the ZyWALL and the remote IPSec router use the same VPN settings. Click VPN a VPN in the navigation panel to configure advanced settings.
- Page 19 Procedure to View a Product’s Certification(s) 1 Go to www.zyxel.com. 2 Select your product from the drop-down list box on the ZyXEL home page to go to that product's page. 3 Select the certification you wish to view from this page.
-
Page 20: Deutsch
Übersicht Die ZyWALL 35 ist eine Load-balancing-, Dual-WAN-Firewall mit VPN, Bandbreitenmanagement, Content Filtering, Anti-Spam, Anti-Virus, IDP (Intrusion Detection and Protection) und vielen anderen Funktionen. Sie können sie als transparente Firewall verwenden, ohne das Netzwerk neu zu konfigurieren und die Routingfunktionen des Geräts zu konfigurieren. Die ZyWALL bietet die Möglichkeit, bei der Benutzung öffentlich zugänglicher Server die Portfunktionen zu wechseln (LAN zu DMZ) und erhöht damit die... - Page 21 Wenn Sie das Gerät installieren, müssen Sie die Hardwaregeräte folgendermaßen anschließen. 1 Verbinden Sie den LAN-/DMZ-Port mit einem Ethernet-Kabel mit dem Computer. Wenn Sie diese Ports im LAN- oder DMZ-Fenster mit dem Web-Konfigurator als DMZ-Ports konfigurieren, können Sie auch mit Ethernetkabeln eine Verbindung von LAN-/DMZ-Ports zu öffentlichen Servern (Internet, E-Mail, FTP usw.) herstellen.
- Page 22 4 Schliessen Sie den Netzanschluss des Geräts (an der Rückseite) mit dem mitgelieferten Netzteil an eine Netzsteckdose an. 5 Sehen Sie sich das vordere Bedienfeld an. Die PWR-LED beginnt zu leuchten. Während des Systemtests blinkt die SYS-LED. Wurde er Test erfolgreich abgeschlossen, bleibt diese Anzeige an. Die LEDs ACT, CARD, LAN/DMZ und WAN beginnen zu leuchten und bleiben an, wenn die entsprechenden Verbindungen richtig hergestellt wurden.
- Page 23 6 Prüfen Sie Netzwerksta tus tabelle. Wenn der Status von WAN 1 nicht Down ist und eine IP- Adresse angegeben ist, gehen Sie Abschnitt Wenn der Status bei WAN 1 Down ist (oder es keine IP- Adresse gibt), klicken Sie auf das Wizard (Assistent)-Symbol, und konfigurieren Sie WAN 1 gemäß der Beschreibung in Abschnitt 4 Verwenden Sie das NETWORK WAN Fenster, wenn Sie WAN 2 konfigurieren möchten.
- Page 24 1 Klicken Sie in der Navigationsleiste auf MAINTENANCE (Wartung) und dann auf Device Mode (Gerätemodus). 2 Wählen Sie Bridge (Brücke) und konfigurieren Sie eine (statische) IP-Adressen- Subnetmaske und eine Gateway-IP-Adresse für die LAN-, WAN-, DMZ- und WLAN- Schnittstelle der ZyWALL. 3 Klicken Sie auf Apply (Übernehmen).
- Page 25 Wenn Sie die Eingabe beendet haben, klicken Sie auf Apply (Übernehmen). • Ethernet Encapsulation Konfigurieren Sie einen Roadrunnerdienst in den NETWORK WAN (Netzwerk-WAN) Fenstern (auf der Registerkarte WAN 1). • PPP over Ethernet or PPTP Encapsulation Wählen Sie Nailed-Up, wenn die Verbindung dauerhaft aufrecht erhalten werden soll (das kann jedoch sehr teuer sein, wenn Ihr Internetdienstanbieter Ihnen die Benutzungsdauer anstelle eines monatlichen Pauschalbetrags in Rechnung stellt).
- Page 26 2 Klicken Sie auf Next (Weiter), um das Fenster aufzurufen, in dem Sie Ihre ZyWALL bei myZyXEL.com (Online-Servicezentrum von ZyXEL) registrieren und den kostenlosen Inhaltsfilter sowie die Anti-Spam-, Antiviren- und IDP-Testsoftware aktivieren können. Oder Sie klicken auf Skip (Überspringen) und...
- Page 27 3 Wenn Sie bei myZyXEL.com bereits ein Konto haben, wahlen Sie Existing myZyXEL.com account (Bestehendes myZyXEL.com-Konto) und geben Sie die Daten zum Konto ein. Anderenfalls wählen Sie New myZyXEL.com account (Neues myZyXEL.com-Konto) und füllen Sie die Felder unten aus, um ein neues Konto zu öffnen und die ZyWALL zu registrieren.
- Page 28 5 DMZ Die DeMilitarisierte Zone (DMZ) ermöglicht es, dass öffentliche Server (Internet, E-Mail, FTP, usw.) nach außen hin sichtbar sind aber dennoch über Firewallschutz vor DoS-Angriffen verfügen (Denial of Service). Anders als beim LAN weist die ZyWALL den an den DMZ-Ports angeschlossenen Computern nicht über DHCP die TCP/IP-Konfiguration zu.
- Page 29 6 NAT NAT (Network Address Translation - NAT, RFC 1631) ist die Übersetzung einer IP-Adresse eines Netzwerks in eine andere IP-Adresse eines anderen Netzwerks. Wenn die ZyWALL mehrere öffentliche IP-Adressen in mehrere private IP-Adressen Ihres LAN (oder Ihrer DMZ) übersetzen soll, verwenden Sie die Fenster NAT Address Mapping (NAT-Adressmapping).
- Page 30 Verbindung zu anderen Computern oder Netzwerken. Eine Gateway-Policy identifiziert an jedem Ende eines VPN-Tunnels die IPSec- Router. In einer Netzwerk-Policy ist festgelegt, welche Geräte (hinter den IPSec-Routern) den VPN-Tunnel benutzen dürfen. Diese Abbildung soll die Hauptfelder in den Assistentenfenstern erläutern.
- Page 31 Adresse und eine Subnetmaske ein, um ein bestimmtes Netzwerk anhand ihrer Subnetmaske festzulegen. Hinweis: Stellen Sie sicher, dass der Remote-IPSec-Router dieselben Sicherheitseinstellungen verwendet, die Sie in den zwei folgenden Fenstern festlegen. Negotiation Mode (Negotiation-Modus): Wählen Sie Main Mode (Hauptmodus) für den Identitätsschutz.
- Page 32 Perfect Forward Secrecy (PFS): None (Keine) ermöglicht ein schnelleres Einrichten des IPSec, DH1 und DH2 bieten aber mehr Sicherheit. 4 In diesem Fenster werden die IKE- Tunneleinstellungen (Internet Key Exchange) konfiguriert. 6 Prüfen Sie Ihre VPN-Einstellungen. Klicken Sie auf Finish (Fertig stellen), um die Einstellungen zu speichern.
- Page 33 DEUTSCH 8.1 Benutzen der VPN-Verbindung Mit VPN-Tunneln können Sie Dateien sicher senden und empfangen sowie einen Remotezugriff auf Firmennetzwerke, Internetserver und E-Mails zulassen. Die Dienste funktionieren so, als wären Sie an einem Standort und nicht über das Internet miteinander verbunden. Zum Beispiel lässt die VPN-Regel “test”...
- Page 34 2 Wählen Sie die Zone, in der sich Ihr E-Mail-Server befindet. An jeder ausgewählten Zone erscheint das Symbol eines E-Mail-Servers. In diesem Beispiel befinden sich die E-Mail-Server im LAN. 3 Je nachdem, wo sich die E-Mail- Server befinden, empfiehlt der Wizard, welche Datenströme auf Spam geprüft werden sollten.
-
Page 35: Zywall
4 In diesem Fenster können Sie Anti- Spam aktivieren und festlegen, welche Datenströme die ZyWALL überprüft. Die empfohlenen Datenströme sind bereits ausgewählt. Normalerweise müssen Sie nur eingehende Emails nach SPAM überprüfen. 5 Klicken Sie auf Apply (Übernehmen). 6 Klicken Sie im letzten Fenster auf Close (Schließen), um das Einrichten des Anti-Spam- Assistenten zu beenden. - Page 36 Klicken Sie in der Navigationsleiste auf WAN und überprüfen Sie die Einstellungen. Es kann keine Stellen Sie sicher, dass die ZyWALL und der Remote-IPSec -Router die gleichen VPN- VPN-Verbindung Einstellungen verwenden. Klicken Sie in der Navigationsleiste auf VPN , um die erweiterten hergestellt Einstellungen zu konfigurieren.
- Page 37 8 Schließen Sie das Fenster Netzwerkverbindungen. Schritte zum Ansehen der Produktzertifizierung(en) 1 Besuchen Sie www.zyxel.com. 2 Wählen Sie auf der ZyXEL-Homepage aus der Liste der Produkte Ihr Produkt aus. 3 Wählen Sie auf dieser die Zertifizierung aus, die Sie gerne angezeigt haben möchten. DEUTSCH...
-
Page 38: Español
Vista previa El ZyWALL 35 es un cortafuegos de WAN dual, con balanceo de carga, soporte de VPNs, gestión del ancho de banda, filtrado de contenidos, anti-spam, antivirus, IDP (Intrusion Detection and Protection) y muchas otras características. Puede usarlo como cortafuegos transparente sin reconfigurar su red ni configurar las características de enrutamiento de ZyWALL. - Page 39 Realice lo siguiente para crear conexiones de hardware para la configuración inicial. 1 Use un cable Ethernet para conectar el puerto LAN/DMZ a un ordenador. Si configura estos puertos como puertos DMZ en la pantalla LAN o DMZ a través del configurador web, también podrá usar cables Ethernet para conectar servidores públicos (web, correo electrónico, FTP, etc.) a los puertos LAN/DMZ.
- Page 40 Apply (Aplicar). 5 Aparecerá la pantalla HOME (Inicio). El ZyWALL está en modo router por defecto. Continúe en el siguiente paso si desea usar características de enrutamiento como NAT, DHCP y VPN. Vaya a Sección 3...
- Page 41 6 Compruebe la tabla Network Status (estado de la red). Si el estado de WAN 1 no es Down (Caído) y hay una dirección IP, vaya a Sección Si el estado de WAN 1 es Down (la línea ha caído) (o no hay una dirección IP), haga clic en el icono Wizard (Asistente) y utilice la Use las pantallas WAN en NETWORK (red) si necesita configurar WAN 2.
- Page 42 1 Haga clic en MAINTENANCE (Mantenimiento) en el panel de navegación y luego en Device Mode (Modo de Dispositivo). 2 Seleccione Bridge (Puente) y configure una máscara de subred de dirección IP (estática) y una dirección IP de puerta de enlace para las interfaces LAN, WAN, DMZ y WLAN del ZyWALL.
- Page 43 • Encapsulación Ethernet Configure un servicio Correcaminos en las pantallas WAN de NETWORK (Red) (use la ficha WAN 1). • Encapsulación PPP sobre Ethernet o PPTP Seleccione Nailed-Up (Forzada) cuando desee que su conexión esté arriba todo el tiempo (esto puede resultar caro si su ISP le cobra por el tiempo de uso de Internet en lugar de una cuota fija mensual).
- Page 44 2 Haga clic en Next (Siguiente) para mostrar la pantalla donde podra registrar ZyWALL con myZyXEL.com (centro de servicios en linea de ZyXEL) y activar el filtrado de contenidos, anti-spam, antivirus y aplicaciones de prueba IDP. En caso contrario, haga clic en Skip...
- Page 45 5 La pantalla siguiente muestra si el registro no ha tenido exito. Haga clic en Return (Volver) para regresar a la pantalla Device Registration (Registro del dispositivo) y comprobar su configuracion. 6 Haga clic en Close (Cerrar) para salir de la pantalla del asistente cuando se hayan realizado el registro y la activacion.
- Page 46 2 Especifique una dirección IP y máscara de subred para la interfaz DMZ. Si usa direcciones IP privadas en la DMZ, use NAT para hacer a los servidores accesibles públicamente (ver Sección Una dirección IP pública debe estar en una subred separada de las direcciones IP públicas de los puertos WAN.
- Page 47 1 Haga clic en ADVANCED (AVANZADA), NAT en el panel de navegación y luego en Port Forwarding (Reenvío de puerto). 2 Seleccione la casilla de verificación Active (Activa). 3 Escriba un nombre para la regla. 4 Escriba el número que el servicio usa.
- Page 48 8 Configuración de reglas VPN Un túnel VPN (Virtual Private Network - Red Privada Virtual) le ofrece una conexión segura a otro ordenador o red. Una política de puerta de enlace identifica a los enrutadores IPSec en ambos extremos del túnel VPN. Una política de red especifica qué...
- Page 49 3 Use esta pantalla para configurar la política de la red. Deje la casilla de verificación Active (Activa) seleccionada. Name (Nombre): Introduzca un nombre para identificar la política de la red. Seleccione Single (Una) e introduzca la dirección IP para una única dirección IP. Seleccione Range IP (Rango IP) e introduzca las direcciones IP inicial y final para un rango específico de direcciones IP.
- Page 50 Perfect Forward Secrecy (PFS): None (Ninguno) permite una configuración IPSec más rápida, pero DH1 y DH2 son el modo seguro. 4 Use esta pantalla para establecer la configuración de túnel IKE (Internet Key Exchange - Intercambio de Claves de Internet). 6 Compruebe su configuración VPN.
- Page 51 ESPAÑOL 8.1 Usar la conexión VPN Use túneles VPN para enviar y recibir archivos con seguridad y permitir el acceso remoto a redes corporativas, servidores de web y correo electrónico. Los servicios funcionan igual que si estuviese en la oficina en lugar de estar conectado a Internet. Por ejemplo, la regla VPN “test”...
- Page 52 2 Seleccione las ubicaciones donde tiene servidores de correo electrónico. Aparecerá un icono de un servidor de correo electrónico en cada punto seleccionado. En este ejemplo los servidores de correo electrónico están en la LAN. 3 El ZyWALL recomienda qué flujo de tráfico escanear para spam basándose en las ubicaciones de sus servidores de correo...
- Page 53 4 Utilice esta pantalla para habilitar anti-spam y seleccione qué flujos de tráfico el ZyWALL escanea para spam. Los flujos de tráfico recomendados ya están seleccionados. Generalmente solo necesita seleccionar direcciones de tráfico que tienen correo electrónico entrante desde servidores de correo electrónico externos.
- Page 54 Problema Solución No se puede Compruebe la conexión de cables entre el ZyWALL y su ordenador o hub. Consulte acceder al para más detalles. ZyWALL desde la Realice un ping al ZyWALL desde un ordenador LAN. Compruebe que la tarjeta Ethernet de LAN.
- Page 55 Procedimiento para ver la(s) certificación(es) del producto 1 Vaya a www.zyxel.com. 2 Seleccione su producto de la lista desplegable en la página inicial de ZyXEL para ir a la página de ese producto. 3 Seleccione la certificación que desee visualizar en esta página.
-
Page 56: Français
Présentation Le ZyWALL 35 est un pare-feu double WAN à équilibrage de charge avec VPN, gestion de bande passante, filtrage de contenu, antispam, antivirus, détection et protection contre les intrusions (IDP) et de nombreuses autres fonctionnalités. Vous pouvez l'utiliser comme un pare-feu transparent et ne pas reconfigurer votre réseau ni configurer les fonctionnalités de routage du ZyWALL. - Page 57 Procédez comme suit pour effectuer les connexions matérielles pour l'installation initiale. 1 Utilisez un câble Ethernet pour connecter le port LAN/DMZ à un ordinateur. Si vous configurez ces ports en ports DMZ dans l'écran LAN ou DMZ à l'aide du configurateur web, vous pouvez aussi utiliser les câbles Ethernet pour connecter les serveurs publics (web, e-mail, FTP, etc.) aux ports LAN/DMZ.
- Page 58 4 Utilisez le adaptateur d'alimentation pour connecter la prise d'alimentation (sur le panneau arrière) à une prise de courant. 5 Regardez le panneau avant. La LED PWR s'allume. La LED SYS clignote lors du test du système et reste ensuite allumée si le test a réussi. Les LED ACT, CARD, LAN/DMZ, et WAN s'allument et restent allumées si les connexions correspondantes sont effectuées correctement.
- Page 59 6 Reportez- vous au tableau d'Network Status (Etat du Réseau). Si l'état WAN 1 n'est pas Désactivé et qu'il y a une adresse IP, allez à la Section Si l'état WAN 1 est Désactivé (ou s'il n'y a d'adresse IP), cliquez sur Internet Access (Accès Internet) et passez à la Utilisez les écrans NETWORK/WAN si vous devez configurer WAN 2.
- Page 60 1 Cliquez sur MAINTENANCE dans le panneau de navigation et ensuite sur le Device Mode (Mode Périphérique). 2 Sélectionnez Bridge (Pont) et configurez une d'adresse IP (statique) de masque de sous-réseau et une adresse IP de passerelle pour les interfaces LAN, WAN, DMZ et WLAN du ZyWALL.
- Page 61 • Encapsulation Ethernet Configurer un service Roadrunner dans les écrans du NETWORK WAN (utilisez l'onglet WAN • PPP over Ethernet ou PPTP Encapsulation Sélectionnez Nailed-Up quand vous voulez que votre connexion soit toujours active (cela peut être cher si votre ISP vous facture pour votre temps d'utilisation à la place d'un abonnement mensuel). Pour ne pas avoir la connexion constamment active, spécifiez un délai d'inactivité...
- Page 62 2 Cliquez sur Next (Suivant) pour afficher l'écran où vous pourrez inscrire votre ZyXEL sur MyZyXEL.com (Centre de services en ligne de ZyXEL) et activer les applications d'évaluation gratuites de filtrage de contenu, antispam, antivirus et IDP. Vous pouvez aussi cliquer sur Skip (Passer) et ensuite sur Close (Fermer) pour terminer l'installation de l'accès...
- Page 63 5 Les écrans suivants s'affichent si l'enregistrement a échoué. Cliquez sur Return (Retour) pour retourner à l'écran Device Registration (Inscription matériel) et vérifier vos paramètres. 6 Cliquez sur Close (Fermer) pour quitter l'assistant quand l'inscription et l'action sont effectuées. Remarque: Si vous voulez activer un service standard avec le numéro PIN de votre iCard (clé...
- Page 64 2 Spécifiez une adresse IP et un masque de sous- réseau pour l'interface DMZ. Si vous utilisez des adresses IP privées sur le DMZ, utilisez NAT pour rendre les serveurs accessibles au public (voir la Une adresse IP publique doit se trouver sur un sous-réseau séparé...
- Page 65 1 Cliquez sur ADVANCED (AVANCÉ), NAT dans le panneau de navigation et ensuite sur Port Forwarding (Réacheminement de Port). 2 Sélectionnez la case à cocher Active (Active). 3 Tapez un nom pour la règle. 4 Tapez le numéro de port que le service utilise.
- Page 66 8 Installation de la règle VPN Un tunnel VPN (Virtual Private Network) vous offre une connexion sécurisée à un autre ordinateur ou réseau. Une stratégie de passerelle identifie les routeurs IPSec aux extrémités d'un tunnel VPN. Une stratégie de réseau spécifie les périphériques (derrière les routeurs IPSec) pouvant utiliser le tunnel VPN.
- Page 67 3 Utilisez cet écran pour configurer la stratégie de réseau. Laissez la case à cocher Active sélectionnée. Name (Nom): Entrez un nom pour identifier la stratégie de réseau. Sélectionnez Single (Unique) et entrez une adresse IP pour une adresse IP unique. Sélectionnez Range IP (Plage d'IP) et saisissez les adresses IP de début et de fin pour une plage d'adresses IP spécifique.
- Page 68 Perfect Forward Secrecy (Confidentialité de transmission parfaite) (PFS): None (Aucune) permet une configuration IPSec plus rapide, mais DH1 et DH2 sont plus sécurisés. 4 Utilisez cet écran pour configurer les paramètres IKE (Internet Key Exchange-Echange de clé Internet). 6 Vérifiez vos paramètres VPN. Cliquer sur Finish (Terminer) pour enregistrer les paramètres.
- Page 69 FRANÇAIS 8.1 Utiliser la Connexion VPN Utilisez les tunnels VPN pour envoyer et recevoir de manière sécurisée, et permettre l'accès à distance aux réseaux d'entreprise, serveurs web et e-mail. Les services fonctionnent comme si vous étiez au bureau au lieu d'être connecté à Internet. Par exemple, la règle VPN “test”...
- Page 70 2 Sélectionnez les zones où se trouvent les serveurs de messagerie. L’icône d’un serveur de messagerie apparaît sur chaque point sélectionné. Dans cet exemple les serveurs de messagerie sont sur le LAN. 3 Le ZyWALL recommande les flux de trafic à inspecter par la fonction Anti-Spam en se basant sur les emplacements de vos serveurs de messagerie.
- Page 71 4 Utilisez cet écran pour activer l’Anti-Spam et sélectionnez les flux de trafic dans lesquels le ZyWALL recherche les pourriels. Les flux de trafic recommandés sont déjà sélectionnés. Vous devez généralement seulement sélectionner les directions de trafic ayant des emails provenant de l’extérieur des serveurs de messagerie.
- Page 72 Problème Action Corrective Impossible Vérifiez la connexion câblée entre le ZyWALL et votre ordinateur ou hub. Reportez-vous à la d'accéder au Section 1 ZyWALL à partir Envoyez un signal Ping au ZyWALL à partir d'un ordinateur du LAN. Vérifiez que la carte du LAN.
- Page 73 Procédure pour Afficher la (les) certification(s) d'un produit 1 Allez à www.zyxel.com. 2 Sélectionnez votre produit dans la boîte de la liste déroulante dans la page d'accueil de ZyXEL pour aller à la page de ce produit. 3 Sélectionnez la certification que vous désirez consulter dans cette page.
-
Page 74: Italiano
Cenni generali ZyWALL 35 è un firewall con funzionalità di Load Balancing, a doppia WAN, dotato di funzioni di VPN, gestione della larghezza di banda, filtraggio dei contenuti, antispam, antivirus, IDP (Intrusion Detection and Protection) e molto altro. È possibile utilizzarlo come firewall trasparente ed evitare di riconfigurare la propria rete e di configurare le funzionalità... - Page 75 Di seguito sono illustrati i collegamenti hardware per l'installazione iniziale. 1 Utilizzare un cavo Ethernet per collegare la porta LAN/DMZ a un computer. Se si configurano queste porte come porte DMZ nelle schermate relative alla LAN o alla DMZ nello strumento di configurazione Web, è anche possibile utilizzare i cavi Ethernet per collegare server pubblici (Web, e-mail, FTP, ecc.) alle porte LAN/DMZ.
- Page 76 Apply (applica). 5 Si apre la schermata HOME. Per impostazione predefinita, lo ZyWALL è in modalità router. Continuare dal passo successivo se si desidera utilizzare funzionalità di routing quali NAT, DHCP e VPN. Passare a Sezione 3 se si preferisce utilizzare lo ZyWALL come firewall trasparente.
- Page 77 6 Controllare la tabella Network Status (stato della rete). Se lo stato della WAN 1 è not Down (disattivata) ed è presente un indirizzo IP, passare a Sezione Se lo stato della WAN 1 è Down (disattivata) (oppure se non è presente un indirizzo IP), fare clic su Internet Access (accesso a Internet) e utilizzare configurare la WAN 1.
- Page 78 1 Fare clic su MAINTENANCE (manutenzione) nel pannello di navigazione, quindi su Device Mode (modalità dispositivo). 2 Selezionare Bridge e immettere un indirizzo IP (statico), una subnet mask e un indirizzo IP del gateway per le interfacce LAN, WAN, DMZ e WLAN dello ZyWALL.
- Page 79 • Incapsulamento Ethernet Configurare un servizio Roadrunner nelle schermate NETWORK WAN (WAN di rete) (utilizzare la scheda WAN 1). • PPP over Ethernet oppure incapsulamento PPTP Selezionare Nailed-Up (riconnessione) quando si desidera che la connessione sia sempre attiva (questa opzione potrebbe rivelarsi costosa se il proprio ISP applica una tariffazione a tempo dell'accesso a Internet piuttosto che un costo mensile fisso).
- Page 80 2 Fare clic su Next (avanti) per visualizzare la schermata in cui e possibile registrare lo ZyWALL sul sito myZyXEL.com (centro di assistenza online ZyXEL) e attivare i servizi filtraggio dei contenuti, antispam, antivirus e IDP gratuiti in versione di valutazione.
- Page 81 5 La seguente schermata indica se la registrazione non ha avuto esito positivo. Fare clic su Return (torna) per tornare alla schermata Device Registration (registrazione dispositivo) e controllare le impostazioni. 6 Fare clic su Close (chiudi) per chiudere la procedura guidata una volta terminata la registrazione e l'attivazione.
- Page 82 2 Specificare un indirizzo IP e una subnet mask per l'interfaccia DMZ. Se si utilizzano indirizzi IP privati sulla DMZ, utilizzare la funzione NAT per rendere i server accessibili pubblicamente (vedere Un indirizzo IP pubblico deve trovarsi su una subnet separata rispetto all'indirizzo IP pubblico della porta WAN.
- Page 83 LAN. Lo ZyWALL consente di accedere alla DMZ dalla WAN o dalla LAN, ma blocca il traffico dalla DMZ alla LAN. Se si utilizza lo ZyWALL in modalità router, continuare con la prossima sezione. Per la modalità bridge, passare a...
- Page 84 Network, rete privata virtuale) offre una connessione sicura a un altro computer o rete. Un criterio di gateway identifica i router IPSec a entrambe le estremità di un tunnel VPN. Un criterio di rete specifica quali dispositivi (dietro i router IPSec) possono utilizzare il tunnel VPN.
- Page 85 IP su una rete mediante la loro subnet mask. Note: Assicurarsi che il router IPSec remoto utilizzi le stesse impostazioni di sicurezza configurate nelle prossime due schermate. Negotiation Mode (modalità di negoziazione): selezionare Main Mode (modalità principale) come protezione dell'identità.
- Page 86 Perfect Forward Secrecy (PFS): None (nessuno) consente una configurazione IPSec più rapida, ma DH1 e DH2 sono più sicuri. 4 Utilizzare questa schermata per configurare le impostazioni del tunnel IKE (Internet Key Exchange, scambio chiavi Internet). 6 Verificare le impostazioni della VPN. Fare clic su Finish (fine) per salvare le impostazioni.
- Page 87 ITALIANO 8.1 Uso della connessione VPN Utilizzare i tunnel VPN per inviare e ricevere in maniera sicura file e per consentire un accesso remoto alle reti aziendali, server Web ed e-mail. I servizi funzioneranno come se ci si trovasse connessi direttamente dall'ufficio invece che da Internet.
- Page 88 2 Selezionare le posizioni dei server di e-mail. Su ogni punto selezionato appare l'icona di un server di e-mail. In questo esempio i server di e-mail sono nella LAN. 3 Lo ZyWALL Consiglia quali flussi di traffico analizzare sulla base delle posizioni dei server di e-mail.
-
Page 89: Risoluzione Dei Problemi
4 Utilizzare questa schermata per attivare la funzione anti-spam e selezionare quali flussi di traffico l'unità ZyWALL deve analizzare per individuare lo spam. I flussi di traffico consigliati sono già selezionati. Generalmente è necessario selezionare il traffico e- mail in ingresso dai server di posta esterni. - Page 90 Fare clic su WAN nel pannello di navigazione per verificare le impostazioni. Impossibile Assicurarsi lo ZyWALL e il router IPSec remoto utilizzi le stesse impostazioni VPN. Fare clic stabilire una su VPN nel pannello di navigazione per configurare le impostazioni avanzate.
- Page 91 Procedura per visualizzare le certificazioni di un prodotto 1 Aprire la pagina www.zyxel.com. 2 Selezionare il prodotto dall'elenco di riepilogo a discesa nella Home Page di ZyXEL per passare alla pagina del prodotto in questione. 3 Selezionare da questa pagina la certificazione che si desidera visualizzare.
-
Page 92: Русский
Обзор Устройство ZyWALL 35 представляет собой межсетевой экран для глобальной сети с выравниванием нагрузки и имеет целый ряд функциональных возможностей, таких как виртуальные частные сети, управление пропускной способностью, фильтрация контента, защита от спама, защита от вирусов, IDP (Intrusion Detection and Protection - Обнаружение и защита от вторжения) и другие. Устройство можно... - Page 93 1 Подключение оборудования Вам потребуется следующее оборудование. ZyWALL Для подключения оборудования выполните следующие действия. 1 Для подключения портов LAN/DMZ к компьютеру используется кабель Ethernet. Если в Web- конфигураторе эти порты настроены как порты DMZ в окне LAN или DMZ, для подключения общедоступных...
- Page 94 2 С помощью другого кабеля(ей) Ethernet подключите порт WAN1 и/или WAN2 к розетке Ethernet, соединенной с Интернет. 3 Установите карту расширения ZyWALL Turbo, чтобы использовать функции защиты от вирусов и IDP, или установите беспроводной адаптер для подключения к беспроводной сети. Дополнительную информацию...
- Page 95 3 Измените пароль по умолчанию, введя новый пароль и щелкнув по кнопке Apply (Применить). 5 Открывается окно HOME (ДОМАШНЯЯ СТРАНИЦА). По умолчанию в ZyWALL установлен режим маршрутизатора. Если вы хотите использовать функции маршрутизации, такие как NAT, DHCP и VPN, переходите к следующему шагу. Если...
- Page 96 Для настройки порта WAN 2 используются окна WAN в разделе NETWORK (СЕТЬ). Также можно настроить функцию выравнивания нагрузки между портами WAN. 3 Режим межсетевого моста Если в ZyWALL установлен режим межсетевого моста, устройство функционирует как прозрачный межсетевой экран. Для установки режима межсетевого моста ZyWALL выполните следующие действия.
- Page 97 4 Настройка доступа в Интернет и регистрация изделия 1 Щелкните на значке Wizard (Мастер) ( (ДОМАШНЯЯ), а затем на ссылке Internet Access Setup (Настройка доступа к Интернет), чтобы открыть мастер настройки. Введите учетные данные для подключения к Интернету. Если вам назначен статический IP-адрес, выберите Static (Статический) в...
- Page 98 поле Idle Timeout (Время простоя). 2 Щелкните Next (Далее) для отображения окна, которое используется для регистрации ZyWALL на сайте myZyXEL.com (центр обслуживания ZyXEL) и активирования фильтрации контента, защиты от спама, защиты от вирусов и испытательных версии приложений IDP. В другом случае, щелкните Skip (Пропустить) и...
- Page 99 3 Если вы уже регистрировались на сайте myZyXEL.com, выберите Existing myZyXEL.com account (Существующие учетные данные myZyXEL.com) и введите параметры учетных данных. В другом случае, выберите New myZyXEL.com account (Новые учетные данные myZyXEL.com) и заполните поля, расположенные ниже, для создания новых учетных данных и регистрации...
- Page 100 5 DMZ DMZ (DeMilitarized Zone - демилитаризованная зона) позволяет внешним пользователям обращаться к общедоступным серверам (web-север, почтовый сервер, FTP-сервер и др.) и обеспечивает защиту серверов посредством межсетевого экрана от внешних атак DoS (Denial of Service - отказ от обслуживания). В отличие от локальной сети, ZyWALL не назначает компьютерам, подключенным к портам DMZ, конфигурацию...
- Page 101 6 NAT NAT (Network Address Translation - трансляция сетевых адресов NAT, RFC 1631) выполняет преобразование IP-адреса одной сети в отличный IP-адрес другой сети. Окна NAT Address Mapping (Преобразование адресов NAT) используются для настройки ZyWALL на преобразование нескольких общедоступных IP-адресов в частные IP-адреса вашей локальной сети (или DMZ). В...
- Page 102 РУССКИЙ 8 Настройка правил виртуальной частной сети (VPN) Туннель VPN (Virtual Private Network - виртуальная частная сеть) обеспечивает защищенное соединение к другому компьютеру или сети. Стратегия шлюза определяет маршрутизаторы IPSec на каждом конце туннеля VPN. Сетевая политика определяет устройства (за маршрутизаторами...
- Page 103 2 Это окно используется для настройки стратегии шлюза. Name (Имя): Введите имя для идентификации стратегии шлюза. Remote Gateway Address (Адрес удаленного шлюза): Введите IP-адрес или доменное имя удаленного маршрутизатора IPSec. 3 Это окно используется для настройки политики сети. Флажок Active (Включить) должен быть установлен.
- Page 104 SA Life Time (Время существования защищенного соединения): Установите, как часто ZyWALL выполняет согласование защищенного соединения по протоколу IKE (минимум 180 секунд). Малое время соединения увеличивает уровень безопасности, но при процедуре согласования туннель VPN временно не доступен. Pre-Shared Key (Предварительно согласованный ключ): Используется от 8 до 31 символа ASCII с учетом...
- Page 105 6 Проверьте настройки VPN. Щелкните Finish (Готово) для сохранения настроек. 8.1 Использование соединения VPN Туннели VPN используются для защищенной отправки и поиска файлов, а также разрешения удаленного доступа к корпоративным сетям, web-серверам и почтовым серверам. Эти службы будут работать так, как если бы вы находились в офисе, а не подключались через Интернет. Например, правило...
- Page 106 В Панели навигации щелкните SECURITY (БЕЗОПАСНОСТЬ), затем VPN и затем закладку SA Monitor (Монитор защищенного соединения) для отображения списка подключенных туннелей VPN (здесь установлен туннель VPN с именем “test”). 9 Настройка Анти-Спама Используйте фильтрацию спама ZyWALL для контроля входящей почты на наличие несанкционированной...
- Page 107 3 Рекомедуется указать порты почтовых серверов, трафик с которых должен сканироваться на наличие спама. 4 Этот экран позволяет включить Анти-Спам и выбрать порты, потоки данных с которых будут ZyWALL проверяться на наличие спама. Рекомендуемые потоки данных уже выбраны. Обычно достаточно выбрать только порты...
- Page 108 10 Поиск и устранение неисправностей Неисправность Способы устранения Не горит ни один Убедитесь, что адаптер питания подключен к ZyWALL и к соответствующему источнику светодиод. питания. Проверьте кабельные соединения. Если светодиоды все еще не горят, возможно, существует аппаратная неисправность. В этом случае следует связаться с поставщиком. Отсутствует...
- Page 109 8 Закройте окно Network Connections (Сетевые подключения). Порядок просмотра сертификата(ов) на изделие 1 Перейдите на сайт www.zyxel.ru. 2 Выберите изделие из раскрывающегося списка на домашней странице ZyXEL для перехода на страницу, посвященную этому изделию. 3 Выберите сертификат для просмотра. РУССКИЙ...
-
Page 110: 简体中文
概述 ZyWALL35 是状态监听型硬件防火墙,具备了虚拟私有网络 (VPN)、带宽管理、内容过滤、防垃圾邮件、防病毒、 入侵检测与防护 (Intrusion detection and Protection, IDP)和多种其他功能。您可以将 ZyWALL 35 当作透 明模式防火墙使用,而无须重设网路或设置 ZyWALL 的路由功能。ZyWALL 增加了选项,能让您将端口角色从 LAN 更改为公用访问服务器可以使用的 DMZ,增强了网络的安全性。本手册的内容包括开始在网络中使用 ZyWALL 时, 需要进行的初始连接和设置等相关信息。 请参阅 《用户手册》 ,获取所有功能的详细信息。 您可能需要准备互联网连接信息。 本手册的章节如下。 1 硬件连接 2 访问网络状态设置程序 3 桥接模式 4 互联网访问设置以及产品注册 5 DNS 1 硬件连接... - Page 111 请执行下列步骤,为硬件连接进行初始设置。 1 使用以太网连接线连接 LAN/DMZ 连接端口和电脑。如果您通过网络状态配置程序,在 LAN 或 DMZ 屏幕中将 这些端口配置为 DMZ 端口,则您也可以使用以太网线将公用服务器 (网络、电子邮件、FTP 等)连接到 LAN/DMZ 端口。 2 使用其他以太网连接线,将 WAN 1 和 / 或 WAN 2 端口连接到可以访问互联网的以太网接口。 3 插入 ZyWALL Turbo 扩展卡使用防病毒与入侵检测与防护 (IDP) 功能,或插入无线网卡使用无线网络功能。如 需更多有关扩展卡的信息,请参阅 ZyWALL Turbo 卡简介。若要安装无线网卡,请参阅 《用户手册》 。 4 使用所附的电源线,为电源插槽 ( 位于后方面板 ) 接上电源。 5 将电源开关打开,并观察前方面板。PWR 指示灯会亮起。SYS 指示灯会在执行系统测试时闪烁,测试成功时灯...
- Page 112 2 访问网络状态设置程序 您可以使用本节中的信息来设置 WAN 1 接口的互联网访问。 1 启动网页浏览器。输入地址 192.168.1.1 (ZyWALL 的默认 IP 地址 )。 如果没有显示登录画面,请参阅章節 脑的 IP 地址。 3 输入新的密码,然后单击 Apply ( 应用 ),更改登 录密码。 5 此时会打开 HOME 页面。 ZyWALL 默认会使用路由器模式。如果想要使用 NAT、 DHCP 和 VPN 之类的路由功能,请继续下个步骤。 如果要将 ZyWALL 作为透明模式防火墙使用,请跳至章節 简体中文 2 单击...
- Page 113 6 查看 Network Status ( 网络 状态 ) 表格。 如果 WAN 1 的状态并非 Down ( 无法运 行 ),且表上 显示了 IP 地 址,请跳至章 節 2。如果 WAN 1 状态为 Down ( 无法运 行 ) ( 或没有 显示 IP 地址 ),请单击 Internet Access ( 网络 连接...
- Page 114 1 单击导航面板上的 MAINTENANCE ( 维护 ), 然后单击 Device Mode ( 设备模式 )。 2 选取 Bridge ( 桥接 ),并 为 ZyWALL 的 LAN、 WAN、 DMZ 和 WLAN 接口设置 ( 静态 ) IP 地址 子网掩码和网关 IP 地址。 3 单击 Apply ( 应用 )。 ZyWALL 会重新启动。...
- Page 115 •Ethernet ( 以太网 ) 封装 在 NETWORK WAN 页面中设置 Roadrunner 服务 ( 使用 WAN 1 选项卡 )。 •PPP over Ethernet 或 PPTP 封装 如果您希望保持连接不中断,请选中 Nailed-Up ( 固定连接 ) ( 如果您的 ISP 是计算网络使用时间收费,而非收 取固定月费,选这个选项可能会较为昂贵 )。 如果不想一直保持连接状态,请在 Idle Timeout ( 闲置超时 ) 中指定闲置等候时间 ( 单位为秒 )。 简体中文...
- Page 116 2 单击 Next (下一步)显示 myZyXEL.com (ZyXEL 在线服务中心)页面,您可在此进行 ZyWALL 产品的注册,启用具有内容过滤、防 垃圾邮件、防病毒和入侵检测与防护功能的免 费试用。若单击 Skip (跳过) 再单击 Close (关闭) ,则结束网络连接建立。 注意: 在启用入侵检测与防护和防病毒订购服务之前 在安装或移除 ZyWALL Turbo 卡 之前,请先关闭 ZyWALL。 3 如果您有 myZyXEL.com 帐号,请选中 Existing myZyXEL.com account(现有的 myZyXEL.com 帐号) ,再输入帐号信息。 若无 myZyXEL.com 帐号,则选中 New myZyXEL.com account (新的...
- Page 117 5 如果注册失败则会显示下列画面。单击 Return (返回) ,回到 Device Registration (产品注 册)屏幕,检查您的设置。 6 果成功完成注册与产品启用,则单击 Close (关闭) ,离开向导屏幕。 注意:若要使用 iCard 的 PIN 密码 (授权 识别码)启用标准服务,请使用 REGISTRATION Service (注册服务) 屏幕。如需相关详细信息,请参阅使 用手册。 5 DMZ 非军事网络区 (DMZ) 会让外部可以看见公用服务器 ( 网络、电子邮件、 FTP 等 ),但仍在防火墙的保护之下, 不会受到 DoS ( 拒绝服务 ) 攻击。 和...
- Page 118 2 为 DMZ 接口指定 IP 地址和子网掩码。 如果您在 DMZ 上使用私有 IP 地址,请使用 NAT, 开放服务器公用访问 ( 请参阅章節 公有 IP 地址必须和 WAN 端口的公有 IP 地址位于不 同的子网络。如果您没有为 DMZ 上的公有 IP 地址 设置 NAT,ZyWALL 会将流量路由传送到 DMZ 上的 公有 IP 地址,而不会执行 NAT。对于不适合使用 NAT 的应用程式而言,这项功能在管理服务器方面 非常有用。 3 单击 Apply ( 应用 )。 4 默认情况下,...
- Page 119 1 单击导航面板上的 ADVANCED (高 级) , NAT,然后选中 Port Forwarding ( 端口转发 )。 2 选中 Active ( 启用 ) 复选框。 3 输入规则名称。 4 输入服务所使用的端口号。 5 输入 HTTP 服务器的 IP 地址。 6 单击 Apply ( 应用 )。 7 防火墙 您可以不设置防火墙,直接使用 ZyWALL。 ZyWALL 的防火墙是预先设置的,可以保护 LAN 避免来自互联网的攻击。默认情况下,除非要求先在 LAN 上产 生,否则不会有任何传输进入...
- Page 120 下图会说明向导页面中出现的主要栏位。 1 按下 HOME ( 首页 ) 画面中的 Wizard ( 向导 ) 图示 ( 向导。 猔種 : 如果您单击 Back ( 上一步 ),将不会保存您的设置 2 您可以在这个页面中设置网关规则。 Name ( 名称 ):为网关规则输入辨识名称。 Remote Gateway Address ( 远程网关地址 ):输入远 程 IPSec 路由器的 IP 地址或网络名称。 3 您可以在这个页面中设置网络规则。 让...
- Page 121 简体中文 Negotiation Mode ( 协商模式 ):选中 Main Mode ( 主要模式 ) 可以提供身份识别保护功能。选中 Aggressive Mode ( 主动模式 ) 可以允许较多来自动态 IP 地址的连入连接使用个别密码。 注意:通过安全性网关连接的多重 SA( 安全性关联 ) 必须使用相同的协商模式。 Encryption Algorithm ( 加密算法 ):选中 3DES 或 AES 会使用较安全 ( 且速度较慢 ) 的加密。 Authentication Algorithm ( 验证算法 ):选中 MD5 会使用较低的安全性,SHA-1 的安全性则较高。 Key Group ( 密钥组...
- Page 122 6 检查 VPN 设置。单击 Finish ( 完成 ) 保存设置。 8.1 使用 VPN 连接 使用 VPN 通道安全地传送和获取文件,并允许远程访问公司网络、网页服务器和电子邮件。服务的运行会和您 在办公室的状况一样,不会像是通过互联网连接进行的。 例如,"test" ( 测试 )VPN 规则可以让您安全地访 问远程公司 LAN 上的网页服务器。将服务器的 IP 地址 ( 在此范例中为 10.0.0.23) 输入浏览器的 URL。ZyWALL 会在您尝试使用 VPN 通道时,自动建 立 VPN 连接。 单击导航面板上的 SECURITY (安全) , VPN,然 后选中...
- Page 123 9 防垃圾邮件设置 利用防垃圾邮件设置使 ZyWALL 检查 未经同意的商业广告或垃圾邮件 (spam)。 注意:您必须已经申请了防垃圾邮件设置才能使用此功能 ( 参见第 1 单击 HOME (主)屏幕内的 Wizard ( 向导)图标, 然后单击 Anti-Spam Setup (防垃圾邮件设置) ,打开 防垃圾邮件设置。 2 择您拥有电子邮件服务器的位置。 在您选择的各地点出现一个电子邮 件服务器图标。本例中的电子邮件 服务器位于 LAN (局域网)内。 3 ZyWALL 基于您的电子邮件服务器位 置来推荐扫描垃圾邮件的业务流。 简体中文 页 )。...
- Page 124 4 用此屏幕启用防垃圾邮件设置,并 选择 ZyWALL 用来扫描垃圾邮件的 业务流。推荐的业务流已经选中。 您通常仅需选择从外部邮件服务器 接收电子邮件的通信方向。 5 单击 Apply (应用) 。 6 在最终屏幕上单击 Close (关闭) , 完成反垃圾邮件设置。 7 祝贺您 , 您已配置好 ZyWALL 来扫 描垃圾邮件。 您也可使用防垃圾邮件设置白名单和黑名单来 鉴别合法电子邮件和垃圾邮件。参见 《用户指南》中的防垃圾邮 件设置章节,了解详情。 10 故障排除 问题 解决方法 LED 全部不亮。 请确保已经将电源线接到 ZyWALL 设备上,且接上了适当的电源。检查所有网线是否正确连 接。 如果...
- Page 125 问题 解决方法 无法从 LAN 访问 检查 ZyWALL 和电脑或集线器之间的网线连接。请参阅 ZyWALL。 从 LAN 电脑上 ping ZyWALL。请确认电脑上安装了以太网卡,且网卡能够正常工作。 在电脑中,单击开始、( 所有程序 ) 程序集、附件,然后单击命令提示符。在命令提示符窗 口中,输入 "ping" 再输入 ZyWALL 的 LAN IP 地址 ( 默认为 192.168.1.1),然后按 ENTER。 ZyWALL 如果忘记了 ZyWALL 的密码,请使用 RESET ( 复位 ) 按钮。按住此按钮约 10 秒 ( 或按住直 到...
- Page 126 5 此时会打开 Internet Protocol TCP/IP 属性窗口 ( 在 Win XP 中位于常规选项卡上 )。 选中自动获得 IP 地址和 自动获得 DNS 服务器地址选项。 6 单击确定,关闭 Internet Protocol (TCP/IP) 属性窗口。 7 单击关闭 ( 在 Windows 2000/NT 中为确定 ),关闭本 地连接属性窗口。 8 关闭本地连接窗口。 查看产品认证信息步骤 1 访问 http://www.zyxel.cn/ 网站。 2 在合勤科技 (ZyXEL) 首页上的下拉列表框中选中所需的产品,跳至该产品的页面。 3 在页面中选中要查看的认证信息。 简体中文...
-
Page 127: 繁體中文
概觀 ZyWALL 35 是負載平衡的雙 WAN 防火牆,具備了虛擬私有網路 (VPN)、頻寬管理、內容過濾、防垃圾郵件、防 病毒、入侵偵測與防護 (Intrusion detection and Protection, IDP)和多種其他功能。 您可以將 ZyWALL 35 當 作透通模式防火牆使用,而無須重設網路或設定 ZyWALL 的路由功能。 ZyWALL 增加了選擇,能讓您將連接埠 角色由 LAN 變為公用存取伺服器可以使用的 DMZ,加強網路的安全性。本手冊的內容包括了開始在網路中使用 ZyWALL 時,所需進行的初始連線和設定等相關資訊。 請參閱 《使用手冊》 ,取得所有功能的詳細資訊。 您可能需要準備網際網路連線資訊。 本手冊的章節如下。 1 硬體連線 2 存取網路組態設定程式 3 橋接模式 4 網際網路存取設定以及產品註冊... - Page 128 請進行下列步驟,為硬體連線進行初始設定。 1 使用乙太網路線連接 LAN/DMZ 連接埠和電腦 。 如果您透過網路組態設定程式 , 在 LAN 或 DMZ 畫面中將這些連 接埠設定為 DMZ 連接埠,您也可以使用乙太網路線,將公用伺服器 ( 網路、電子郵件、FTP 等 ) 連接到 LAN/DMZ 連接埠。 2 使用另一條乙太網路線,將 WAN 1 和 / 或 WAN 2 連接埠連接到可以存取網際網路的乙太網路插孔。 3 插入 ZyWALL Turbo 擴充卡使用防毒與 IDP 功能,或插入無線網卡使用無線網路功能。如需更多關於擴充卡 的資訊,請參閱...
- Page 129 2 存取網路組態設定程式 您可以使用本節中的資訊設定 WAN 1 介面的網際網路存取。 1 啟動網頁瀏覽器。輸入位址 192.168.1.1 (ZyWALL 的預設 IP 位址 )。 如果沒有顯示登入畫面,請參閱章節 腦的 IP 位址。 3 輸入新的密碼,然後按一下 Apply ( 套用 ),變更登 入密碼。 5 會開啟 HOME 畫面。 ZyWALL 預設會使用路由器模式。如果想要使用 NAT、DHCP 和 VPN 之類的路由功能,請繼續下個步驟。 如果要將 ZyWALL 做為透通模式防火牆使用,請移至章節 繁體中文 2 按一下 Login ( 登入 ) ( 已經輸入預設的密碼 1234)。...
- Page 130 6 查看 Network Status ( 網路 狀態 ) 表格。 如果 WAN 1 並非 的狀態 Down ( 無法 運作 ),且表 上顯示了 IP 位址,請移至 章節 5。 如果 WAN 1 狀態為 Down ( 無法運作 ) ( 或沒有顯示 IP 位址 ),請 按一下 Internet Access ( 網 際網路存取...
- Page 131 4 網際網路存取設定以及產品註冊 1 按一下 HOME ( 首頁 ) 畫面中的 Wizard ( 精靈 ) 圖示 ( 再按一下 Internet Access Setup ( 網際網路接取設定 ) 連 結,開啟網際網路接取精靈。 確實輸入您的網際網路存取資訊。 如果 ISP 有提供您 IP 位址,請在 IP Address Assignment (IP 位址設定 ) 下拉式清單方塊中選取 Static ( 靜態 ),然後 輸入提供的資訊。...
- Page 132 如果不想一直保持連線狀態,請在 Idle Timeout ( 閒置等候時間 ) 中指定閒置等候時間 ( 單位為秒 )。 2 按一下 Next (下一步)顯示 myZyXEL.com (ZyXEL 線上服務中心)頁面,您可在此進行 ZyWALL 產品的註冊,啟用具有內容過濾、防 垃圾郵件、防病毒和 IDP 功能的免費試用。若 按 Skip (跳過) 再按 Close (關閉) ,則結 束網路連線建立。 注意: 在啟用 IDP 和防毒訂購服務之前,請確定您已安裝 ZyWALL Turbo 卡。 在安裝或移除 ZyWALL Turbo 卡 之前,請先關閉 ZyWALL。...
- Page 133 3 如果您有 myZyXEL.com 帳號,請選取 Existing myZyXEL.com account(現有的 myZyXEL.com 帳號) ,再輸入帳號資訊。 若無 myZyXEL.com 帳號,則選取 New myZyXEL.com account (新的 myZyXEL.com 帳號) ,再填寫下列欄位以 建立新帳號並進行產品註冊。按一下 Next (下一步) 。 4 等待註冊完成。 5 如果註冊失敗會顯示下列畫面。按一下 Return (返回) ,回到 Device Registration (產品註 冊)畫面,檢查您的設定。 6 如果成功完成註冊與產品啟用,則按一下 Close (關閉) ,離開精靈畫面。 注意:...
- Page 134 5 DMZ 非軍事網域區 (DMZ) 會讓外部可以看見公用伺服器 ( 網路、電子郵件、FTP 等 ),但仍在防火牆的保護之下, 不會受到 DoS( 拒絕服務 ) 攻擊。 和 LAN 不同的是,ZyWALL 不會透過 DHCP 將 TCP/IP 設定指派給連接到 DMZ 連接埠的電腦。請使用靜態 IP 位址設定電腦 ( 和 DMZ 連接埠的 IP 位址位於同個子網路 ) 和 DNS 伺服器位址。使用 ZyWALL 的 DMZ IP 位 址做為預設閘道。...
- Page 135 1 按一下導覽面板上的 ADVANCED (進階) , NAT,然後選取 Port Forwarding ( 連接埠轉遞 )。 2 選取 Active ( 啟用 ) 核取方塊。 3 輸入規則名稱。 4 輸入服務所使用的連接埠號碼。 5 輸入 HTTP 伺服器的 IP 位址。 6 按一下 Apply ( 套用 )。 7 防火牆 您可以不設定防火牆,直接使用 ZyWALL。 ZyWALL 的防火牆是預先設定的,可以保護 LAN 免於受到來自網際網路的攻擊。依照預設,除非要求先在 LAN 上 產生,否則不會有任何傳輸進入...
- Page 136 下圖會說明精靈畫面中出現的主要欄位。 1 按一下 HOME ( 首頁 ) 畫面中的 Wizard ( 精靈 ) 圖示 ( 啟 VPN 精靈。 注意: 如果您按下 Back ( 上一步 ),將不會儲存您的設定。 2 您可以在這個畫面中設定閘道原則。 Name ( 名稱 ):為閘道原則輸入辨識名稱。 Remote Gateway Address ( 遠端閘道位址 ) : 輸入遠 端 IPSec 路由器的 IP 位址或網域名稱。 3 您可以在這個畫面中設定網路原則。...
- Page 137 繁體中文 Negotiation Mode ( 交涉模式 ) : 選取 Main Mode ( 主要模式 ) 可以提供身份識別保護功能 。 選取 Aggressive Mode ( 主動模式 ) 可以允許較多來自動態 IP 位址的連入連線使用個別密碼。 注意: 透過安全性閘道連線的多重 SA( 安全性關聯 ) 必須使用同樣的交涉模式。 Encryption Algorithm ( 加密演算法 ):選取 3DES 或 AES 會使用較安全 ( 且速度較慢 ) 的加密。 Authentication Algorithm ( 驗證演算法...
- Page 138 6 檢查 VPN 設定。按一下 Finish ( 完成 ) 儲存設 定。 8.1 使用 VPN 連線 使用 VPN 通道安全地傳送和擷取檔案,並允許遠端存取公司網路、網頁伺服器和電子郵件。服務的運作會和您 在辦公室的狀況一樣,不會像是透過網際網路連線進行的。 例如,"test" ( 測試 )VPN 規則可以讓您安全 地存 取遠端公司 LAN 上的網頁伺服器。 將伺服器的 IP 位址 ( 在這個範例中為 10.0.0.23) 輸入為瀏覽器 的 URL。ZyWALL 會在您嘗試使用 VPN 通道時, 自動加以建立。 按一下導覽面板上的...
- Page 139 9 防垃圾郵件設定 使用防垃圾郵件讓 ZyWALL 為您檢查未經請求即寄發的商業或垃圾電子郵件 (垃圾郵件) 。 注意: 您必需先啟用防垃圾郵件服務,才能享用這項功能 (請參閱第 1 按一下 HOME ( 首頁 ) 畫面中的 Wizard ( 精靈 ) 圖示,再按一下 Anti-Spam Setup ( 防垃圾郵件設定 ),開 啟防垃圾郵件精靈。 2 選取您有電子郵件伺服器的位置。 在每個您選取的點上,都會出現一 個電子郵件伺服器的圖示。此範例 中,電子郵件伺服器位在區域網路 上。 3 根據您的電子郵件伺服器位置, ZyWALL 會建議掃描那個傳輸流量的 垃圾郵件。 繁體中文 頁)...
- Page 140 4 使用此畫面啟用防垃圾郵件,並選 取 ZyWALL 掃描垃圾郵件的傳輸流 量。建議的傳輸流量已經選取。一 般而言,您只需要選取從外部電子 郵件伺服器內送電子郵件的傳輸方 向即可。 5 按一下 Apply ( 套用 )。 6 在最後一個畫面按一下 Close ( 關 閉 ) 完成防垃圾郵件精靈的設定。 7 恭喜,您已設定好 ZyWALL 掃描垃 圾郵件。 您也可以使用防垃圾郵件的 whitelist 及 blacklist 來辨識出合法的電子郵件及垃圾郵件。請參閱 《使用手 冊》中的防垃圾郵件相關章節,取得詳細資訊。 10 疑難排解 問題 修正動作 指示燈全部不亮。 請確認已經將電源供應器接到 ZyWALL 裝置上,且接上了適當的電源。檢查所有纜線是否正 確連接。...
- Page 141 問題 修正動作 無法從 LAN 存取 檢查 ZyWALL ZyWALL。 從 LAN 電腦上 ping ZyWALL。請確認電腦上安裝了乙太網路卡,且網路卡能夠正常運作。 在電腦中,按一下開始、( 所有程式 ) 程式集、附屬應用程式,然後按一下命令提示字元。 在命令提示字元視窗中,輸入 "ping" 再輸入 ZyWALL 的 LAN IP 位址 ( 預設為 192.168.1.1),然後按一下 ENTER。ZyWALL 裝置應該會有回應。如果仍然沒有回應,請參 閱章節 10.1。 如果忘記了 ZyWALL 的密碼,請使用 RESET ( 重設 ) 按鈕。按住這個按鈕約 10 秒 ( 或按 住直到...
- Page 142 5 Internet Protocol TCP/IP 內容畫面會開啟 ( 在 Win XP 中位於一般索引標籤上 )。選取自動取得 IP 位址和自動 取得 DNS 伺服器位址選項。 6 按一下確定,關閉 Internet Protocol (TCP/IP) 內容視 窗。 7 按一下關閉 ( 在 Windows 2000/NT 中為確定 ) , 關閉區域 連線內容視窗。 8 關閉網路連線畫面。 檢視產品檢定資訊步驟 1 到 http://www.zyxel.com.tw/ 網站。 2 在合勤科技 (ZyXEL) 首頁上的下拉式清單方塊中選取所要的產品,移至該產品的頁面。 3 在頁面中選取要檢視的檢定資訊。 繁體中文...
Need help?
Do you have a question about the ZyWall 35 and is the answer not in the manual?
Questions and answers