Dometic RUC5208X Installation And Operating Manual
Compressor refrigerator
Hide thumbs
Also See for RUC5208X:
- Installation and operating manual (60 pages) ,
- Installation and operating manual (76 pages)

Related Manuals for Dometic RUC5208X


Summary of Contents for Dometic RUC5208X
- Page 1 REFRIGERATION RUC5208X, RUC6408X, RUC8408X Compressor refrigerator Installation and Operating Manual...
- Page 2 © 2024 Dometic Group. The visual appearance of the contents of this manual is protected by copyright and design law. The underlying technical design and the products contained herein may be protected by design, patent or pending patent. The trademarks mentioned...
-
Page 3: Table Of Contents
This product manual, including the instructions, guide- lines, and warnings, and related documentation, may be subject to changes and updates. For up-to-date product information, please visit dometic.com. Contents 1 Explanation of symbols ..............3 2 Safety instructions . -
Page 4: Safety Instructions
Safety instructions RUC 5208X, RUC 6308X, RUC 8308X NOTICE! Indicates a situation that, if not avoided, can result in property damage. NOTE Supplementary information for operating the product. 2 Safety instructions 2.1 General safety WARNING! Failure to obey these warnings could result in death or serious injury. Electrocution hazard •... -
Page 5: Safety When Installing
RUC 5208X, RUC 6308X, RUC 8308X Safety when installing • Do not use mechanical devices or other means to accelerate the defrosting process, other than those recommended by the manufacturer. • Do not open or damage the refrigerant circuit under any circumstances. •... - Page 6 Safety when installing RUC 5208X, RUC 6308X, RUC 8308X 3.1 Safety when operating CAUTION! Failure to obey these cautions could result in minor or moderate injury. Health hazard • Ensure that foodstuffs do not touch the walls of the cooling area. •...
-
Page 7: Scope Of Delivery
Ref. no. LS300 ventilation grille 9620000524 Roof vent kit 9620008608, 9620008609 RUC5208X only: Door reversing kit • Left hand to right hand (LH to RH) 9620001938 • Right hand to left hand (RH to LH) 9600024323 Accessories are available from specialist dealers. If you have any questions, please contact the dealer or your service partner directly. -
Page 8: Technical Description
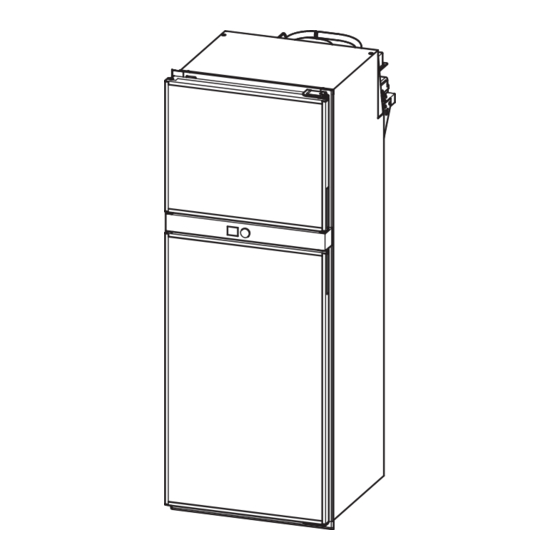
• Incorrect maintenance or use of spare parts other than original spare parts provided by the manufacturer • Alterations to the product without express permission from the manufacturer • Use for purposes other than those described in this manual Dometic reserves the right to change product appearance and product specifications. 7 Technical description 7.1 General The refrigerator is a compressor refrigerator. - Page 9 RUC 5208X, RUC 6308X, RUC 8308X Technical description 7.2 Components RUC5208X No. in Description Quantity fig. 1 Upper door rack Bottom door rack with bottle holder Crisper Refrigerator shelf Interior light Freezer compartment Control and display elements...
- Page 10 Technical description RUC 5208X, RUC 6308X, RUC 8308X RUC6408X, RUC8408X Quantity No. in Description fig. 2 RUC6408X RUC8408X Freezer compartment door Freezer door rack Refrigerator door Upper door rack Bottom door rack with bottle holder Crisper Refrigerator shelf Air duct cover plate Interior light Control and display elements Freezer shelf...
- Page 11 RUC 5208X, RUC 6308X, RUC 8308X Technical description 7.3 Control and display elements No. in Description fig. 3 Control knob Display 7.4 Control knob Function of the control knob: • Rotate: Choose menu item. The selected menu item is highlighted. •...
- Page 12 Technical description RUC 5208X, RUC 6308X, RUC 8308X 7.5 Display Main menu By default the display shows the following main menu: No. in Symbol Description fig. 4 Cooling capacity indicator (cooling level 1 – 5) Blue snowflake: Compressor is on. White snowflake: Compressor is off.
- Page 13 RUC 5208X, RUC 6308X, RUC 8308X Technical description No. in Symbol Description fig. 4 User mode currently activated: PERFORMANCE mode (factory default): All functionalities of the refrigerator are activated. The inner fan switches on and off in the same way as the compressor. Cooling level 1 –...
- Page 14 Technical description RUC 5208X, RUC 6308X, RUC 8308X Settings menu Button Description Child lock Beep off CI-Bus (not applicable) Standby mode and error screen After 10 seconds without operating the control knob, the backlight dims and the display returns to the main menu (A).
-
Page 15: Installation
RUC 5208X, RUC 6308X, RUC 8308X Installation 8 Installation CAUTION! Risk of injury The refrigerator has sharp edges. Use gloves during installation. NOTICE! Damage hazard Do not install the refrigerator in the rear of motor homes with the door facing the direction of travel. 8.1 Preparing the installation When installing the refrigerator, note the following: •... - Page 16 Installation RUC 5208X, RUC 6308X, RUC 8308X RUC 5208X RUC 6408X RUC 8408X Refrigerator Dimension in mm Height (A) 1191 1657 1447 Width (B) Depth (C) (excluding control knob, 5 mm) Recess Height (H) 1181 – 1186 1437 – 1442 1647 –1652 Width (W) 530 –...
- Page 17 RUC 5208X, RUC 6308X, RUC 8308X Installation 8.2 Installing the refrigerator The distance between the refrigerator and the back wall has an impact on the cooling performance and power con- sumption. For optimal cooling performance: ➤ Ensure that the clearance between the refrigerator and the rear wall is at least 10 mm and not more than 25 mm. ➤...
- Page 18 Installation RUC 5208X, RUC 6308X, RUC 8308X No. in Description fig. 9 Maximum height for the top edge of the ventilation grille (250 mm below the compressor shelf) LS300 ventilation grille (accessories) Air outlet vent Air inlet vent Minimum height for the bottom edge of the ventilation grille (equal to the height of the compressor shelf) Air baffle ➤...
- Page 19 RUC 5208X, RUC 6308X, RUC 8308X Installation Installation with one lower rear vent and one roof vent 100 mm 100 mm No. in Description fig. 0 Maximum height for the top edge of the ventilation grille (equal to 100 mm below the compressor shelf) LS300 ventilation grille Air outlet vent Air inlet vent...
- Page 20 Installation RUC 5208X, RUC 6308X, RUC 8308X ➤ Make cut outs in the wall for the air inlet and outlet vents. Observe the required dimensions specified in the installation manual for the LS ventilation grille and the roof vent kit. –...
- Page 21 RUC 5208X, RUC 6308X, RUC 8308X Installation 1. Apply sealant to the inner edge of the mounting frame to ensure the installation is water resistant (fig. b). 2. Insert the mounting frame into the prepared openings in the outer wall (see chapter “Installing the refrigerator” on page 17) and screw the mounting frame to the mounting holes (fig.
- Page 22 Installation RUC 5208X, RUC 6308X, RUC 8308X 8.4 Installing the roof vent NOTE Use the roof vent kit (accessories). No. in fig. e Description Hood Mounting frame 1. Apply sealant to the inner edge of the mounting frame to ensure the installation is water resistant (fig. f).
- Page 23 RUC 5208X, RUC 6308X, RUC 8308X Installation 2. Insert the mounting frame into the prepared opening in the outer wall (see chapter “Installing the refrigerator” on page 17) and screw the mounting frame to the mounting holes (fig. g 1). 3.
- Page 24 Installation RUC 5208X, RUC 6308X, RUC 8308X 1. Apply the sealing strip to all four sides of the bottom surface of the refrigerator (fig. h 1). 2. Push the refrigerator into position (fig. h 2). ✔ The space behind the refrigerator is sealed to the interior of the vehicle. Sealing the refrigerator using the bottom trim If the refrigerator is placed on a platform, the bottom trim must be installed to seal the space between the refriger- ator and the platform.
- Page 25 RUC 5208X, RUC 6308X, RUC 8308X Installation 3. Insert the screws (fig. j 1) through the plastic bushings on the sides of the refrigerator and screw the refriger- ator into the recess. 4. Fit the caps (fig. j 2) onto the bushings.
-
Page 26: Connecting The Refrigerator
Connecting the refrigerator RUC 5208X, RUC 6308X, RUC 8308X 9 Connecting the refrigerator NOTICE! Damage hazard Lay the connection cables so that they do not come into contact with hot parts of the device or with sharp edges. 9.1 Connecting the refrigerator to DC power supply The electrical power supply must be connected by a qualified electrician who has demonstrated skill and knowledge related to the construction and operation of electrical equipment and instal- lations, and who is familiar with the applicable regulations of the country in which the equipment... -
Page 27: Using The Refrigerator
RUC 5208X, RUC 6308X, RUC 8308X Using the refrigerator 3. Protect the positive cable of the vehicle battery with a fuse: – 12 V: 15 A – 24 V: 7.5 A 9.2 Connecting the refrigerator to AC power supply DANGER! Electrocution hazard •... - Page 28 Using the refrigerator RUC 5208X, RUC 6308X, RUC 8308X 10.2 Information on storing food CAUTION! Health hazard If the refrigerator is exposed to an ambient temperature below +10 °C for an extended period of time, regulation of the frozen compartment temperature can no longer be guaranteed. That may cause the temperature of the frozen compartment to increase and the stored goods to be defrosted.
- Page 29 RUC 5208X, RUC 6308X, RUC 8308X Using the refrigerator • For optimal energy consumption, position the shelves and drawers according to their position on delivery. • On a regularly basis, make sure the door seal still fits properly. • Clean dust and dirt from the condenser at regular intervals. •...
- Page 30 Using the refrigerator RUC 5208X, RUC 6308X, RUC 8308X 1. Rotate the control knob to select a submenu. 2. Press the control knob to open the selected submenu. ✔ The submenu opens. 3. Rotate the control knob to navigate through the submenu items or to adjust a setting. 4.
- Page 31 RUC 5208X, RUC 6308X, RUC 8308X Using the refrigerator 10.8 Setting the cooling capacity NOTE For ambient temperatures of +15 °C to +25 °C, select the average cooling capacity. 1. Select the submenu “Cooling capacity” (see table on page 29). 2.
- Page 32 Using the refrigerator RUC 5208X, RUC 6308X, RUC 8308X ➤ Press the handle and pull the door open. Locking the refrigerator door/freezer compartment door 1. Ensure the door is not in the winter position (chapter “Positioning the refrigerator door/freezer compartment door into winter position”...
- Page 33 RUC 5208X, RUC 6308X, RUC 8308X Using the refrigerator 10.11 Using the crisper NOTICE! Damage hazard The maximum load capacity of the crisper is 18 l. ➤ Use the slider in the crisper (fig. q, page 33) to regulate the humidity in the vegetable compartment: Goods to be cooled Optimal humidity Slider position...
- Page 34 Using the refrigerator RUC 5208X, RUC 6308X, RUC 8308X 10.12 Removing and refitting the shelves WARNING! Risk of child entrapment All shelves are fixed in place to prevent children from climbing inside the refrigerator. • Only remove the shelves for cleaning purposes. •...
- Page 35 RUC 5208X, RUC 6308X, RUC 8308X Using the refrigerator Refitting the shelves 1. Tilt the right end of the shelf up to slide the shelf back into the refrigerator compartment. 2. Position the plastic holders on the left side in the suspension (fig. s 1.). 3.
- Page 36 Using the refrigerator RUC 5208X, RUC 6308X, RUC 8308X Positioning the bottle shelf The shelves can be optionally installed in a backward or forward sloping position as a bottle rack. ➤ Remove the respective shelf and relocate the shelf as shown in fig. u. 180°...
- Page 37 RUC 5208X, RUC 6308X, RUC 8308X Using the refrigerator 10.13 Replacing the door panel Removing the door panel ➤ Pull off the decorative strip at the upper edge of the door and slide the door panel out of the door frame (fig.
- Page 38 When sliding the panel into the door frame, ensure that the edges fit into the grooves of the door frame. 10.14 Reversing the door stop (RUC5208X only) NOTICE! Damage hazard Be careful not to damage the door bushing and the surface of the door panel.
- Page 39 RUC 5208X, RUC 6308X, RUC 8308X Using the refrigerator RUC 5208X 1. Open the door. 2. Remove the cover of the top hinge pin (fig. x 1) using a small screwdriver. 3. Pull out the top hinge pin (fig. x 2) using pliers. RUC 5208X...
- Page 40 Using the refrigerator RUC 5208X, RUC 6308X, RUC 8308X RUC 5208X 4. Remove the refrigerator door by lifting the refrigerator door over the bottom hinge pin (fig. y 1.). 5. Place the refrigerator door level on a soft material to avoid scratches. 6.
- Page 41 RUC 5208X, RUC 6308X, RUC 8308X Using the refrigerator RUC 5208X 14. Attach the locking latch and bushing to the opposite side of the door frame from their respective starting posi- tion (fig. B). RUC 5208X 15. Remove the two screws (fig. C 1.) from the latch assembly. 16.
- Page 42 Using the refrigerator RUC 5208X, RUC 6308X, RUC 8308X RUC 5208X 21. Insert the refrigerator door onto the bottom hinge pin at the new position on the opposite side of the door frame (fig. E 1.). 22.Push the top hinge pin into the refrigerator door top bush and attach the top pin cover (fig. E 2.). 10.15 Reversing the door stop (RUC6408X, 8408X only) RUC 6408X, 8408X 90°...
- Page 43 RUC 5208X, RUC 6308X, RUC 8308X Using the refrigerator RUC 6408X, 8408X RUC 6408X, 8408X NOTICE! Damage hazard Be careful not to damage the door bushing and the surface of the door panel. 1. Open the freezer door more than 90°. 2.
- Page 44 Using the refrigerator RUC 5208X, RUC 6308X, RUC 8308X RUC 6408X, 8408X 7. Remove the refrigerator door by lifting the refrigerator door over the bottom hinge pin (fig. H 1.). 8. Place the refrigerator door level on a soft material to avoid scratches. 9.
- Page 45 RUC 5208X, RUC 6308X, RUC 8308X Using the refrigerator 14. Remove the screws under the hinge bushings on the hinge side (fig. I 2). RUC 6408X, 8408X 15. Attach the locking latches and the bushings to the opposite side of the door frame from their respective start- ing position (fig.
- Page 46 Using the refrigerator RUC 5208X, RUC 6308X, RUC 8308X 16. Remove the two screws (fig. K 1.) from the latch assemblies on the freezer door and on the refrigerator door. 17. Use a small screwdriver to push the spring bolt inwards and release the latch assembly (fig. K 2.). 18.
- Page 47 RUC 5208X, RUC 6308X, RUC 8308X Using the refrigerator RUC 6408X, 8408X 26.Insert the middle hinge pin and push it into the top of the refrigerator door (fig. M 1.). ✔ The refrigerator door is now fixed. 27. Insert the freezer door onto the middle hinge pin (fig. M 2.). RUC 6408X, 8408X 28.Open the freezer door more than 90°.
-
Page 48: Cleaning And Maintenance
Cleaning and maintenance RUC 5208X, RUC 6308X, RUC 8308X 11 Cleaning and maintenance WARNING! Electrocution hazard Always disconnect the refrigerator from the AC and DC power supply before cleaning. NOTICE! Damage hazard • Do not use abrasive cleaning agents or hard objects during cleaning as these can damage the refrigerator. - Page 49 RUC 5208X, RUC 6308X, RUC 8308X Cleaning and maintenance 11.1 Defrosting the refrigerator The refrigerator compartment is equipped with an automatic cyclic defrost system that prevents excessive frost for- mation on the evaporator fins. If the refrigerator is used for a long time in high humidity and/or high ambient tem- peratures, frost may still form on the evaporator fins and the refrigerator must be defrosted manually.
-
Page 50: Troubleshooting
Troubleshooting RUC 5208X, RUC 6308X, RUC 8308X 12 Troubleshooting Problem Possible cause Suggested remedy ➤ Check that no ventilation grille or roof vent is Poor cooling perfor- The ventilation around the mance. The refrigerator cooling unit is not suffi- obstructed. ➤... - Page 51 RUC 5208X, RUC 6308X, RUC 8308X Troubleshooting Problem Possible cause Suggested remedy ➤ Bend the component carefully away from the Unusual noises (e.g. loud A component of the refrig- humming) erant circuit cannot move obstruction. freely (touching the wall). ➤ Remove the foreign object. A foreign object is located between the cooling unit and the wall.
- Page 52 Troubleshooting RUC 5208X, RUC 6308X, RUC 8308X 12.2 AC operation only Problem Possible cause Suggested remedy ➤ Connect the vehicle to the AC power supply. The refrigerator does not The vehicle is not con- work. The display does not nected to the AC power light up.
-
Page 53: Warranty
If the product does not work as it should, please contact your retailer or the manufacturer's branch in your country (see dometic.com/dealer). The warranty applicable to your product is 3 year(s). For repair and warranty processing, please include the following documents when you send in the device: •... -
Page 54: Disposal
This warranty policy is subject to the conditions and guarantees which are mandatory as implied by the Consumer Guarantees Act 1993(NZ). Local support Please find local support at the following link address: dometic.com/dealer 14 Disposal WARNING! Fire hazard • The refrigerant used is highly flammable. Do not open or damage the refrigerant circuit. -
Page 55: Technical Data
RUC 5208X, RUC 6308X, RUC 8308X Technical data 15 Technical data This product contains fluorinated greenhouse gases. The cooling unit is hermetically sealed. RUC5208X RUC6408X RUC8408X Capacity 133 l 134 l 170 l • Refrigerator compartment 13 l 46 l 46 l •... - Page 56 Technical data RUC 5208X, RUC 6308X, RUC 8308X RUC5208X RUC6408X RUC8408X Dimensions H x W 1191 x 550 mm 1447 x 550 mm 1657 x 550 mm • With flange 1178 x 525 mm 1434 x 525 mm 1644 x 525 mm •...
- Page 60 YOUR LOCAL YOUR LOCAL DEALER SUPPORT SALES OFFICE dometic.com/dealer dometic.com/contact dometic.com/sales-offices A complete list of Dometic companies, which comprise the Dometic Group, can be found in the public filings of: DOMETIC GROUP AB • Hemvärnsgatan 15 • SE-17154 Solna • Sweden...
Need help?
Do you have a question about the RUC5208X and is the answer not in the manual?
Questions and answers