Dometic RUC8408X Installation And Operating Manual
Ruc series.
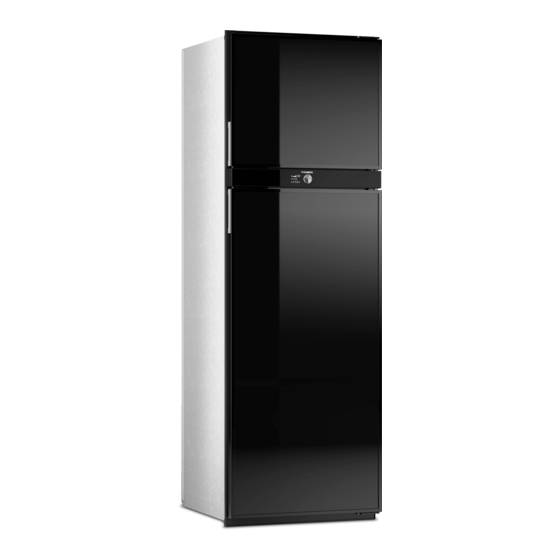
compressor refrigerator
Hide thumbs
Also See for RUC8408X:
- Installation and operating manual (60 pages) ,
- Installation and operating manual (60 pages) ,
- Installation and operating manual (76 pages)

Related Manuals for Dometic RUC8408X


Summary of Contents for Dometic RUC8408X
- Page 1 REFRIGERATION RUC SERIES RUC8408X Compressor refrigerator Installation and Operating Manual...
-
Page 3: Table Of Contents
RUC8408X Please read this instruction manual carefully before installation and first use, and store it in a safe place. If you pass on the product to another person, hand over this instruction manual along with it. Table of contents Explanation of symbols ......... . .4 Safety instructions . -
Page 4: Explanation Of Symbols
Explanation of symbols RUC8408X Explanation of symbols DANGER! Safety instruction: Failure to observe this instruction will cause fatal or serious injury. WARNING! Safety instruction: Failure to observe this instruction can cause fatal or serious injury. CAUTION! Safety instruction: Failure to observe this instruction can lead to injury. - Page 5 RUC8408X Safety instructions If this device's power cable is damaged, it must be replaced by the • manufacturer, customer service or a similarly qualified person in order to prevent safety hazards. This device may only be repaired by qualified personnel. Inadequate •...
- Page 6 Safety instructions RUC8408X Make sure that the refrigerator circuit is not damaged during transpor- • tation. The refrigerant in the refrigerator circuit has a low potential to become flammable. In the event of any damage to the refrigerator circuit: – Avoid naked flames and sparks.
-
Page 7: Scope Of Delivery
RUC8408X Scope of delivery Scope of delivery Quantity Description Refrigerator Drain hose Bottom trim piece Installation and Operating Manual Accessories Available as accessories (not included in the scope of delivery): Description LS300 ventilation grille (W x H: 490 x 249 mm, open ventilation area 667 cm Accessories are available from specialist dealers. -
Page 8: Technical Description
Technical description RUC8408X Technical description Description The device can refrigerate goods to +8 °C to 0 °C and keep them cool. Products can be frozen to –10 °C to –20 °C in the freezer compartment. You can use the control display to set the desired temperature. - Page 9 RUC8408X Technical description No. in Description fig. 1 Freezer compartment door Freezer door rack Refrigerator door Top door bin Bottom door bin with bottle holder Fruit and vegetable section Refrigerator shelf Refrigerator compartment Air duct cover plate Internal light Control and display...
-
Page 10: Installing The Refrigerator
Installing the refrigerator RUC8408X Installing the refrigerator Preparing the installation When installing the refrigerator, note the following: Ensure that the floor is solid and level. • Ensure that the refrigerator is level. • The refrigerator must be installed so that it is easily accessible for service work, •... - Page 11 RUC8408X Installing the refrigerator Refrigerator Overall dimension in mm Height (A) 1657 Width (B) Depth (C) 677 (includes control knob 5mm) Recess Dimension in mm Height (H) 1647 –1652 Width (W) 530 – 535 Depth (D) min. 611 Installation with two rear vents The air inlet and outlet vents must not be covered by vehicle parts (such as an •...
- Page 12 Installing the refrigerator RUC8408X Pos. in fig. 4, Description page 12 Maximum height to 300 mm below the compressor shelf LS300 vent Minimum height is equal to the height of the compressor shelf Air deflection plate The outer wall must be fitted with one air inlet ventilation grille (fig. 4 2a, •...
- Page 13 RUC8408X Installing the refrigerator Fit an air deflection plate (fig. 4 4, page 12) above the compressor so that the • heat does not accumulate in the vehicle. Installation with one lower rear vent and one roof vent NOTE This installation method is satisfactory for refrigerator performance, but not the preferred method due to lack of service access to the compres- sor shelf area.
- Page 14 Installing the refrigerator RUC8408X A roof vent may be installed instead of the air outlet vent. • – The roof vent should be installed directly above the back of the refrigerator as far as this is possible. Use an air duct if you need to install the roof vent (fig.
- Page 15 RUC8408X Installing the refrigerator OPTIONAL: ➤ If the refrigerator stands on a platform, install the bottom trim piece in order to seal the space between the refrigerator and the platform. – Apply a sealing strip (fig. 7 1) to the lower surface of the bottom trim piece.
- Page 16 Installing the refrigerator RUC8408X Installing the drain water hose ➤ To avoid damage to the drain water hose, position the hole for the drain water hose in a way that the hose does not kink. ➤ Drill a hole through the floor at the rear of the refrigerator.
- Page 17 RUC8408X Installing the refrigerator ➤ Ensure the installation frame is water resistant (fig. a). ➤ Insert the installation frame and screw it down tightly (fig. b). Use all the fixing holes for this. ➤ Fit the ventilation grille (1. and 2. in fig. c).
- Page 18 Installing the refrigerator RUC8408X Install the roof vent No. in Description fig. d Hood Installation frame ➤ Cut out a section in the roof. Refer to the roof vent instruction manual for the required dimensions. When doing so, observe the information, see chapter “Pre- paring the installation”...
- Page 19 RUC8408X Installing the refrigerator ➤ Insert the installation frame and screw it down tightly (fig. f). Use all the fixing holes for this. ➤ Insert the hood and screw it down tightly (fig. g).
-
Page 20: Securing The Refrigerator
Installing the refrigerator RUC8408X Securing the refrigerator CAUTION! Only screw through the bushes built into the refrigerator, otherwise foamed components, including electrical wiring, can be damaged. NOTE Ensure that the screws are tight, even when under increased loads (while driving). -
Page 21: Connecting The Refrigerator
RUC8408X Connecting the refrigerator Connecting the refrigerator Connecting the refrigerator to 12 – 24 V NOTICE! To avoid voltage drops and loss of performance, keep the • connection cable as short as possible and uninterrupted. Therefore avoid additional switches, plugs or power strips. - Page 22 Connecting the refrigerator RUC8408X Key to the figure Coordinate axis Meaning Unit Cable length ∅ Cable cross section mm² NOTICE! Make sure the polarity is correct. ➤ Before starting up the device for the first time, check whether the operating voltage and the battery voltage match (see type plate).
-
Page 23: Using The Refrigerator
RUC8408X Using the refrigerator Connecting the refrigerator to AC mains DANGER! Danger of fatal injury! Never handle plugs and switches with wet hands or if you are • standing on a wet surface. If you are operating your refrigerator on a boat with an AC mains •... - Page 24 Using the refrigerator RUC8408X NOTE Before starting your new refrigerator for the first time, you should • clean it inside and outside with a damp cloth for hygienic reasons. The cooling performance can be affected by: • – the ambient temperature (e.g. when the vehicle is exposed to direct sunlight) –...
-
Page 25: Energy Saving Tips
RUC8408X Using the refrigerator Energy saving tips Choose a well ventilated location which is protected from direct sunlight. • Allow warm food to cool down first before keeping it cool in the refrigerator. • Do not open the refrigerator more often than necessary. - Page 26 Using the refrigerator RUC8408X Menu overview and navigation ➤ Turn/press the control knob on preferred setting and user mode option. ✓ The colour turns blue when selected. ➤ Press again to deselect.
- Page 27 RUC8408X Using the refrigerator Display By default the display shows the following main menu: No. in Description fig. l The temperature bars show the set temperature: Lowest bar: lowest cooling function (warmest inner temperature) Highest bar: highest cooling function (coldest inner temperature) Blue snowflake: compressor is on.
- Page 28 Using the refrigerator RUC8408X No. in Description fig. l The display lock is selectable by user to prevent accidental adjustments or children from using the controls. The lock activates approx. 10 seconds after the last control knob touch and the display dims.
- Page 29 RUC8408X Using the refrigerator NOTE - inner fan All cooling modes: the inner fan switches off when the refrigerator • door is opened. Performance/Silent/Turbo modes: the inner fan cycles on/off with • the compressor. Eco mode: the inner fan remains on during compressor off cycles.
- Page 30 Using the refrigerator RUC8408X Display dimming functions (fig. n) If there is no operation on control knob within 10 seconds, the backlight will be dimmed and the display will return to idle screen (A). After another 3 minutes with- out operation, the screen will enter standby (C) on which a snowflake appears in the top left corner to indicate that the refrigerator is on.
- Page 31 RUC8408X Using the refrigerator Opening the refrigerator door/freezer compartment door CAUTION! Always close and lock the refrigerator before starting the journey. • Open the refrigerator doors carefully, because goods may have • shifted and could fall out. ➤ Press the handle and pull the door out.
- Page 32 Using the refrigerator RUC8408X 9.10 Locking the refrigerator door/freezer compartment door ➤ Ensure the locking catch is in the normal use position and not in the airing func- tion position (fig. q, page 34). ➤ Press the door shut until you hear it clearly click.
- Page 33 RUC8408X Using the refrigerator No. in Food fig. p Frozen food Dairy products, ready-made meals Meat, fish, items for defrosting Salad, vegetables, fruit Eggs, butter Dressing, ketchup, jam Drinks in bottles or cartons Please observe the following instructions for storing items: NOTE Do not keep carbonated drinks in the freezer compartment.
-
Page 34: Switching Off The Refrigerator
Using the refrigerator RUC8408X 9.12 Switching off the refrigerator ➤ Press and hold the control knob for more than 3 seconds. ✓ The display goes blank and the refrigerator is switched off completely. ➤ Disconnect the DC power supply. 9.13... - Page 35 RUC8408X Using the refrigerator 9.14 Removing and refitting the shelves Removing the shelves ➤ Push the shelf locks off the left end of the wire shelf (1.). ➤ Slide the shelf to the left until it is clear on the right side (2.).
- Page 36 Using the refrigerator RUC8408X Refitting the shelves ➤ Position the shelf in the desired location. ➤ Insert the ends of the shelf on the left (1.). ➤ Slide the shelf into the holes on the right (2.). ➤ Slide the plastic plugs into the holes in the wall (3.).
-
Page 37: Defrosting The Refrigerator
RUC8408X Using the refrigerator ➤ Snap the shelf locks onto the shelf. 9.15 Defrosting the refrigerator NOTICE! Never use mechanical tools to remove ice or to loosen objects stuck to the device. NOTE The refrigerator compartment has a cyclic defrost system, which can •... - Page 38 Using the refrigerator RUC8408X ➤ Leave the doors open. ✓ The condensate drains off through a hose at the back of the refrigerator and is routed outside the vehicle. ➤ Wipe both compartments dry with a cloth. 9.16 Replacing the door panel Removing the door panel Proceed as follows (fig.
- Page 39 RUC8408X Using the refrigerator Installing the new door panel Proceed as follows (fig. v): ➤ Push the new panel downwards into the door. Ensure, that the vertical edges fit into the grooves of the door frame (1.). ➤ Push the new panel downwards until the lower horizontal edge of the panel fits into the bottom grove.
-
Page 40: Reversing The Doors
Using the refrigerator RUC8408X 9.17 Reversing the doors ≥90° ➤ Open the freezer door more than 90 degrees. ➤ Remove the three screws (fig. w 1) from the upper hinge. ➤ Pull the upper hinge upwards out of the bushing and away from the freezer door. - Page 41 RUC8408X Using the refrigerator ➤ Remove the refrigerator door by lifting it up until it clears the lower pin (1. in fig. y). NOTE Carefully lift up the refrigerator door to prevent damaging the door bushing. ➤ Place the refrigerator door on soft material in order to prevent scratches.
- Page 42 Using the refrigerator RUC8408X ➤ Rotate the locking catches on the latch side by 180 degrees to expose the fixing screws. ➤ Remove the locking catch screws (fig. z 1). ➤ Take off the locking catches (fig. z 1). ➤ Remove the covers on the hinge side with a small screwdriver (fig. z 2).
- Page 43 RUC8408X Using the refrigerator ➤ Remove the two screws (1. in fig. B) of the handle components on both doors. ➤ Push the spring bolt (2. in fig. B) inwards with a small screwdriver, until the handle components (fig. B 1) are released.
- Page 44 Using the refrigerator RUC8408X ➤ Remove the covers from the upper and lower hinge points (1. in fig. C). ➤ Install the covers on the opposite side (2. in fig. C). ➤ Turn the former upper hinge 180 degrees and mount it to the new lower hinge position with the three screws.
- Page 45 RUC8408X Using the refrigerator ➤ Position the freezer door on the middle pin (2. in fig. D, page 44). ➤ Turn the former lower hinge 180 degrees and hold it in the new upper hinge posi- tion. Take care that the hinge pin fits into the upper bushing of the freezer door (1.
-
Page 46: Cleaning And Maintenance
Cleaning and maintenance RUC8408X Cleaning and maintenance WARNING! Always disconnect the refrigerator from the mains before you clean and service it. NOTICE! Do not use abrasive cleaning agents or hard objects during cleaning • as these can damage the refrigerator. -
Page 47: Troubleshooting
RUC8408X Troubleshooting In case of multiple faults, the error code will be rolling. The beep will last for 2 minutes and repeat every 30 minutes until the fault is restored. Error type faults must be manually reset by pressing and holding the control knob between 2 s and 4 s. - Page 48 Troubleshooting RUC8408X Influence on Code Fault Type Icon Beep cooling Compressor Error No flashing overloaded Thermal cut-out Error No flashing of controller unit Compressor does not run (battery connection) Fault Possible cause Remedy Device does not The connection between the battery Establish a connection.
- Page 49 RUC8408X Troubleshooting Fault Possible cause Remedy Start attempt with Ambient temperature too high – ≥ U Term Insufficient ventilation Clean existing ventilation or install sufficient ventilation. Condenser is dirty Clean the condenser. Fan defective Replace the fan. Electric circuit between...
- Page 50 Troubleshooting RUC8408X Compressor is not running (connected to AC supply) Fault Possible cause Remedy Device does not Connection supply line interrupted Establish a connection. function, display does Main switch faulty (if installed) Replace the main switch. not glow Additional supply line fuse has blown Replace the supply line (if installed).
- Page 51 RUC8408X Troubleshooting Poor cooling, increase in interior temperature Fault Possible cause Remedy Compressor runs for a Evaporator is iced over. Defrost the evaporator. long time/continuously Cooling area insulation is insufficient Adjust/replace the door (moist/wet). seal. Ambient temperature too high –...
-
Page 52: Warranty
Warranty RUC8408X Warranty The statutory warranty period applies. If the product is defective, please contact the manufacturer's branch in your country (see the back of the instruction manual for the addresses) or your retailer. For repair and guarantee processing, please include the following documents when... -
Page 53: Technical Data
RUC8408X Technical data Technical data RUC8408X Capacity – total: 216.5 l Capacity – freezer compartment: 46 l Connection voltage: 12 Vg or 24 Vg 100 – 240 Vw, 50 – 60 Hz Power rating (AC): 75 W Rated current 12 Vg: 10.5 A... - Page 54 Technical data RUC8408X RUC8408X Dimensions (mm) W x H without flange: 525 x 1644 with flange: 550 x 1657 overall (includes control knob 5 mm): back face to rear: Weight: 46 kg Inspection/certification: NOTE The power consumption is measured at 32 °C ambient temperature with 3 °C average cooling temperature in the refrigerator compartment.
- Page 56 Dometic (Pty) Ltd. Dometic Branch Office Belgium MEXICO Regional Office Zincstraat 3 Dometic Mx, S. de R. L. de C. V. South Africa & Sub-Saharan Africa B-1500 Halle Circuito Médicos No. 6 Local 1 Unit 6-7 on Mastiff Linbro Park +32 2 3598040 Colonia Ciudad Satélite...
Need help?
Do you have a question about the RUC8408X and is the answer not in the manual?
Questions and answers