Advertisement
Quick Links
1
2
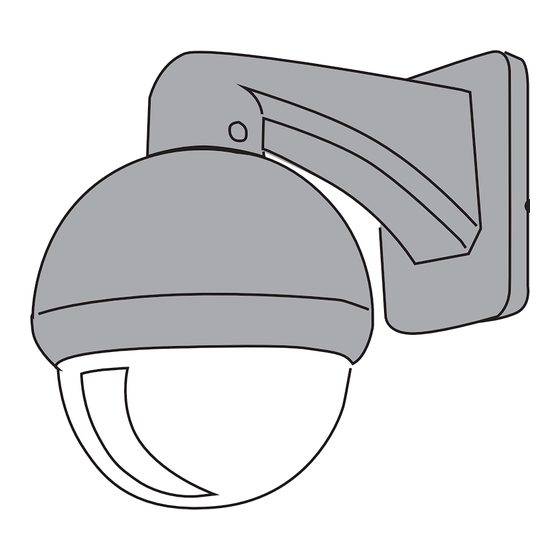
DOME CAMERA
DOME CAMERA
3
PAN TILT CAMERA
PAN TILT CAMERA
4
LED monitor
VGA
cable
5
6
QUICK START GUIDE
CWR-30002
CWR-30003
Video in V2, V3 or V4
Adapter
Connection
Adapter
Adapter
Video in V1
Video in V1
DVR recorder
DVR recorder
EN
1. - DVR
- VGA cable
- powersplitter
2. Connect the dome camera, see figure 2. Connect the mini din of the camera to the mini din of the 18.3m
cable. Connect the video plug of the camera to the video plug of the DVR recorder V2, V3 or V4. Connect
the power plug of the 18,3 m cable to the power adapter and plug the adapter into the 230V socket.
3. Connect the pan tilt camera, see figure 3 and 4. Connect the Video out plug of the camera to the Video
out plug of the cable. Connect the RS plug of the camera to the RS plug of the cable. Connect the power plug of
the camera to the power plug of the cable. Connect the Video in (V1) plug of the cable to the video in of the
recording device (HD DVR). Connect the RS plug of the cable to the RS in of the recording device (HD DVR).
Connect the power plug of the cable to the power adapter and plug the power adapter into the 230V socket.
Deafault settings:
- Protocol: Pelcod
- Baud rate: 2400
- Address: 1
4. To configure your DVR you need to connect a screen to the HDMI or VGA port. Connect the mouse to the
USB port of the DVR.
5. The system will start with an installation wizard. Click "next".
6. Click "OK" (Standard "user name": admin and "password":
7. Set the desired time zone, time and date.
DST (Daylight Saving Time)= summertime.
When you check "enable", then you can set the start date and end date of the summertime which is
applicable for you.
At "language" you can change the system language. Click "next".
8. Connect a network cable to the DVR and your router. Click "network" and make sure that DHCP is checked.
Click "OK", followed by "Retry". The test for "gateway, network and DNS" will get the "OK" status. Click "next".
When you only want to see the images locally, you won't have to connect a network cable,
so then you can click on "skip".
9. Scan the QR code with your smartphone to download the Xmeye app. When you can't scan a QR code then
you can also download the Xmeye app in the Google Play or Apple Store. Click "next".
10. Open the app on your smartphone. Choose "local login". Click on "+" to add a DVR. Choose a "device name"
and click on the image of the QR code. Scan with your smartphone the QR code on the screen which is
connected to the DVR and click in the app on "OK".
On the screen which is connected to the DVR you first click "next", followed by "OK".
The installation wizard is completed.
11. In the app, touch (select) the "device name" you just have arranged.
Choose which camera you would like to see "live" by clicking on it.
Now you can see the live images/footage of the camera.
12. We strongly recommend you to change the "default password".
DVR: choose the right mouse button, a menu will pop-up.
Click "main menu", "advanced", "Account", Modify Pwd". At "Old" you don't need to fill in anything.
With "new" you can choose a new password, with "confirm" you need to reconfirm your new password.
App: Open the Xmeye app. Tap "Local Login".
Tap the blue pencil, choose "Edit", fill in your new password of the DVR and tap "Yes".
DE
1. - DVR
- VGA-Kabel
- Powersplitter
2. Verbinden Sie die Dome Kamera, wie in Abb. 2 angegeben.
Kamera mit dem Mini-Din Stecker des 18,3 Meter langen Kabels. Verbinden Sie den Video Stecker des Kabels
mit der "Video In" Buchse am Recorder (DVR), im V2, V3 oder V4. Verbinden Sie den den Stromanschluss des
18,3 Meter Kabels mit dem Adapter und stecken Sie diesen in eine 230 Volt Steckdose.
3. Verbinden Sie die Pan Tilt Kamera, wie in Abb. 3 und 4 angegeben. Verbinden Sie den Video Out Stecker der
Kamera mit dem Video Out Stecker des Kabels. Verbinden Sie den RS Stecker der Kamera mit dem RS Stecker des
Kabels Verbinden Sie den Stromanschluss der Kamera mit dem Stromanschluss des Kabels. Verbinden Sie den
Video In Stecker des Kabels mit der "Video In" (V1) Buchse am Recorder (HD DVR). Verbinden Sie den RS Stecker des
Kabels mit der RS Buchse am Recorder (HD DVR). Verbinden Sie den den Stromanschluss des Kabels mit dem
Adapter und stecken Sie diesen in eine 230 Volt Steckdose.
Standardeinstellungen:
- Protocol: Pelcod
- Baud rate: 2400
- Address: 1
4. Um Ihren DVR zu konfigurieren, müssen Sie ein Bildschirm mit Ihrem HDMI- oder VGA-Port verbinden.
RS in
RS in
Verbinden Sie die Maus mit dem USB-Port des DVR.
5. Das System wird mit einem Installationsassistenten starten. Klicken Sie auf „nächster".
6. Klicken Sie auf „OK" (Standard „Benutzername": Admin und „Passwort":
7. Stellen Sie die gewünschte Zeitzone, Zeit und Datum ein. DST (Daylight Saving Time)= Sommerzeit.
Wenn sie „aktivieren" ankreuzen, dann können Sie das für Sie relevante Start- und Enddatum der
Sommerzeit einstellen. Unter „Sprache" können Sie die Systemsprache ändern. Klicken Sie auf „nächster".
8. Verbinden Sie ein Netzwerkkabel mit dem DVR und Ihrem Router. Klicken Sie auf „Netzwerk" und stellen Sie
sicher, dass der DHCP angekreuzt ist. Klicken Sie auf „OK", gefolgt von einem „Neuversuch".
Der Test für „Gateway, Netzwerk und DNS" wird den Status „OK" bekommen.
Klicken Sie auf „nächster". Wenn Sie die Bilder nur lokal sehen wollen, müssen Sie kein Netzwerkkabel
verbinden, damit Sie dann auf „Überspringen" klicken können.
9. Scannen Sie den QR-Code mit Ihrem Smartphone, um die App Xmeye herunterzuladen. Wenn Sie einen
QR-Code nicht scannen können, können Sie auch die App Xmeye im Google Play oder Apple Store
herunterladen. Klicken Sie auf „nächster".
10. Öffnen Sie die App auf Ihrem Smartphone. Wählen Sie „lokaler Login". Klicken Sie auf „+", um einen DVR
hinzuzufügen. Wählen Sie einen „Gerätenamen" und klicken Sie auf das Bild des QR-Codes. Scannen Sie den
QR-Code mit Ihrem Smartphone auf dem Bildschirm, der mit dem DVR verbunden ist und klicken Sie in der
App auf „OK". Auf dem Bildschirm, der mit dem DVR verbunden ist, klicken Sie zuerst auf „nächster", gefolgt
von „OK". Der Installationsassistent ist abgeschlossen.
11. Berühren (Wählen) Sie in der App den „Gerätenamen", den Sie gerade eingerichtet haben.
Wählen Sie, welche Kamera Sie gerne „live" sehen möchten, indem Sie darauf klicken. Jetzt können Sie die
Live-Bilder/-Aufnahmen der Kamera sehen.
12. Wir empfehlen Ihnen dringend, das „Standard-Passwort" zu ändern. DVR: wählen Sie die rechte Maustaste,
ein Menü wird erscheinen. Klicken Sie auf „Hauptmenü", „erweitert", „Account", „Pwd ändern". Unter „Alt"
müssen Sie nicht alles ausfüllen. Mit „neu" können Sie ein neuen Passwort wählen, mit „bestätigen" müssen
Sie Ihr neues Passwort wieder bestätigen. App: Öffnen Sie die App Xmeye. Drücken Sie auf „Lokaler Login".
Drücken Sie auf den blauen Stift, wählen Sie „Bearbeiten", geben Sie Ihr neues Passwort des DVR ein und
drücken Sie auf „Ja".
- Remote control
- mouse
- 3x adaptor
- 2x 18,3m cable
- screw set
- Quick Start Guide.
)
- Fernbedienung
- Maus
- 3x Netzteil
- 2x 18,3m Kabel
- Schraubensatz
- Kurzanleitung
Verbinden
Sie den Mini-Din Stecker der
- screen
- 2x cameras
- Bildschirm
- 2x Kameras
)
Advertisement

Related Manuals for Smartwares CWR-30002


Summary of Contents for Smartwares CWR-30002
- Page 1 QUICK START GUIDE CWR-30002 1. - DVR - Remote control - mouse - screen - VGA cable - 3x adaptor - 2x 18,3m cable - 2x cameras CWR-30003 - powersplitter - screw set - Quick Start Guide. 2. Connect the dome camera, see figure 2. Connect the mini din of the camera to the mini din of the 18.3m cable.
- Page 2 QUICK START GUIDE 1. - DVR CWR-30002 - afstandsbediening - muis - monitor - VGA cable - 3x adapter - 2x 18,3m kabel - 2x cameras CWR-30003 - powersplitter, - schroevenset - Quick Start Guide 2. Sluit alle bedrading voor de dome camera aan zoals zichtbaar in het schema in figuur 2. Sluit de mini-din plug van de camera aan, op de mini-din plug van de 18.3 meter kabel.
Need help?
Do you have a question about the CWR-30002 and is the answer not in the manual?
Questions and answers