Table of Contents
Advertisement
Quick Links
Advertisement
Table of Contents

Related Manuals for MULTIQUIP MIX N' GO MC3PBAT


Summary of Contents for MULTIQUIP MIX N' GO MC3PBAT
- Page 1 MODEL MC3PBAT MINI CONCRETE PLASTIC DRUM MIXER ( BATTERY OPERATED ) Revision #0 (04/09/24) To find the latest revision of this publication or associated parts manual, visit our website at: www.multiquip.com THIS MANUAL MUST ACCOMPANY THE EQUIPMENT AT ALL TIMES.
-
Page 2: Proposition 65
PROPOSITION 65 PAGE 2 — MIX N' GO MIXER MC3PBAT • OPERATION MANUAL — REV. #0 (04/09/24) -
Page 3: Silicosis/Respirator Warnings
SILICOSIS/RESPIRATOR WARNINGS WARNING WARNING SILICOSIS WARNING RESPIRATORY HAZARDS Grinding/cutting/drilling of masonry, concrete, metal and Grinding/cutting/drilling of masonry, concrete, metal and other materials with silica in their composition may give other materials can generate dust, mists and fumes off dust or mists containing crystalline silica. Silica is a containing chemicals known to cause serious or fatal basic component of sand, quartz, brick clay, granite and injury or illness, such as respiratory disease, cancer,... -
Page 4: Table Of Contents
TABLE OF CONTENTS Multiquip Mix N' Go Portable Concrete Mixer Proposition 65 ............2 Silicosis/Respirator Warnings ........3 Safety Information ..........6-9 Operation And Safety Decal ........10 Specifications ............11 Dimensions ............12 General Information ..........13 Components ............14 Assembly Instructions ........ - Page 5 NOTES MIX N' GO MIXER • MC3PBAT • OPERATION MANUAL — REV. #0 (04/09/24) — PAGE 5...
-
Page 6: Safety Information
SAFETY INFORMATION Do not operate or service the equipment before reading Potential hazards associated with the operation of this the entire manual. Safety precautions should be followed equipment will be referenced with hazard symbols which at all times when operating this equipment. may appear throughout this manual in conjunction with Failure to read and understand the safety safety messages. - Page 7 „ NEVER use accessories or attachments that are not „ Avoid wearing jewelry or loose fi tting clothes that may recommended by Multiquip for this equipment. Damage snag on the controls or moving parts as this can cause to the equipment and/or injury to user may result.
- Page 8 SAFETY INFORMATION BATTERY SAFETY MIXER SAFETY DANGER DANGER „ NEVER disassemble, crush, or puncture the battery. „ NEVER operate the equipment in an explosive atmosphere or near combustible materials. An „ NEVER expose the battery to fi re or water to prevent explosion or fi re could result causing severe potential hazards such as explosion, damage, or injury bodily harm or even death.
- Page 9 SAFETY INFORMATION TRANSPORTING SAFETY CAUTION „ NEVER allow any person or animal to stand underneath the equipment while lifting. NOTICE „ ALWAYS make sure forklift forks are inserted into pockets (if applicable) as far as possible when lifting the mixer. „...
-
Page 10: Operation And Safety Decal
OPERATION AND SAFETY DECAL Machine Safety Decal The Mix N' Go mixer is equipped with an operation and safety decal (Figure 1). This decal is provided for operator safety and maintenance information. The illustration below shows the decal as it appears on the machine. If the decal becomes unreadable a replacement decal can be ordered from the MQ Parts Dept. -
Page 11: Specifications
SPECIFICATIONS Table 1. Battery Specifications Type 48V 30Ah Lithium-Ion Battery 3.5 x 5.25 x 18.25 in Dimensions (L x W x H) (88.9 x 133.35 x 463.55 mm) Approximate Operating Time 3 hour 45 minutes 6.5 hours Charge Time Charger Type 115 VAC, 5 Amp Dry Net Weight: 16 lbs. -
Page 12: Dimensions
DIMENSIONS 56.10 IN. (1,425 MM. 34.68 IN. (881 MM. 31.41 IN. 47.67 IN. (798 MM. (1,211 MM. 48.75 IN. (1,238 MM. 23.5 IN. (597 MM. 68.22 IN. (1,733 MM. 40 IN. (1,016 MM. Figure 2. Dimensions PAGE 12 — MIX N' GO MIXER MC3PBAT • OPERATION MANUAL — REV. #0 (04/09/24) -
Page 13: General Information
GENERAL INFORMATION APPLICATION TRANSPORTING THE MIXER This mixer is only intended for the production of concrete Use a ramp (Figure 3) to load and unload the mixer from and mortar. The mixer must be used for its intended the transport vehicle. Never drop the mixer onto the ground; purposes and is not suitable for the mixing of flammable damage to the mixer could result. -
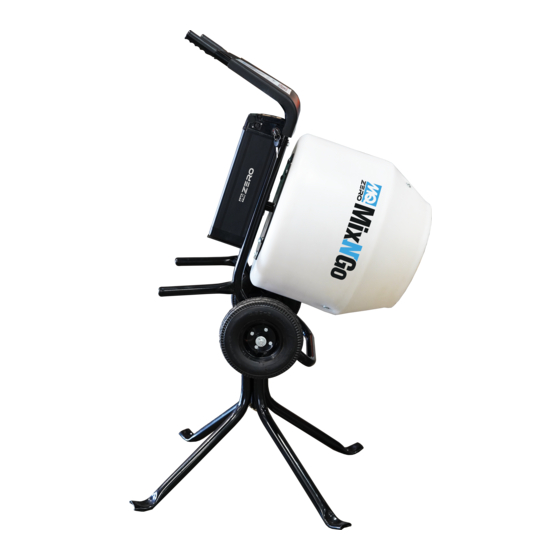
Page 14: Components
COMPONENTS Figure 4 shows the basic components of the MC3PBAT Mixer. Suppot stand is optional. MIXING DRUM BLADE MIXING DRUM COVER HAND GRIP BATTERY CONTROLLER PIVOTING STAND ELECTRIC MOTOR STAND LOCKING CLIP DRIVE BELT COVER GEAR BOX FRONT WHEELS OPTIONAL SUPPORT STAND STAND LOCKING PIN Figure 4. -
Page 15: Assembly Instructions
ASSEMBLY INSTRUCTIONS ASSEMBLY Top Cover Installation 1. Remove the mixer drum and associated components 1. Place the mixer frame on a secure level surface, and from the packing container (Figure 5). The following attach the top cover as shown in Figure 7. componets are enclosed in the shipping container. - Page 16 ASSEMBLY INSTRUCTIONS Battery Installation 6. To lock the battery (Figure 11), place the key switch in the OFF position, locking pin is extended. 1. Remove the battery from the packing container. It can be located inside the mixing drum. 2. Fully lift the top cover on the mixer. 3.
- Page 17 ASSEMBLY INSTRUCTIONS 3. Tip mixer onto mouth as shown in Figure 13, and insert 2. DO NOT tilt the mixer on a wet, smooth or slippery support stand into frame swivel point. surface (Figure 15). SUPPORT STAND SLIPPERY OR WET SURFACE Figure 15.
-
Page 18: Startup/Operation
STARTUP/OPERATION STARTING NOTICE DO NOT attempt to operate the mixer until the Safety, General Information and Inspection sections have been read and understood. 1. Before starting, make sure mixer is positioned on a secure flat surface to prevent tipping. 2. NEVER! operate mixer with the drive belt cover removed. - Page 19 STARTUP/OPERATION Battery Removal 6. As the drum rotates, this will allow the mixing process to begin. Use a shovel (Figure 20) to place the cement PUSH 1. Place key switch in the position (Figure 22). mix inside the drum, add water as required. WATER Figure 22.
- Page 20 STARTUP/OPERATION Drum Removal/Cleaning 3. Fully lift the top cover on the mixer and remove keys from battery key switch. 1. Clean entire mixer inside and out with a mild detergent. 4. Next, grip the battery handle (Figure 24) and lift the 2.
-
Page 21: Maintenance
MAINTENANCE DRIVE BELT INSPECTION (ONCE A YEAR) DISCONNECT CONTROLLER POWER CORD FROM BATTERY 1. Remove the drive belt cover as shown in Figure 26. INSERT BATTERY CHARGER PLUG INTO BATTERY CHARGING RECEPTACLE 2. Next inspect the drive belt for wear. If it shows signs of wear or cracks, replace drive belt. - Page 22 MAINTENANCE GEARBOX OIL REPLACEMENT (EVERY 6 MONTHS) 3. Next, place a oil pan (Figure 31) underneath the oil drain plug to catch the oil. NOTICE Replace gearbox oil every 6 months with SAE 80W-90, API GL-5 type gear oil. Make sure oil is cool before draining.
- Page 23 MAINTENANCE 5. Let oil completely drain into oil pan (Figure 33). 7. Insert oil filler hose from gear oil canister into oil filler port as shown in Figure 35. OIL FILLER HOSE GEARBOX OIL FILLER PORT GEAR OIL CANISTER Figure 35. Adding Gear Oil Figure 33.
-
Page 24: Troubleshooting
TROUBLESHOOTING Troubleshooting (Mixer) Symptom Possible Problem Solution Check that the electric motor pinion Defective electric motor, electric gear and bearings are not worn. motor pinion gear or bearings? Replace components if necessary. Replace electric motor if necessary. Inspect the gearbox and bearings for Defective gearbox or bearings? Drum rotates slow. - Page 25 TROUBLESHOOTING Troubleshooting (Mixer) Symptom Possible Problem Solution Allow the motor to cool down by Motor running hot? turning off the mixer and letting it rest for awhile. Ensure that the mixer is not Mixer load is too large? overloaded with excessive material. Electric motor overheating.
- Page 26 © COPYRIGHT 2024, MULTIQUIP INC. Multiquip Inc , the MQ logo are registered trademarks of Multiquip Inc. and may not be used, reproduced, or altered without written permission. All other trademarks are the property of their respective owners and used with permission.
Need help?
Do you have a question about the MIX N' GO MC3PBAT and is the answer not in the manual?
Questions and answers