Table of Contents

Related Manuals for Hall Technologies KVMC-UH-8-UHD


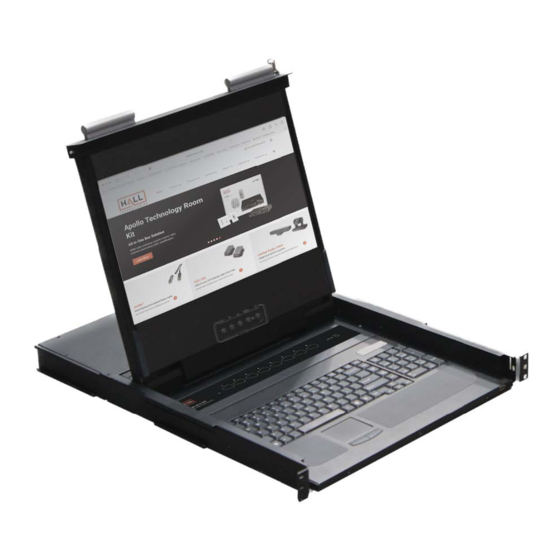
Summary of Contents for Hall Technologies KVMC-UH-8-UHD
- Page 1 Hall Technologies • 1234 Lakeshore Dr Suite #150 Coppell, TX 75019 • halltechav.com KVMC-UH-8-UHD 8-Port HDMI KVM Switch Console with USB 2.0 and 4K Video Support USER MANUAL October 1, 2023 Hall Technologies October 1, 2023 Page 1 of 10...
- Page 2 8. Protect the power cord from being walked on or pinched particularly at plugs. 9. Only use attachments / accessories specified by the manufacturer. Refer all servicing to qualified service personnel. Hall Technologies October 1, 2023 Page 2 of 10...
-
Page 3: Table Of Contents
Features ..............................4 Sliding out the rear mounting brackets ..................5 Mount in 4-point Rack ........................5 Setup and Operation ..........................6-7 Hotkey Sequences .......................... 7 Troubleshooting ............................8 Specifications ............................. 9 Hall Technologies October 1, 2023 Page 3 of 10... -
Page 4: Introduction
KVM Switching. The KVMC-UH-8-UHD also provides an integrated 2-port USB 2.0 Hub with one port on the rear and one on the front. When you select a new PC on the KVM, the USB 2.0 hub connects to the selected The console features 8 individual buttons for selecting inputs. -
Page 5: Sliding Out The Rear Mounting Brackets
Mount both brackets (separated from the console) to the inside rear of a standard 1U rack system using user-supplied screws. Take the console and gently slide it into the two rear-mounted brackets in the rack and secure the console in place by inserting user-supplied screws. Hall Technologies October 1, 2023 Page 5 of 10... -
Page 6: Setup And Operation
Setup and Operation The figures below show the front and rear of the KVM Switch Console. Cables are not included. For each input, you must provide one HDMI and one USB cable. Hall Technologies October 1, 2023 Page 6 of 10... -
Page 7: Hotkey Sequences
(1) You must complete the key sequence within 3 seconds. (2) In SCAN mode, the switch automatically cycles through all inputs one at a time. Each input is shown for 10 seconds. To stop the scan mode, press any key. Hall Technologies October 1, 2023 Page 7 of 10... -
Page 8: Troubleshooting
Do not open or try to repair the unit yourself, as this will void your warranty. To return the extender for repair, contact HR Support and obtain an RMA (Return Material Authorization) number. Hall Technologies October 1, 2023 Page 8 of 10... -
Page 9: Specifications
Device: 27 lbs (12.3 kg) Shipping: 38 lbs (17.2 kg) Vibration ISTA 1A in carton (International Safe Transit Association) Safety EMI/EMC CE, FCC Class A MTBF 90,000 hours (calculated average) Warranty 3 years parts and labor Hall Technologies October 1, 2023 Page 9 of 10... - Page 10 © Copyright 2023. Hall Technologies All rights reserved. 1234 Lakeshore Drive, Coppell, TX 75019 halltechav.com / support@halltechav.com (800)-959-6439 Hall Technologies October 1, 2023 Page 10 of 10...
Need help?
Do you have a question about the KVMC-UH-8-UHD and is the answer not in the manual?
Questions and answers