Table of Contents
Advertisement
Quick Links
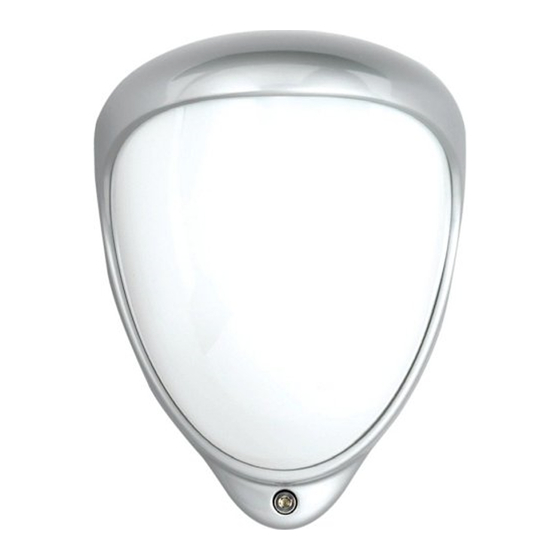
Universal Wireless Detector
GJD630 Battery Powered Quad PIR
Package contents
Package Contains:
•
1 x Universal Wireless Detector
•
1 x Drilling template for fixing holes
•
3 x 31.75mm wall plugs
•
3 x 31.75mm screws
•
2 x Additional sliding curtains
•
2 x Tamper feet
•
1 x Installation manual
•
1 x Self-adhesive lens mask
•
1 x Opening tool
•
1 x Tamper cup
Introduction
The Universal Wireless Detector is a battery powered
outdoor motion detector that uses two independent
passive infra-red detectors, both of which must trigger to
cause the detector to signal an alarm. Utilising quad PIR
technology, the Universal Wireless PIR delivers precise,
reliable presence detection.
The detector is a battery powered device with three
independent negative outputs to connect to third party
transmitter modules.
Quick Installation
1.
Mount the detector following the instructions given
later in this sheet.
2.
Fit the 2 x CR123 3 volt batteries observing the
correct polarity. The red LED will flash.
3.
Wait approximately 2 to 3 minutes to allow the
detector to settle.
4.
Press the programming button once to activate
Walk Test mode. The detection LED is now enabled
for 5 minutes.
Note: The front cover must be fitted when walk
testing.
The default settings are:
•
Range: 30 metres
•
Pulse count: 1
•
Outputs: Negative applied – active
Batteries
Only use CR123 3 V Lithium batteries.
Observe correct polarity when fitting.
Battery safety information
•
Do not put in a fire
•
Do not heat
•
Do not charge
•
Do not short circuit
•
Do not disassemble
•
Only fit batteries of the same type and voltage
To preserve battery life the detector has a 2 minute sleep
timer after a detection. This is reduced to 6 seconds
during walk test.
Mounting The Unit
During installation, protect the electronics against water, as
trapped moisture can affect or damage the unit.
1.
1.Drill the wall to accept the two fixing screws and the
tamper cup if used. See Figure 1. A hole-drilling template
is provided.
Note: We recommend using the tamper cup on uneven wall
surfaces.
2.
Remove the cover assembly by loosening the locking
screw. The cover hinges from the top and lifts out of the
location slot.
3.
Remove the detector from the mounting base by loosen-
ing the 5 securing screws. The mounting base is used to
accommodate the transmitter module.
Note: The mounting base must always be fitted to ensure
water tightness.
4.
Screw the mounting base to the wall ensuring that the
tamper pin is correctly located. To aid installation, two
alternative length tamper feet are provided.
5.
Fit transmitter module into mounting base and run cables
into detector housing.
6.
Secure detector to the mounting base with the 5 screws.
7.
Connect the transmitter cables into the terminal block.
8.
Fit two CR123 3 volt batteries.
Note: Observe correct polarity
9.
When the detector is aligned, connected and pro-
grammed to suit the installation, replace and secure the
front cover.
Connecting The T ransmitter
The transmitter module should be fitted in the mounting base.
There are 3 negative switching outputs and a 3 volt output on
the detector.
These are marked
– Common negative. Direct from battery –.
A Negative switching alarm output. Active for 4 seconds with
an activation.
T Negative switching tamper output. Active when either
tamper switch is open.
B Negative switching low battery output. Active when battery
voltage drops below 2.7 volts.
+ 3 Volts output. Direct from battery +.
– Common negative. Direct from battery –.
The three negative outputs can be programmed to be either
negative applied when active or negative removed when active.
See programming chart.
If the transmitter module is powered from its own battery then
connect the common negative on the detector to the common
negative on the transmitter module and DO NOT CONNECT
THE +
-1-
– A T B + –
Advertisement
Table of Contents

Summary of Contents for GJD GJD630
- Page 1 Universal Wireless Detector GJD630 Battery Powered Quad PIR Package contents Mounting The Unit Package Contains: • 1 x Universal Wireless Detector During installation, protect the electronics against water, as • 1 x Drilling template for fixing holes trapped moisture can affect or damage the unit.
- Page 2 Multibeam Alignment & Masking To re-set the default settings remove the batteries, wait 10 seconds, press and hold the program button then re-fit the batteries, the LED will flash rapidly then release the program The multifunction lens fitted to the Universal Wireless detector button.
- Page 3 T amper Protection The Universal Wireless Detector is fitted with two tamper switches to detect the front cover being removed and removal from the fixing surface. The flying lead on the rear of the Universal Wireless Detector PCB must be plugged into the top PCB for the tamper switches to operate.
- Page 5 Button...
- Page 6 Engineer Notes Technical: 01706 363990 Sales: 01706 363998 Fax: 01706 363991 Email: info@gjd.co.uk Unit 2, Birch Business Park, Whittle,Lane,Heywood,OL10 2SX...


Need help?
Do you have a question about the GJD630 and is the answer not in the manual?
Questions and answers