
Related Manuals for Opsytec Dr. Grobel UVpad


Summary of Contents for Opsytec Dr. Grobel UVpad
- Page 1 UVpad / UVpad E Manual version 2.1.0E Opsytec Dr. Gröbel GmbH Am Hardtwald 6-8 D-76275 Ettlingen Telefon: +49(0)7243 / 9 47 83-50 info@opsytec.de...
-
Page 2: Table Of Contents
Manufacturer, Ordering of Spares and Customer Service ........7 Change history ......................7 Copyright ........................7 Device identification ....................7 Intended use ......................7 Intended Use UVpad ....................10 Intended Use UVpad E ....................11 Foreseeable misuse ....................11 Legal Information .....................12 4.9.1 Limitation of liability ..................12 4.9.2 Declaration of conformity................12... - Page 3 12.2 Set UVpad for high belt speeds ................58 12.3 The UVpad displays too little irradiance values ............59 12.4 The UVpad displays too high or too low UVC Values ..........59 12.5 The UVpad displays “ - “ ..................59 12.6 The measured value is not reproducible ..............60 Maintenance &...
- Page 4 1Table of contents 13.2 Troubleshooting .......................61 13.3 Charging the battery ....................62 13.4 Reset 13.5 Firmware update ......................63 Technical data ........................65 Errors / faults ........................68 Maintenance & Cleaning ....................69 Spare parts ........................71 Declaration of conformity ....................72 NOTES ..........................73...
-
Page 5: Preface
12 months. Please note: These instructions apply to the UVpad with integrated sensor and the UVpad E with external sensor. You can operate both device versions identically, selecting the band mode for measuring curing systems. -
Page 6: Directives And Norms
3 Directives and Norms Directives and Norms The system is machinery under Annex II A of the Machinery Directive and is therefore delivered with a declaration of conformity and with a CE mark (in accordance with the Machinery Directive). Guidelines EC Directives 06/42/EC (Machinery) (partially observed) 2014/30/EC (EMC) -
Page 7: Identification
4 Identification Identification 4.1 Manufacturer, Ordering of Spares and Customer Service Opsytec Dr. Gröbel GmbH Am Hardtwald 6-8 D – 76275 Ettlingen Tel.: +49(0)7243 / 9 47 83-50 info@opsytec.de www.opsytec.com 4.2 Change history We reserve the right to make changes in content. Opsytec Dr. Gröbel GmbH is not liable for any errors in this documentation. - Page 8 Here, the UVpad offers enormous application advantages compared to the common spectral radiometers. Not only is the UVpad the worlds flattest autonomic spectral radiometer, it also offers a high- quality spectral measurement technology in a robust and easy to operate measurement device.
- Page 9 4 Identification • Before opening, the system must be disconnected from the power supply and it must be checked that no voltage is present. • Wear gloves for cleaning the sensors. • Any use other than that mentioned above will result in damage to the product. It is also associated with hazards such as short circuits, fire and electric shock .
-
Page 10: Intended Use Uvpad
It can be used in UV curing systems, if the maximum operating temperature of 70 °C is not exceeded. For this reason, the UVpad is equipped with a thermal shield on the rear panel. The rear panel of the UVpad may be exposed to intensive UV radiation. -
Page 11: Intended Use Uvpad E
Gloves need to be worn when cleaning the optically active surface. The UVpad E is a highly sensitive optical measurement device. It must not be exposed to shocks. Any other usage than the one described above leads to a damage of the product. -
Page 12: Legal Information
4 Identification 4.9 Legal Information 4.9.1 Limitation of liability All information in this manual has been compiled taking into account the currently applicable standards and regulations, the technical standard and our many years of knowledge and experience. The manufacturer is not liable for damages in case that: •... - Page 13 4 Identification Non-observance of the instructions in the manual regarding safety, transport, • storage, assembly, commissioning, operation and maintenance Unauthorised spare parts have been used • technical modifications have been made • Improperly performed repairs • Impact of foreign bodies or mechanical damage •...
-
Page 14: General
5 General General IMPORTANT SAFETY INSTRUCTIONS WARNING - Always observe the following basic precautions when using electrical equipment: a) Read all instructions before using the device. b)This device only used qualified trained personnel. See the training section of this manual. c) Do you know how to switch off the product Become thoroughly familiar with the controls. -
Page 15: Information About The Symbols
5 General For a simple description, the above mentioned components are collectively referred to as system. 5.2 Information about the Symbols 5.2.1 SAFETY INSTRUCTIONS In this manual, safety information is indicated by means of symbols. Safety information is preceded by signal words that indicate the scope of risk. To avoid accidents and damage to persons or property, always follow the information and act prudently. -
Page 16: Prohibition Signs
5 General 5.2.2 Prohibition Signs General “Prohibited-sign” 5.2.3 WARNING SIGNS Warning of optical radiation (such as UV, IR, or visible radiation) Warning about electricity! 5.2.4 ATTENTION Wear eye protection! Opaque eye protection must be worn! Disconnect the power plug from the socket! Disconnect before carrying out maintenance or repair Use hand protection! Refer to the instruction manual/booklet... -
Page 17: Optional Functions
5 General 5.2.5 Optional functions Optional functions, not available for every system 5.3 Owner/operator information The System is used in the commercial sector. The owner/operator of the system is therefore subject to the legal obligations concerning work safety. In addition to the safety information in this manual, the generally applicable regulations valid for the application area of the system concerning safety, prevention of accidents and for protection of the environment must be noted and complied with. -
Page 18: Personnel Requirements
5 General 5.4 Personnel requirements The maximum number of qualified professionals who may be present at the site at the same time: 2 5.4.1 Qualifications WARNING Risk of injury when personnel are insufficiently qualified! If unqualified personnel carries out work on the system or stays in the danger area of the system risks arise that may cause severe injuries and serious material damage. -
Page 19: Personal Protective Equipment
5 General Instruction and training must be carried out in regular intervals by the owner/operator. For better tracking, execution of instruction and training should be recorded. 5.5 Personal protective equipment The purpose of personal protective equipment is to protect personnel from hazards that could affect their safety or health when working with the RMD Pro and UV lamps, LEDs or lights. -
Page 20: Safety Instructions And Residual Risk
6 Safety instructions and residual risk Safety instructions and residual risk 6.1 General The system is state-of-the-art and has been built in compliance with recognized safety regulations. Nonetheless, its use may constitute risks for life and limb of the operating and repair personnel (service personnel) or third parties or impairments to the machine. -
Page 21: Safety Instructions In Relation To Normal Operation
6.2 Safety instructions in relation to normal operation Never look directly into LEDs, lamps or UV lamps. The UVpad / UVpad E itself does not emit any hazardous radiation. Safety for persons working with UV radiation: The wearing of personal protective equipment (e.g. safety goggles and hand protection) is generally recommended when measuring LEDs, lamps or UV lamps. -
Page 22: Maintenance And Troubleshooting
6 Safety instructions and residual risk CAUTION Risk of damage • Skin grease and dirt are absorbent in the UV and visible spectral range. Avoid fingerprints on the optically active sensor surface. If • necessary, the components must be carefully cleaned with isopropanol. -
Page 23: Safety Instructions Regarding Service And Repair Work
6 Safety instructions and residual risk 6.4 Safety instructions regarding service and repair work CAUTION Risk of damage • Skin grease and dirt are absorbent in the UV and visible spectral range. Avoid fingerprints on the optically active sensor surface. If •... -
Page 24: Safety Instructions Regarding The Power Supply
The device is powered by lithium polymer batteries. To recharge the batteries, plug the USB cable into the USB port of the UVpad / UVpad E and connect the other end of the cable to the USB interface of a computer or to the mains voltage using the supplied mains adapter. -
Page 25: Description Of The System And Functional Overview
During the measurement, the dose and the irradiance curve over time can also be documented. Spectra and measurement data can be exported and evaluated with the supplied software. In addition, the UVpad E can be used on the PC as a classic spectrometer. -
Page 26: Practical Tips
For simple description, the above components are collectively referred to as a system or UVpad. The UVpad is available in several variants. If some of the functions described in this manual are not available in your UVpad, please contact the manufacturer or distributor for an upgrade. -
Page 27: Transport, Storage, Delivery
Protect the device from chemical vapors and solvents, shocks and vibrations, splash water, condensation on its surface and corrosive media. Unpack all components and remove the packaging materials. • Position the sensor / UVpad at the desired location. • Switch on the UVpad. •... -
Page 28: Quick Start Guide (Band Mode On)
7 Description of the system and functional overview 7.5 Quick start guide (BAND MODE ON) This quick start guide is intended to explain the function of the UV pad by means of an operating procedure. Step 1 Turn on the UV pad with any key on the front panel. - Page 29 Step 8 Connect the device to your PC using a Mini USB cable. With the software UVpad Viewer you can now transfer your measurements to the PC. For more information, see chapter 10 Data Export / PC-Software.
-
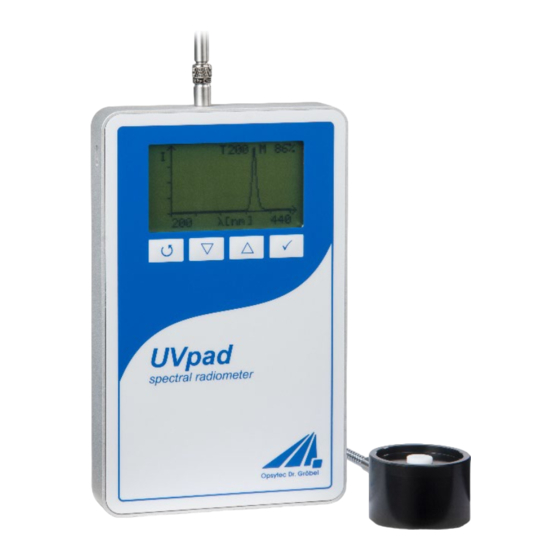
Page 30: Operation
8 Operation Operation The UVpad is operated via four keys. These are arranged on the front panel below the display. The keys and the functions are illustrated as follows: Function Back / Cancel / Off Down Confirm / Continue ... -
Page 31: Standby Menu
In the standby menu, the UVpad is switched off via the key -key. After 2 minutes of not using the UVpad, the device switches off automatically. Standby Menu Via the standby menu, all functions of the UVpad are available for you. These are: Start measurement • Show last measurement •... -
Page 32: Band Mode On - Start Measurement
8 Operation 8.3 Band Mode ON - Start Measurement From the standby menu, a measurement is started with the key -key. The measurement device displays that a measurement is in progress. Stop the measurement by pressing -key. Turn the measurement device and position it for the measurement. 1. - Page 33 T 100: The optimal integration time is 100 ms For optimal measurement results, the measurement range has to be fully modulated. For this purpose, the UVpad has a 12-bit analogue/digital converter, which scans the spectrum continuously. Excellent measurement results are achieved, when the measurement range is used to at least 50%.
-
Page 34: Manual Dark Measurement
-key or -key you can return to the standby screen. Note: If the irradiance is too low for the measurement range, then the UVpad displays no measured values. The irradiance and the dosage values are then displayed with “-“. - Page 35 8 Operation 2. After the dark measurement, the UVpad automatically starts normal measurement. Note that the optically active area always points in the direction of the radiation source and is not obscured. 3. Press and hold the key (approx. 1 sec) to end the measurement and display the result on the display.
-
Page 36: Band Mode Off - Start Measurement
8 Operation 8.4 Band Mode OFF - Start Measurement From the standby menu, a measurement is started with the key . First, the spectrum is displayed. Use ‘”Auto” mode to get the best integration time or, in fixed mode use and keys to adjust integration time. - Page 37 8 Operation Switch between spectral and radiometric view by pressing . If storing measurements is selected via menu „recording time“, measurement automatically recorded if the radiometric view is shown. Stop the measurement by pressing the key for at least 0.5s. The measurement results are displayed automatically.
-
Page 38: Setting Integration Time During Measurements
If using fixed integration time, during a measurement you can set up the sensitivity of the UVpad E with the keys and . Select for a lower sensitivity and for a higher sensitivity. The sensitivity is not saved. -
Page 39: Manual Dark Measurement
8.4.2 Manual dark measurement For manual dark measurement, select the "dark+radiometric" menu item under Settings, Measurement mode. If your UVpad E is equipped with several active functions, manual dark measurement may be available for further active functions. Hint: Manual dark measurement is only active in the "Fixed sensitivity"... - Page 40 8 Operation For measurement with manual dark measurement, start the measurement and set the integration time with the key or . Set the integration time with the or button. Start irradiance display with key or start dark measurement with key . 1.
-
Page 41: Show Last Measurement
See Data Export Delete all measurements: The internal memory can be deleted directly on the UVpad E or via a PC. For this purpose, please select the prior menu item “Clear memory”. Confirm with Yes (). Return with or . -
Page 42: Settings
8.7 Settings In the menu „Settings“, you can set up the sensitivity, the effective function, the menu language and the date / time. Furthermore, you can reset the UVpad to the factory settings. 8.8 Settings In the menu „Settings“, you can set up the sensitivity, the effective function, the menu language and the date / time. -
Page 43: Sensitivity
8 Operation 8.8.1 Sensitivity The UVpad adjusts the sensitivity automatically, in order to ensure the optimal signal-noise ratio. The sensitivity is hereby set via the sampling rate. With high irradiances, the sampling rate is increased in order to not exceed the measurement range. With low irradiances the sampling rate is decreased. -
Page 44: Measurement Mode / Effective Functions
“(ef)” for “effective”. Radiometric and effect-related measurements are illustrated subsequently. Example: radiometric Example: with effective function The function “Effective Function” is only available, if your UVpad has been programmed with a customized effective function at factory. -
Page 45: Measurement Delay
-key and -key and confirm with -key. 8.8.5 Date / Time The UVpad has a real-time clock to check the validity of the calibration. You can set up the real-time clock in the menu „Date / Time“. First set the day with the keys -key and -key. -
Page 46: Factory Settings
8 Operation 8.8.7 Factory Settings Reset the UVpad to the factory settings and confirm. Confirm the restoration of the factory settings with -key. With -key you can cancel the restoration of the factory settings. -
Page 47: Data Export / Pc Software
Connect the UVpad with the PC and switch it on. The screen displays the message “USB connected”. Once the UVpad is connected with the PC, it does not react to any keystroke. Disconnect the connection with the PC and the UVpad continues working autonomously. -
Page 48: Viewer Software
Importing can take a few seconds. During this time, a progress bar displays the import: If the UVpad is not connected or not ready yet, then an error message pops up. Restart the import after a few seconds via the button „Connect“. -
Page 49: Export Of Measurements
You can select and compare different measurements. You can also add a comment in the table before exporting data. Note: The UVpad Viewer displays measurement settings and results as sensitivity, saturation and errors. Use mouse over function in table view this. -
Page 50: Import Measurements
9 Data Export / PC Software Marked measurements appear in the display area, as illustrated by the following LED spectrum: 9.5 Import measurements Saved measurements can be imported again. To do this, select Load/remove reference measurements and then select the desired, unchanged *.csv file: To do this, select up to 10 measurements and choose "Import selection"... -
Page 51: Displaying The Irradiance Profile
9 Data Export / PC Software Up to 10 measurements are selectable at the same time and are labeled in the display area with date / time. Each display can be saved via the button “save chart” as an image file (*.jpg, *.bmp, *.tiff, *.wmf). - Page 52 9 Data Export / PC Software The table on the right-hand side shows the maximum irradiance and the dose display range. Measurements can also be synchronized / shifted in time in the profile tab:...
-
Page 53: Deleting Measurements
9 Data Export / PC Software 9.8 Deleting Measurements You can delete the entire memory of the UVpad via the button “Delete all measurements”. Confirm the confirmation prompt with OK. Individual measurements cannot be deleted. Tip: Via the button „Info “, the serial number and the assignment of... -
Page 54: Remote Control / Live Measurement
10 Remote control / Live measurement 10 Remote control / Live measurement In addition to the export functions, the UVpad E software also has a remote control called "Live measurement". The button with the same name takes you to a separate user interface for remote control of the UVpad. - Page 55 Three methods are available for the dark current measurement, depending on the selected mode. In the "Auto" mode a dark current measurement is done directly in the device. In "Auto" mode, dark current correction is carried out as usual in the UVpad device. “Calibration + Auto” mode corresponds to the measurement result of the UVpad.
- Page 56 10 Remote control / Live measurement When exporting all measurements, in addition to the averaged measurement result, all individual measurements as well as the measurement results for irradiance are exported to a *. csv file. The export of a "single measurement" only provides the averaged measurement result.
-
Page 57: System Selection
For the UVpad we recommend the setting "fixed integration time". Different settings may therefore be necessary for some UV systems. The UVpad Config Tool offers the possibility to parameterize the measurement settings for 6 UV systems. In addition, the system name is displayed in the exported measurements in order to be able to assign the measurements. -
Page 58: Notes For Optimal Measurement Results
The measurement time for the UVpad is set via the integration time. Typical integration times are 10 ms to 200 ms. If the UVpad is moved underneath an UV system at slow speed, then the maximum irradiance (directly underneath the UV lamp) is being determined, since several measurements are available for the irradiance. -
Page 59: The Uvpad Displays Too Little Irradiance Values
Furthermore, the UV lamps generally emit visible light and IR radiation apart from the UV radiation. Both can generate scattered light in the UVpad, which is then detected. It is also possible that the UVpad heats up during the measurement and thus the reading noise increases. -
Page 60: The Measured Value Is Not Reproducible
12 Notes for optimal measurement results 12.6 The measured value is not reproducible Measurements are only stored and displayed in UVpad when the saturation is between 10% and 100%. This can cause to saturation direct under the light source, however correct measurement may be recorded before or after that. -
Page 61: Maintenance & Troubleshooting
13 Maintenance & Troubleshooting 13.1 Calibration The calibration of the UVpads is checked during the initialization. If the UVpad is not calibrated properly anymore, then this is indicated by a note after the initialization process. Measurements are also possible at any time with an expired calibration. -
Page 62: Charging The Battery
The calibration is expired Calibration interval expired Have the UVpad re-calibrated. The UVpad is not detected by The UVpad is switched off Switch the UVpad on and wait a the PC few seconds for the initialization. Use delivered cable. Check USB cable 13.3 Charging the battery... -
Page 63: Firmware Update
13 Maintenance & Troubleshooting 13.5 Firmware update It is possible to update the firmware of the UVpad via USB. For this purpose the R UVpad MD must be connected via USB to a suitable PC running the update program. In addition, the UVpad must be put into update mode via menu, the update mode is secured by the password: Menu->... - Page 64 13 Maintenance & Troubleshooting During the update, the USB connection must not be disconnected and the PC must not be switched off! The loading bar shows the progress of the update, only when the info window says "Done" can the RMD be removed and the software closed.
-
Page 65: Technical Data
70 °C Optically active surface Diameter: 6 mm back side, 3 mm recessed Optically active surface position Technical data UVpad e Size (L x W x H) 160 x 100 x 20 mm³ Weight ~ 500 g Max. operational temperature 60 °C... - Page 66 14 Technical data Radiometric Measurement Spectral range Uvpad : 200 - 440 nm ±5 nm as standard, Uvpad E : 240 - 480 nm ±5 nm as standard, Optional: device specific Spectral bandwidth ~ 2 nm Irradiance measurement range see technical datasheet + version...
- Page 67 14 Technical data [32]. CAUTION: Avoid heating the meter as it will not be corrected. Connections Carging voltage and frequency, plug-in 5 V DC power supply PC interface USB 2.0 Power supply Integrated Li-Ion battery, USB-Connection / Hardware- Software requirements PC requirements min Intel CORE i3, 2 GB Ram, >40 Gb HDD Operating system...
-
Page 68: Errors / Faults
15 Errors / faults 15 Errors / faults The following notes and errormessages are directed to the user. The explanations should help to ensure proper operation. Possible reasons and remedies are given. Function / Display Meaning Measures The RMD Pro cannot be Battery empty Charge the battery. -
Page 69: Maintenance & Cleaning
The system is largely maintenance-free. Clean the optical components only if necessary. The UVpad / UVpad E is a system that requires only occasional cleaning as maintenance according to need and calibration. For cleaning, we recommend that this is only carried out when necessary and not regularly, as the sensor surface is (scratch) sensitive. - Page 70 16 Maintenance & Cleaning CAUTION The surfaces of the sensors can be affected by UV radiation heat it up. This can cause burns on contact. Therefore please note: - wear protective gloves if necessary - If necessary, observe the cooling phase CAUTION Risk of damage •...
-
Page 71: Spare Parts
17 Spare parts 17 Spare parts Please contact us for replacement orders: Opsytec Dr. Gröbel GmbH At Hardtwald 6-8 76275 Ettlingen Germany Phone +49 - 7243 - 94 783 - 50 Fax +49 - 7243 - 94 783 - 65 Visit us on the Internet: www.opsytec.de When operating with damaged components or foreign components, no guarantee can be given for the correctness of the measured values. -
Page 72: Declaration Of Conformity
Road: Am Hardtwald 6-8 Place: 76275 Ettlingen Country: Germany product: Spectral Radiometer Type designation: UVpad / UVpad E Type number: 670011 xxxx 670027 xxxx 670027HP xxxx 670027HS xxxx The manufacturer hereby declares that we have developed, designed and produced the above-... -
Page 73: Notes
19 NOTES 19 NOTES CAUTION THIS MANUAL CONTAINS IMPORTANT SAFETY INSTRUCTIONS. KEEP THIS MANUAL.
Need help?
Do you have a question about the UVpad and is the answer not in the manual?
Questions and answers