
Related Manuals for RDI AC215TOPWORKS


Summary of Contents for RDI AC215TOPWORKS
- Page 1 Red Deer Ironworks TOPWORKS, Adjustable Choke Valve Maintenance Manual Parts Covered: AC215TOPWORKS, AC215TOPWORKSSTD AC315TOPWORKS, AC315TOPWORKSSTD & AC26TOPWORKS MM-10 Revision 1 Revision Date: July 9, 2018...
-
Page 2: Table Of Contents
Assembly Procedure ........................... 11 General Installation Procedure - TOPWORKS to a Positive Choke Body ............ 18 Greasing Instructions ..........................21 Seat Testing of Adjustable Chokes ......................21 RDI Sales & Service Centers ................Error! Bookmark not defined. Page 1 of 22... -
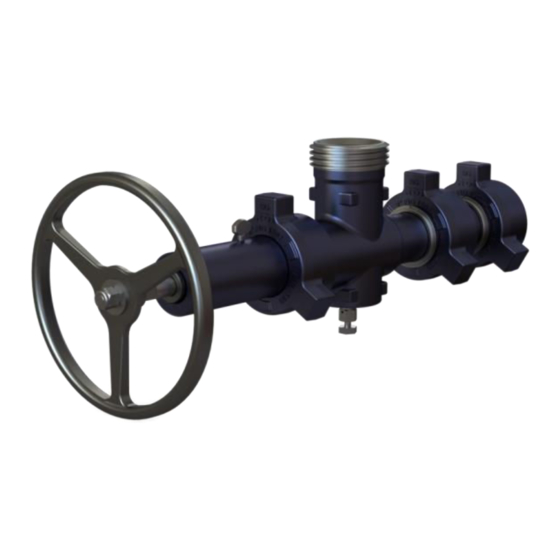
Page 3: Exploded View - 2" 1502 Topworks, Adjustable Choke Valve
MM-10 TOPWORKS, Adjustable Choke Valve Maintenance Manual Rev.1 Exploded View - 2” 1502 TOPWORKS, Adjustable Choke Valve Page 2 of 22... -
Page 4: Parts Listing - 2" 1502 Topworks, Adjustable Choke Valve
MM-10 TOPWORKS, Adjustable Choke Valve Maintenance Manual Rev.1 Parts Listing - 2” 1502 TOPWORKS, Adjustable Choke Valve Item Qty Description Part # Sour (H Part # Standard 5/8” Nyloc Nut NYLOCNUT 0.6250-11-D-N NYLOCNUT 0.6250-11-D-N 5/8” Flat Washer FW 0.625 FW 0.625 Hand Wheel AC215HANDLE AC215HANDLE... -
Page 5: Major Repair Kit Parts Listing - 2" 1502 Topworks, Adjustable Choke Valve
MM-10 TOPWORKS, Adjustable Choke Valve Maintenance Manual Rev.1 Major Repair Kit Parts Listing - 2” 1502 TOPWORKS, Adjustable Choke Valve Item Qty Description Part # Sour (H S) and Standard Major Repair Kit ACRK215MAJ Thumbscrew - 2” Choke AC2TSCREW Ball 2” Choke ACBALL Grease Fitting 1/8”... -
Page 6: Exploded View - 3" 1502 Topworks, Adjustable Choke Valve
MM-10 TOPWORKS, Adjustable Choke Valve Maintenance Manual Rev.1 Exploded View - 3” 1502 TOPWORKS, Adjustable Choke Valve Page 5 of 22... -
Page 7: Parts Listing - 3" 1502 Topworks, Adjustable Choke Valve
MM-10 TOPWORKS, Adjustable Choke Valve Maintenance Manual Rev.1 Parts Listing - 3” 1502 TOPWORKS, Adjustable Choke Valve Item Qty Description Part # Sour (H Part # Standard Nyloc Nut, 5/8-11 NYLOCNUT 0.6250-11-D-N NYLOCNUT 0.6250-11-D-N Flat Washer - 5/8 FW 0.625 FW 0.625 Hand Wheel AC3HANDLE... -
Page 8: Major Repair Kit Parts Listing - 3" 1502 Topworks, Adjustable Choke Valve
MM-10 TOPWORKS, Adjustable Choke Valve Maintenance Manual Rev.1 Major Repair Kit Parts Listing - 3” 1502 TOPWORKS, Adjustable Choke Valve Item Qty Description Part # Sour (H S) and Standard Major Repair Kit ACRK315MAJ Thumbscrew, 3” Adj. Choke AC3TSCREW Ball - 2in Adjustable Choke ACBALL Grease Fitting - 1/8 NPT Str. -
Page 9: Exploded View - 2" 602 Topworks, Adjustable Choke Valve
MM-10 TOPWORKS, Adjustable Choke Valve Maintenance Manual Rev.1 Exploded View - 2” 602 TOPWORKS, Adjustable Choke Valve Page 8 of 22... -
Page 10: Parts Listing - 2" 602 Topworks, Adjustable Choke Valve
MM-10 TOPWORKS, Adjustable Choke Valve Maintenance Manual Rev.1 Parts Listing - 2” 602 TOPWORKS, Adjustable Choke Valve Item Qty Description Part #: Sour (H 5/8” Nyloc Nut NYLOCNUT 0.6250-11-D-N 5/8” Flat Washer FW 0.625 Handle Body AC26HANDLE Indicator - 2” Choke AC2INDIC Choke Nut Body CH26NUT... -
Page 11: Major Repair Kit Parts Listing - 2" 602 Topworks, Adjustable Choke Valve
MM-10 TOPWORKS, Adjustable Choke Valve Maintenance Manual Rev.1 Major Repair Kit Parts Listing - 2” 602 TOPWORKS, Adjustable Choke Valve Item Qty Description Part #: Sour (H Major Repair Kit ACRK26MAJ Thumbscrew - 2” Choke AC2TSCREW Ball 2” Choke ACBALL Grease Fitting 1/8”... -
Page 12: Assembly Procedure
MM-10 TOPWORKS, Adjustable Choke Valve Maintenance Manual Rev.1 Assembly Procedure Pictorial – 2” 1502 TOPWORKS It is important that the workstation is clean and free of any contaminants such as metal shavings, dirt, etc. Do not sand or de-burr any items while at the assembly workstation. Note: AMSOIL synthetic multi-purpose grease and Nikal (anti-seize compound) are used in this procedure. - Page 13 MM-10 TOPWORKS, Adjustable Choke Valve Maintenance Manual Rev.1 3. Lubricate the threads and sealing surface of the Stem (#13) with synthetic multi- purpose grease. 4. Slide the Junk Ring (#11) over the threaded end of the Stem and up against the shoulder. 5.
- Page 14 MM-10 TOPWORKS, Adjustable Choke Valve Maintenance Manual Rev.1 6. Slide the Nylon Spacer of the Packing Kit over the threaded end and up against the first U- Cup Seal. 7. Slide the second U-Cup Seal onto the Stem and up against the Nylon Spacer (black rubber O-Ring of the U-Cup Seal facing the carbide tip).
- Page 15 MM-10 TOPWORKS, Adjustable Choke Valve Maintenance Manual Rev.1 9. Coat the Packing Kit, Junk Ring and Stem Guide with synthetic multi-purpose grease. 10. Install the Stem Assembly into the Bonnet Body (#6) by turning the Stem clockwise until the threads are engaged or until a portion of the Stem is visible at the other end of the Bonnet.
- Page 16 MM-10 TOPWORKS, Adjustable Choke Valve Maintenance Manual Rev.1 12. Tap the Junk Ring lightly to ensure that it is below the groove in the pocket of the Bonnet. 13. Install the Internal Snap Ring (#12) into the groove. Remove from bench-vise. 14.
- Page 17 MM-10 TOPWORKS, Adjustable Choke Valve Maintenance Manual Rev.1 15. Apply anti-seize compound the threads of the Grease Fitting (#7) and screw it into the 1/8 NPT threaded hole of the Bonnet Body. DO NOT over tighten. 16. Turn the Bonnet Body around and insert the Nylon Ball (#8) into threaded hole.
- Page 18 MM-10 TOPWORKS, Adjustable Choke Valve Maintenance Manual Rev.1 18. Slide the Indicator (#4) onto the Stem - keep it loose. Note: The Indicator is set when the TOPWORKS is installed onto a Positive Choke Body and is adjusted during field operations. 19.
-
Page 19: General Installation Procedure - Topworks To A Positive Choke Body
MM-10 TOPWORKS, Adjustable Choke Valve Maintenance Manual Rev.1 General Installation Procedure - TOPWORKS to a Positive Choke Body Pictorial - 2” 1502 TOPWORKS to a 2” 1502 Positive Choke Body It is important that the workstation is clean and free of any contaminants such as metal shavings, dirt, etc. - Page 20 MM-10 TOPWORKS, Adjustable Choke Valve Maintenance Manual Rev.1 3. Thread the Choke Seat/Bean clockwise into the Positive Choke with an extended socket wrench - hand tight only. 4. Apply an anti-seize compound on the threads of the Positive Choke Body. Note: Before attaching the TOPWORKS, retract the Stem fully into the Bonnet Body to...
- Page 21 MM-10 TOPWORKS, Adjustable Choke Valve Maintenance Manual Rev.1 6. Slightly engage the Stem’s carbide tip against the Choke Seat or Bean by turning the Hand Wheel clockwise. 7. Set the Indicator to zero (0) through the notch on the Bonnet Body. 8.
-
Page 22: Greasing Instructions
MM-10 TOPWORKS, Adjustable Choke Valve Maintenance Manual Rev.1 Greasing Instructions It is recommended to grease the TOPWORKS, Adjustable Choke Valve with synthetic multi- purpose grease after every application. Grease the TOPWORKS, Adjustable Choke in both OPEN/CLOSE positions. Do this at least twice to ensure that the threads and sealing surface of the Stem are fully greased. -
Page 23: Rdi Sales & Service Centers
MM-10 TOPWORKS, Adjustable Choke Valve Maintenance Manual Rev.1 RDI Sales & Service Centers For a list of our locations visit our website @ https://rdironworks.com/contact-a-location-near-you/. Toll Free Phone: 855.973.4733 Toll Free Fax: 855.573.4473 Email: info@rdironworks.com Page 22 of 22...
Need help?
Do you have a question about the AC215TOPWORKS and is the answer not in the manual?
Questions and answers