Kensa Heat Pumps Shoebox Installation, Commissioning And User Manual
Hide thumbs
Also See for Shoebox:
- User manual (20 pages) ,
- Installation and commissioning manual (42 pages) ,
- Installation manual (40 pages)

Subscribe to Our Youtube Channel
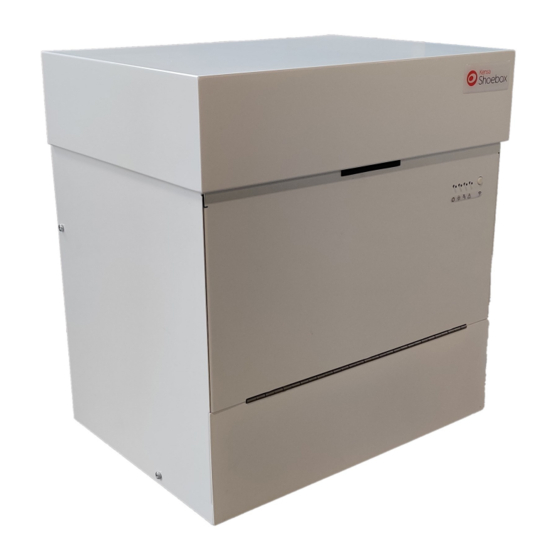
Related Manuals for Kensa Heat Pumps Shoebox


Summary of Contents for Kensa Heat Pumps Shoebox
- Page 1 Manual Genesis Commissioning and User Manual Copyright ©2023 Kensa Heat Pumps Ltd Genesis Commissioning Instructions 5 Page 1 of 46...
-
Page 2: Table Of Contents
2....... Safety Information ............... 6 2.1......Disposal/Decommissioning..................6 2.2......Returning Products ....................6 3....... General Product Information ............7 3.1......Kensa Heat Pumps ....................7 3.2......Product Description ....................7 4....... Operational Instructions .............. 10 4.1......Controller........................ 10 4.2…………………….. - Page 3 4.8.3…………………….. Wi-Fi Connect…………………………………………………………………………………………………….. 32 5….………………… Error Log……………………………………………………………………………………. 34 6……………………. My Product………………………………………………………………………………… 35 7…………………….. Fault Finding……………………………………………………………………………… 36 7.1………………………. Fault Finding (shoebox LED Flashes)………………………………………………………………….. 39 8……………………. Warranty…………………………………………………………………………………… 40 8.1......Terms and Conditions..................... 40 8.1.1......Persons covered by the Warranty................40 8.1.2......Validity period of the Warranty................40 8.1.3......
- Page 4 This page is intentional left blank. Genesis Commissioning Instructions 5 Page 4 of 46...
-
Page 5: Introduction
Introduction—a message from the CEO Kensa Heat Pumps has been manufacturing Ground Source Heat Pumps since 1999. Our mission is to enable mass decarbonisation of heat using our award- winning heat pumps. A key part of the Kensa heat pump's design is simplifying the installation pro- cess to allow any competent plumber to perform the work rather than need- ing specialist skills. -
Page 6: Safety Information
Customers and stockists are reminded that under EC Health, Safety and Environment Law, when returning products to Kensa Heat Pumps they must provide information on any hazards and the precautions to be taken due to contamination residues or mechanical damage which may present a health, safety or environmental risk. -
Page 7: General Product Information
This manual explains how to install, commission and operate a Kensa ground source heat pump. 3.1 Kensa Heat Pumps Kensa Heat Pumps is the leading UK manufacturer of a full range of ground source heat pumps. Kensa provides exceptional levels of expertise and advice on the use, design and application of heat pumps. - Page 8 A ground source heat pump (GSHP) extracts heat from the ground by circulating a cold solution of water and antifreeze (brine) around pipes horizontally buried in the ground, or boreholes. The horiontal pipes are buried below 1m in depth and the boreholes around 200m. The temperature of the ground remains pretty constant (8 to 10 C), and heat is absorbed from the ground into the fluid (approximately 5 C).
- Page 9 This page is intentional left blank. Genesis Commissioning Instructions 5 Page 9 of 46...
-
Page 10: Operational Instructions
For the Evo heat pump the controller and heat pump settings are accessed via the display on the Evo, for the shoebox it is via an application for android or IOS devices downloadable using the QR code below. -
Page 11: Location Of Shoebox Ap Button
Press the AP button (Access point) button on the front of the shoebox. III. The hot water LED on the front of the shoebox should flash blue confirming that the shoebox is in AP mode. On the app, select the network name [kensa…] of the heat pump you wish to connect to. -
Page 12: On Start Up
If there is no activity the screen will automatically dim after 10 minutes. This is settable within the controller. The following screens are based on the Evo heat pump and will be similar for the shoebox app. Where there are major differences this will be indicated. -
Page 13: Guide To Home Screen Icons
Return temperature from the Heating Mode heating/cooling distribution Indication of compressor running Menu button Fig 6 Start up screen Load side pressure Ground side pressure icons and temperature and temperature 4.4 Guide to Home Screen icons Menu Button—This provides access to the lower menus Compressor Icon—This is lit when the compressor is running. -
Page 14: Main Menu
4.5 Main Menu Pressing the menu button on the home screen provides access to the main menu. Fig 7 Main menu 4.5.1 Main Menu Icons Home Icon—This will return the user to the home screen. Back Button– Returns the user back to the previous screen. Diagnostics—Enters the diagnostics menu displaying various readings such as temperatures and pressures to aid fault finding. -
Page 15: Diagnostics Menu
4.6 Diagnostics Menu Fig 8 Diagnostics Menu 4.6.1 Diagnostics—Temperatures Fig 9 Diagnostics— Temperature Menu The temperature screen shows the current temperature measured within the system. Load side • T1—Temperature of the heating/cooling distribution fluid returning to the heat pump. • T2—Temperature of the heating/cooling distribution fluid leaving the heat pump. -
Page 16: Diagnostics-Pressure
1.5 which would suit most properties. • Maximum Variation—This is the maximum amount of positive deviation that is allowed by the weather compensation. 4.6.2 Diagnostics—Pressures Fig 10 Diagnostics—Pressure Menu The pressure screen shows the current pressures measured within the system. •... -
Page 17: Diagnostics-Compressor Performance
4.6.4 Diagnostics—Compressor Performance Fig 12 Diagnostics— Compressor Performance Menu The Compressor Performance screen provides information on how the compressor is operating. • Coefficient of Performance—This provides an indication of the COP of the compressor only. It is not the system or heat pump COP, SCoP or SPF, but should provide a good indication into how the compressor is performing. -
Page 18: Diagnostics-Input Voltage
4.6.6 Diagnostics—Input Voltage Fig 14 Diagnostics—Input Voltage Menu This screen indicates the measured voltage connected to the heat pump. It is an indication of the approximate voltage with a tolerance of +/- 10%. It also indicates the voltage at which a fault is indicated and registered. -
Page 19: Diagnostics-Dhw And External Immersion
Fig 16 Diagnostics—History Log Menu 2nd page • T4—Temperature of the thermal transfer fluid returning to the heat pump from the ground. • T5—Temperature of the thermal transfer fluid leaving the heat pump to the ground. Fig 17 Diagnostics—History Log Menu 3rd page •... -
Page 20: Diagnostics-Configurable Relay
• Cut Out (bar) - Comp 1—The pressure at which the pressure transducer switch terminates the DHW cycle on a single compressor model . Ext. Immersion • Mode—This indicates whether a pasteurisation cycle is enabled on the controller or not. During a pasteurisation a call signal is sent to an external relay to operate the immersion heater on a sepa- rate supply voltage. - Page 21 Open Loop The configurable relay can also be set for an Open Loop system. In this mode the relay will close simultaneously with the ground pump’s relay. Fig 20 Diagnostics—Configurable Relay Menu (Open Loop) Genesis Commissioning Instructions 5 Page 21 of 46...
-
Page 22: Commissioning Menu
4.7 Commissioning Menu Fig 21 Main Menu screen From the main menu, press commissioning:- Fig 22 Commissioning — Password page Click to enter and enter the commissioning menu password ‘11’ using the Number Pad. Fig 23 Commissioning — Number Pad Genesis Commissioning Instructions 5 Page 22 of 46... -
Page 23: Commissioning-Function Tests
Fig 24 Commissioning —main menu The controller then provides a choice either to perform a Function Test or to Setup the heat pump. It is advisable to initially perform a function test as this provides a check that the wiring is correct and specific functions of the system are operational. -
Page 24: Commissioning
4.7.2 Commissioning Press Setup to commission the heat pump Fig 26 Commissioning Main Menu 4.7.2.1 Commissioning—Set up Fig 27 Commissioning —Set up menu 4.7.2.2 Commissioning- Heating Set Points Fig 28 Commissioning —Set up– Heating Set Points menu Genesis Commissioning Instructions 5 Page 24 of 46... - Page 25 Load • Heating S.P. ( C) - This is the return temperature set point of the heating distribution fluid returning to the heat pump. Generally for underfloor it would be set to approximately 30 C and for radiators C. This means the temperature of the water leaving the heat pump would be approximately 5 hotter.
- Page 26 4.7.2.3 Commissioning—Pump Parameters Fig 30 Commissioning —Set up– Pump Parameters menu The pump exercise routine sets a frequency and duration of an exercise routine for the Load water pump and the Ground Water pump. It is designed so that in periods of long non-operation a signal is sent to the water pumps to spin the pumps to avoid them from sticking due to in-activity.
- Page 27 4.7.2.4 Commissioning—Weather Compensation Fig 31 Commissioning —Set up– Weather Compensation menu • Ext. Temp Set Point ( C)—Weather compensation set point, i.e. the external temperature at which the weather compensation starts to operate. • Degree Per Degree Gradient—This is the multiplier of the number of degrees that the water set point changes for each degree change sensed in the outdoor temperature.
- Page 28 4.7.2.6 Commissioning-Pulse Inputs Fig 33 Commissioning —Set up– Pulse Outputs menu This screen allows the pulse inputs to be identified. It also allows a multiplier to be set, i.e. one pulse = 10 units of fluid being metered. It also allows the units to be specified. 4.7.2.7 Commissioning—Configurable relay Fig 34 Commissioning —Set up–...
- Page 29 Open Loop Fig 35 Commissioning —Set up– Configurable Relay Open Loop menu If the open loop setting for D09 is set then the relay will close contact simultaneously with the ground pump’s relay. 4.7.2.8 Commissioning—DHW Parameters Fig 36 Commissioning —DHW Parameters menu •...
- Page 30 This enables passive cooling in the heat pump which sets the speed of the ground pump to its set back speed. For passive cooling additional equipment and set up is required. Please speak to Kensa Heat Pumps. 4.7.2.10 Commissioning—Active Cooling Fig 38 Commissioning —...
-
Page 31: Main Menu-Settings
Confirmation that the appropriate amount of antifreeze has been added to the distribution (load) side of the system is required before the cooling is activated. Antifreeze is required in the distribution side to avoid freezing occurring in the heat pumps heat exchanger and possible damage to the unit. If ‘Continue without anti-freeze’... -
Page 32: Display And Sound
4.8.1 Display and Sound Fig 43 Settings— Display and sounds The Display and Sound page selects whether the COP is displayed on the home page and whether the error sound is enabled. It also allows the duration of the warning and fault sound to be set to be able to distinguish between a warning and an actual fault. - Page 33 Fig 46 Settings— Wi-Fi and phone App connection From this screen it is also possible to enable the access point (AP) where the unit will create its own Wi-Fi hot spot allowing connection of the unit to a mobile device (android or IOS). Genesis Commissioning Instructions 5 Page 33 of 46...
-
Page 34: Error Log
5. Error Log Fig 47 Main menu The Error Log records all of the faults and Warnings that are activated by the unit. Fig 48 Error log menu The time in chronological order from when the heat pump was turned on that the event occurred, the status (whether it was a warning or fault), error message and when the fault was cleared are recorded . -
Page 35: My Product
6. My Product Fig 49 Main menu My Product provides information regarding the unit. Fig 50 My product menu Genesis Commissioning Instructions 5 Page 35 of 46... -
Page 36: Fault Finding
7. Fault Finding Error Code Error Error Message Action Level Check wall mounted electrical isolator switch or call No power supply electrician Controls MCB tripped Call electrician to investigate cause Blank display on No Error software controller There is no call from the time-clock or Programme time-clock according to manufacturer’s thermostat for heat pump operation instructions... - Page 37 Error Code Error Error Message Action Level Temperature differential T4-T6 (Temperature of the thermal transfer fluid returning to the heat Check ground pump speed pump from the ground—Temperature of the Check ground flow FGH2 Warning thermal transfer fluid leaving the heat pump to Check for flow restrictions on ground side the ground.(2nd compressor)) is greater than set Check set low flow differentials...
- Page 38 Error Code Error Error Message Action Level Temperature differential T5-T4 (Temperature of the thermal transfer fluid leaving the heat pump Check ground pump speed to the ground—Temperature of the thermal Check ground flow FGC1 Warning transfer fluid returning to the heat pump from Check for flow restrictions on ground side the ground.) is greater than set point.
-
Page 39: Fault Finding (Shoebox Led Flashes)
7.1 Fault Finding (shoebox LED Flashes) Many faults which occur on commissioning are found to be due to incorrect wiring or setting up, therefore it is recommended that a thorough check is carried out should there be a problem. The alarm LED will flash a number of times indicating what the issue is. -
Page 40: Warranty
Kensa Heat Pumps Ltd will, at its option and without charge to the Buyer, replace or repair any Parts which cause the Kensa Ground Source Heat Pump to be inoperable; however, if Kensa Heat Pumps Ltd elects to provide replacement Parts, it shall not be obligated to install such replacement Parts and the Buyer shall be responsible for all other costs, including, but not limited to, shipping fees and expenses. -
Page 41: Care Of Duty
8.1.7 Replacement Parts Kensa Heat Pumps Ltd’s warranty obligations with respect to replacement parts are identical to those with respect to original parts; provided, however, in no event shall the warranty term for such replacement parts extend beyond the term established by the commencement date (i.e. - Page 42 Genesis Commissioning Instructions 5 Page 42 of 46...
Need help?
Do you have a question about the Shoebox and is the answer not in the manual?
Questions and answers