
Subscribe to Our Youtube Channel
Related Manuals for Kensa Heat Pumps 7kW Evo


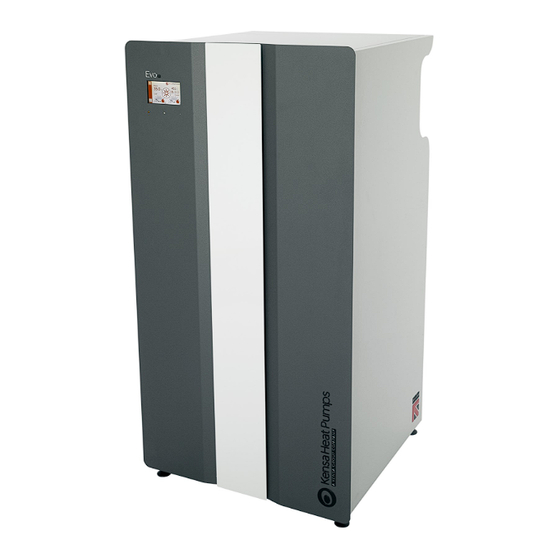
Summary of Contents for Kensa Heat Pumps 7kW Evo
- Page 1 Manual Evo Heat Pump Installation and Commissioning Manual Copyright ©2017 Kensa Heat Pumps Ltd Evo Heat Pump Manual Version 5 Page 1 of 84...
-
Page 2: Table Of Contents
Contents Page Section Description Page 1....... Introduction .................. 6 2....... Safety Information ................ 7 2.1......Access ........................7 2.2......Lighting ........................7 2.3......Tools and consumables ................... 7 2.4......Handling ........................7 2.5......Residual hazards ...................... 7 2.6......Freezing ........................7 2.7...... - Page 3 Contents Page Section Description Page 4.7......Electrical installation ....................29 4.7.1......Cable entry points ....................30 4.7.2..... Electrical isolation…………………................31 4.7.3 ....Wiring diagrams………………………................32 4.7.3.1..... Main power supply terminals ................. 32 4.7.3.2..... Main PCB terminals……………………………………………..........32 4.7.3.3..... Main PCB terminals description ................33 4.7.3.4…………………..
-
Page 4: Contents Page
Contents Page. Section Description Page 6.4.7…………………….. Diagnostics—History log……………………………………………………………………………………… 56 6.4.8…………………….. Diagnostics—DHW and external immersion………………………………………………………… 58 6.4.9…………………….. Diagnostics—Supplementary heat………………………………………………………………………. 58 6.5……………………….. Commissioning……………………………………………………………………………………………………. 60 6.5.1…………………….. Commissioning—Function tests…………………………………………………………………………… 61 6.5.1.1…………………. Commissioning—Function tests page 2……………………………………………………………….. 62 6.5.2…………………….. Commissioning—Set up…………………..………………………………………………………………….. 62 6.5.2.1………………….. Commissioning—Set up—Water temperatures………………………………………….………. 63 6.5.2.2………………….. - Page 5 Evo Heat Pump Manual Version 5 Page 5 of 84...
-
Page 6: Introduction
1. Introduction—a message from the Managing Director Kensa Heat Pumps has been manufacturing ground source heat pumps since 1999. In the early days, it was difficult to find contractors willing to consider the technology. As a consequence, Kensa made considerable efforts to simplify the installation pro- cess to allow any competent plumber to perform the work. -
Page 7: Safety Information
General installation and safety instructions for pipeline and plant construction, as well as the proper use of tools and safety equipment must also be complied with. Manufacturer:- Kensa Heat Pumps Mount Wellington Chacewater Truro Cornwall... -
Page 8: General Product Information
3. General Product Information This manual explains how to install and commission a Kensa Evo ground source heat pump. The Evo Single Compressor Heat Pump is designed to provide a low cost renewable heat source for a build- ings heating system. In addition, and if required, the Kensa Evo can also provide domestic hot water. Heat pumps can provide lower running costs and will generate significantly lower carbon emissions compared with traditional fossil fuels. -
Page 9: Kensa Evo Technical Details
Evo Heat Pump Manual Version 5 Page 9 of 84... -
Page 10: Water Pump Curves
3.3 Water pump curves The following pump curves are for the water pumps fitted within the Evo range of Kensa Heat Pumps. Design Pressure drop kPa Water p ump Part Heat Pump Duty Flowrate across heat pump @ Number kg/min... - Page 11 Fig 3 30-002C Pump Curve Fig 3a 30-003C Pump Curve Evo Heat Pump Manual Version 5 Page 11 of 84...
-
Page 12: Installation
4. Installation Note: Before actioning any installation observe the 'Safety information' in Section 1. It is essential that the following installation guidelines are followed carefully. The installation must conform to all relevant construction and electrical codes and comply with the requirements of the Microgeneration Certification Scheme (MCS) MIS3005 ’Requirements for Contractors undertaking the Supply, Design, Installation, Set to Work Commissioning and Handover of Microgeneration Heat Pump Systems’... - Page 13 As an alternative to a buffer vessel it is possible to have some zones left “open” – i.e. without electric actuators. These zones will still require thermostats so can call for heat when required. In houses, the best zones to chose are ensuite bathrooms, and hallways, neither of which are likely to be overheated. If the “open”...
-
Page 14: Radiators Schematic. Space Heating Only
4.3 Radiators—Schematic. Space heating only The following section includes typical schematics of how a heat pump can be connected. Only the load side is shown i.e. the heating distribution system. It is important to note that the schematics are only general arrangements and hence do not illustrate all required valves or fittings. -
Page 15: Second Set Point Schematic
4.4 2nd Set point Architecture Fig 5 shows a schematic of a system architecture that can utilise the second set point function in the Evo. See section 6.5.2.1. The system uses two different emitters which generally require two different temperatures, both systems use a different timeclock, however the higher temperature set point is given priority within the Evo. -
Page 16: Domestic Hot Water (Dhw) -Schematic
4.5 Domestic Hot Water (DHW) —Schematic The DHW option needs to be specified at time of ordering. Warning - when a heat pump is used for heating domestic hot water, it may not get the water hot enough to kill the dangerous Legionella that can breed in hot water cylinders. Alternative arrangements should therefore be made to ensure the cylinder is pasteurised regularly. -
Page 17: Tank Thermostat
Please note the valve should be installed with the motor at any angle vertical to 30° above the horizontal plane. Failure to do so will invalidate the 3 port diverting valve warranty. 4.5.5 Tank Thermostat A tank thermostat is not required but maybe fitted and used as a tank safety stat if wired in series with the time clock. -
Page 18: Towel Rails
Meter Ready Requirement. Isolation values to reserve space for flow meter and temperature sensor in the return line and space for a temperature sensor in the flow line. See section 4.6.6.1 Call Signal to external immersion heater relay Fig 8 Underfloor with multiple manifolds and DHW Schematic Please note:- •... - Page 19 This page is intentionally blank Evo Heat Pump Manual Version 5 Page 19 of 84...
-
Page 20: Mechanical Installation
4.6 Mechanical Installation 4.6.1 Locating the Heat Pump Decide on a suitable location for the Heat Pump. This should ideally be in the back of a domestic garage, or a utility room. It should not be placed in any inhabited space or near any noise sensitive areas. The Evo emits limited noise and vibration, and should not be placed adjacent to, or below bedrooms or occupied spaces. - Page 21 Place the front cover in a safe position away from the unit. iii. Remove the two transit bolts (M5) positioned as shown below from the front of the unit. iii. Remove the two transit bolts (M5) positioned as shown below from the rear of the unit. Front Transit bolts x2 (M5 Hex head) Rear Transit bolts x2...
-
Page 22: Positioning The Unit
4.6.3 Positioning the unit. Position the appliance on a firm, level and substantial concrete base that will absorb vibration well away from any occupied rooms. Ensure that the appliance does not stand on the electrical supply cable. If the supply cable is damaged, it must be replaced. Ensure all pipes and wires are adequately supported where necessary, pipes are properly insulated and concentrations of inhibitor (where added) are correct. -
Page 23: Installation Of The Heat Pump
4.6.5 Installation of the heat pump Ideally the heat pump should be placed next to an external wall allowing easy access to the externally mounted ground array manifold. Any pipes internal to the building must be insulated with vapour barrier insulation such as Armaflex. - Page 24 Position the appliance on a firm, level and substantial concrete base that will absorb vibration and ensure the unit is well away from any occupied rooms. Using the adjustable feet, level the unit and tighten the M10 locking nuts on the feet when level. iii.
- Page 25 Fig 17 Evo Single Compressor heat pump connections Flow to heating system from heat Supply to Pump 28 mm Ground from heat pump 28 mm OD Return from ground to Return from heat pump 28 heating mm OD system to heat pump 28 mm OD It is advisable that a cold feed connection is connected on the ground and distribution side.
-
Page 26: Meter Installations
4.6.6 Meter Installations The government is introducing the Renewable Heat Incentive (RHI) to support renewable heat generation in the domestic sector. The scheme will offer tariff payments for supported technologies which include MCS (or equivalent)-certified solar thermal systems, ground source heat pumps, air source heat pumps and biomass boilers or stoves with back boilers for use in the domestic sector. - Page 27 diameter to enable BEIS’s chosen metering to be installed on the return pipework. The table below shows the length of straight pipe required for a number of standard pipe sizes. Pipe Diameter (mm) Total length of straight pipework Total length of straight pipework required in return pipe (mm) required in the flow pipe (mm) For each location where a heat meter is required, a section of pipe of 175 mm should be left for...
-
Page 28: Electrical Metering
3. Leave sufficient pipework accessible, i.e. not boxed in or under floor boards, to enable meters to be fitted; Feedback information about the installation BEIS will need to know a number of factors about a site so an application will not be considered to be “meter-ready”... -
Page 29: Electrical Installation
4.7 Electrical Installation The Kensa Evo heat pump range is available in single phase power supply versions. Any electrical work required to install or maintain this appliance should be carried out by a suitably qual- ified electrician in accordance with current IEE regulations To access the wiring terminals :- If not already removed, remove the heat pump front cover by unscrewing the 1 x 5mm posidrive screw on the top of the heat pump. -
Page 30: Cable Entry Points
Power Supply Wiring Terminals Smart Start Main PCB Fig 23 Electrics box with the electrics cover removed 4.7.1 Cable entry points Push out cable entry points are positioned at the rear of the electrics tray. These can be pushed out using a screw driver or similar tool. -
Page 31: Electrical Isolation
space heating to an indirect coil in the DHW tank, (See DHW schematic, Section 4.5). The diverting valve should be first connection in the heat pumps flow line, before any underfloor heating man- ifolds. The valve’s electrical connections are connected to the heat pump’s internal wiring. (See 4.7.3) 4.7.2 Electrical Isolation All installations should be fitted with a local isolation switch immediately adjacent to the heat pump. -
Page 32: Wiring Diagrams
4.7.3 Wiring Diagrams 4.7.3.1 Main Power Supply Terminals 32/25 amp C6 amp Compressor Controls Figure 25 Mains Power Supply terminals Main Wiring Terminals 230 Vac 50Hz power supply via a Type C MCB in the buildings distribution Board 15kW Three phase unit will have three live terminals L1, L2 and L3 and voltage 380 - 420V 50Hz... -
Page 33: Main Pcb Terminals Description
4.7.3.3 Main PCB terminals description Terminal Block 1 Terminal Terminal Terminal Block 4 Terminal Block 2 Block 3 Block 5 * if the load from the underfloor control is likely to be near or exceed 2.5A, live should be taken from the out- put side of the 6A MCB instead Heat Pump Enable Signal No Call 0-50V... - Page 34 Terminal Block 2—DHW Earth—Earth connection for domestic hot water timeclock, powered by the Heat Pump. Neutral—Neutral connection for domestic hot water timeclock, powered by the Heat Pump. Live- 240V AC, 1A Live connection for domestic hot water timeclock, powered by the Heat Pump. DI2—Live return 240V AC, 1A (On signal) call for domestic hot water heating returned from the domestic hot water heating timeclock connected to the Heat Pump.
- Page 35 2.5A* Evo Heat Pump Manual Version 5 Page 35 of 84...
- Page 36 Evo Heat Pump Manual Version 5 Page 36 of 84...
- Page 37 2.5A* Evo Heat Pump Manual Version 5 Page 37 of 84...
- Page 38 Evo Heat Pump Manual Version 5 Page 38 of 84...
-
Page 39: Weather Compensation
4.7.4 Weather Compensation. All Kensa Evo Heat Pumps are supplied with Weather Compensation as standard. This facility will reduce the return water set-point against a schedule of external ambient temperatures. In more simple terms, the temperature of water flowing into the building’s radiators or underfloor heating is reduced in mild weather, which allows the heat pump to run more efficiently. -
Page 40: Mechanical Set To Run
5. Mechanical Set to Run After all mechanical and electrical work has been completed, the following commissioning instructions should be followed. 5.1 Purging the ground array of air. It is important for correct operation that all the air is removed from the ground arrays. Slinkies consist of a large number of 1 metre diameter loops of 32mm OD pipe and air can collect at the top of these loops. - Page 41 Pump priming port Clarke Purge Pump 80 litre dustbin Fig 33 Slinky purging kit connected to a manifold The expansion vessel on the ground side is optional in most cases. It maintains the pressure within the ground loop as the pipe relaxes.
-
Page 42: Adding Antifreeze For Multiple Slinkies
should be flowing through the heat pump or through the other slinkies. The flow rate should be in excess of 30 litres per minute. This can be checked simply by holding a 10 litre bucket to collect wa- ter returning from the slinky, and ensuring that it fills in less than 20 seconds. If the flow is less than this, sufficient velocity is not being achieved to displace the air at the tops of the slinky coils. -
Page 43: Pressurising The System
Close the slinky valves; add the next quantity of antifreeze to the dustbin and repeat the above steps vi and vii for each individual slinky. If in doubt please watch the online video at the Kensa Heat Pumps Channel on Youtube or the website www.kensaheatpumps.com 5.1.2.1 Pressurising the system. -
Page 44: Pressure Testing In Accordance To Bs805 Section 11.3.3.4
5.1.2.2 Pressure Testing in accordance to BS805 Section 11.3.3.4 In accordance with MCS Guidelines, leak tightness (pressure) testing has to follow the EN 805 prescriptions in section 11.3.3.4. This test should be carried out after the ground arrays have been purged but before the antifreeze is added. -
Page 45: Purging Procedure And Adding Antifreeze For Single Slinkies
Fig 38 Graphical Test Procedure The ground array has passed the test if the pressure difference (pressure drop) between (6)C and (6)A does not exceed 0.1 bar. The test should not be conducted in cold weather, when there is a risk of freezing. 5.1.3 Purging Procedure and adding antifreeze for single slinkies The single slinky manifold consists of two three port diverting valves, one for flow and one for the return. - Page 46 The sequence of valve operation for a single manifold is slightly different from larger manifolds. Each slinky is connected to a three port diverting valve as above. The slots machined on the front of each valve indicate which connection is open. The previous drawing (Fig 39) is set for normal operation, i.e. both purge connections are closed and the flow and return from the slinky to the heat pump are open.
-
Page 47: Testing Of Antifreeze Concentration
vii. After the air has been removed it is advisable that before the antifreeze is added the system is leak tested to BS EN805.(See 5.1.2.2), if this didn’t occur when the slinkies were installed. When all the air has been removed reduce the level of water in the bin to 200-250mm by removing fresh water from the system (via the pump discharge pipe). -
Page 48: Heating Distribution And Load Side Purging
DO NOT operate the compressor 32/25 amp MCB until Kensa Heat Pumps has been contacted and flow has been confirmed around the system. Failure to do this will cause the unit to freeze and may invalidate the warranty. - Page 49 Reposition the top panel(s) Fig 43 Reassembling the top panels. Offer up the front panel and engage the bottom hooks into the main case. Pull up and magnetically attached the front panel. Warning :- Care must be taken in replacing the front cover as the item is heavy.
-
Page 50: Controller
6. Controller The heat pump controller fitted to the Evo has been especially designed for the application. It uses clear and concise language to indicate faults and uses a logical and intuitive menu structure providing trouble free commissioning. 6.1 On Start up On initial start up the following screen is displayed. -
Page 51: Guide To Home Screen Icons
Return temperature from the Heating Mode heating/cooling distribution Indication of compressor running Menu button Fig 48 Start up screen Load side pressure Ground side pressure icons and temperature and temperature 6.2 Guide to Home Screen icons Menu Button—This provides access to the lower menus Compressor Icon—This is lit when the compressor is running. -
Page 52: Main Menu
6.3 Main Menu Pressing the menu button on the home screen provides access to the main menu. Fig 49 Main menu 6.3.1 Main Menu Icons Home Icon—This will return the user to the home screen. Back Button– Returns the user back to the previous screen. Diagnostics—Enters the diagnostics menu displaying various readings such as temperatures and pressures to aid fault finding. -
Page 53: Diagnostics Menu
6.4 Diagnostics Menu Fig 50 Diagnostics Menu 6.4.1 Diagnostics—Temperatures Fig 51 Diagnostics— Temperature Menu The temperature screen shows the current temperature measured within the system. Load side • T1—Temperature of the heating/cooling distribution fluid returning to the heat pump. • T2—Temperature of the heating/cooling distribution fluid leaving the heat pump. -
Page 54: Diagnostics-Pressures
Weather Compensation • T9—Weather compensation set point, i.e. the external temperature at which the weather compensation starts to operate. • Multiplier—This is the multiplier of the number of degrees that the water set point rises for each degree change sensed in the outdoor temperature. Ideally this should be a value between 1.0 and 1.5 which would suit most properties. -
Page 55: Diagnostics-Compressor Performance
The pumps parameter screen shows the current information of the water pumps within the heat pump. • State—Indicates whether the pump is running or not. • % - Real time feedback from the pump indicating power consumption of the pump and its electrical performance •... -
Page 56: Diagnostics-Input Voltage
Devices such as electricity meters, heat meters, etc. The display only shows the number of pulses detected, for example if a single pulse was an indication of 100 units, it would only register 1 pulse and to get the true reading the number of pulses needs to be multiplied by 100 (or whatever the single pulse is meant to represent). - Page 57 Fig 58 Diagnostics—History Log Menu 2nd page • T4—Temperature of the thermal transfer fluid returning to the heat pump from the ground. • T5—Temperature of the thermal transfer fluid leaving the heat pump to the ground. • T6 - Temperature of the thermal transfer fluid leaving the heat pump to the ground. (This is only displayed for twin compressor units.) •...
-
Page 58: Diagnostics-Dhw And External Immersion
6.4.8 Diagnostics—DHW and External Immersion Fig 60 Diagnostics—DHW and external immersion menu • State— Whether the DHW cycle is currently running.. • Lock Out (HH,MM) - Amount of time before a second DHW cycle is allowed to restart following a completed DHW cycle. - Page 59 vate a supplementary heat source on a separate supply voltage. The call for supplementary heating will cancel once the return temperature increases to within the settable cut out differential. • Relay—Whether the supplementary heat function is enabled or disabled. • Time Delay (HH:MM) - The period of time in hours that the return temperature stays below the set point temperature minus the cut in differential.
-
Page 60: Commissioning
6.5 Commissioning Menu Fig 62 Main Menu screen From the main menu, press com- missioning:- Fig 63 Commissioning — Password page Click to enter and enter the commissioning menu password ‘11’ using the Number Pad. Fig 64 Commissioning — Number Pad Evo Heat Pump Manual Version 5 Page 60 of 84... -
Page 61: Commissioning-Function Tests
Fig 65 Commissioning —main menu The controller then provides a choice either to perform a Function Test or to Setup the heat pump. It is advisable to initially perform a function test as this provides a check that the wiring is correct and specific functions of the system are operational. -
Page 62: Commissioning-Set Up
6.5.1.1 Commissioning—Function Test Page 2 Fig 67 Commissioning — Function tests page 2 menu This page allows the Error Sound, Error LED, Supplementary Heater, Fault Output and External Immersion Heater to be tested (if wired to the heat pump). The Error Sound will reset itself after less than a second. The other Function Tests will cancel themselves once the page is navigated from. - Page 63 6.5.2.1 Commissioning—Set up—Water Temperatures Fig 70 Commissioning —Set up– Water temperatures menu Load • Heating S.P. ( C) - This is the return temperature set point of the heating distribution fluid returning to the heat pump. Generally for underfloor it would be set to approximately 30 C and for radiators C.
-
Page 64: Commissioning—Set Up—Low Flow Differentials
Ground • Heating Mode Anti-freeze Limit ( C)—This is the temperature of the thermal transfer fluid below which the heat pump will go to alarm and stop operating. This is dependant on the amount of antifreeze added to the system and for MCS installations the amount of anti-freeze added should give protection to–10 C However due to the interaction between the antifreeze and the thermal transfer fluid Kensa recommend that this should not be set any lower than –5... -
Page 65: Commissioning—Set Up—Pump Exercise Routine
6.5.2.3 Commissioning—set up—Pump Exercise Routine Fig 73 Commissioning —Set up– Pump Exercise Routine menu The pump exercise routine sets a frequency and duration of an exercise routine for the Load water pump and the Ground Water pump. It is designed so that in periods of long non-operation a signal is sent to the water pumps to spin the pumps to avoid them from sticking due to in-activity. -
Page 66: Commissioning—Set Up—Water Pressures
6.5.2.5 Commissioning—set up—Water Pressures Fig 75 Commissioning —Set up– Water Pressures menu The Water Pressure screen allows the pressures to be set at which the alarms will be activated. Ground Side (Bar) This allows the low and high pressure values to be set at which the fault alarms will be activated for the ground side. -
Page 67: Commissioning—Set Up Page 2
water pump will drop to when the compressor is not operational. A flow on the ground side is always required when the heat pump is operating as it enables the temperature of the thermal transfer fluid to be continually and accurately measured. Having a setback speed maintains the flow but reduces the pump’s speed to improve efficiency of the system. -
Page 68: Commissioning—Set Up Page 2—Dhw Parameters
temperature is not increasing above a settable differential for a settable period of time it activates a relay to activate a supplementary heat source. The call for supplementary heating will cancel once the return temperature increases to within the settable cut out differential. •... -
Page 69: Commissioning—Set Up Page 2—Active Cooling
6.5.2.10 Commissioning—set up page 2—Active Cooling Fig 81 Commissioning —Set up page 2—Active cooling menu This menu only appears if the heat pump is specified and available in cooling. Activating cooling results in the following warning screen:- Fig 82 Commissioning —Set up page 2–... -
Page 70: Commissioning—Set Up Page 2—Home Screen Display
6.5.2.11 Commissioning—set up page 2—Home Screen Display Fig 84 Commissioning —Set up page 2– Home screen display menu The home screen display allows some customisation of the home screen. This includes displaying the compressor COP and the weather compensation icon. 6.5.2.12 Commissioning—set up page 2—Passive Cooling Fig 85 Commissioning —Set up page 2–... - Page 71 Pressing the default reset will return the controller to the factory default settings. A confirmation display will be displayed. Fig 87 Commissioning —Set up page 2– Default reset menu Evo Heat Pump Manual Version 5 Page 71 of 84...
-
Page 72: Error Log
6.6 Error Log Fig 88 Main menu The Error Log rec- ords all of the faults and Warnings that are activated by the unit. Fig 89 Error log menu The time in chronological order from when the heat pump was turned on that the event occurred, the status (whether it was a warning or fault), error message and when the fault was cleared are recorded . -
Page 73: Settings
6.7 Settings Fig 90 Main menu The settings menu allows the controllers standard functions to be set. Fig 91 Settings menu 6.7.1 Settings—Display and sound Fig 92 Settings—Display & sound menu This allows the time taken for the screen to dim to be set in minutes. By enabling the error sound, different frequencies of beep can be assigned for a fault or warning sound. -
Page 74: Settings-Date And Time
6.7.2 Settings—Date and Time Fig 93 Settings menu This allows the date and time to be set. Fig 94 Settings-Date & time menu Evo Heat Pump Manual Version 5 Page 74 of 84... -
Page 75: My Product
6.8 My Product Fig 95 Main menu My Product provides information regarding the unit. Fig 96 My product menu Evo Heat Pump Manual Version 5 Page 75 of 84... -
Page 76: Fault Finding
7. Fault Finding Error Code Error Error Message Action Level Check wall mounted electrical isolator switch or call No power supply electrician Controls MCB tripped Call electrician to investigate cause Blank display on No Error software controller There is no call from the time-clock or Programme time-clock according to manufacturer’s thermostat for heat pump operation instructions... - Page 77 Error Code Error Error Message Action Level Temperature differential T4-T6 (Temperature of the thermal transfer fluid returning to the heat Check ground pump speed pump from the ground—Temperature of the Check ground flow FGH2 Warning thermal transfer fluid leaving the heat pump to Check for flow restrictions on ground side the ground.(2nd compressor)) is greater than set Check set low flow differentials...
- Page 78 Error Code Error Error Message Action Level Temperature differential T5-T4 (Temperature of the thermal transfer fluid leaving the heat pump Check ground pump speed to the ground—Temperature of the thermal Check ground flow FGC1 Warning transfer fluid returning to the heat pump from Check for flow restrictions on ground side the ground.) is greater than set point.
- Page 79 This page is intentionally blank Evo Heat Pump Manual Version 5 Page 79 of 84...
-
Page 80: Warranty
Kensa Heat Pumps Ltd will, at its option and without charge to the Buyer, replace or repair any Parts which cause the Kensa Evo Ground Source Heat Pump to be inoperable; however, if Kensa Heat Pumps Ltd elects to provide replacement Parts, it shall not be obligated to install such replacement Parts and the Buyer shall be responsible for all other costs, including, but not limited to, shipping fees and expenses. -
Page 81: Care Of Duty
8.1.7 Replacement Parts Kensa Heat Pumps Ltd’s warranty obligations with respect to replacement parts are identical to those with respect to original parts; provided, however, in no event shall the warranty term for such replacement parts extend beyond the term established by the commencement date (i.e. -
Page 82: Heat Pump Settings Sheet
9. Heat Pump Settings Sheet General Installation Serial Number Visual Inspection Feet level on floor Visual check of site wiring Software operating Software errors Heating Status Type of heating No of Manifolds Any UFH water pumps Control philosophy Ground Array Type of ground arrays Number and length Depth and width of trenches... - Page 83 Water Temperature Set Points Heating / Cooling Set Point 2nd Heating Set Point Anti Freeze Temperature Limit Ground Upper Limit (Cooling) Heat Pump Pressures P1 Current Ground Water Pressure P2 Current Load Water Pressure P3 / P4 Suction Pressure P5 / P6 Discharge Pressure Internal Water Pumps Operational Speed % (Load/Ground) Set Back Speed % (Load/Ground)
- Page 84 Low Flow Differentials Load Side ∆T (Heating / Cooling) Ground Side ∆T (Heating and Cooling) Pressure Fault Settings Ground Side Load Side Passive Cooling Passive Cooling Enabled / Disabled Active Cooling Active Cooling Enabled / Disabled Antifreeze Concentration Load Side Heat Pump Left In Good Working Order Demonstration and Handover of Heat Pump Completed...
Need help?
Do you have a question about the 7kW Evo and is the answer not in the manual?
Questions and answers