Advertisement
Quick Links
INSTALLER:
keep adjacent to water heater.
2. Before leaving premises: REVIEW this operation,
Operating, installation
and service manual
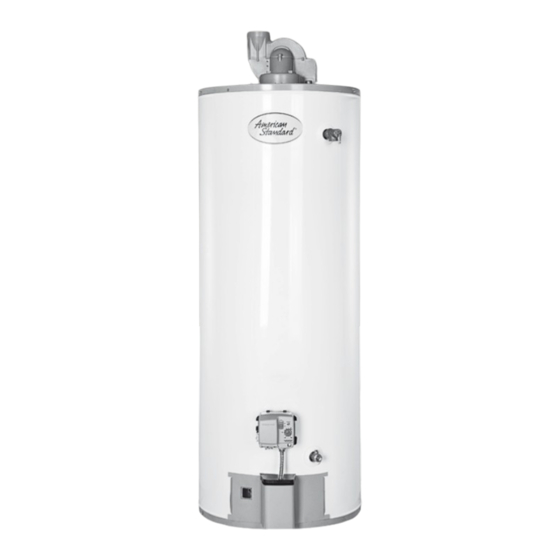
Standard Residential power vent
Gas Water Heater with vaporshield Technology.
explosion may result causing property damage, personal injury or death.
or any other appliance.
WHAT TO DO IF YOU SMELL GAS
1. Do not try to light any appliance.
2. Do not touch any electrical switch; do not use any
gas supplier.
THIS WATER HEATER SHALL NOT BE INSTALLED IN BATHROOMS, BED-
ROOMS, OR ANY OCCUPIED ROOM NORMALLY KEPT CLOSED.
VAPORSHIELD® Technology Gas Water Heaters meet the new ANSI Z21.10.1
the rating plate near the gas control valve for the correct gas. DO NOT USE THIS
WATER HEATER WITH ANY GAS OTHER THAN THE ONE LISTED ON THE
RATING
in DEATH, SERIOUS BODILY INJURY OR PROPERTY DAMAGE. If you have any
natural gas to any other gas.
OWNER:
reference.
heater.
CALL THIS TOLL FREE NUMBER 1-888-883-0788
WITH ANY QUESTIONS DURING OR AFTER INSTALLATION.
HAVE YOUR MODEL AND SERIAL NUMBER AVAILABLE BEFORE
-
CALLING.
Advertisement

Related Manuals for American Standard POWER VENT


Summary of Contents for American Standard POWER VENT
- Page 1 Operating, installation and service manual Standard Residential power vent Gas Water Heater with vaporshield Technology. explosion may result causing property damage, personal injury or death. or any other appliance. WHAT TO DO IF YOU SMELL GAS 1. Do not try to light any appliance.
- Page 2 GENERAL SAFETY Read and understand instruction manual and safety message before installing, operating or servicing this water heater. Failure to follow instructions and safety messages could result in death or serious injury. Instruction manual must remain with water heater. For continued protection •...
- Page 3 CONTENTS ABLE OF General safety Typical Installation Potable water system Termination clearances sidewall Installation vent system 13 to 21 Installation check list IMPROPER INSTALLATION, ADJUSTMENT, ALTERATION, SERVICE OR MAINTENANCE CAN CAUSE INJURY, DEATH OR PROPERTY DAMAGE READ AND REFER TO THIS MANUAL. Ordering parts and service presented along with the warranty in the event a claim is necessary.
- Page 4 CONSUMER RESPONSIBILITIES THIS MANUAL HAS BEEN PREPARED TO ACQUAINT YOU WITH THE INSTALLATION, OPERATION AND MAINTENANCE OF YOUR GAS WATER HEATER AND TO PROVIDE IMPORTANT SAFETY INFORMATION. DEATH, INJURY OR PROPERTY DAMAGE. American Gas Association National Fire Protection Agency 400 North Capitol, St; NW 1 Batterymarch Park Washington D.C.
- Page 5 WARNING When this heater is installed directly on carpeting, carpeting THIS MANUAL HAS BEEN PREPARED TO ACQUAINT YOU WITH THE INSTALLATION, OPERATION AND MAINTENANCE OF YOUR GAS WATER HEATER AND TO PROVIDE IMPORTANT INFORMATION. FAILURE TO HEED THIS WARNING MAY RESULT IN FIRE FIGURE 3: Typical installation in WARNING...
- Page 6 NOTICE: limitations. Approved venting materials -For installations in the US only -For installations in CANADA Approved primers and cements -For installations in the US only -For installations in CANADA NOTICE:...
- Page 7 INSTALLATION TYPICAL CLOSED WATER SYSTEM EXPANSION PRESSURE REDUCING VALVE WITH BYPASS HOT OUTLET WATER COLD COLD WATER WATER INLET INLET VALVE TEMPERATURE AND PRESSURE RELIEF VALVE **SOME MODELS MAY HAVE TEMPERATURE & PRESSURE RELIEF VALVE TAPPING ON TOP OF HEATER DATA PLATE AND LIGHTING INSTRUCTION LOCATION DRAINAGE TO AN OPEN DRAIN.
- Page 8 AIR SUPPLY ALL AIR OUTDOORS FROM two permanent openings, one commencing within 12 inches of the top and one commencing within 12 inches of the The following types of installation that freely • • • • • Water heaters installed in chemical storage areas. VENTILATION LOUVERS (EACH END OF ATTIC)
- Page 9 NOTE: each opening shall have a free area of not FIGURE 8 UPPER AIR DUCT WATER HEATER FURNANCE LOWER permission of the copyright holder. AIR DUCT DISCHARGE PURGED GASES WARNING VENTING Supply And Ventilation”) MECHANICAL EXHAUSTING AND DOWNDRAFT OPERATION FIREPLACES •...
- Page 10 VERTICAL EXHAUST GAS VENT WATER PIPING CAUTION OPERATING AN EMPTY OR PARTIALLY FILLED WATER HEATER WILL RESULT IN DAMAGE TO THE TANK COLD. PRESSURE BUILD-UP IN CLOSED WATER HOT. SYSTEMS of hot water within the pipes. Do not remove the inserts within the heat traps. is recommended for ease or removing the water heater for service or replacement.
- Page 11 TEMPERATURE & PRESSURE RELIEF VALVE "T&P relief valve". T&P RELIEF VALVE INSULATION T&P RELIEF VALVE INSULATION MANUAL RELIEF LEVER T&P RELIEF VALVE T&P RELIEF VALVE DRAIN LINE WARNING: Do not attempt to operate this water heater with cold water inlet valve closed. .
- Page 12 1. Locate the T&P Relief Valve on the Water Heater. relief lever.
- Page 13 DO NOT DO NOT DO NOT DO NOT DO NOT DO NOT DO NOT USE FULL BLOW BALL OR GATES VALVES ONLY. DO NOT DO NOT...
- Page 14 TERMINATION CLEARANCES SIDE WALL POWER VENT FIGURE 2B Inside Other than direct vent terminal clearances corner detail (See Clause 4.33.2) 15 ft Fixed closed Operable Fixed closed Operable Regular vent outlet In the event no Légende : regulator is present,...
- Page 15 CONDENSATE DRAIN BLOWER ASSEMBLY 8 in LOOP DRAIN Fig. 12 This water heater is a polarity sensitive appliance and will not HOT SURFACE installed. The Power Vent operates on 110 -120 VAC. therefore reversed when making these connections. Fig. 13...
- Page 16 access panel is properly secured. INSTALLATION OF VENT SYSTEM PLANNING THE VENT SYSTEM not designed to carry the load or stresses of the venting system if they are rigidly held. contraction of the chosen venting material. performed prior to any installation work. Verify that correct...
- Page 17 EXHAUST VENTING The PVC vent termination elbow ( IPEX USA LLC PART NUMBER: 397010) Supplied with this heater has been certified to be used with PVC and CPVC vent systems. details and clearances. Connection of the venting piping to the Correct installation of the venting system is essential to the safe and provided with the heater.
- Page 18 • • of operational noise. In order to minimize noise transmission hangers and the vent pipe. • Most power vent installations develop some condensation in if the condensate is allowed to collect and freeze. Pooling of of the system. •...
- Page 19 Calculating Equivalent Feet Important: VENT PRESSURE HEATER WATER MINIMUM MAXIMUM SIZE EQUIVALENT SWITCH EQUIVALENT INPUT HEATER (Inside VENT LENGTH VENT LENGTH (BTU/hr.) SETTING MODEL Diam.) 50 ft. + termination 7 ft. + termination 2” 40 (tall) & elbow, elbow, -0.60 in w.c. 50 (tall/short) 40,000 125 ft.
- Page 20 Venting instructions style and position of the vent termination, the vent pipe pipe connections. are not designed to carry the weight of the venting system. ATTACH SEALANT TERMINATION ELBOW (MAY ALSO BE 90º) any interference conditions. VENT PIPING MAY RODENT BE SLOPED IN ANY SCREEN COVER PLATE...
- Page 21 VENTING SCENARIO installations. Do not attempt to connect the vent piping Before installing clean and lightly sand the end of the that there is no stress on the connection or the vent Diagram suitable for Power Vented HIGH-INPUT models. completed. 2"...
- Page 22 4" VENT PIPE • 2" - 4" ADAPTER (FIELD SUPPLIED) • 2" RUBBER • COUPLING (SUPPLIED) 2" VENT PIPE, 75 mm (3 in) MAX LENGTH • • Primer and Cleaner • Solvent Cement - PVC for PVC Components and CPVC for CPVC Components only •...
- Page 23 Applicators: B. Deburring from the end of small diameter pipe. into the IMPORTANT NOTE: 3/32" (2.5 MM) APPROX RECOMMENDED BRUSH* SIZE FOR PRIMER AND CEMENT APPLICATIONS Nominal Brush Size 10-15° Pipe (IPS) 1.5” - 2.5” *USE ONLY NATURAL BRISTLE Fig. 24 Table 2 3.
- Page 24 • Apply a second coat of cement to the pipe End. WARNING Fire Hazard •Primers and cements are extremely flammable, and must not be stored or used near heat or open flame. •Also, use only in a well ventilated area. Fig.
- Page 25 INSTALLATION CHECKLIST Vertical heater. Correct any conditions that do not meet these Water Heater Location Water System Piping Centrally located with the water piping system. Located as close to gas piping and vent pipe system from freezing. Located indoors and in a vertical position. Protected All piping properly installed and free of leaks.
- Page 26 SOLAR INSTALLATION following warning applies. WARNINGS CAUTION operating condition. the Federal Government.
- Page 27 SAFETY READ OPERATING FOR YOUR BEFORE WARNING • department. BEFORE OPERATING a service technician. Force or attempted repair WHAT TO DO IF YOU SMELL HAS. • Do not try to light any appliance. • technician to inspect the appliance and to replace any part of the control system and any gas control •...
- Page 28 GAS REQUIREMENTS plate located near the gas control valve. If the information does not agree with GAS PIPING INSTALLATION WATER HEATER WITH ANY GAS OTHER THAN TYPE LISTED ON THE RATING PLATE. pipe dope sparingly to the male threads only. DO NOT apply pipe dope to the gas valve. exceeding LP GAS NOTE:...
- Page 29 WARNING DO NOT OPERATE APPLIANCE UNTILL ALL REMOVING REPLACING THE GAS CONTROL VALVE/THERMOSTAT Important: The gas control is an electronic valve: verse order: • counterclockwise to the off position. into tank. • or other approved method. • lighting and activating the water heater. •...
- Page 30 REPLACING THE HIGH TEMPERATURE CUT OFF SWITCH ASSEMBLY the switch to determine if the switch is still in the open 2. If this test shows that the switch is defective, the switch installation of a new switch, the gasoline vapors will per the following.
- Page 31 REMOVAL REMOVAL BURNER BURNER OF THE OF THE ASSEMBLY ASSEMBLY BURNER ADJUSTMENT BURNER MAINTENANCE WARNING: DO NOT ATTEMPT TO REMOVE THE BURNER FROM THE COMBUSTION CHAMBER UNLESS YOU ARE QUALIFIED TO DO SO. material is positioned properly. If any of the gasket are the damaged gaskets are replaced.
- Page 32 DRAINING FLUSHING INTERIOR OF TANK 2. Close the cold water inlet valve to the heater 4. Open the heater drain valve. WARNING TAMPERING WARNING THIS WATER CAN BE HOT these components. TEMPERATURE ADJUSTMENT The temperature selector dial has been adjusted to its lowest setting when shipped from the factory.
- Page 33 EMERGENCY SHUT DOWN WARNING Stacking are taken from the water heater tank. This OPERATION SAFETY PRECAUTIONS: the electronic valve. CONDESATION water scald potential however if the electronic valve is set too high. GAS MODELS NATURAL SMELL GAS: IF YOU 1. Open windows. L.P.G.
- Page 34 WARNING HYDROGEN GAS time HYDROGEN GAS IS EXTREMELY FLAMMABLE. To prevent the the hot water system. EXPOSURE TO WATER technician to inspect the appliance and to replace any part of the control system and any gas ANODE In each water heater there is installed at least one anode rod for protection of the as smelly water and removal of the rod will void any warranties stated or implied.
- Page 35 SERVICE MUST BY A QUALIFIED INSTALER, BE PERFORMED SERVICE AGENCY OR GAS SUPPLIER THE FOLLOWING IS A LIST OF THE MOST COMMON COMPLAINTS RELATED TO THE USE OF WATER HEATERS. MANY COMPLAINTS ARE DUE TO ITEMS NOT DIRECTLY RELATED TO THE WATER HEATER. DO NOT ATTEMPT TO SERVICE THE WATER HEATER OF PERFORM OTHER RECOMMENDATIONS ON THIS LIST UNLESS YOU ARE TRAINED AND QUALIFIED TO DO SO.
- Page 36 TROUBLESHOOTING CHECK LIST PROBLEM CORRELATIVE ACTION GAS CONTROL VALVE AND Electrical Switch remain lit BLOWER WITH OUT the Electrical Switch remain lit POWER BURNER FLAME TOO Provide ventilation to water heater HIGH Provide ventilation to water heater BURNER WILL NOT STAY LIT Defective gas control valve Replace the control valve...
- Page 37 TROUBLESHOOTING CHECK LIST GAS CONTROL Defective gas control valve Replace gas control valve. VALVE FAILS TO Replace gas control valve. SHUT OFF SMELLY WATER Replace with anode appropriate for water conditions. Normal operation: the condensation. Normal operation: the condensation CONDENSATION Install condensate hose to drain port on Undersized water heater Provide fresh air ventilation to the water...
- Page 38 TROUBLESHOOTING CHECK LIST Gas control valve set too low Disconnected or loose wire Repair and reconnect wires. BLOWER WILL NOT START hose. draft - check for: switch. BLOWER RUNS CONTINUOSLY Replace High limit switch HOT SURFACE receptacle. IGNITER NOT Replace igniter. GLOWING Replace gas control valve Defective gas control valve...
- Page 39 RESETTING THE HEATER CONTROL • reset. • • LOCKOUTS • • for service information. still observed, slide the “ON/OFF” switch...
- Page 40 IGNITION STATE TIMING LED FLASH CONTROL IGNITION STATE TIMING SEQUENCE STATUS 10 seconds Call for Heat Ignition Activation Low Flame Signal One Flash, three Flame Recognition Two Flash, three Trial For Ignition Closed Three Flash, three Period 30 seconds limit Response Time 30 seconds Five Flash, three...
- Page 41 READING LED FLASH SEQUENCE CORRECTIVE ACTION CORRECTIVE ACTION NUMBER Normal operation, no action necessary. Normal operation, no action necessary. Check that all wiring is correct. disconnected; power to the control.
- Page 42 CORRECTIVE ACTION CORRECTIVE ACTION NUMBER Flammable vapor sensor has detected the presence of flammable vapors. Verify that no vapors of gasoline, paint, or any possible gas leaks, etc. are present. Contact Technical Support. Check for any damages on the wiring between the FVS sensor and the gas valve. Check for the connections to be tight.
- Page 43 REPAIR ILLUSTRATION PARTS ITEM PARTS DESCRIPTION BLOWER 4. BAFFLE COLD WATER DIP TUBE 8. TEMPERATURE & PRESSURE RELIEF VALVE DRAIN VALVE 11. MANIFOLD 13. MAIN BURNER 14. HOT SURFACE FV SENSOR 17. HARNESS SENSOR FVR AND TOD 18. EXTERIOR DOOR LEGEND A Special anode rod •...
- Page 44 NEED SERVICE IF YOU Department at the following address: American Standard Water Heaters 1-888-883-0788 c. Name and address of installer or any service agency who performed service on the water heater. d. Date of original installation and dates any service work was performed.
Need help?
Do you have a question about the POWER VENT and is the answer not in the manual?
Questions and answers