Uniden PRO505XL Manual
Professional mobile cb radio
Hide thumbs
Also See for PRO505XL:
- User manual ,
- Owner's manual (13 pages) ,
- Manual del usuario (11 pages)
Table of Contents
Advertisement
Quick Links
Advertisement
Table of Contents

Subscribe to Our Youtube Channel
Related Manuals for Uniden PRO505XL


Summary of Contents for Uniden PRO505XL
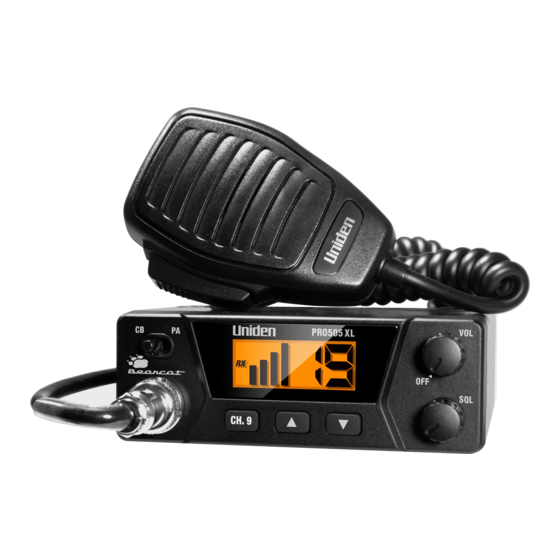
- Page 1 User Manual of Product 1: Whistler WS1025 Analog Desktop Scanner (Black) User Manual of Product 2: Uniden PRO505XL 40-Channel CB Radio. Pro-Series, Compact Design. Public Address (PA) Function. Instant Emergency Channel 9, External Speaker Jack, Large Easy to Read Display. - Black...
- Page 2 WS1025 200 Channel VHF/Air/UHF Desktop Scanner OWNER’S MANUAL...
-
Page 3: Table Of Contents
TABLE OF CONTENTS Package Contents ............. 3 Scanning Legally ............3 Features ..............4 Scanner Basics ............5 Setup ................. 6 Connecting the Antenna ..........6 Connecting a Speaker or Headphones ......7 Powering Your Scanner .............7 Turning on the Scanner ............7 Turning Off the Key Tone ..........8 Understanding the Display ..........8 Understanding the Keypad ..........10... -
Page 4: Package Contents
INTRODUCTION WELCOME Thank you for choosing a Whistler product. We are dedicated to providing products that represent both quality and value. Please read the user manual carefully before using this product. If you have additional questions, please visit the FAQ page on our website at www.whistlergroup.com or call toll free 800-531-0004, 8am to 5pm CT, Monday through Friday to speak to a Customer Service... -
Page 5: Features
FEATURES This scanner is designed to prevent reception of illegal transmissions, in compliance with the law which requires that scanners be manufactured in such a way as to not be easily modifiable to pick up those transmissions. Do not open your scanner’s case to make any modifications that could allow it to pick up transmissions that are not legal to listen to. -
Page 6: Scanner Basics
SCANNER BASICS Scan Delay – Delays scanning for about 2 seconds, so that you can hear replies on the same channel. Priority Channel – Lets you set the scanner to check one channel every 2 seconds so that you do not miss transmissions on that channel. -
Page 7: Setup
CONNECTING ANTENNA Channels Channels are storage areas for frequencies saved in your scanner’s memory. Each saved frequency is assigned a channel. Banks A bank is a storage area for a group of channels. Your scanner provides 10 banks (1 to 10) that can each store up to 20 channels, for a total of 200 channels. You can use the banks to group and organize frequencies. -
Page 8: Connecting A Speaker Or Headphones
CONNECTING ACCESSORIES Connecting a Speaker or Headphones You can plug an amplified speaker or headphones (not supplied) with Çinch (3.5 mm) mini-plug into the HEADPHONE jack on the back of the scanner. This automatically disconnects the internal speaker. Note: Use an amplified speaker with this scanner. Non-amplified speakers do not provide sufficient volume for comfortable listening. -
Page 9: Turning Off The Key Tone
DISPLAY Turning Off the Key Tone The scanner is preset to sound a tone each time you press one of its keys. To turn the key tone on and off: 1. Turn on the scanner. WELCOME SCAnnInG rECEIVEr appears. 2. While the welcome message is on the screen, press 1 to turn on the key tone or press 2 to turn it off. - Page 10 DISPLAY Display Messages ALL CH L-out – All channels locked out during scan or marine band search. b X Ch-FULL – All displayed bank channels are full. b X StorE – Frequency programmed into displayed bank’s channel. CLOnE – Clone mode. -dUPL- –...
-
Page 11: Understanding The Keypad
KEYPAD Understanding the Keypad MAR – Search the preprogrammed marine bank. FD/PD – Search the preprogrammed fire/police bank. – Search the preprogrammed weather bank, or press and hold to jump to the Skywarn channel. You must first program your local Skywarn frequency into channel 200 (see page 22). - Page 12 KEYPAD 0–9 – Input numbers when entering frequencies and selecting banks (0 selects bank 10). The number range above the keys (1–20, 21–40, 41-60, etc.) indicates the channels stored in that bank. • / DELAY – Input a decimal point when entering frequencies.
-
Page 13: Configuring Your Scanner
CONFIGURING SCANNER Configuring Your Scanner Preprogrammed Frequencies Your scanner includes 153 preprogrammed frequencies, which you can load into Channels 1 to 153. For a list of these frequencies, see “Preprogrammed Frequency List” on page 23. To load the pregprogrammed frequencies: 1. -
Page 14: Programming With A Computer
PROGRAMMING Programming with a Computer You can upload or download programmed data to or from a PC using a PC/IF cable. The application software is available online at www.PSRedit.com or www.Starrsoft.com. Find model WS1025 and follow instructions in the software package to upload and download data. -
Page 15: Searching For Frequencies
SERVICE SEARCH Service Bank Search Your scanner contains groups of preset frequencies called Service Banks. You can search for marine, fire/ police, aircraft, ham, FM, and weather transmissions even if you do not know the specific frequencies that are used in your area. Then you can store the frequencies you find into the scanner’s channels (except for weather and marine banks, which are already stored as channels). -
Page 16: Birdie Frequencies
SCANNING STORED CHANNELS • If the scanner displays -dUPL-, the frequency is already stored in another channel. Press ENT if you want to continue storing the frequency. Press TUNE/CLEAR to cancel. • If there are no empty channels in the bank, Ch-FULL appears. You can select another bank or clear some channels in the current bank (see “Clearing a Stored Channel”... - Page 17 PRIORITY CHANNEL To turn a channel-storage bank on or off, press the bank’s number key (1–0, using 0 for bank 10) during scanning. The channel-storage banks are on when they have a bar underneath them and off when no bar appears underneath them. • You cannot turn off all banks; there must be at least one active bank.
-
Page 18: Monitoring A Channel
MONITORING CHANNEL 3. To turn on the priority feature, press PRI/ALERT during scanning or searching. PRI appears. The scanner checks the priority channel every two seconds and stays on the channel if there is activity. To turn off the priority feature, press PRI/ALERT. PRI disappears. -
Page 19: Clearing A Stored Channel
MANAGING SERVICE BANK Managing Service Bank Lock-outs 1. Hold down L/O L/O RV W for about two seconds during a Service Bank search. 2. Press or repeatedly to scroll through the list of locked-out frequencies. L-r and appear in the display. -
Page 20: Weather Features
WEATHER Weather Features The NOAA and your local weather reporting agency broadcast local forecast and regional weather information on one or more channels allocated for use by weather reporting agencies. Your scanner is an extremely sensitive high-quality receiver on the weather frequencies. However, the included antenna is optimized for general purpose scanning. -
Page 21: Same Standby Mode
WEATHER SAME Standby Mode In SAME Standby mode, your scanner monitors weather channels for SAME alerts for up to seven areas you specify by entering the FIPS codes. To program your scanner for SAME Standby mode: 1. Press 2. Press PGM to access the FIPS code entry mode. 3. -
Page 22: Skywarn
SKYWARN Testing the Weather Alert and Beep Tone 1. To test the weather alert, press and hold ENT for more than 2 seconds while F [1-7] StAndby appears on the display. The display indicates the type of message, and the scanner sounds an alert or series of beeps. The beeps automatically change every 3 seconds. -
Page 23: Additional Information
ADDITIONAL INFORMAITON Additional Information Care Your scanner is not waterproof. Do not expose it to rain, moisture, or extremely high humidity. If the scanner gets wet, wipe it dry immediately. Use and store the scanner only in normal temperature environments. Handle the scanner carefully; do not drop it. -
Page 24: Preprogrammed Frequency List
PREPROGRAMMED FREQUENCY LIST Preprogrammed Frequency List BANK 1 BANK 2 BANK 3 Freq. Freq. Freq. (MHz) (MHz) (MHz) 40.5000 151.6250 154.3250 52.5250 151.8200 154.3400 121.5000 151.8800 154.3550 122.0000 151.9400 154.3700 122.2000 151.9550 154.3850 122.7000 154.0100 154.4000 122.7500 154.0700 154.4150 122.8000 154.1300 154.4300 122.9000... - Page 25 PREPROGRAMMED FREQUENCY LIST BANK 4 BANK 5 BANK 6 Freq. Freq. Freq. (MHz) (MHz) (MHz) 155.3400 415.7000 460.4250 155.3550 446.0000 460.4500 155.3700 450.8000 460.4750 155.3850 454.0000 460.5000 155.4000 460.0250 460.5250 155.4750 460.0500 460.5500 156.4250 460.0750 460.5750 156.4500 460.1000 460.6000 156.4750 460.1250 460.6250 156.5750...
- Page 26 PREPROGRAMMED FREQUENCY LIST BANK 7 BANK 8 Freq. Freq. Freq. (MHz) (MHz) (MHz) 462.5750 462.9500 467.5875 462.5875 462.9750 467.6125 462.6000 464.5000 467.6375 462.6125 464.5500 467.6625 462.6250 464.8750 467.6875 462.6375 467.0625 467.7125 462.6500 467.5625 467.7625 462.6625 467.8125 462.6750 467.8500 462.6875 467.8750 462.7000 467.9000 462.7125...
-
Page 27: Service Banks
SERVICE BANKS Service Banks The scanner is preprogrammed with the frequencies allocated to marine, fire/police, aircraft, ham radio, FM broadcast and weather services. This is handy for quickly finding active frequencies instead of searching through an entire bank (see “Service Bank Search”... - Page 28 SERVICE BANKS Ham Amateur Radio Group Frequency Range (MHz) Step (kHz) 29.000-29.700 50.000-54.000 144.000-148.000 420.000-450.000 12.5 FM Broadcast Frequency Range (MHz) Step (kHz) 87.3–107.9 Weather Channels Channel Frequency (MHz) 162.400 162.425 162.450 162.475 162.500 162.525 162.550...
- Page 29 SERVICE BANKS Marine Frequency (MHz) Frequency (MHz) 156.0500 156.1750 156.2500 156.2250 / 160.8250 156.3000 156.2750 156.3500 156.3250 156.4000 156.3750 156.4500 156.4250 156.5000 156.4750 156.5500 156.5250 156.6000 156.5750 156.6500 156.6250 156.7000 156.6750 156.7500 156.7250 156.8000 156.8750 156.8500 156.9250 156.9000 156.9750 156.9500 157.0250 157.0000 / 161.6000 157.0750...
-
Page 30: Specifications
SPECIFICATIONS Specifications Frequency Coverage 29-54 MHz ..........(5 kHz steps)/FM 87.3-107.9 MHz ........(100 kHz steps)/WFM 108-136.99166 MHz ......(8.33 kHz steps)/AM 137-143.9875 MHz ......... (12.5 kHz steps)/FM 144-148 MHz ..........(5 kHz steps)/FM 148.0125-150.7875 MHz ......(12.5 kHz steps)/FM 150.8-161.995 MHz ........(5 kHz steps)/FM 162-174 MHz .......... -
Page 31: Fcc Notice
FCC INFORMATION FCC Notice This equipment has been tested and found to comply with the limits for a scanning receiver, pursuant to Part 15 of the FCC Rules. These limits are designed to provide reasonable protection against harmful interference in a residential installation. This equipment generates, uses and can radiate radio frequency energy and, if not installed and used in accordance with the instructions, may cause harmful... -
Page 32: Limited Warranty
WARRANTY Consumer Warranty This Whistler product is warranted to the original purchaser for a period of one (1) year from the date of original purchase against all defects in materials and workmanship, when purchased from an authorized Whistler retailer. This limited warranty is void if the unit is abused, misused, modified, installed improperly, or if the housing and/or serial numbers have been removed. - Page 33 WARRANTY IMPORTANT: Whistler will not assume responsibility for loss or damage incurred in shipping. Therefore, please ship your unit insured with return receipt requested. CODs will not be accepted! 2. Include with your unit the following information, clearly printed: • Your name and physical street address for shipping (no PO Boxes), a daytime telephone number, and an email address (if applicable).
- Page 34 WARRANTY In the event repairs cannot be covered by the minimum service fee, you will be contacted by a Whistler technical service specialist who will outline options available to you. IMPORTANT: When returning your unit for service, be cer- tain to include a daytime telephone number and an email address (if applicable).
- Page 35 CORPORATE HEADQUARTERS 1716 SW Commerce Dr. Ste. 8 PO Box 1760 Bentonville, AR 72712 Toll Free (800) 531-0004 TEL (479) 273-6012 FX (479) 273-2927 www.whistlergroup.com CUSTOMER RETURN CENTER 1412 South 1st St. Rogers, AR 72756 Customer Service Tel (866) 923-8719 Email: info@whistlergroup.com P/N 581001a 05A14 © 2014 The Whistler Group, Inc.
- Page 36 PRO505XL Professional Mobile CB Radio © 2016 Uniden America Corp. Printed in Vietnam Irving, Texas U01UT386ZZA(1)
- Page 37 INTRODUCTION Welcome to the world of Citizens Band radio communications. Your Uniden radio is an advanced mobile radio designed for use in the Citizens Band (CB) Radio Service. It will operate on any of the 40 AM frequencies authorized by the Federal Communications Commission (FCC).
- Page 38 Microphone and hook PRO505XL Mobile radio Mounting bracket, knobs, and mounting hardware ► Other printed materials NOTE: You must use a CB antenna (sold separately) with this radio. PARTS OF THE RADIO Front Name Details CB/PA Switches between CB Radio and PA systems...
- Page 39 NOTE: FCC rules reserve Channel 9 for motorist assistance and other emergency communications. Channel 9 should only be used in situations where there is immediate danger to the safety of individuals or the protection of property. Back No. Name Details Antenna Connects to a male PL-259 external antenna Connector...
- Page 40 with either a positive or negative ground. If you don’t know whether your power supply uses a positive or negative ground, consult the manual for your power supply or contact the manufacturer. WARNING! DO NOT connect this equipment to a power supply if you are not absolutely certain of the grounding type! 1) Make sure your power supply is turned off.
- Page 41 CAUTION: Make sure the SWR is less than 2:1 before using the radio. An SWR higher than 2:1 can damage the transmitter. Your Uniden dealer can help you select the antenna that is best for your needs. Consult the specifications in the back of this manual for detailed transmitter and antenna information.
- Page 42 ► All mounting screws are securely fastened. Inspect all screws and other mounting hardware. TROUBLESHOOTING If your radio is not performing to your expectations, please try these simple steps. If these steps don’t solve your problem, visit www.uniden. com for help.
- Page 43 Problem: Things to try: Radio won’t 1. Check the radio’s power cord and all connections. turn on (no 2. Check the fuse in the radio’s power cord. power) 3. Check your vehicle’s electrical system. 1. Adjust the squelch level. Poor reception 2.
- Page 44 Weight 1 lb. 3 oz. Antenna Connector UHF, SO-239 LCD Meter Indicates relative RF output and received signal strength ransmiTTer Power Output 4 Watts Modulation Class B amplitude modulation Freq. Response 300-2500 Hz Output Impedance 50 ohms, unbalanced eceiver Sensitivity 0.8μV for 10 dB;...
- Page 45 WARRANTOR: UNIDEN AMERICA CORPORATION (“Uniden”) ELEMENTS OF WARRANTY: Uniden warrants, for one year, to the original retail owner, this Uniden Product to be free from defects in materials and craftsmanship with only the limitations or exclusions set out below. WARRANTY DURATION: This warranty to the original user shall terminate and be of no further effect 12 months after the date of original retail sale.
- Page 46 The product should be shipped freight prepaid, by traceable means, to warrantor at: Uniden America Service C/O Saddle Creek 743 Henrietta Creek Rd., Suite 100...
Need help?
Do you have a question about the PRO505XL and is the answer not in the manual?
Questions and answers