
Related Manuals for Avidsen BambooView


Summary of Contents for Avidsen BambooView
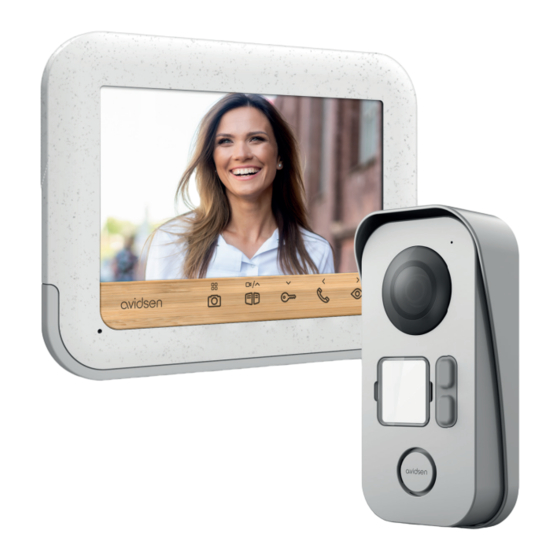
- Page 1 BambooView THE ECO-DESIGNED VIDEOPHONE Ref. 112282 Made with Made with Designed to last Compatible with any home Easy to install and use www.avidsen.com...
-
Page 2: Table Of Contents
CONTENTS A - SAFETY 3.2.2 - Connection to an electric strike plate with additional power supply INSTRUCTIONS 3.3 - Activation and use of badges 3.3.1 - Initialisation 1 - INTRODUCTION 3.3.2 - Adding user badges 3.3.3 - Deactivating all badges 2 - MAINTENANCE AND CLEANING 3.3.4 - Selecting the action associated with the user badges... - Page 3 E - TECHNICAL AND LEGAL INFORMATION 1 - TECHNICAL CHARACTERISTICS 2 - WARRANTY 3 - HELP AND ADVICE 4 - EU DECLARATION OF CONFORMITY...
-
Page 5: A - Safety Instructions
A - SAFETY INSTRUCTIONS 1 - INTRODUCTION • Do not clean with abrasive or corrosive products. Use a damp cloth with soapy water. This video intercom system pairs two modules: a • Unplug the device if it will not be used for an receiver-monitor and an easy-to-install and use extended period of time. -
Page 6: B - Product Description
B - PRODUCT DESCRIPTION 1 - KIT CONTENTS Monitor Screws (3 for the monitor, 3 for the intercom panel) Intercom panel Screws for the intercom panel Monitor wall bracket Mains adapter Dowels (3 for the monitor, 3 for the intercom RFID badges (red x1, grey x1, blue x3) panel) 2 - MONITOR... -
Page 7: Intercom Panel
B - PRODUCT DESCRIPTION Loudspeaker Communication terminals Power supply terminals 3 - INTERCOM PANEL Call button Protective hood RFID badge reset button Lens Connection terminals Name holder + badge reader Main or secondary intercom selection switch Loudspeaker Camera direction slots Microphone Infrared illumination 4 - WALL BRACKET... -
Page 8: C - Installation
C - INSTALLATION The recommended installation height for the intercom panel is about 160 cm from the ground and 150 cm from the floor for the indoor unit. 50cm 65° 160cm 150cm NOTE: For obvious safety reasons, the connections must only be made after shutting off the power supply. 1 - INTERCOM PANEL INSTALLATION The intercom panel must not be directly exposed to bad weather. - Page 9 C - INSTALLATION After making the connections on the intercom panel (see the connections paragraph), put the intercom panel into the hood. Then screw the intercom panel to the hood with the screw provided. Put on the name label.
-
Page 10: Monitor Installation
C - INSTALLATION 2 - MONITOR INSTALLATION Attach the wall mount to the wall using the screws and wall plugs suited to the support (the screws and plugs supplied are suitable for solid walls). After connecting the monitor (refer to the “connections” paragraph), fit the monitor onto its support. Note: only 3 screws are needed to attach the bracket. -
Page 11: Connection Between The Monitor And The Intercom Panel
C - INSTALLATION • You can connect and use an electric strike plate (not provided) with your intercom panel, with mechanical memory. Between the monitor and the intercom panel (100 m maximum) To ensure good audio and video quality, it is recommended to not use more than 100 m of cable between the intercom and the intercom panel. -
Page 12: Connections
C - INSTALLATION 3.2 - CONNECTIONS 3.2.1 - CONNECTIONS FOR A FAMILY WITH 1 MONITOR + 2 INTERCOM PANELS Main monitor Secondary Intercom intercom panel panel* * the secondary Intercom panel is not included in the ref.112282 kit. 3.2.2 - CONNECTION TO AN ELECTRIC STRIKE PLATE WITH ADDITIONAL POWER SUPPLY Relay with 12 V coil and NO 12 Vdc contact... -
Page 13: Activation And Use Of Badges
C - INSTALLATION 3.3 - ACTIVATION AND USE OF BADGES Three types of badges are included: the red administrator badge, the grey add badge and the blue user badges (optional additional badges, ref. 112259, a maximum of 4 user badges can be stored in the intercom panel’s memory). 3.3.1 - INITIALISATION With the video doorkeeper powered on, press on the “RESET”... -
Page 14: Adding User Badges
C - INSTALLATION After 10 seconds, the intercom panel emits 1 long beep. 3.3.2 - ADDING USER BADGES Pass the add badge (grey) in front of the name holder. The intercom panel will beep 4 times. Within the next 10 seconds, wave the user badges one-by-one in front of the name holder. The intercom panel will beep once. -
Page 15: Deactivating All Badges
C - INSTALLATION 3.3.3 - DEACTIVATING ALL BADGES Wave the administrator badge in front of the name holder to remove all of the recognized user badges. 3.3.4 - SELECTING THE ACTION ASSOCIATED WITH THE USER BADGES The RFID badges enable both the electric strike plates and the door controls to open. The function is selected according to how long the RFID badge is held under the scanner. -
Page 16: D - Using The Product
D - USING THE PRODUCT 1 - IDENTIFY AND SPEAK TO THE VISITOR button (for the automatic control system) to let a visitor enter. The visitor presses the intercom panel’s call button: The doorbell sounds through the monitor’s speaker and the intercom panel’s video camera is activated. If the visitor is positioned within the camera’s field of vision, their image will appear on the monitor for 120 seconds. -
Page 17: Unlocking Using A Badge
D - USING THE PRODUCT decrease or increase the contrast level of the image. Press the button to close the settings menu. Colour: press the buttons to 5 - UNLOCKING USING A BADGE decrease or increase the saturation level of the image. - Page 18 E - TECHNICAL AND LEGAL INFORMATION 1 - TECHNICAL CHARACTERISTICS MONITOR Ultra-flat 7" colour LCD Screen PAL/NTSC Video standard 800 x 3 (RGB) x 480 Resolution with 230 Vac mains adapter Power supply 50 Hz/17 Vdc 1.5 A included 17 Vdc 1.5 A (adapter included) Supply voltage Short circuit and reverse polarity protection Protection...
- Page 19 3 years from the date of purchase. Proof of purchase must be retained for the duration of the with the RED directive warranty period. Avidsen hereby declares that the equipment • The warranty does not cover damage caused by designated below: negligence, knocks or accidents.
- Page 20 19 Avenue Marcel Dassault ZAC des Deux Lions - 37200 Tours - France Photographs and illustrations non-binding/©AdobeStock.com/© Avidsen France 2022...
Need help?
Do you have a question about the BambooView and is the answer not in the manual?
Questions and answers