STIEBEL ELTRON WPL 13 cool Operation And Installation Manual
Air/water heat pump
Hide thumbs
Also See for WPL 13 cool:
- Manual (39 pages) ,
- Operation and installation manual (40 pages) ,
- Operation and installation manual (36 pages)

Related Manuals for STIEBEL ELTRON WPL 13 cool


Summary of Contents for STIEBEL ELTRON WPL 13 cool
- Page 1 OperatiOn and installatiOn air/Water Heat pUMp » Wpl 13 cool » 18 cool » 23 cool » 13 e » 18 e » 23 e...
-
Page 2: Table Of Contents
OperatiOn OperatiOn ��������������������������������������������� 2 12.4 Taking the appliance out of use ������������������������������ 16 General information ������������������������������������������3 Maintenance ������������������������������������������������ 16 ������������������������������������������������������������������ 3 Fault remedy ������������������������������������������������ 16 Reference to applicable documents ������������������������� 3 Specification ������������������������������������������������ 18 Safety ����������������������������������������������������������3 15.1 Wiring diagram �������������������������������������������������� 18 Correct use ��������������������������������������������������������... -
Page 3: General Information
OperatiOn General infOrMatiOn General information Safety The chapter Operation is intended for the user and the heating correct use contractor. The appliance is designed to: The chapter installation is intended for the heating contractor. — heat rooms The operating instructions for the heat pump manager are also —... -
Page 4: Appliance Description
OperatiOn appliance descriptiOn Appliance description Operation Operation is exclusively controlled via the heat pump manager. properties Please therefore observe the heat pump manager operating and The appliance is a heating heat pump that functions as an air/water installation instructions. heat pump. Heat is extracted from the outside air at a low temperature level, and then transferred to the heating water at a higher level. -
Page 5: Safety
installatiOn safety Safety general safety instructions Please observe the technical requirements for boiler rooms, e.g. Boiler Room Directives or national Building Regulations. Please continue to observe local Building Regulations, commercial and fire as well as emission control regulations and requirements. For example in Germany these are: TA-Lärm: Technical instructions to protect against noise emissions. -
Page 6: Appliance Description
installatiOn appliance descriptiOn Appliance description 8.2.2 Acoustic emissions for internal installation Never install the appliance directly below or next to living rooms For external installation the appliance offers additional frost or bedrooms. protection of the heating water pipes. The integral frost protection control automatically starts the circulation pump —... -
Page 7: Installation
installatiOn installatiOn Installation Thermally insulated air hoses are available in lengths of 3 m and 4 m. general information description part no. — Ensure that the appliance is accessible from all sides. Air hose with thermal insulation, 3 m 168080 —... -
Page 8: Heat Pump Manager Wpm
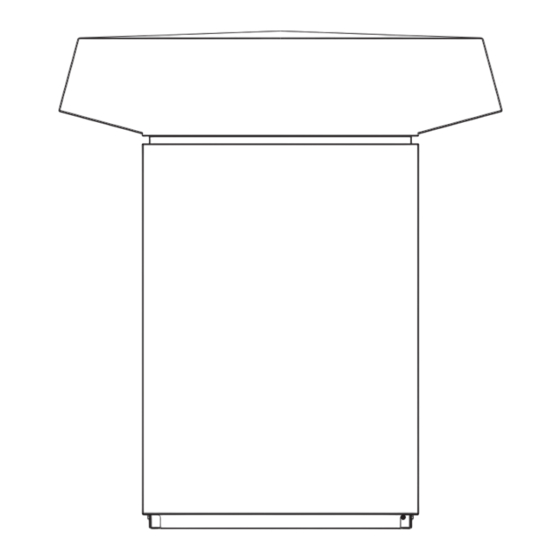
installatiOn installatiOn Dimensions, external installation 9.1.2 Internal installation Route the water and electrical pipes/cables into the 1280 appliance from the top through the hood. Dimensions, internal installation 1150 1240 Recess for external installation 1150 1240 Air outlet Air inlet Main wind direction Heat pump manager Wpm Recess A WPM II heat pump manager is required to operate the appliance. -
Page 9: Electrical Installation
installatiOn asseMbly electrical installation 10.3 internal installation In accordance with VDE 0298-4, route cables with the following » Place the hood on the appliance and fix with two screws. cross-sections subject to their fuse protection: » Create cut-outs in the hood for the water pipe outlets. Fuses cable cross-sections »... -
Page 10: External Installation
installatiOn asseMbly 10.4 external installation Connector for internal installations For external installation, water pipes and electrical cables must be routed into the appliance from below through the knock-outs in the bottom of the appliance. Water and electrical connections for external installation Connector Union nut 10.6... -
Page 11: Oxygen Diffusion
installatiOn asseMbly Water connection for internal installations To prevent damage to valves, heat exchangers and heating elements, observe VDI 2035, sheet 1 [or local regulations] when filling the system with heating water. In particular, this means that: During the service life of the system, the total fill and top-up water must not exceed three times the nominal volume of the heating system: The total alkaline earths in the water must be <... -
Page 12: Second Heat Source
installatiOn asseMbly Air hose installation 10.10.1 External installation » Route the hose downwards out of the appliance. 10.10.2 Internal installation » Route the condensate into a drain. For this, the hose can be routed through an opening in the floor plate and frame, and by removing the knock-out in the bottom of the side panel to the right out of the equipment. -
Page 13: Power Connection General
installatiOn pOWer cOnnectiOn Power connection 11.3.1 X3 terminal: Appliance and second heat source Connect the appliance and the second heat source to the X3 11.1 general terminal. For optimum function all three stages of the integral second heat Please observe the heat pump manager operating and source should be connected. -
Page 14: Installing Casing Components
installatiOn cOMMissiOninG 11.4 installing casing components 11.3.2 Connections X4, X2, control unit and low voltage » Place the hood on the appliance and secure with two screws. Control unit and low voltage connection » Hook the side panels and front and back doors onto the standard appliance. -
Page 15: Checks Before Commissioning
installatiOn cOMMissiOninG 12.1 checks before commissioning Check whether the DIP switch (WP type) is set correctly. Before commissiong check the points detailed below. WP type DIP switch 12.1.1 Heating system — Have you filled the heating system to the correct pressure, and opened the quick-acting air vent valve? 12.1.2 Temperature sensor... -
Page 16: Operation And Control
installatiOn Maintenance Fault remedy Never reduce the temperature in the entire building by closing all zone or thermostatic valves, but by using the setback programs. Please observe the heat pump manager operating and installation instructions. 12.2.2 Other WPM II adjustments Activate the constant buffer cylinder primary pump operation on Faults caused by deposits of corrosion products (rust sludge) inside the WPM II. - Page 17 installatiOn faUlt reMedy green centre led: The LED flashes during the initialisation and becomes steady after the BUS address has been allocated. Only then is communication established with the WPM II. green r.h. led: It illuminates steadily if STAND ALONE operation has been selected.
-
Page 18: Specification
installatiOn specificatiOn Specification 15.1 Wiring diagram Wiring diagram part 1 WPL E | WPL cool Integrierte Wärmepumpensteuerung (IWS) Hochdruckwächter Differenzdruckschalter Abtauen IWS Stecker 12pol - Steueru Temperaturfühler Wärmepumpenvorlauf - KTY Sicherheitstemperaturbegrenzer DHC Hochdrucksensor IWS Stecker 3pol - Bus Temperaturfühler Wärmepumpenrücklauf - KTY Schütz Widerstandsanlauf Niederdrucksensor Verbindungsklemme DHC... - Page 19 installatiOn specificatiOn Wiring diagram part 2 WPL E | WPL cool Differenzdruckschalter Abtauen IWS Stecker 12pol - Steuerung A2 Integral heat pump controller IWS II P1 Low pressure sensor Hochdrucksensor IWS Stecker 3pol - Bus Niederdrucksensor Verbindungsklemme DHC B1 Heat pump flow temperature sensor - KTY P3 High pressure sensor Anlaufwiderstand IWS Stecker 5pol - el.
-
Page 20: Specification
15.2 specification Heat pump type WPL 13 cool WPL 18 cool WPL 23 cool Part no. (standard appliance) 223400 223401 223402 Heat pump type WPL 13 E WPL 18 E WPL 23 E Part no. (standard appliance) 227756... - Page 21 Heat pump type WPL 13 cool | WPL 13 E WPL 18 cool | WPL 18 E WPL 23 cool | WPL 23 E Electrical specification Fuse protection Heat pump power supply A 16 gl Supply – booster heater DHC (internal HS 2)
-
Page 22: Output Diagrams
15.3 Output diagrams Heating output diagram WPL 13 E | WPL 13 cool Vorlauftemperatur 35 °C Flow temperature °C Flow temperature °C Vorlauftemperatur 50 °C Flow temperature °C Vorlauftemperatur 60 °C Outside temperature °C Outside temperature °C | Wpl cool... - Page 23 installatiOn specificatiOn Heating output diagram WPL 18 E | WPL 18 cool Vorlauftemperatur 35 °C Flow temperature °C Flow temperature °C Vorlauftemperatur 50 °C Flow temperature °C Vorlauftemperatur 60 °C Outside temperature °C Outside temperature °C www.stiebel-eltron.com Wpl cool|...
- Page 24 installatiOn specificatiOn Heating output diagram WPL 23 E | WPL 23 cool Vorlauftemperatur 35 °C Flow temperature °C Flow temperature °C Vorlauftemperatur 50 °C Flow temperature °C Vorlauftemperatur 60 °C Outside temperature °C Outside temperature °C | Wpl cool www.stiebel-eltron.com...
- Page 25 Cooling output diagram WPL 13 cool Außentemperatur 30 °C Outside temperature °C Outside temperature °C Außentemperatur 35 °C Flow temperature °C Flow temperature °C www.stiebel-eltron.com Wpl cool|...
- Page 26 installatiOn specificatiOn Cooling output diagram WPL 18 cool Ethylene glycol/water mixture with 33 % by vol. ethylene glycol Outside temperature °C Außentemperatur 30 °C Outside temperature °C Außentemperatur 35 °C Flow temperature °C Flow temperature °C | Wpl cool www.stiebel-eltron.com...
- Page 27 installatiOn specificatiOn Cooling output diagram WPL 23 cool Ethylene glycol/water mixture with 33 % by vol. ethylene glycol Outside temperature °C Außentemperatur 30 °C Outside temperature °C Außentemperatur 35 °C Flow temperature °C Flow temperature °C www.stiebel-eltron.com Wpl cool|...
-
Page 28: Commissioning Report
Commissioning report Customer’s address: Installation conditions according to Stiebel Eltron installation and operating instructions: Installation room volume: m³ Operating mode Installer: mono mode dual-mode - parallel - part parallel - alternative Dual-mode heat source Building type: Gas fired boiler Oil fired boiler... - Page 29 installatiOn cOMMissiOninG repOrt 10. Heat source: 12. System periphery: Outside air Circulation pump source Extract air Manufacture / type Temperature min: °C Circulation pump heating Manufacture / type max: °C Ground Circulation pump Ground probe Heat pump/heat exchanger Manufacture / type Internal pipe diameter: Distributor: yes Circulation pump...
- Page 30 installatiOn cOMMissiOninG repOrt 15. Actual data: 16. Tested to VDE 0701 Actual at the heat pump after 10 min. operation: Implemented: Brine inlet/water/air: °C Values OK: Brine outlet/water/air: °C Heat pump flow temp.: °C Heat pump return temp: °C 17. System layout Place, date Installer’s signature | Wpl cool...
-
Page 31: Guarantee
GUarantee envirOnMent and recyclinG Guarantee For guarantees please refer to the respective terms and conditions of supply for your country. The installation, electrical connection and first operati- on of this appliance should be carried out by a qualified installer. The company does not accept liability for failure of any goods supplied which have not been installed and ope- rated in accordance with the manufacturer‘s instructions. - Page 32 Deutschland Verkauf Tel. 0180 3 700705 | Fax 0180 3 702015 | info-center@stiebel-eltron.com STIEBEL ELTRON GmbH & Co. KG Kundendienst Tel. 0180 3 702020 | Fax 0180 3 702025 | kundendienst@stiebel-eltron.com Ersatzteilverkauf Tel. 0180 3 702030 | Fax 0180 3 702035 | ersatzteile@stiebel-eltron.com Dr.-Stiebel-Straße | D-37603 Holzminden...
Need help?
Do you have a question about the WPL 13 cool and is the answer not in the manual?
Questions and answers