Table of Contents
Advertisement
Quick Links
Advertisement
Table of Contents

Related Manuals for artisJet proV6


Summary of Contents for artisJet proV6
- Page 1 Printer Installation Manual...
- Page 2 Thank you for spending your valuable time on reading this manual. This manual is vital to your experience and safety, as well as proper maneuvering of artisJet printers in production. The contents herein will guide you through the whole procedures of the initial setup of the printer.
-
Page 3: Printer Overview
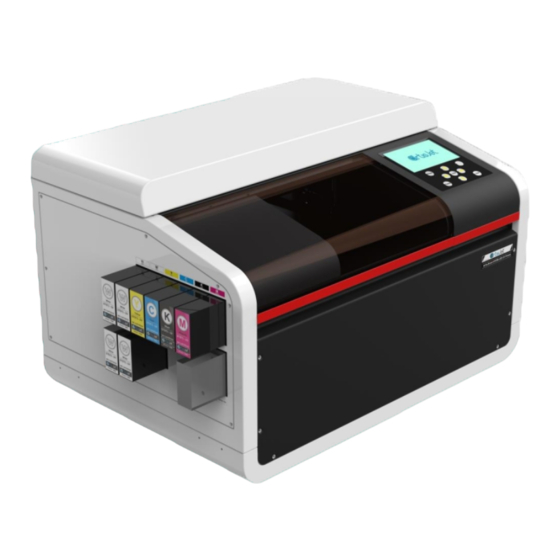
Printer overview Get to know printer With productivity and user-friendly operation in mind, artisJet created a COMFORT and FUNCTIONAL DESIGN printer for workplace efficiency, ideal for digital stores and small working spaces. The next image showcases the printer front view (Fig. 1), which comprises: control panel, with different functions;... - Page 4 Fig.2 – Printer right view Fig.3 – Printer back view. artisjet.com | info@artisjet.com Daily Check Schedule for artisJet proV6...
-
Page 5: The Control Panel
The control panel Display, control buttons, functions Fig.4 Printer top view-artisJet proV6 control panel and display artisjet.com | info@artisjet.com Daily Check Schedule for artisJet proV6... - Page 6 Manual head cleaning Move up* Move down* Move out* Move back* Fig.5 – Control panel buttons and functions; *the arrow buttons work in Engineer Mode only (as shown in Fig. 22) artisjet.com | info@artisjet.com Daily Check Schedule for artisJet proV6...
-
Page 7: Opening The Package
Fig.6 – Move / transport the package with Fig.7 – Unlock the outer package case universal wheels (use handlers to lift the case) Fig.8 – Unlock the printer from the Fig.9 – Remove the protection cloth package base artisjet.com | info@artisjet.com Daily Check Schedule for artisJet proV6... -
Page 8: Printer Environment
Then place the printer on a flat and even table surface (Fig.11). Fig.10 – How to correctly lift the printer Fig.11 – Position the printer onto the desk / table / flat surface artisjet.com | info@artisjet.com Daily Check Schedule for artisJet proV6... - Page 9 Execute the initial inspection after the shipment Fig.12 – Open the cover and take out the accessories box from the inside Fig.13 – Open the maintenance cover and unlock the carriage by removing the tapes artisjet.com | info@artisjet.com Daily Check Schedule for artisJet proV6...
- Page 10 Fig.14 – Connect the power cable Fig.15 – Turn on the printer Fig.16 – Wait till the printer is ready (a message will be displayed on the screen) artisjet.com | info@artisjet.com Daily Check Schedule for artisJet proV6...
- Page 11 “ ”and install it step by step. artisJet workstation for artis proV6 V.4.0 Beta install.exe Fig.17 – Insert the USB drive (artisJet proV6) & the Design Software dongle (artisRIP V9.0) artisjet.com | info@artisjet.com Daily Check Schedule for artisJet proV6...
- Page 12 In the “1-artisRIP V9.0 Software & Workstation” folder, double click on the “artisJet workstation for artis proV6 V.4.0 Beta install.exe” file. The “Setup – artisJet workstation artis proV6 V4.0 ” window will open. Follow the steps as instructed by the driver installer.
-
Page 13: Ink System
Enter the engineer mode (Fig.21) and then enter the password*(Fig.22). Fig.20 – Ink cartridges and waste ink tank Open print software(artisJet Workstation for ProV6 V4.0 Beta) and click PM option. Fig.21 –PM option from print software(artisJet Workstation for ProV6 V4.0 Beta) artisjet.com | info@artisjet.com... - Page 14 The printer starts ink charging process automatically and it lasts 8mins. The screen shows ’cleaning’ information during ink charging process and shows’ printer ready’ once the process done. Fig.22 –Ink charging for maintenance Fig.23-Cleaning Fig.24-Printer ready artisjet.com | info@artisjet.com Daily Check Schedule for artisJet proV6...
- Page 15 After ink charging process done, click CLEAN button on screen to perform head cleaning. Fig.25 – Click the “Clean” button on the control panel artisjet.com | info@artisjet.com Daily Check Schedule for artisJet proV6...
- Page 16 Printing quality test Perform nozzle check Fig.26 – Connect the USB cable Fig.27 – Take one piece of E-fixture mat and peel off the film artisjet.com | info@artisjet.com Daily Check Schedule for artisJet proV6...
- Page 17 Fig.30 – On the Print Software, click on the “PM” icon (1); the “Maintenance” window will open; click on the “Nozzle Check” button (2); wait till the screen states “Print Complete” artisjet.com | info@artisjet.com Daily Check Schedule for artisJet proV6...
- Page 18 Fig.31 – Good quality. Continue. Fig.32 – Bad quality. Repeat the PUMP + CLEAN process artisjet.com | info@artisjet.com Daily Check Schedule for artisJet proV6...
-
Page 19: Start Printing
(Fig.34) to open the print template file (Fig.35) and print it (Fig.36). Fig.33 – Peel off the bottom film of the E-fixture mat Fig.34 – Double click on the “Import” icon to import the print file template artisjet.com | info@artisjet.com Daily Check Schedule for artisJet proV6... - Page 20 Locate the “5-PRN files” folder from the USB drive, select the “Mother Template Positioning.prn” file, and click the “Open” button. Fig.35 – Open’Mother Template positioning’prn file Fig.36 – Go to the Print Software and click on the “Print” icon artisjet.com | info@artisjet.com Daily Check Schedule for artisJet proV6...
- Page 21 Start the product printing There are different product templates to print. For how to print products, please refer to manual ‘How to print MAC products.’ artisjet.com | info@artisjet.com Daily Check Schedule for artisJet proV6...
- Page 22 Product Consulting +86 158 1111 9658 info@artisjet.com Technical Support +86 186 1133 3892 ccc@artisjet.com Sample Testing +86 159 1024 3211 sample@artisjet.com artisjet.com | info@artisjet.com Daily Check Schedule for artisJet proV6...
Need help?
Do you have a question about the proV6 and is the answer not in the manual?
Questions and answers