Table of Contents
Advertisement
Quick Links
Advertisement
Table of Contents

Related Manuals for artisJet Young


Summary of Contents for artisJet Young
- Page 1 VERSION 2 .0 an innovative brand in smart sizes uv printers Feb. 2021...
- Page 2 Young A4 LED UV PRINTER artis Young PRINTER INSTALLATION MANUAL...
- Page 3 Thank you for spending your valuable time on reading this manual. This manual is vital to your experience and safety, as well as proper maneuvering of artisJet printers in production. The contents herein will guide you through the whole procedures of the initial setup of the printer.
-
Page 4: Printer Overview
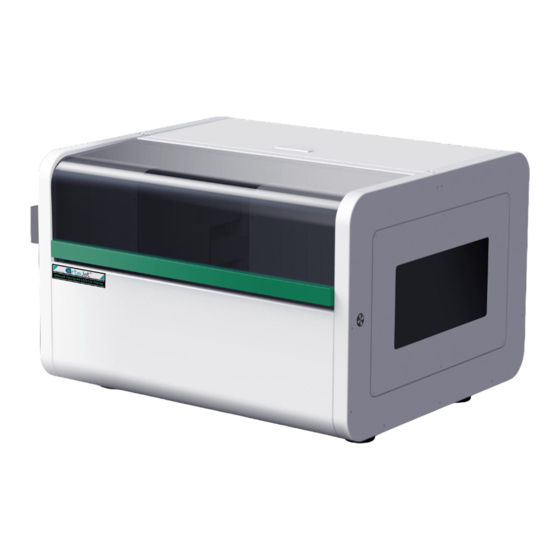
1. Printer overview GET TO KNOW THE PRINTER A timely expectable printer, the artis Young LED UV printer is suitable for small working environments as printing digital stores, making it a versatile desktop printer for print on demand workflows. The printer’s front and right side view (Fig. 1), displays: the control panel, with different functions;... - Page 5 Fig.2 – Printer front and left side view Printer Net Weight : 90kg Fig.3 – Printer sizes overview (depth x width x height; table size) and printer net weight Copyright © 2019 Signs Full Joint Tech Co.,Ltd artisjet.com | info@artisjet.com...
-
Page 6: The Control Panel
2. The control panel Display, control buttons & functions Fig.4 – artis Young control panel and display Copyright © 2019 Signs Full Joint Tech Co.,Ltd artisjet.com | info@artisjet.com... - Page 7 Auto height adjustment and back to print Cancel Cancel current printing task Pause Pause current printing task Move up Move down Move out Move back Fig. 5 – Control panel buttons and functions Copyright © 2019 Signs Full Joint Tech Co.,Ltd artisjet.com | info@artisjet.com...
- Page 8 Adjust this value when using bidirectional printing for better results. After the printer is turned on and in the holiday mode,it will auto Holiday mode cleaning. Information Printer version information Fig.5 – Control panel buttons and functions Copyright © 2019 Signs Full Joint Tech Co.,Ltd artisjet.com | info@artisjet.com...
-
Page 9: Printer Environment
Then place the printer on a flat and even table surface (Fig.7). Fig.6 – Four people moving the printer carefully Fig.7 – Position the printer onto the desk / table / flat surface Copyright © 2019 Signs Full Joint Tech Co.,Ltd artisjet.com | info@artisjet.com... - Page 10 Execute the initial inspection after the shipment Fig.8 – Open the cover carefully and take out the E-fixture matt from the working table Fig.9 – Unlock the carriage by removing the tapes Copyright © 2019 Signs Full Joint Tech Co.,Ltd artisjet.com | info@artisjet.com...
- Page 11 Fig.12 – After pressing the General Power Fig.13 – Wait till the printer is ready (a button, the “Initializing” message will be message will be displayed on the screen) displayed on the screen Copyright © 2019 Signs Full Joint Tech Co.,Ltd artisjet.com | info@artisjet.com...
- Page 12 From the folder list (Fig.15), open the “1-artisJet Workstation” folder, from where you choose the “artisJet Workstaion for Young Install V4.0 Beta.exe” and install it. Fig.14 – Insert the USB drive (artis Young) & the Design Software dongle (artisRIP V9.0) Copyright © 2019 Signs Full Joint Tech Co.,Ltd...
- Page 13 Install the Print Software (artisJet Young Work Station). In the “1-artisJet Workstation” folder, double click on the “artisJet workstation for Young.exe” file. The “Setup – artisJet workstation for Young V4.0” window will open. Follow the steps as instructed by the driver installer.
-
Page 14: Ink System
The process will last around 8 mins. Fig.18 – Click the “Clean” button on the control panel for 2 times; the “Cleaning” message will be displayed on the screen Copyright © 2019 Signs Full Joint Tech Co.,Ltd artisjet.com | info@artisjet.com... - Page 15 Fig.19 – Connect the USB cable and peel off the film one side only Fig.21 – Put the E-fixture matt onto the table and spread it till even on the surface Copyright © 2019 Signs Full Joint Tech Co.,Ltd artisjet.com | info@artisjet.com...
- Page 16 Fig.23 – On the Print Software, click on the “PM” icon (1); the “Maintenance” window will open; click on the “Nozzle Check” button (2); wait till the screen states “Print Complete” Copyright © 2019 Signs Full Joint Tech Co.,Ltd artisjet.com | info@artisjet.com...
- Page 17 Check the print quality Copyright © 2019 Signs Full Joint Tech Co.,Ltd artisjet.com | info@artisjet.com...
-
Page 18: Start Printing
( F i g . 2 7 ) t o o p e n t h e p r n file(Fig.28) and print it (Fig.29). Fig.26 - Color test image Fig.27 – click on the “Import” icon to import the prn file. Copyright © 2019 Signs Full Joint Tech Co.,Ltd artisjet.com | info@artisjet.com... - Page 19 USB drive, and click the “Open” button. Fig.28 – Open the “Color test image.prn” Fig.29 – Go to the Print Software and click on the “Print” icon Copyright © 2019 Signs Full Joint Tech Co.,Ltd artisjet.com | info@artisjet.com...
- Page 20 Print result Fig.30 – color test image printing Fig.31 – Print result Copyright © 2019 Signs Full Joint Tech Co.,Ltd artisjet.com | info@artisjet.com...
- Page 21 Fig.33 – Auto-detecting the sample and auto-adjusting the printing height Start the product printing For each product, there can be different printing menus. artisJet provides custom menus & templates for different products. Product printing menus are available on demand. Copyright © 2019 Signs Full Joint Tech Co.,Ltd...
- Page 22 CONTACT US FOR MORE info@artisjet.com | ccc@artisjet.com | +86 186 11333892...
Need help?
Do you have a question about the Young and is the answer not in the manual?
Questions and answers