
Related Manuals for IOGear GME228BW6


Summary of Contents for IOGear GME228BW6
- Page 1 Installation Installation Installation Guide ® Bluetooth Laser Mouse with Nano Coating Technology GME228BW6 PART NO. M0411...
- Page 3 ® To better serve you, IOGEAR offers an array of additional USB 2.0, USB, FireWire, KVM, and other pe- ® ripheral products. For more information, or to purchase additional IOGEAR products, visit us at www.IOGEAR.com. ® We hope you enjoy using your new Bluetooth mouse –...
-
Page 4: Table Of Contents
Table of Contents Package Contents Disconnect Device (Windows XP SP2- Microsoft Bluetooth stack) Overview Installation (Windows Vista x86/x64- Features Microsoft Bluetooth Stack) Requirements Disconnect Device (Windows Vista x86/ x64-Microsoft Bluetooth Stack) Pictorial Introduction Installation (Mac OS) Before Started Disconnect Device (Mac OS) Installation (Windows XP-Widcomm BTW 5.1.0.2700) Operation... -
Page 5: Package Contents
Package Contents This package contains: ® 1 Bluetooth Laser Mouse with Nano Coating Technology 1 Carrying case 1 USB battery charger cable 1 User manual 2 AAA rechargeable batteries 1 Warranty/Registration card If any of the items are missing or damaged, please contact your dealer immediately. -
Page 6: Overview
IOGEAR’s Bluetooth Laser Mouse with Nano Coating Technology is USB ready, Plug-n-Play, and Hot Pluggable. It provides a 33 feet (10 meter) wireless range, and it is also backed by IOGEAR’s 3 Year Limited Warranty. -
Page 7: Features
Features • 1600 dpi Laser sensor offers twice the accuracy of typical optical mouse movement • 1600/800 dpi adjustable switch to accommodate different user preference • Nano coating contains antimicrobial properties built-in to protect the product from bacteria surviving on the surface •... -
Page 8: Requirements
Computer/Laptop must be Bluetooth-enabled and support the HID profi le • Operating System: • Windows 98SE/ME/2000/XP • Windows Vista • MAC OS X v10.3.5 or later ® If the computer/laptop is currently not Bluetooth-enabled, a Bluetooth USB adapter will be required. Refer to IOGEAR part number GBU221 and GBU321... -
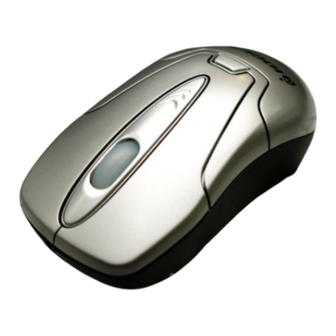
Page 9: Pictorial Introduction
Pictorial Introduction Scroll Wheel Right Click Button Left Click Button Battery Charging Connection Battery Cover Release Battery Compartment Connect Button Laser Sensor Power On/Off Switch... -
Page 10: Before Started
Before You Start BATTERY INSTALLATION Push the battery cover release Insert the batteries (included in the package) into the battery compartment Put the cover back on Make sure the power On/Off switch is at ON position. We do recommend that you charge the batteries for 10 hours before using the mouse To charge the batteries, just plug the USB... - Page 11 INSTALLATION INSTRUCTIONS ® Before you can use the IOGEAR Bluetooth mouse with your computer, you will fi rst need to establish communication and then connect to it. The procedures below may be different for you, depending on the Bluetooth software you are using.
-
Page 12: Installation
Installation (Windows XP-Widcomm BTW 5.1.0.2700) ® In the example below, the Bluetooth software The IOGEAR Bluetooth mouse should be used was WIDCOMM BTW 5.1.0.2700 listed as shown in the image. If the mouse is not detected, repeat step 4 and search for ®... - Page 13 ® Right-click the IOGEAR Bluetooth mouse Then simply click the Click here button with ® and select “Connect Device.” the Bluetooth mouse to confi rm that the mouse is paired with your computer. When prompted to connect, click Yes.
- Page 14 You should now be able to use the IOGEAR ® Bluetooth mouse. Once you have connected and paired your mouse with your Bluetooth-enabled computer, you don’t need to repeat this procedure. Even if you turn on/ ® off the Bluetooth...
-
Page 15: Disconnect Device (Windows Xp-Widcomm Btw 5.1.0.2700)
Disconnect Device (Windows XP-Widcomm BTW 5.1.0.2700) ® If you would like to disconnect your Bluetooth mouse, just open My Bluetooth places. Right ® click on the Bluetooth mouse in Entire Bluetooth Neighborhood and simply click on disable. When prompted to disable, click Yes. -
Page 16: Installation (Windows Xp Sp2-Microsoft Bluetooth Stack)
Installation (Windows XP SP2-Microsoft Bluetooth stack) The instructions below apply to Windows XP Right-click on the Bluetooth icon and select systems with Service Pack 2 installed. “Add a Bluetooth Device.” Make sure that your computer is Bluetooth- enabled and that the Bluetooth icon shows on your tray-bar. - Page 17 Before proceeding with the Bluetooth Your computer will scan for Bluetooth Wizard, please do the following: devices in your area and display all found ® devices. On this window, you should see • Switch ON the Bluetooth mouse “Bluetooth Mouse” as shown below. Select •...
- Page 18 ® ® To pair with the Bluetooth mouse, select At this point, the IOGEAR Bluetooth mouse “Don’t use a passkey”. Upon clicking Next, should be functional. Simply click Finish to Windows XP will pair with the mouse and close the Wizard.
-
Page 19: Disconnect Device (Windows Xp Sp2-Microsoft Bluetooth Stack)
Disconnect Device (Windows XP SP2-Microsoft Bluetooth stack) If you would like to disconnect your ® Bluetooth mouse, just open the Bluetooth devices control panel and delete the pairing for the mouse. -
Page 20: Installation (Windows Vista X86/X64-Microsoft Bluetooth Stack)
Installation (Windows Vista x86/x64-Microsoft Bluetooth Stack) The instructions below apply to Windows Vista Right-click on the Bluetooth icon and select x86/x64 systems. “Add a Bluetooth Device.” Make sure that your computer is Bluetooth- enabled and that the Bluetooth icon shows on your tray-bar. - Page 21 Before proceeding with the Bluetooth Your computer will scan for Bluetooth Wizard, please do the following: devices in your area and display all found ® devices. On this window, you should see • Switch ON the Bluetooth mouse. “Bluetooth Mouse” as shown below. Select •...
- Page 22 ® ® To pair with the Bluetooth mouse, select At this point, the IOGEAR Bluetooth mouse “Don’t use a passkey”. Upon clicking Next, should be functional. Simply click Finish to Windows XP will pair with the mouse and close the Wizard.
-
Page 23: Disconnect Device (Windows Vista X86/X64-Microsoft Bluetooth Stack)
Disconnect Device (Windows Vista x86/x64-Microsoft Bluetooth Stack) ® If you would like to disconnect your Bluetooth mouse, just open the Bluetooth devices control panel and delete the pairing for the mouse. -
Page 24: Installation (Mac Os)
Under the settings tab, make sure that example below, we used MAC OS X v10.3.5 to Bluetooth is ON and that the box next to ® confi gure the IOGEAR Bluetooth Mouse. Discoverable is checked. Make sure your computer is Bluetooth- enabled and that it supports the Bluetooth HID profi... - Page 25 Next, select the Devices tab and click on Set This will start the Bluetooth Setup Up New Device. Assistant. Click Continue to proceed.
- Page 26 ® On the next window, select the Mouse Turn ON the IOGEAR Bluetooth Mouse, option and click Continue. then press and hold the Connect button located under the mouse for approximately fi ve (5) seconds. ® Once the IOGEAR Bluetooth...
- Page 27 Your computer will automatically pair with the Once you have connected and paired your ® Bluetooth mouse. Then you are done! Your mouse with your Bluetooth-enabled computer, ® Bluetooth mouse should now be functional. you don’t need to repeat this procedure. Even ®...
-
Page 28: Disconnect Device (Mac Os)
Disconnect Device (Mac OS) ® If you would like to disconnect your Bluetooth mouse, just open System Preferences and double-click on the Bluetooth icon. Then delete the mouse from the device list. -
Page 29: Operation
Operation Please avoid using this mouse on glass, mirror How to use the scroll wheel and metal surfaces. Your mouse has a wheel that functions both as When traveling, it is advised that you turn the a wheel for Windows Scrolling and also as a power On/Off switch to the OFF position in customized button. - Page 30 Resolution switching How to Charge the mouse Press scroll wheel and right button together. Plug the USB cable into the mouse and the The red LED light will blink when switching available USB port of the computer, and it will DPI.
-
Page 31: Specifi Cations
Specifi cations Function Specifi cation Resolution 800/1600dpi Frequency Band 2.4 Ghz Interface Wireless Operating Range 33 ft. (10m) Power Amps < 36mA Power Voltage Battery Type Ni-Mh... - Page 32 Power indicator lights Green LED On Power cable is connected and the battery is charging. Green LED Off Power cable is connected and the battery is fully charged. Red LED Blinking Low Battery...
- Page 33 Power saving features To conserve the battery power, the mouse offers power management functions as below: The mouse goes into “Power Save” after 10 seconds of inactivity The mouse powers down to “Sleep Mode” after 5 minutes of inactivity Press one of the mouse buttons to wake it up while in Power Save or Sleep Mode. There may be a slight delay while the mouse re-establishes Bluetooth connection from power saving or sleep mode.
-
Page 34: Radio & Tv Interference Statement
Radio & TV Interference Statement WARNING!!! This equipment generates, uses and can radiate radio frequency energy and, if not installed and used in accordance with the instruction manual, may cause interference to radio communications. This equipment has been tested and found to comply with the limits for a Class B computing device pursuant to Subpart J of Part 15 of FCC Rules, which are designed to provide reasonable protection against such interference when operated in a commercial environment. -
Page 35: Limited Warranty
Limited Warranty IN NO EVENT SHALL THE DIRECT VENDOR’S LIABILITY FOR DIRECT, INDIRECT, SPECIAL, INCIDENTAL OR CONSEQUENTIAL DAMAGES RESULTING FROM THE USE OF THE PRODUCT, DISK OR ITS DOCUMENTATION EXCEED THE PRICE PAID FOR THE PRODUCT. The direct vendor makes no warranty or representation, expressed, implied, or statutory with respect to the contents or use of this documentation, and especially disclaims its quality, performance, merchantability, or fi... -
Page 36: Contact
IOGEAR and the IOGEAR logo are trademarks or registered trademarks of IOGEAR, Inc. Microsoft and Windows are registered trademarks of Microsoft Corporation. IBM is a registered trademark of International Business Machines, Inc. IOGEAR makes no warranty of any kind with regards to the information presented in this document. - Page 40 The use of our technology solutions helps reduce electronic waste. HEALTH IOGEAR supports healthy and fi t lifestyles. By integrating products with the latest scientifi c developments, IOGEAR’s solutions enhance the life of end-users. © 2007 IOGEAR, INC.
Need help?
Do you have a question about the GME228BW6 and is the answer not in the manual?
Questions and answers