iDataLink maestro Rr Install Manual
For 2015-2017 chrysler 300
Hide thumbs
Also See for maestro Rr:
- Install manual (1403 pages) ,
- How to use manual (201 pages) ,
- Manual (106 pages)
Advertisement
Quick Links
SELECT VEHICLE
PRINT PAGES NEEDED
HOW TO USE THIS INSTALL GUIDE
1
Open the Bookmarks menu and find your vehicle OR scroll
down until you find the install guide for your vehicle.
2
Print only the pages for your vehicle using the advanced
options in the Print menu.
3
Install your Maestro RR according to the guide for your vehicle.
Pressing the printer icon or "quick printing" this document will print
NOTICE: Automotive Data Solutions Inc. (ADS) recommends having this installation performed by a certifi ed technician. Logos and trademarks used here in
are the properties of their respective owners.
WARNING
all of the guides in this compilation.
Advertisement

Related Manuals for iDataLink maestro Rr


Summary of Contents for iDataLink maestro Rr
- Page 1 Print only the pages for your vehicle using the advanced options in the Print menu. Install your Maestro RR according to the guide for your vehicle. WARNING Pressing the printer icon or “quick printing” this document will print all of the guides in this compilation.
-
Page 2: Install Guide
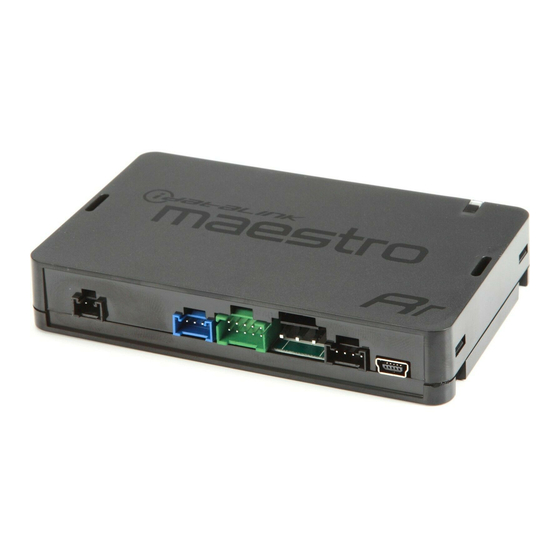
PRODUCTS REQUIRED PROGRAMMED FIRMWARE: CH3-RR-DS iDatalink Maestro RR or RR2 Radio Replacement Interface iDatalink Maestro CHA1 Dash Kit NOTICE: Automotive Data Solutions Inc. (ADS) recommends having this installation performed by a certified technician. Logos and trademarks used here in are the properties of their respective owners. -
Page 3: Need Help
Chrysler 300 2015-2017 WELCOME ADDITIONAL INFORMATION AND ACCESSORIES Congratulations on the purchase of your iDatalink Maestro RR Radio replacement solution. You are HEAD UNIT ADAPTER: now a few simple steps away from ACC-HU-PIO1, SON1, KEN1, KEN2, ALP1 enjoying your new car radio with enhanced features. -
Page 4: Dash Disassembly
Slide console back slightly, lift, and unplug wiring connectors. Remove the console. (Fig. 1.9) 10. Using a panel tool, depress the clips and remove the USB hub from the center console by pushing it upward. Fig. 1.9 Automotive Data Solutions Inc. © 2023 CH3-RR-DS-(HRR-CHA1)-EN maestro.idatalink.com... - Page 5 If the vehicle was equipped with the 8” screen, use bezel marked “8” 15. Place the bezel onto the radio and secure it with the six Phillips screws provided with the CHA1. (Fig. 1.18, 1.19) Automotive Data Solutions Inc. © 2023 CH3-RR-DS-(HRR-CHA1)-EN maestro.idatalink.com...
-
Page 6: Make Connections
(REFER TO WIRING DIAGRAM) into the W/R port. 1. If using head unit adapter (sold separately), connect HRR- 4. Connect all the harnesses to the Maestro RR module (see CHA1 harness to adapter and skip to step 2. wiring diagram). -
Page 7: Wiring Diagram
*REQUIRED ACCESSORY WITHOUT AMP When using an Alpine radio in vehicles without OEM amplifier, with OEM parking sensors, cross-traffic alerts, or lane departure alerts WHITE BLACK MAESTRO RR MODULE BLACK N.C. AMP TURNON AMP TURNON N.C. HHR-CHA1 T-HARNESS NOT REQUIRED... -
Page 8: Radio Wire Reference Chart
Wire Color on Adapter Kenwood Radio Wire Description E-Brake LtGreen LtGreen Reverse Light* Purple/White Purple/White Steering Wheel Controls (DATA) Blue/Yellow * Reverse light wire: Only connect to radio or module damage will occur. Automotive Data Solutions Inc. © 2023 CH3-RR-DS-(HRR-CHA1)-EN maestro.idatalink.com... -
Page 9: Module Diagnostics
Problem detected. Consult troubleshooting table. • 1 GREEN flash After radio boots up : Normal operation. • 3 GREEN flashes Bluetooth is activated. Turns off after one minute: Normal operation. • • Normal operation (inactive). Automotive Data Solutions Inc. © 2023 CH3-RR-DS-(HRR-CHA1)-EN maestro.idatalink.com... -
Page 10: Troubleshooting Table
The light on the Maestro is blinking RED TWICE and the radio IS turning on. Ensure the 4-pin data cable is connected between the radio and the RR, and that it is plugged into the black port on the Maestro RR. The red and blue ports on the RR should be empty. - Page 11 PRODUCTS REQUIRED PROGRAMMED FIRMWARE: CH3-RR-DS iDatalink Maestro RR or RR2 Radio Replacement Interface iDatalink Maestro CHA1 Dash Kit NOTICE: Automotive Data Solutions Inc. (ADS) recommends having this installation performed by a certified technician. Logos and trademarks used here in are the properties of their respective owners.
- Page 12 Chrysler 300 2018-2020 WELCOME ADDITIONAL INFORMATION AND ACCESSORIES Congratulations on the purchase of your iDatalink Maestro RR Radio replacement solution. You are HEAD UNIT ADAPTER: now a few simple steps away from ACC-HU-PIO1, SON1, KEN1, KEN2, ALP1 enjoying your new car radio with enhanced features.
- Page 13 Slide console back slightly, lift, and unplug wiring connectors. Remove the console. (Fig. 1.9) 10. Using a panel tool, depress the clips and remove the USB hub from the center console by pushing it upward. Fig. 1.9 Automotive Data Solutions Inc. © 2023 CH3-RR-DS-(HRR-CHA1)-EN maestro.idatalink.com...
- Page 14 If the vehicle was equipped with the 8” screen, use bezel marked “8” 15. Place the bezel onto the radio and secure it with the six Phillips screws provided with the CHA1. (Fig. 1.18, 1.19) Automotive Data Solutions Inc. © 2023 CH3-RR-DS-(HRR-CHA1)-EN maestro.idatalink.com...
- Page 15 W/R port. diagram, from aftermarket radio main harness to the CHA1 T-harness and match the wire functions. 5. Connect all the harnesses to the Maestro RR module (see wiring diagram). Note: only connect purple/white wire to radio reverse input or module damage will occur.
- Page 16 OEM amplifier, with OEM parking sensors, cross-traffic alerts, BLACK or lane departure alerts N.C. AMP TURNON AMP TURNON N.C. MAESTRO RR MODULE STEP 3 CAN JUNCTION CONNECTOR (GREEN) BLACK N.C. UNPLUG BLACK INSERT THE MALE WHITE CONNECTOR FROM B HARNESS INTO THE JUNCTION BLOCK.
- Page 17 Wire Color on Adapter Kenwood Radio Wire Description E-Brake LtGreen LtGreen Reverse Light* Purple/White Purple/White Steering Wheel Controls (DATA) Blue/Yellow * Reverse light wire: Only connect to radio or module damage will occur. Automotive Data Solutions Inc. © 2023 CH3-RR-DS-(HRR-CHA1)-EN maestro.idatalink.com...
- Page 18 Problem detected. Consult troubleshooting table. • 1 GREEN flash After radio boots up : Normal operation. • 3 GREEN flashes Bluetooth is activated. Turns off after one minute: Normal operation. • • Normal operation (inactive). Automotive Data Solutions Inc. © 2023 CH3-RR-DS-(HRR-CHA1)-EN maestro.idatalink.com...
- Page 19 The light on the Maestro is blinking RED TWICE and the radio IS turning on. Ensure the 4-pin data cable is connected between the radio and the RR, and that it is plugged into the black port on the Maestro RR. The red and blue ports on the RR should be empty.
- Page 20 PRODUCTS REQUIRED PROGRAMMED FIRMWARE: CH3-RR-DS iDatalink Maestro RR or RR2 Radio Replacement Interface iDatalink Maestro CHA1 Dash Kit NOTICE: Automotive Data Solutions Inc. (ADS) recommends having this installation performed by a certified technician. Logos and trademarks used here in are the properties of their respective owners.
- Page 21 DoDge Challenger 2015-2017 WELCOME ADDITIONAL INFORMATION AND ACCESSORIES Congratulations on the purchase of your iDatalink Maestro RR Radio replacement solution. You are HEAD UNIT ADAPTER: now a few simple steps away from ACC-HU-PIO1, SON1, KEN1, KEN2, ALP1 enjoying your new car radio with enhanced features.
- Page 22 Disconnect the climate control wiring harness Fig. 1.6 Fig. 1.7 and remove the trim. (Fig. 1.7) 9. Open the center console compartment and remove the USB hub. Disconnect the wiring harnesses. (Fig. 1.8) Fig. 1.8 Automotive Data Solutions Inc. © 2023 CH3-RR-DS-(HRR-CHA1)-EN maestro.idatalink.com...
- Page 23 If the vehicle was equipped with the 8” screen, use bezel Fig. 2.3 marked “8” 13. Place the bezel onto the radio and secure it with the six Phillips screws provided with the CHA1. (Fig. 2.2, 2.3) Automotive Data Solutions Inc. © 2023 CH3-RR-DS-(HRR-CHA1)-EN maestro.idatalink.com...
- Page 24 (REFER TO WIRING DIAGRAM) into the W/R port. 1. If using head unit adapter (sold separately), connect HRR- 4. Connect all the harnesses to the Maestro RR module (see CHA1 harness to adapter and skip to step 2. wiring diagram).
- Page 25 *REQUIRED ACCESSORY WITHOUT AMP When using an Alpine radio in vehicles without OEM amplifier, with OEM parking sensors, cross-traffic alerts, or lane departure alerts WHITE BLACK MAESTRO RR MODULE BLACK N.C. AMP TURNON AMP TURNON N.C. HHR-CHA1 T-HARNESS NOT REQUIRED...
- Page 26 Wire Color on Adapter Kenwood Radio Wire Description E-Brake LtGreen LtGreen Reverse Light* Purple/White Purple/White Steering Wheel Controls (DATA) Blue/Yellow * Reverse light wire: Only connect to radio or module damage will occur. Automotive Data Solutions Inc. © 2023 CH3-RR-DS-(HRR-CHA1)-EN maestro.idatalink.com...
- Page 27 Problem detected. Consult troubleshooting table. • 1 GREEN flash After radio boots up : Normal operation. • 3 GREEN flashes Bluetooth is activated. Turns off after one minute: Normal operation. • • Normal operation (inactive). Automotive Data Solutions Inc. © 2023 CH3-RR-DS-(HRR-CHA1)-EN maestro.idatalink.com...
- Page 28 The light on the Maestro is blinking RED TWICE and the radio IS turning on. Ensure the 4-pin data cable is connected between the radio and the RR, and that it is plugged into the black port on the Maestro RR. The red and blue ports on the RR should be empty.
- Page 29 PRODUCTS REQUIRED PROGRAMMED FIRMWARE: CH3-RR-DS iDatalink Maestro RR or RR2 Radio Replacement Interface iDatalink Maestro CHA1 Dash Kit NOTICE: Automotive Data Solutions Inc. (ADS) recommends having this installation performed by a certified technician. Logos and trademarks used here in are the properties of their respective owners.
- Page 30 DoDge Challenger 2018-2022 WELCOME ADDITIONAL INFORMATION AND ACCESSORIES Congratulations on the purchase of your iDatalink Maestro RR Radio replacement solution. You are HEAD UNIT ADAPTER: now a few simple steps away from ACC-HU-PIO1, SON1, KEN1, KEN2, ALP1 enjoying your new car radio with enhanced features.
- Page 31 CAN JUNCTION 10. Remove the three clips securing the under dash panel below the glovebox. Pull the panel down to gain access to the CAN junction block. (Fig. 1.9) Fig. 1.9 Fig. 1.8 Automotive Data Solutions Inc. © 2023 CH3-RR-DS-(HRR-CHA1)-EN maestro.idatalink.com...
- Page 32 If the vehicle was equipped with the 8” screen, use bezel Fig. 2.3 marked “8” 14. Place the bezel onto the radio and secure it with the six Phillips screws provided with the CHA1. (Fig. 2.2, 2.3) Automotive Data Solutions Inc. © 2023 CH3-RR-DS-(HRR-CHA1)-EN maestro.idatalink.com...
- Page 33 W/R port. diagram, from aftermarket radio main harness to the CHA1 T-harness and match the wire functions. 5. Connect all the harnesses to the Maestro RR module (see wiring diagram). Note: only connect purple/white wire to radio reverse input or module damage will occur.
- Page 34 OEM amplifier, with OEM parking sensors, cross-traffic alerts, BLACK or lane departure alerts N.C. AMP TURNON AMP TURNON N.C. MAESTRO RR MODULE STEP 3 CAN JUNCTION CONNECTOR (GREEN) BLACK N.C. UNPLUG BLACK INSERT THE MALE WHITE CONNECTOR FROM B HARNESS INTO THE JUNCTION BLOCK.
- Page 35 Wire Color on Adapter Kenwood Radio Wire Description E-Brake LtGreen LtGreen Reverse Light* Purple/White Purple/White Steering Wheel Controls (DATA) Blue/Yellow * Reverse light wire: Only connect to radio or module damage will occur. Automotive Data Solutions Inc. © 2023 CH3-RR-DS-(HRR-CHA1)-EN maestro.idatalink.com...
- Page 36 Problem detected. Consult troubleshooting table. • 1 GREEN flash After radio boots up : Normal operation. • 3 GREEN flashes Bluetooth is activated. Turns off after one minute: Normal operation. • • Normal operation (inactive). Automotive Data Solutions Inc. © 2023 CH3-RR-DS-(HRR-CHA1)-EN maestro.idatalink.com...
- Page 37 The light on the Maestro is blinking RED TWICE and the radio IS turning on. Ensure the 4-pin data cable is connected between the radio and the RR, and that it is plugged into the black port on the Maestro RR. The red and blue ports on the RR should be empty.
- Page 38 PRODUCTS REQUIRED PROGRAMMED FIRMWARE: CH3-RR-DS iDatalink Maestro RR or RR2 Radio Replacement Interface iDatalink Maestro CHA1 Dash Kit NOTICE: Automotive Data Solutions Inc. (ADS) recommends having this installation performed by a certified technician. Logos and trademarks used here in are the properties of their respective owners.
- Page 39 DoDge Charger 2015-2017 WELCOME ADDITIONAL INFORMATION AND ACCESSORIES Congratulations on the purchase of your iDatalink Maestro RR Radio replacement solution. You are HEAD UNIT ADAPTER: now a few simple steps away from ACC-HU-PIO1, SON1, KEN1, KEN2, ALP1 enjoying your new car radio with enhanced features.
- Page 40 9. Remove the two (2) 7mm screws securing the front storage compartment. Disconnect the power port wiring harness from the back. (Fig. 1.8) 10. Using a panel tool, pry upward on the cup holder trim. (Fig. 1.9) Fig. 1.8 Fig. 1.9 Automotive Data Solutions Inc. © 2023 CH3-RR-DS-(HRR-CHA1)-EN maestro.idatalink.com...
- Page 41 If the vehicle was equipped with the 8” screen, use bezel marked “8” 18. Place the bezel onto the radio and secure it with the six Phillips screws provided with the CHA1. (Fig. 1.18, 1.19) Fig. 1.18 Fig. 1.19 Automotive Data Solutions Inc. © 2023 CH3-RR-DS-(HRR-CHA1)-EN maestro.idatalink.com...
- Page 42 (REFER TO WIRING DIAGRAM) into the W/R port. 1. If using head unit adapter (sold separately), connect HRR- 4. Connect all the harnesses to the Maestro RR module (see CHA1 harness to adapter and skip to step 2. wiring diagram).
- Page 43 *REQUIRED ACCESSORY WITHOUT AMP When using an Alpine radio in vehicles without OEM amplifier, with OEM parking sensors, cross-traffic alerts, or lane departure alerts WHITE BLACK MAESTRO RR MODULE BLACK N.C. AMP TURNON AMP TURNON N.C. HHR-CHA1 T-HARNESS NOT REQUIRED...
- Page 44 Wire Color on Adapter Kenwood Radio Wire Description E-Brake LtGreen LtGreen Reverse Light* Purple/White Purple/White Steering Wheel Controls (DATA) Blue/Yellow * Reverse light wire: Only connect to radio or module damage will occur. Automotive Data Solutions Inc. © 2023 CH3-RR-DS-(HRR-CHA1)-EN maestro.idatalink.com...
- Page 45 Problem detected. Consult troubleshooting table. • 1 GREEN flash After radio boots up : Normal operation. • 3 GREEN flashes Bluetooth is activated. Turns off after one minute: Normal operation. • • Normal operation (inactive). Automotive Data Solutions Inc. © 2023 CH3-RR-DS-(HRR-CHA1)-EN maestro.idatalink.com...
- Page 46 The light on the Maestro is blinking RED TWICE and the radio IS turning on. Ensure the 4-pin data cable is connected between the radio and the RR, and that it is plugged into the black port on the Maestro RR. The red and blue ports on the RR should be empty.
- Page 47 PRODUCTS REQUIRED PROGRAMMED FIRMWARE: CH3-RR-DS iDatalink Maestro RR or RR2 Radio Replacement Interface iDatalink Maestro CHA1 Dash Kit NOTICE: Automotive Data Solutions Inc. (ADS) recommends having this installation performed by a certified technician. Logos and trademarks used here in are the properties of their respective owners.
- Page 48 DoDge Charger 2018-2022 WELCOME ADDITIONAL INFORMATION AND ACCESSORIES Congratulations on the purchase of your iDatalink Maestro RR Radio replacement solution. You are HEAD UNIT ADAPTER: now a few simple steps away from ACC-HU-PIO1, SON1, KEN1, KEN2, ALP1 enjoying your new car radio with enhanced features.
- Page 49 9. Remove the two (2) 7mm screws securing the front storage compartment. Disconnect the power port wiring harness from the back. (Fig. 1.8) 10. Using a panel tool, pry upward on the cup holder trim. (Fig. 1.9) Fig. 1.8 Fig. 1.9 Automotive Data Solutions Inc. © 2023 CH3-RR-DS-(HRR-CHA1)-EN maestro.idatalink.com...
- Page 50 If the vehicle was equipped with the 8” screen, use bezel marked “8” 19. Place the bezel onto the radio and secure it with the six Phillips screws provided with the CHA1. (Fig. 1.19, 1.20) Fig. 1.20 Automotive Data Solutions Inc. © 2023 CH3-RR-DS-(HRR-CHA1)-EN maestro.idatalink.com...
- Page 51 W/R port. diagram, from aftermarket radio main harness to the CHA1 T-harness and match the wire functions. 5. Connect all the harnesses to the Maestro RR module (see wiring diagram). Note: only connect purple/white wire to radio reverse input or module damage will occur.
- Page 52 OEM amplifier, with OEM parking sensors, cross-traffic alerts, BLACK or lane departure alerts N.C. AMP TURNON AMP TURNON N.C. MAESTRO RR MODULE STEP 3 CAN JUNCTION CONNECTOR (GREEN) BLACK N.C. UNPLUG BLACK INSERT THE MALE WHITE CONNECTOR FROM B HARNESS INTO THE JUNCTION BLOCK.
- Page 53 Wire Color on Adapter Kenwood Radio Wire Description E-Brake LtGreen LtGreen Reverse Light* Purple/White Purple/White Steering Wheel Controls (DATA) Blue/Yellow * Reverse light wire: Only connect to radio or module damage will occur. Automotive Data Solutions Inc. © 2023 CH3-RR-DS-(HRR-CHA1)-EN maestro.idatalink.com...
- Page 54 Problem detected. Consult troubleshooting table. • 1 GREEN flash After radio boots up : Normal operation. • 3 GREEN flashes Bluetooth is activated. Turns off after one minute: Normal operation. • • Normal operation (inactive). Automotive Data Solutions Inc. © 2023 CH3-RR-DS-(HRR-CHA1)-EN maestro.idatalink.com...
- Page 55 The light on the Maestro is blinking RED TWICE and the radio IS turning on. Ensure the 4-pin data cable is connected between the radio and the RR, and that it is plugged into the black port on the Maestro RR. The red and blue ports on the RR should be empty.
Need help?
Do you have a question about the maestro Rr and is the answer not in the manual?
Questions and answers