
Related Manuals for Yamaha Portatone EZ-250i


Summary of Contents for Yamaha Portatone EZ-250i
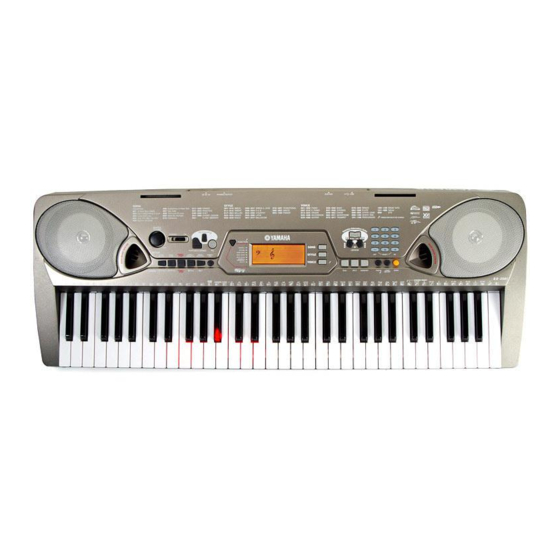
- Page 1 Install KEYBOARDMANIA to your computer (see page 3 and 60) and connect it to the EZ-250i by an USB cable – then play musical games and learn songs.
-
Page 2: Special Message Section
Yamaha. This product should be used only with the components supplied or; a cart, rack, or stand that is recommended by Yamaha. If a cart, etc., is used, please observe all safety markings and instructions that accompany the accessory product. - Page 3 Software. 1. Copyright and permission for use Yamaha grants you as an individual the right to use the Software on only one computer at any single time. The ownership of the disk on which the Software is recorded belongs to you, but the ownership and copyright of the Program itself belongs to Yamaha and Yamaha’s...
- Page 4 • Use the specified adaptor (PA-3C or PA-3B or an equivalent recommended by Yamaha) only. Using the wrong adaptor can result in damage to the instrument or overheating. • Check the electric plug periodically and remove any dirt or dust which may have accumulated on it.
- Page 5 fluids, or chemical-impregnated wiping cloths. Yamaha cannot be held responsible for damage caused by improper use or modifications to the instrument, or data that is lost or destroyed. Always turn the power off when the instrument is not in use.
-
Page 6: Main Features
I Yamaha Education Suite ... pages 40, 42, 49 The EZ-250i features the new Yamaha Education Suite — a set of learning tools that utilize the latest technology to make studying and practicing music more fun and fulfilling than ever before! I One Touch Setting ... -
Page 7: Table Of Contents
• Using Initial Setup Send with a Sequencer ... 57 • PC Mode ... 58 • Loading a Song into EZ-250i’s Flash Memory ... 58 Accessory CD-ROM Installation Guide... 60 • Contents of CD-ROM ... 60 • CD-ROM Installation Procedure... 60 •... -
Page 8: Panel Controls And Terminals
Panel Controls and Terminals I Front Panel q [MASTER VOLUME] dial This determines the overall volume of the EZ-250i. w Power switch ([STANDBY/ON]) e [METRONOME] button This turns the metronome on and off. (See page 21.) Holding down this button calls up the Time Signet settings. -
Page 9: Rear Panel
This is for connection to a set of stereo headphones or to an external amplifier/speaker system. (See page 11.) @8 DC IN 12V jack This is for connection to a PA-3C or PA-3B AC power adaptor. (See page 10.) EZ-250i Owner’s Manual... -
Page 10: Setting Up
Setting Up This section contains information about setting up your EZ-250i for playing. Make sure to read this section carefully before using the instrument. Power Requirements Although the EZ-250i will run either from an optional AC adaptor or batteries, Yamaha recommends use of an AC adaptor whenever possible. An AC adaptor is more environmentally friendly than batteries and does not deplete resources. -
Page 11: Turning On The Power
• Even when the switch is in the “STANDBY” position, electricity is still flowing to the instrument at the mini- mum level. When you are not using the EZ-250i for a long time, make sure you unplug the AC power adaptor from the wall AC outlet, and/or remove the batteries from the instrument. -
Page 12: Quick Guide
Simply by pressing the [PORTABLE GRAND] button, you can automatically select the Grand Piano voice. Press the [PORTABLE GRAND] button. Play the keyboard. Want to find out more? See page 21. EZ-250i Owner’s Manual Playing along with the Metronome Press the [METRONOME] button. Stop the Metronome. - Page 13 Selecting and Playing Other Voices The EZ-250i has a huge total of 480 dynamic and realistic instrument voices. Let’s try a few of them out now... Press the [VOICE] button. G Panel Voice List Voice Name Voice Name PIANO Folk Guitar...
-
Page 14: Step 2 Songs
Playing the Songs The EZ-250i is packed with a total of 80 songs, including 10 Demo songs — which has been specially created to showcase the rich and dynamic sounds of the instrument. There are also 70 additional songs, designed to be used with the educational Lesson feature. -
Page 15: Song List
I’ve Been Working On The Rail- road (Traditional) My Darling Clementine (Traditional) Auld Lang Syne (Traditional) Grandfather’s Clock (H.C. Work) Amazing Grace (Traditional) My Bonnie (H.J Fulmer) Yankee Doodle (Traditional) Joy To The World (G.F. Händel) Ave Maria (F.Schubert) EZ-250i Owner’s Manual... -
Page 16: Step 3 Style
The powerful yet easy-to-use Style features give you profes- sional instrumental backing for your performances. Simply play chords with your left hand — and the EZ-250i automat- ically produces appropriate bass, chord and rhythm backing. Use your right hand to play melodies, and you’ll sound like an entire band! •... - Page 17 Select a section. The auto accompaniment has four sections: Intro, Main A/B, and Ending. Stop the style. Step 3 Style Want to find out more? See page 42. Want to find out more? See page 34. EZ-250i Owner’s Manual...
-
Page 18: Basic Operation And Lcd Display
LCD. For example, when Transpose is selected: Function bar EZ-250i Owner’s Manual Name and Number indication (Song/Style /Voice) Currently selected name and number (Song, Style or Voice) appear here. -
Page 19: Music Rest
Hold down this button until the func- tion calls up. Music Rest Insert the bottom edge of the included music rest into the slot located at the top rear of the EZ-250i control panel. Basic Operation and LCD Display Song... - Page 20 CHORD Indicates the chord name when playing in the style or song (only chord type song) mode. EZ-250i Owner’s Manual Indicates that the Dual Voice feature is turned on. Indicates that the Split feature is turned on. Indicates that the Harmony fea- ture is turned on.
-
Page 21: Portable Grand
Restoring the Default Tempo Value Each song and style has been given a default or standard Tempo setting. If you’ve changed the Tempo, you can instantly restore the default setting by pressing both [+]/[–] buttons simultaneously (when Tempo is selected). EZ-250i Owner’s Manual... - Page 22 Adjusting the Metronome Volume You can adjust the volume of the Metronome sound in the Function mode (page 67). The volume range is 000 - 127. EZ-250i Owner’s Manual Numeric Time signature keypad Plays no “1” beats (all low clicks) 1/4 —...
-
Page 23: Playing Voices
Playing Voices The EZ-250i features a total of 480 authentic voices — all of which have been created with Yamaha’s sophisticated AWM (Advanced Wave Memory) tone generation system. These include 360 XG Lite voices and drum kits. The EZ-250i also has a Dual Voice or Split Voice function that lets you combine two different voices in a layer, or play from separate areas of the keyboard, play the two together across the keyboard. - Page 24 • For more details, see page 76. G For example, when 109 “Standard Kit 1” is selected: EZ-250i Owner’s Manual Name Standard Kit 1 Standard Kit 2 Room Kit...
-
Page 25: Ots
The following parameters can be set in the Function mode (page 67). CATEGORY SELECT Dual Voice Voice Volume Octave Reverb Send Level Chorus Send Level To turn the Dual Voice on or off, press the [DUAL] button. #000 OTS is selected. Indicates Dual Voice is on. Playing Voices EZ-250i Owner’s Manual... -
Page 26: Split Voice
The Split Point determines the highest key for the split voice and sets the split point. Split Point Split Voice Split Point can be set in the Function mode (page 66). EZ-250i Owner’s Manual Indicates Split Voice is on. Main Voice • This setting also affects the split point for the accompaniment area. -
Page 27: Touch And Touch Sensitivity
Touch and Touch Sensitivity The EZ-250i features a Touch Response function that gives you dynamic, expres- sive control over the volume of the voices. The Touch Sensitivity parameter lets you set the degree of Touch Response. Turn the Touch function on or off as desired by pressing the [TOUCH] button. -
Page 28: Transpose And Tuning
It also determines the pitch of the songs. This allows you to easily match the pitch of the EZ-250i to other instruments or singers, or play in a different key without changing your fingering. The Transpose settings can be adjusted over a range of ±... -
Page 29: Effects
Effects The EZ-250i is equipped with a wide variety of effects that can be used to enhance the sound of the voices. The EZ-250i has three separate effect systems — Harmony, Reverb and Chorus — and each has many different effect types to choose from. -
Page 30: Chorus
Chorus Send Level Split Voice Chorus Send Level Sustain The Sustain effect automatically adds a slow, natural decay to the voice sound when the keys are released. Sustain on/off can be set in the Function mode (page 66). EZ-250i Owner’s Manual... -
Page 31: Effect Types
• The Tremolo effect Types (13 - 19) repeat all held notes (up to four). • The Echo effect Types (20 - 26) create delayed repeats of each note played. Effects EZ-250i Owner’s Manual... - Page 32 Room 2 Stage 1 Stage 2 Plate 1 Plate 2 G Chorus Types Chorus Type Chorus 1 Chorus 2 Flanger 1 Flanger 2 EZ-250i Owner’s Manual Display Name Description Hall1 Concert hall reverb. Hall2 Hall3 Room1 Small room reverb. Room2 Stage1 Reverb for solo instruments.
-
Page 33: Selecting And Playing Styles
F#2 and lower) is for the auto accompaniment function. The EZ-250i also features the convenient Dictionary function (page 42). Dictionary provides you with a built-in “chord encyclopedia” that teaches you how to play any chord you specify by showing you the appropriate notes in the display. -
Page 34: Playing The Styles
(See below.) Turn on the auto accompaniment. Press the [ACMP ON/OFF] button to turn on (enable) the auto accompani- ment. EZ-250i Owner’s Manual Pressing this button alter- Pressing this button switches nately enables and cancels between the Main A and Main B the Sync Start function. - Page 35 [TEMPO/TAP] button twice at the desired tempo. I Using Sync Start The EZ-250i also has a Sync Start function that allows you to start the style by simply pressing a key on the keyboard. To use Sync Start, first press the [SYNC START] button (the beat mark flashes to indicate Sync Start stand-...
- Page 36 3) Press the [SYNC START] button to enable Sync Start, and start the Intro section and accompaniment by play- ing any key on the keyboard. (When auto accompaniment is on, play a key or chord in the auto accompani- ment area of the keyboard.) EZ-250i Owner’s Manual Indicates selected section (Main A or B). Indicates Intro standby.
- Page 37 In effect, this gives you a “split keyboard,” with bass and chords in the left hand and the normally selected voice in the right. EZ-250i Owner’s Manual...
-
Page 38: Changing The Tempo
— for song and style playback. The flashing “metronome” icons indi- cate both the downbeats and upbeats of a measure as fol- lows: EZ-250i Owner’s Manual Current Tempo value • When style playback is stopped and a different style is selected, the tempo returns to the default setting of the new style. -
Page 39: Accompaniment Sections (Main A/B And Fill-Ins)
1st measure 2nd measure 3rd measure ...a fill-in pattern ...and the Main plays from here... A or B section begins here. Selecting and Playing Styles • Style Volume cannot be changed unless the Style mode is active. EZ-250i Owner’s Manual... -
Page 40: Using Auto Accompaniment - Multi Fingering
(see Single Finger Chords below). The Fingered technique is that of conventionally playing all the notes of the chord. Whichever method you use, the EZ-250i “understands” what chord you indicate and then automatically generates the accompaniment. - Page 41 • The auto accompaniment will sometimes not change when related chords are played in sequence (e.g. some minor chords followed by the minor sev- enth). • Two-note fingerings will produce a chord based on the previously played chord. EZ-250i Owner’s Manual...
-
Page 42: Dictionary
Press the key on the keyboard that corresponds to the desired chord type (as printed on the panel). Notation of chord Chord name (root and type) EZ-250i Owner’s Manual Pressing this key selects the major seventh chord type (M7). • Make sure to turn on the Light Guide function when using the Dictionary function. - Page 43 Inversion examples for the key of C Flashes when correct notes are held. Minor chord Augmented chord (ex. Cm) (ex. Caug) Minor 3rd Major 3rd Major 3rd Selecting and Playing Styles Diminished chord (ex. Cdim) Minor 3rd Minor 3rd EZ-250i Owner’s Manual...
- Page 44 C major scale: Other Chords sus4 m7b b b b 5 Dominant Diminished chord EZ-250i Owner’s Manual Minor chord Augmented chord Root Dominant Major chord Dominant Minor...
-
Page 45: Selecting And Playing Songs
The songs are generally for your listening enjoyment; however, you can also play along with them on the key- board. The songs of the EZ-250i can also be used with the powerful Lesson feature (page 49), a convenient tool that makes learning songs fun and easy. -
Page 46: Playing The Songs
Playing the Flash Memory Song The EZ-250i can play a song loaded into its internal flash memory. To do this, you’ll need to connect the EZ-250i to a personal computer, and use the “Song Filer” software to transmit the song from the computer. -
Page 47: A-B Repeat
• You can also set the A-B Repeat function when the song is stopped. Simply use the REW] and [ FF] buttons to select the desired measures, pressing the [A-B REPEAT] but- ton for each point, then start play- back. EZ-250i Owner’s Manual... -
Page 48: Melody Voice Change
Selecting and Playing Songs Melody Voice Change The EZ-250i lets you play a melody on the keyboard along with each of the songs, either with the original melody voice or one of your own selection. The conve- nient Melody Voice Change feature takes this one step further — it lets you replace the original voice used for the melody of the song with the panel voice of your own selection. -
Page 49: Song Lesson
I Lesson 2 — Waiting In this lesson step, the EZ-250i waits for you to play the correct notes before continuing playback of the song. I Lesson 3 — Minus One This lesson step plays back the song with one part muted, letting you play and master the missing part (following the Light Guide) yourself —... - Page 50 “grade” is shown in the display. After a short pause, the Lesson begins again automatically. Press the [START/STOP] button to stop the Lesson. The EZ-250i exits from the Lesson feature automatically when the [START/ STOP] button is pressed. EZ-250i Owner’s Manual...
-
Page 51: Select The Lesson Track
In Lesson 1, simply play one note repeatedly in time with the music. Regarding chords and the use of the left hand, the EZ-250i actually has two different types of songs: 1) songs with normal left-hand chords, and 2) songs in which the left hand plays arpeggios or melodic figures in combination... -
Page 52: Lesson 2 - Waiting
Song Lesson Lesson 2 — Waiting In this lesson step, the EZ-250i waits for you to play the correct notes before con- tinuing playback of the song. This lets you practice reading the music at your own pace. The notes to be played are shown in the display, one after another, as you play them correctly. -
Page 53: Lesson 4 - Both Hands
The Lesson feature has a built-in evaluation function that monitors your practicing of the Lesson songs, and just like a real teacher, it indicates how well you did each exercise. Four grades are assigned, depending on your performance: “Try Again,” “Good,” “Very Good!,” and “Excellent!.” Song Lesson EZ-250i Owner’s Manual... -
Page 54: Midi Functions
Voice number (with what voice) Note number (with which key) Note on (when was it pressed) and note off (when was it released) Velocity (about how strong) EZ-250i Owner’s Manual Digital instrument note production Tone Generator (Electronic circuit) Sampling Note... -
Page 55: Channel Messages
Realtime Messages that control the MIDI device. Message Name EZ-250i Operation/Panel Setting Exclusive Message Reverb setting, etc. Realtime Messages Clock, Start/stop operations The messages transmitted/received by the EZ-250i are shown in the MIDI Imple- mentation Chart on page 78. MIDI Functions EZ-250i Owner’s Manual... -
Page 56: Connecting To A Personal Computer
EZ-250i Owner’s Manual EZ-250i USB Cable Viewing the Notation for MIDI Channel 1 • The EZ-250i has a special func- tion that lets you view the notes of the MIDI data (channel 1 only) on the display. -
Page 57: Local Control
MIDI sequencer. If you are using the sequencer to play back the voices of the EZ-250i, you would want to set this to “off” — in order to avoid getting “double” notes, both from the keyboard and from the sequencer. -
Page 58: Pc Mode
You can play or practice Flash songs (saved in flash memory) in the same way as preset songs. To transmit song data from a personal computer to the EZ-250i, you first need to install the “Song Filer” application to your computer. - Page 59 I Song Filer • • • • • • • • • • • • • • • • • • • • • • • • • • • • • • • • • • • • • • After you install Song Filer and connect the EZ-250i to the computer, you can use the two functions described below.
-
Page 60: Accessory Cd-Rom Installation Guide
*1 Song Filer cannot be used with the instrument when the instrument is in one of the following conditions. *2 The applications are supplied with online/PDF manuals. *3 Unfortunately, Yamaha makes no guarantee concerning the stability of these programs nor can it offer user support for them. CD-ROM Installation Procedure The following steps are the same for both Windows and Macintosh. -
Page 61: Minimum System Requirements
— — — — 640 x 480 High — Color (16bit) Display Other 800 x 600, 256 — colors or more OMS 2.3.3 or later (included in — the CD-ROM in the package) MIDI instrument EZ-250i EZ-250i Owner’s Manual... - Page 62 98, or the “USBdrv2k_“ directory (for example, D:\USBdrv2k_\) in Win- dows 2000, and continue the installation. After confirming that “YAMAHA USB MIDI Driver” is shown in the driver search window, click [Next]. Installation starts. • The exact pathname or location of the driver may differ depend- ing on the particular instrument and other variables.
-
Page 63: For Macintosh Users
Refer to the “OMS_***_Mac.pdf” (English version only) how to use the application. Copy the “OMS Setup for YAMAHA” in the CD-ROM to the “OMS Applications” folder (drag-and-drop it to the folder). In the “OMS Setup for YAMAHA” folder you will find the OMS Setup files for the Yamaha tone generators, which can... -
Page 64: Setting Up Oms
Click [Restart]. The computer automatically restarts. You can locate the installed files in the following locations: • [System Folder] → [Control Panels] → [YAMAHA USB MIDI Patch] • [System Folder] → [Extensions] → [USB YAMAHA MIDI Driver] •... - Page 65 5. LIMITED LIABILITY Your sole remedies and Yamaha’s entire liability are as set forth above. In no event will Yamaha be liable to you or any other person for any damages, including without limitation any incidental or con- sequential damages, expenses, lost profits, lost savings or other dam-...
-
Page 66: Function
Function The EZ-250i has a variety of settings in the Function parameters. These give you detailed control over many of the EZ-250i’s features. Using the Function parameters Select a Function name. Press the [FUNCTION] button, repeatedly if necessary, until appropriate Function name is appear in the display. - Page 67 This setting is effective only loaded song. On/Off This determines the Demo Cancel is enabled or not. Press the [+]/[-] buttons to set Demo Cancel to on or off. YES/NO This determines the Internal Flash Memory is initialized or not. Function EZ-250i Owner’s Manual...
-
Page 68: Data Backup
All Data Initialization proce- dure is carried out. • Carrying out the data initializa- tion procedure will usually restore normal operation if the EZ-250i freezes or begins to act erratically for any reason. -
Page 69: Troubleshooting
ON and keys are played in the auto accompaniment area of the keyboard. The EZ-250i is polyphonic up to a maximum of 32 notes. If the Dual voice or Split voice is being used and a style or song is playing back at the same time, some notes/sounds may be omitted (or “stolen”) -
Page 70: Voice List
I Maximum Polyphony • • • • • • • • • • • • • • • • • • • • • • • • • • • • • • The EZ-250i has 32-note maximum polyphony. This means that it can play a max- imum of up to 32 notes at once, regardless of what functions are used. - Page 71 70’s DrawOrg 1 60’s DrawOrg 3 16+2"2/3 Organ Bass 70’s DrawOrg 2 Cheezy Organ DrawOrg 3 Percussive Organ 70’s Percussive Organ Detuned Percussive Organ Light Organ Percussive Organ 2 Rock Organ Rotary Organ Slow Rotary Fast Rotary EZ-250i Owner’s Manual Voice List...
- Page 72 Voice List Bank Select MIDI Voice Program Change# GUITAR BASS EZ-250i Owner’s Manual Voice Voice Name Church Organ Church Organ 3 Church Organ 2 Notre Dame Organ Flute Tremolo Organ Flute Reed Organ Puff Organ Accordion Hamonica Harmonica 2 Tango Accordion...
- Page 73 Glass Percussion Thai Bells Woodblock Castanets Taiko Drum Gran Cassa Melodic Tom Melodic Tom 2 Real Tom Rock Tom Synth Drum Analog Tom Electronic Percussion Reverse Cymbal SOUND EFFECTS Fret Noise Breath Noise Seashore Bird Tweet EZ-250i Owner’s Manual Voice List...
- Page 74 Voice List Bank Select MIDI Voice Program Change# EZ-250i Owner’s Manual Voice Name Telephone Ring Helicopter Applause Gunshot Cutting Noise Cutting Noise 2 String Slap Flute Key Click Shower Thunder Wind Stream Bubble Feed Horse Bird Tweet 2 Maou Phone Call...
-
Page 75: Style List
VienneseWaltz EnglishWaltz Slowfox Foxtrot Quickstep Tango Pasodoble Samba ChaChaCha Rumba Jive TRADITIONAL USMarch 6/8March GermanMarch PolkaPop OberPolka Tarantella Showtune ChristmasSwing ChristmasWaltz ScottishReel WALTZ SwingWaltz JazzWaltz CountryWaltz OberWalzer Musette PIANIST Stride PianoSwing Arpeggio Habanera SlowRock 8BeatPianoBallad 6/8PianoMarch PianoWaltz EZ-250i Owner’s Manual... -
Page 76: Drum Kit List
MSB/LSB/PC Keyboard MIDI Alternate assign Note# Note Note# Note C# -1 D# -1 G# -1 EZ-250i Owner’s Manual 127/000/000 127/000/001 127/000/008 Standard Kit 1 Standard Kit 2 Room Kit Surdo Mute Surdo Open Hi Q Whip Slap Scratch Push Scratch Pull... - Page 77 Siren Hand Cym. H Train Jet Plane Hand Cym.Short H Starship Burst Roller Coaster Submarine Shower Laugh Thunder Scream Wind Punch Stream Heartbeat Bubble FootSteps Feed Machine Gun Horse Laser Gun Bird Tweet 2 Explosion Firework Maou EZ-250i Owner’s Manual...
-
Page 78: Midi Implementation Chart
MIDI Implementation Chart MIDI Implementation Chart EZ-250i Owner’s Manual... - Page 79 MIDI Implementation Chart NOTE: *1 By default (factory settings) the EZ-250i ordinarily functions as a 16-channel multi-timbral tone generator, and incoming data does not affect the panel voices or panel settings. However, the MIDI messages listed below do affect the panel voices, auto accompa- niment, and songs.
-
Page 80: Effect Map
* By using an external sequencer, which is capable of editing and transmitting the system exclusive messages and parameter changes, you can select the Reverb, Chorus and DSP effect types which are not accessible from the EZ-250i panel itself. When one of the effects is selected by the external sequencer, “ - ” will be shown on the display. -
Page 81: Specifications
: L-2C, L-2L * Specifications and descriptions in this owner’s manual are for information purposes only. Yamaha Corp. reserves the right to change or modify prod- ucts or specifications at any time without prior notice. Since specifications, equipment or options may not be the same in every locale, please check with your Yamaha dealer. -
Page 82: Index
STYLE... 8 SUSTAIN... 11 SYNC START ... 8 TEMPO/TAP ... 9 TOUCH ... 9 USB ... 9 VOICE ... 8 EZ-250i Owner’s Manual Misc. #000 OTS ...25 A-B repreat ...47 AC Power adaptor...10 accessory jacks...11 accompaniment sections ...39 Accompaniment Split Point...26 Batteries ...10... - Page 83 Troubleshooting...69 Tuning...28 Voice List...70 voices, Drum Kit ...76 voices, selecting and playing ...23 voices, XG Lite...71 Volume, dual...25 Volume, harmony...29 Volume, main...23 Volume, Metronome ...22 Volume, Song ...48 Volume, split...26 Volume, Style ...39 XG Lite Voice List...71 EZ-250i Owner’s Manual...
-
Page 84: Limited Warranty
If during the first 90 days that immediately follows the purchase date, your new Yamaha product covered by this warranty is found to have a defect in material and/or workmanship, Yamaha and/or its authorized representative will repair such defect without charge for parts or labor. - Page 87 For details of products, please contact your nearest Yamaha representative or the authorized distributor listed below. Pour plus de détails sur les produits, veuillez-vous adresser à Yamaha ou au distributeur le plus proche de vous figurant dans la liste suivante.
- Page 88 Yamaha PK CLUB (Portable Keyboard Home Page, English only) http://www.yamahaPKclub.com/ Yamaha Manual Library http://www2.yamaha.co.jp/manual/english/ M.D.G., Pro Audio & Digital Musical Instrument Division, Yamaha Corporation © 2003 Yamaha Corporation WA07130 ???PO???.?-03C0 Printed in China...
Need help?
Do you have a question about the Portatone EZ-250i and is the answer not in the manual?
Questions and answers