Table of Contents
Advertisement
Advertisement
Table of Contents

Related Manuals for Yamaha PortaTone EZ-30


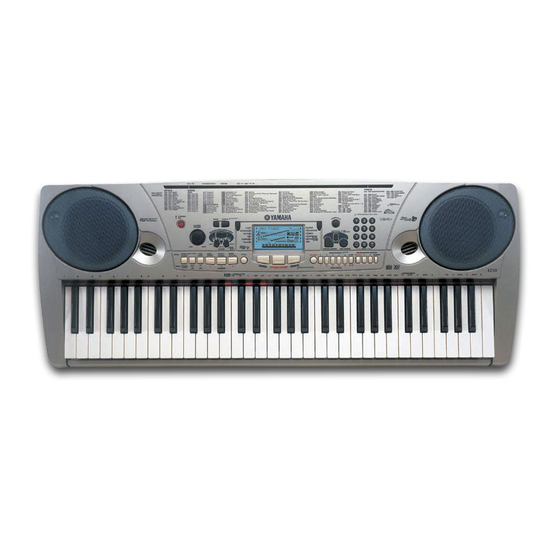
Summary of Contents for Yamaha PortaTone EZ-30
- Page 1 Owner's Manual...
-
Page 2: Special Message Section
Yamaha. This product should be used only with the components supplied or; a cart, rack, or stand that is recommended by Yamaha. If a cart, etc., is used, please observe all safety markings and instructions that accompany the accessory product. - Page 3 fied Yamaha service personnel. • Use the specified adaptor (PA-5C or an equivalent recom- mended by Yamaha) only. Using the wrong adaptor can result in damage to the instrument or overheating. • Before cleaning the instrument, always remove the electric plug from the outlet.
-
Page 4: Main Features
The EZ-30 is a sophisticated yet easy-to-use keyboard with the following features and functions: Yamaha Education Suite The EZ-30 features the new Yamaha Education Suite - a set of learning tools that uti- lize the latest technology to make studying and practicing music more fun and fulfilling than ever before! The Yamaha Education Suite includes: Lesson ... - Page 5 Powerful, easy-to-use song recording operations, for recording and playing back up to five of your original songs. Registration Memory presets for storing all of the EZ-30’s panel settings to a single button for instant and automatic recall. One Touch Setting function for automatically calling up an appropriate voice to match the style or song you select.
-
Page 6: Table Of Contents
Contents Setting Up ...8 Power Requirements ... 8 Using Headphones... 9 Connecting a Keyboard Amplifi- er or Stereo System... 9 Using a Footswitch... 9 Using the MIDI Terminals ... 9 Panel Controls and Terminals.10 Quick Guide ...12 Songs ... 12 Playing the Demo Songs... - Page 7 Connecting to a Personal Com- puter ... 78 Local Control ... 79 Using Bulk Dump Send to Save Data ... 80 Transmitting the EZ-30 Panel Settings (Initial Send) ... 81 Transmitting SMF Format Data.. 82 Troubleshooting... 83 Data Backup & Initialization.. 84 Data Backup ...
-
Page 8: Setting Up
• Even when the switch is in the “STANDBY” position, electricity is still flowing to the instrument at the minimum level. When you plan not to use the EZ-30 for a long period of time, make sure you unplug the AC power adaptor from the wall AC out- let, and/or remove the batteries from the instrument. -
Page 9: Using Headphones
Connecting a Keyboard Ampli- fier or Stereo System Though the EZ-30 is equipped with a built-in speaker system, you can also play it through an external amplifier/speaker system. First, make sure the EZ-30 and any external devices are... -
Page 10: Panel Controls And Terminals
Panel Controls and Terminals Front Panel 1 Power switch ([STANDBY/ON])... 22 2 [MASTER VOLUME] dial... 22 3 [DEMO] button ... 28 4 [TOUCH] button... 47 5 [Dict.] (DICTIONARY) button ... 58 6 LESSON [L] (Left) and [R] (Right) buttons34 7 Overall (left, right) buttons ... 23 8 [TEMPO/TAP] button ... - Page 11 P Q R S...
-
Page 12: Quick Guide
If you do not wish to play the Demo songs when you press the [DEMO] button, turn on the power to the EZ-30 while pressing and holding down the [DEMO] button. To activate the Demo playback function, turn on the power to the EZ-30 in the normal manner. -
Page 13: Playing A Single Song
[START/STOP] button, you can start playback. 1 Start the song. When the power of the EZ-30 is turned on, the song of “003: Linus And Lucy” is selected. For instructions on selecting songs, See page 28. 2 Stop the song. -
Page 14: Lesson
Lesson feature. Let’s start the practice, following the light. 1 Select Timing, Waiting, or Minus One, and start the lesson. When the power of the EZ-30 is turned on, the song of ”003: Linus And Lucy” and the right-hand part are selected. - Page 15 Want to find out more? See page 34. Grade The EZ-30 has a built-in evaluation function that monitors your practicing and - like a real teacher - tells you how well you did each practice. Four grades are assigned, depending on your performance: “Try Again,” “Good,” “Very Good,”...
-
Page 16: Voices
Guide Playing the Piano Simply by pressing the [PORTABLE GRAND] button, you can automati- cally reset the entire EZ-30 for piano play. 1 Press the [PORTABLE GRAND] button. The song and style are also set for piano performance. 2 Play the keyboard. -
Page 17: Playing The Abc/Doremi Voices
2 Play the keyboard. Want to find out more? See page 43. Selecting and Playing Other Voices The EZ-30 has a huge total of 610 dynamic and realistic instrument voices. Let’s try a few of them out now... 1 Press the [VOICE] button. -
Page 18: Auto Accompaniment
STEP Guide Using the Auto Accompaniment Simply play chords with your left hand - and the EZ-30 automatically produces appropriate bass, chord and rhythm backing. Use your right hand to play melodies, and you’ll sound like an entire band! For more information on playing proper chords for the auto accompaniment, see “Using Auto Accompaniment - Multi Finger-... - Page 19 3 Turn the auto accompani- ment on. 4 Turn the Sync Start func- tion on. 5 Play a chord with your left hand. The auto accompaniment starts as soon as you play the keyboard. Want to find out more? See page 55.
-
Page 20: Looking Up Chords In The Dictionary
Continuation Quick STEP Auto Accompaniment Guide Looking up Chords in the Dictionary The convenient Dictionary function teaches you how to play chords by showing you the individual notes. In the example below, we’ll learn how to play a GM7 chord... Chord detection Example: 1 Press the [Dict.] button. - Page 21 2 Specify the root note of the chord (in this case, G). 3 Specify the chord type of the chord (in this case, M7). 4 Play the chord by pressing the keys lighted up. The chord name flashes and a ”congratulations” melody is played, when the chord is played properly.
-
Page 22: Panel Display Indications
“STANDBY” position, electricity still flows through the instrument at the minimum level. When you plan not to use the EZ-30 for a long period of time, make sure you unplug the AC power adaptor from the wall AC outlet, and/or remove the batteries from the instrument. - Page 23 Overall indicator Overall (L, R) indicator The left and right Overall buttons enable you to make EZ-30’s global settings. Overall (left) LIGHT ABC/DoReMi REVERB HARMONY TALKING Overall (right) OCTAVE TRANSPOSE TUNING ACMP/SONG VOLUME 61, 32 METRONOME VOLUME MIDI 74, 79...
-
Page 24: Selecting A Function
(The icon of the selected function appears.) Style Select a style for accompaniment. • If you select a song or accompaniment, then select a voice, the EZ-30 indicates the following: [Song Voice] Select a voice using the numeric keypad. Press the [START/STOP] button to start the song. - Page 25 Numeric keypad Name & number indication (Song/Style/Voice) The top row of the display indicates the name and number of the currently-selected function. E.g., Selecting a song Song number Song name Selecting a number • To increment or decrement the number, use the numeric keypad or [+]/[–] button.
- Page 26 Panel Display Indications Touch indicator This appears when the Touch function is turned on. Harmony indicator This appears when the Harmony effect is turned on. Low battery indicator This appears when the battery voltage is getting low. Sync Stop indicator This appears when the Sync Stop function is turned on.
-
Page 27: Fingering Guide
Notation display When you are using the Lesson function, the notation display indicates the song melody or chord notation. When you are using the Dictionary function, it indicates the notes that make up the chord. Other than that, it usually indicates the notes you played. -
Page 28: Selecting And Playing Songs
Songs from #1 to #100 will be played sequentially. If you select a song after another song has started playing, the EZ-30 will sequentially play songs in the category (e.g., Pianist etc. See page 13.) that contains the selected song. -
Page 29: Listening To A Flash Song
[REW] button ... Press this button during playback will rewind Listening to a Flash Song The EZ-30 can play a song loaded into its internal flash memory. To do this, you need to connect the EZ-30 to a personal computer, and use “Song Filer” application pro- gram on the computer to transmit a song. -
Page 30: Melody Voice Change
Selecting and Playing Songs Melody Voice Change You can change the voice of a song melody to the desired one during song playback. Select the desired voice. Press the [ VOICE ] button, then use the numeric keypad or [ + ]/[ – ] buttons to select the desired voice. -
Page 31: Adjusting The Tempo
Adjusting the Tempo Song and accompaniment tempo can be adjusted in the range of q = 32–280 (the num- ber of quarter notes per minute). Press the [TEMPO/TAP] button. Press the numeric keypad or [+]/[–] buttons to change the tempo value. Tap Function You can set your own tempo intuitively. -
Page 32: Song Volume Level
Selecting and Playing Songs Song Volume Level Adjust the song volume to balance with the level of the keyboard performance. Press the right Overall button repeatedly until “SONG VOL” appears in the display. Current song volume Press the numeric keypad or [+]/[–] buttons to set the song volume (000–127). - Page 33 Press the [+] or [–] button to turn the Light Guide on or off. CAUTION Playing while looking at the lights for a long period of time may cause eye strain and stiff neck/ shoulders. For your health and comfort, we recommend that you take a ten-minute break for every hour.
-
Page 34: Song Lesson
Song Lesson You can practice playing a song selected from Lesson songs #001–100 and songs in flash memory. Using the Lesson Feature Select one of the Lesson songs. Press the [SONG] button, then use the numeric keypad or [+]/[–] buttons to select the desired song. - Page 35 Lesson 1: Timing ... This lesson step lets you practice just the timing Lesson 2: Waiting ... In this lesson step, the EZ-30 waits for you to Lesson 3: Minus One ... This lesson step lets you practice playing the •...
-
Page 36: Abc/Doremi Guide
Song Lesson ABC/DoReMi Guide When the ABC/DoReMi Guide is activated, the EZ-30 sings the next note to play using “A, B, C...” or “Do, Re, Mi...” in Lesson 2. For instruction on changing the guide voice (ABC or DoReMi), see page 43. -
Page 37: Grade
“announces” your grade. Press the [GRADE ON/OFF] button to turn the Grade on or off. The EZ-30 tells you your grade via the LCD, Light Guide, and the Talking function. After displaying your grade, the EZ-30 resumes the Lesson. -
Page 38: Talking
Song Lesson Talking This feature “talks” to you through the speakers, “announcing” the Grade comments as well as the titles of the Lesson steps and the names of certain functions. Press the left Overall button repeatedly to select “TALKING”. Press the [+]/[–] buttons to set Talking to on or off. The Talking function includes the following “announcements”: [Dictionary]... -
Page 39: Portable Grand
You can practice playing “a real piano,” by pressing the [ POR- TABLE GRAND ] button. When you press the [ PORTABLE GRAND ] button, the EZ-30 configures all the settings for piano performance. The song and style category “PIANIST” (automatically selected with the settings described above) includes the songs and styles that are suitable for the piano performance. -
Page 40: Setting The Time Signature Of The Metronome
Adjusting the Metronome Volume You can adjust the volume of the Metronome sound independently of the other EZ-30 sounds. The volume range is 000–127. Press the right Overall button repeatedly to select “METRONOME VOLUME”. - Page 41 Press the numeric keypad or [+]/[–] buttons to set the desired Metronome Volume value. To restore the default Metronome Volume value (100), press both [+]/[–] buttons simultaneously (when Metronome Volume is selected in the Overall menu).
-
Page 42: Playing Voices
Playing different keys on the keyboard produces different drum sounds. ABC (Oboe) voice (609), DoReMi (Oboe) voice (610) When you play the keyboard, the EZ-30 “sings” the corresponding notes using ABC or DoReMi. If the Transpose value is adjusted (other than “00”), they sound using Oboe voice. -
Page 43: One Touch Setting
Play the selected voice. Try playing different voices. When you select a voice, a DSP type most appropriate for the voice will be selected automatically. Selecting the ABC or DoReMi voice Simply by pressing the [ABC/DoReMi] button, you can select the ABC (Oboe) voice (#609) or DoReMi (Oboe) voice (#610). -
Page 44: Changing The Split Point
Playing Voices Press the numeric keypad [0] or [+]/[–] buttons to select the voice number “000.” This turns on the One Touch Setting. Changing the Split Point Pressing and holding down the [ACMP ON/OFF] button for more than one second enables you to change the split point. -
Page 45: Transpose
Transpose Transpose determines the key of both the main voice and the bass/chord accompani- ment of the selected style. The Transpose settings can be adjusted over a range of ±12 semitones (±1 octave). Press the right Overall button repeatedly to select “TRANSPOSE”. -
Page 46: Tuning
Playing Voices Tuning Tuning determines the fine pitch setting of both the main voice and the bass/chord accompaniment of the selected style. The Tuning settings can be adjusted over a range of ±100 (approx. ±1 semitone). Press the right Overall button repeatedly to select “TUNING”. -
Page 47: Touch
Turn the Touch function on or off as desired by pressing the [TOUCH] button. Touch Sensitivity Touch Sensitivity lets you set how the EZ-30 responds to your playing strength, allow- ing you to customize this expressive function to suit your own playing style. -
Page 48: Effects
Stage 1 Stage 2 Plate 1 Plate 2 • Each style of the EZ-30 has its own indepen- dent Reverb setting. • You can instantly restore the default setting by pressing both [+]/[–] buttons simulta- neously (when Reverb is selected). -
Page 49: Dsp
Symphonic Phaser Rotary Speaker 1 Rotary Speaker 2 • Each voice of the EZ-30 has its own independent DSP setting. • You can instantly restore the default setting by pressing both [+]/[–] buttons simultaneously (when DSP is selected). DSP Type... -
Page 50: Harmony
Harmony The Harmony section features a variety of performance effects that enhance the melo- dies you play when using the accompaniment styles of the EZ-30. Some Harmony types add harmony to a chord detected in the left-hand key range (accompaniment key range). -
Page 51: Auto Accompaniment
Auto Accompaniment The EZ-30 provides dynamic rhythm/accompaniment patterns - as well as voice set- tings appropriate for each pattern - for various popular music styles. A total of 106 different styles are available, in several different categories. With the auto accompaniment function, the EZ-30 auto-... -
Page 52: Starting Accompaniment
You can start playing accompaniment using one of the following four methods. Sync start Press the [SYNC START] button. The EZ-30 enters Sync start waiting mode, and the beat indicators flash. When you start playing chords in the accompaniment key range, the accompaniment starts playing. -
Page 53: Start
Start As soon as you press the [START/STOP] button, the rhythm part starts playing. When you play a chord in the accompaniment key range, the EZ-30 produces the bass and chords. When you press the [START/STOP] button, only the rhythm part of the selected accompaniment starts playing. -
Page 54: Stopping The Accompaniment
(when Tempo is selected). • Press the [SYNC START] button. The accompaniment stops immediately. All beat indica- tors flash and the EZ-30 en- ters Sync start waiting mode. Current Tempo value • Press the [INTRO/ENDING] button. The accompaniment stops... -
Page 55: Using Auto Accompaniment-Multi Fingering
(see “Single Finger Chords” below). The Fingered technique is that of conventionally playing all the notes of the chord. Whichever method you use, the EZ-30 “understands” what chord you indicate and then automatically generates the accompaniment. Single Finger Chords Chords that can be produced in Single Finger operation are major, minor, seventh and minor seventh. -
Page 56: Fingered Chords
Auto Accompaniment Fingered Chords Using the key of C as an example, the chart below shows the types of chords that can be recognized in the Fingered mode. • Example for “C” chords Csus Caug CM aug ( #11) * Notes enclosed in parentheses are optional; the chords will be recognized without them. - Page 57 Chord Name/[Abbreviation] Minor major seventh [mM7] Minor major seventh ninth [mM7(9)] Minor seventh flatted fifth [m7b5] Minor major seventh flatted fifth [mM7b5] Diminished [dim] Diminished seventh [dim7] Seventh [7] Seventh flatted ninth [7(b9)] Seventh add flatted thirteenth [7(b13)] Seventh ninth [7(9)] Seventh add sharp eleventh [7(#11)] Seventh add thirteenth [7(13)] Seventh sharp ninth [7(#9)]...
-
Page 58: Looking Up Chords In The Dictionary
Auto Accompaniment Looking up Chords in the dictionary The Dictionary function is essentially a built-in “chord book” that shows you the indi- vidual notes of chords. It is ideal when you know the name of a certain chord and want to quickly learn how to play it. - Page 59 Play a chord, following the Light Guide. The display indicates the notes of the GM7 chord, and the Light Guide indi- cates which keys to play on the keyboard. The chord name flashes in the display (and a “congratulations” melody is played) when the correct notes are held down.
-
Page 60: Other Chords
Auto Accompaniment • • • • • • • • • • • • • • • • • • Writing Chord Names• • • • • • • • • • • • • • • • Knowing how to read and write chord names is an easy yet invaluable skill. Chords are often written in a kind of shorthand that makes them instantly recognizable (and gives you the freedom to play them with the voicing or inversion that you prefer). -
Page 61: Playing A Melody Along With The Accompaniment
Playing a Melody along with the Accompaniment You can play a melody along with the accompaniment. While playing different chords with your left hand... Set a tempo you feel comfortable with. (See page 54.) Adjusting the Accompaniment Volume The playback volume of the accompaniment can be adjusted. This volume control affects only the accompaniment volume. -
Page 62: Changing The Accompaniment Section
Main There are two Main sections, A and B. When you press the [MAIN/AUTO FILL] but- ton, the EZ-30 plays the Fill-in pattern, then changes to another variation. You can also assign the accompaniment sections by pressing the [MAIN/AUTO FILL] button before the song starts (while the rhythm part is stopped). -
Page 63: Ending
[MAIN/AUTO FILL] button here, after beat 4... Ending When you press the [INTRO/ENDING] button at the end of the song, the EZ-30 plays the Ending section appropriate for the song, then stops the performance. Ritardando (rit.) If you press the [INTRO/ENDING] button during the Ending section, the song gets slower little by little and then stops. -
Page 64: Registration Memory
• DSP Type • Harmony On/Off setting and Type • Style number * * These settings are disabled with the songs. The EZ-30 has eight Registration Memory banks, each with two different presets (a total of sixteen). Eight Registration Memory banks Make all desired settings for the EZ-30. -
Page 65: Recalling A Registration Memory Preset
Record the settings to the desired preset, 1 or 2. While holding down the [MEMORY] button, press the appropriate REGIS- TRATION MEMORY preset button, [1] or [2]. If you select a REGISTRATION MEMORY preset button to which data has already been recorded, the existing data will be overwritten and deleted. Recalling a Registration Memory Preset Select the appropriate Registration Memory bank. -
Page 66: Song Recording
• Note that song data will be lost if you turn off the power to the EZ-30, unplug the power adaptor from the AC outlet, or if the battery fully discharges while you are recording. - Page 67 Select a User song for recording. Use the numeric keypad or [+]/[–] buttons to select the desired song: 201– 205. If no song is manually selected, the EZ-30 automatically selects the first available empty song number. Select a track number for recording.
-
Page 68: Recording A Melody Track
When you press the [INTRO/ENDING] button while recording the accompa- niment track, the EZ-30 plays the Ending section and stops recording. When recording is finished, the measure number on the display is reset to “001” and the recorded tracks DATA indicators light up. -
Page 69: Erasing A Song
Re-recording... Select the recorded tracks as recording tracks. When you start recording, the new performance will overwrite the existing data. (The existing data will be deleted and replaced with new data.) Erasing a Song Song Clear The Song Clear operation completely erases all recorded data on all tracks of a selected User song. -
Page 70: Track Clear
Song Recording Track Clear The Track Clear operation completely erases all recorded data on a selected track of a selected User song, leaving the other tracks intact. Select the desired song. Press the [SONG] button, then use the numeric keypad or [+]/[–] buttons to select the desired song (201–205). -
Page 71: Loading A Song Into Flash Memory
Available Memory: 8MB or more Free space in Hard Disk: 2MB or more Display: 800 x 600, 256 colors or more Visit the Yamaha PK CLUB website for more information on the latest version of Song Filer and the installation method. -
Page 72: Song Filer's Functions
Loading a Song into Flash Memory Song Filer’s Functions After you install Song Filer on the computer and connect the EZ-30 to the computer, you can use the two functions described below. • Refer to page 78 for information on connecting the EZ-30 to a computer. -
Page 73: Octave
Octave If the notes in a Flash song are outside the EZ-30’s key range (C1–C6), You can change their pitch in octave steps so that you can use the Lesson function. If the appears in the lower-left of the display during playback of flash songs, follow the procedure: Stop the song, and press the right Overall button to select “OCTAVE”. -
Page 74: Available Flash Memory Amount
EZ-30. While holding down the highest black key (A#5), press the [STANDBY/ON] switch to turn on the power to the EZ-30. The flash memory will be initialized. When the initialization is complete, the EZ-30 indicates “ClrFlash” on the display. -
Page 75: Midi Functions
For example, let’s say you play a “C” quarter note using the grand piano sound on the EZ-30 keyboard. Unlike an acoustic instrument that puts out a resonated note, the elec- tronic instrument puts out information from the keyboard such as “with what voice,”... - Page 76 MIDI messages can be divided into two groups: Channel messages and System mes- sages. Below is an explanation of the various types of MIDI messages which the EZ-30 can receive/transmit. Channel Messages The EZ-30 is an electronic instrument that can handle 16 channels.
-
Page 77: Available Midi Funcitons
• MIDI OUT ...Transmits the EZ-30’s keyboard infor- MIDI LSB receive cancel To set the EZ-30 so that it will not receive LSB data for Bank Select, press the [STANDBY/ON] switch to turn on the power to the EZ-30 while holding down the lowest key (C1). -
Page 78: Connecting To A Personal Computer
MIDI Functions You can send song data from a computer to the EZ-30’s internal flash memory. (See page 71.) Performance data recorded in User songs can be output via MIDI and saved in an external device as SMF data for other applications. (See page 82.) •... -
Page 79: Local Control
MIDI sequencer. If you are using the sequencer to play back the voices of the EZ-30, you would want to set this to “off” - in order to avoid getting “double” notes, both from the keyboard and from the sequencer. -
Page 80: Using Bulk Dump Send To Save Data
MIDI Functions Using Bulk Dump Send to Save Data This operation lets you save important EZ-30 data and settings to another device, such as a sequencer, computer, or MIDI data filer. This operation saves all User song data and all settings for the Registration Memory presets. Once the data is saved, you can reload it any time you need it. -
Page 81: Transmitting The Ez-30 Panel Settings (Initial Send)
Bulk Dump operation described above. • Make sure that the EZ-30 is not in the middle of an operation, such as song recording or playback, Accompaniment playback, saving a Registration Memory preset, sending Bulk Dump data, etc. -
Page 82: Transmitting Smf Format Data
MIDI Functions Transmitting SMF Format Data Performance data recorded in the EZ-30’s User songs can be transmitted via MIDI and stored in the SMF format. Select a User song to transmit. Follow the steps described above in the “Transmitting the EZ-30 Panel Settings (Ini- tial Send)”... -
Page 83: Troubleshooting
The Pianist styles have no drums or bass - only piano accompaniment. The EZ-30 is polyphonic up to a maximum of 32 notes. If the Dual voice or Split voice is being used and a style or song is playing back at the same time, some notes/sounds may be omitted (or “stolen”) from the accompaniment or song. -
Page 84: Data Backup & Initialization
Data Backup & Initialization Data Backup Except for the data listed below, all EZ-30 panel settings are reset to their initial settings whenever the power is turned on. The data listed below are backed up - i.e. retained in memory - as long as an AC adaptor is connected or a set of batteries is installed. -
Page 85: Voice List
Voice List Maximum Polyphony The EZ-30 has 32-note maximum polyphony. This means that it can play a maximum of up to 32 notes at once, regardless of what functions are used. Auto Accompaniment uses a number of the available notes, so when Auto Accompaniment is used the total number of available notes for playing on the keyboard is correspondingly reduced. - Page 86 Bank Select# MIDI Voice# Program MSB# LSB# Change# SYNTH LEAD SYNTH PAD PERCUSSION SPLIT – – – – – – – – – – – – – – – – – – – – – – – – – – –...
- Page 87 Bank Select# MIDI Voice# Program MSB# LSB# Change# Organ Flute Tremolo Organ Flute Reed Organ Puff Organ Accordion Accord It Hamonica Harmonica 2 Tango Accordion Tango Accordion 2 GUITAR Nylon Guitar Nylon Guitar 2 Nylon Guitar 3 Velocity Guitar Harmonics Ukulele Steel Guitar Steel Guitar 2...
- Page 88 Bank Select# MIDI Voice# Program MSB# LSB# Change# SAXOPHONE etc. FLUTE etc. SYNTH LEAD Voice Name Voice# Horn Orchestra Brass Section Trumpet & Trombone Section Brass Section 2 High Brass Mellow Brass Synth Brass 1 Quack Brass Resonant Synth Brass Poly Brass Synth Brass 3 Jump Brass...
- Page 89 Bank Select# MIDI Voice# Program MSB# LSB# Change# Smokey Goblins Goblins Synth Creeper Ring Pad Ritual To Heaven Night Glisten Bell Choir Echoes Echoes 2 Echo Pan Echo Bells Big Pan Synth Piano Creation Star Dust Resonant & Panning Sci-Fi Starz ETHNIC Sitar...
-
Page 90: Style List
Style List Style Name 8 beat 8 Beat 1 8 Beat 2 8 Beat Adria 8 Beat Pop 1 British Pop 8 Beat Soft 16 beat 16 Beat 1 16 Beat 2 16 Beat 3 Soft Fusion Hip Hop Pop Cool Dance 16 Beat Funk Funky Pop... -
Page 91: Drum Kit List
Drum Kit List * “ ” indicates that the drum sound is the same as “Standard Kit 1”. * Each percussion voice uses one note. * The MIDI Note # and Note are actually one octave lower than listed. For example, in “117: Standard Kit 1”, the “Seq Click H”... - Page 92 Voice No. MSB/LSB/PC Keyboard MIDI Note# Note Note# Note Voice No. MSB/LSB/PC Keyboard MIDI Note# Note Note# Note C#-1 D#-1 F#-1 G#-1 A#-1 127/000/000 127/000/001 Standard Kit 1 Standard Kit 2 Splash Cymbal Cowbell Crash Cymbal 2 Vibraslap Ride Cymbal 2 Bongo H Bongo L Conga H Mute...
- Page 93 Voice No. MSB/LSB/PC Keyboard MIDI Electronic Kit Note# Note Note# Note Snare L Bass Drum H BD Rock BD Gate SD Rock L SD Rock H E Tom 1 E Tom 2 E Tom 3 E Tom 4 E Tom 5 E Tom 6 Scratch Push Scratch Pull...
- Page 94 Voice No. MSB/LSB/PC Keyboard MIDI Note# Note Note# Note C#-1 D#-1 F#-1 G#-1 A#-1 127/000/40 127/000/48 Brush Kit Symphonic Kit Brush Slap L Bass Drum L Gran Cassa BD Jazz Gran Cassa Mute Brush Slap Marching Sn M Brush Tap Marching Sn H Brush Tom 1 Jazz Tom 1...
- Page 95 Voice No. MSB/LSB/PC Keyboard MIDI Note# Note Note# Note 127/000/40 127/000/48 Brush Kit Symphonic Kit 126/000/000 126/000/001 SFX Kit 1 SFX Kit 2 Shower Laugh Thunder Scream Wind Punch Stream Heartbeat Bubble FootSteps Feed Machine Gun Horse Laser Gun Bird Tweet 2 Explosion Firework Ghost...
-
Page 96: Effect Type List
Effect Type List Reverb Types Reverb Type Hall 1 Hall 2 Room 1 Room 2 Stage 1 Stage 2 Plate 1 Plate 2 DSP Types DSP Type Hall 1 Hall 2 Room 1 Room 2 Stage 1 Stage 2 Plate 1 Plate 2 Early Reflection 1 Early Reflection 2... - Page 97 DSP Type Display Name EQ Disco EQ Disco EQ Telephone EQ Tel 3Band EQ 3BandEQ 2Band EQ 2BandEQ No Effect Harmony Types Harmony Type Display Name Duet Duet Trio Trio Block Block Country Country Octave Octave Trill 1/4 note Tril1/4 Trill 1/6 note Tril1/6 Trill 1/8 note...
-
Page 98: Midi Implementation Chart
MIDI Implementation Chart... - Page 100 NOTE: By default (factory settings) the EZ-30 ordinarily functions as a 16-channel multi-timbral tone generator, and incoming data does not affect the panel voices or panel settings. However, the MIDI messages listed below do affect the panel voices, auto accompaniment, and songs.
-
Page 101: Effect Map
* By using an external sequencer, which is capable of editing and transmitting the system exclusive messages and parameter changes, you can select the Reverb, Chorus and DSP effect types which are not accessible from the EZ-30 panel itself. When one of the effects is selected by the external sequencer, “... -
Page 102: Specifications
* Specifications and descriptions in this owner’s manual are for information purposes only. Yamaha Corp. reserves the right to change or modify products or specifications at any time without prior notice. Since specifications, equipment or options may not be the same in every locale, please check with your Yamaha dealer. -
Page 103: Index
Index Misc. +/– buttons... 23 ABC/DoReMi ... 43 AC Power adaptor... 8 accompaniment sections... 62 Accompaniment Volume ... 61 Auto Accompaniment ... 51 auxiliary jacks... 9 Bank ... 64 Batteries... 8 Beat indicators ... 27 Bulk Dump ... 80 Chord Names... 56 Chord Type... -
Page 104: Limited Warranty
Yamaha. 3. This warranty is applicable only to units sold by retailers authorized by Yamaha to sell these products in the U.S.A., the Dis- trict of Columbia, and Puerto Rico. This warranty is not applicable in other possessions or territories of the U.S.A. or in any other country. - Page 105 For details of products, please contact your nearest Yamaha or the authorized distributor listed below. Pour plus de détails sur les produits, veuillez-vous adresser à Yamaha ou au distributeur le plus proche de vous figurant dans la liste suivante. NORTH AMERICA CANADA Yamaha Canada Music Ltd.
- Page 106 Yamaha Manual Library (English versions only) http://www2.yamaha.co.jp/manual/english/ M.D.G., PA ・ DMI Division, Yamaha Corporation © 2001 Yamaha Corporation V* * * * * * * * *AP* * *.*-01A0 Printed in China...
Need help?
Do you have a question about the PortaTone EZ-30 and is the answer not in the manual?
Questions and answers