
Subscribe to Our Youtube Channel
Related Manuals for Titon HRV1.3 Q Plus


Summary of Contents for Titon HRV1.3 Q Plus
- Page 1 Manual HRV 1.3 Q Plus HRV 1.60 Q Plus HRV4 Q Plus HRV 1.35 Q Plus HRV 1.65 Q Plus HRV4.1 Q Plus HRV4.25 Q Plus HRV20 Q Plus H200 Q Plus H200 Q Plus ventilation systems...
-
Page 2: Warnings, Safety Information And Guidance
Warnings, Safety Information and Guidance Important Information Important: read these instructions fully before the installation of this appliance Installation of the appliance and accessories must be carried out by a quali- fied and suitable competent person and be carried out in clean, dry conditions where dust and humidity are at minimal levels. - Page 3 16. This appliance can be used by children aged from 8 years and above and persons with reduced physical, sensory or mental capabilities or lack of ex- perience and knowledge if they have been given supervision or instruction concerning use of the appliance in a safe way and understand the hazards involved.
-
Page 4: Explanation Of Symbols On The Appliance
Explanation of symbols on the appliance Symbol Definition Read instruction Manual. Risk of Electric Shock. General hazard safety alert. Wait until all machine components have completely stopped before touching them. Disconnect the mains supply before removing this cover. Disconnect the mains supply before removing this cover. -
Page 5: Titon Recommend
Titon Recommend: Any flexible ducting should only be used for final terminations only and must be a maximum of 300m long and be pulled taut, and straight. A minimum distance of 200mm between the HRV unit and any sharp bends in duct work. -
Page 6: Table Of Contents
HRV20 � � � � � � � � � � � � � � � � � � � � � � � � � � � � � � � 20 Titon Recommend: � � � � � � � � � � � � � � � � � � � � � � � � � � � 5 Right Hand Units Handing Change�... -
Page 7: Units
Default Settings � � � � � � � � � � � � � � � � � � � � � � � � � � � � �52 Modbus Configuration Reset � � � � � � � � � � � � � � � � � � �54 Maintenance Routine Maintenance �... -
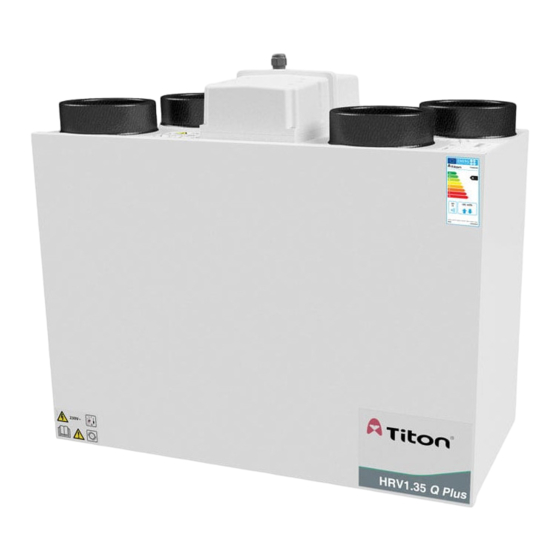
Page 8: Product Information
Product Information The HRVs are Mechanical Ventilation with Heat Recovery (MVHR) units. They are designed for the energy efficient ventilation of dwellings. The units are designed for continuous ventilation, exhausting stale moist air from bathrooms, toilets, kitchen and utility rooms. As the stale air is extracted, the unit’s heat exchanger transfers heat, which would have been wasted, to the fresh air being supplied to the bedrooms and living rooms. -
Page 9: Units' Dimensions
Units' Dimensions The following diagrams detail the overall size of the units, the duct port positions & the additional space required around the units (Service Void - - - -) to allow for commissioning and future service and maintenance. 600.00 HRV1.3 &... -
Page 10: Hrv4, 4.1 & 4.25 Q Plus
477.5 396.5 HRV4, 4.1 & 4.25 Q Plus 237.5 383.5 125.5 1150 HRV20 Q Plus... -
Page 11: H200 Q Plus (Horizontal Unit)
1004 H200 Q Plus (Horizontal Unit) -
Page 12: Product Features
Product Features Right or Left Hand Summer By Pass Other than the H200 all units are supplied as Summer Bypass is designed to operate Left Handed Units and can be reconfigured during hot periods where fresh air can be on site to Right Hand units using the onboard vented straight into the property without controller. -
Page 13: Two Live Switch Inputs
Two Live Switch Inputs Analogue Outputs These are live input switches which can also There are two open collector analogue perform all of functions of the volt free inputs. outputs. Connecting these to an external circuit allows the status of the filter and fans Frost Protection Program (Default) to be monitored as they are driven low (to 0V) During very cold weather, the Frost Protection... - Page 14 Installation IMPORTANT Other than the H200 all units are supplied as Left Handed Units and can be reconfigured on site to Right Hand Units using the on-board controller. Left Right Hand Hand Before installation of Ducting, Condensate Drain & the HRV the hand of the installation must be confirmed and communicated to all persons involved with the installation and commissioning of the HRV.
-
Page 15: Unit Mounting
Unit Mounting Read and observe the guidance & safety notices listed in Warnings, Safety Information and Guidance . Do not remove the Port Covers, where fitted, until connecting ducting. Port Covers are fitted to prevent debris falling into the unit and causing blockages and damage: The mounting surface must be sufficiently strong to support the unit. -
Page 16: Safety Bracket
Safety Bracket The Safety Bracket(s) MUST be used. HRV20 Remove the rear Transport Feet to enable fitment of the Safety Brackets and remove the front Transport Feet and M6x40mm fixing screw and discard. Fit the supplied M6x10mm screws from the Safety Bracket Pack. -
Page 17: Mounting H200
Mounting H200 Read and observe the guidance & safety notices listed in Warnings, Safety Information and Guidance . The units are designed to be mounted on the underside of a horizontal surface. The mounting surface and fixings must be sufficiently strong to support the unit. The H200 unit is 32Kg, Consider the positioning of electrical services and the Condensate Drain when siting the unit. -
Page 18: Condensate Drain
Must be installed to have a 3 to 5° fall from the unit. Titon recommend the use of a diaphragm type waste valve, in place of a conventional ‘wet’ trap which could dry out; Such as a ‘Hepworth HepvO® Hygienic self sealing plastic waste valve’... -
Page 19: Left Hand Units
Left Hand Units Other than the H200 all units are supplied as Left Handed Units. Left Right Hand Hand Left / Right Hand Drain Connection & corresponding Ducting Connections HRV1.3 & 1.35 The Condensation Drain Pipe Is attached via a 15mm compression fitting HRV 1.6 1.65, 4, 4.1 &... -
Page 20: Hrv20
HRV20 Fit hose clamps around both Condensate Drain Sockets, ensuring they are pushed over the lip and aligned with recess in sheet metal casing Insert 22mm O/D PVC pipe into Condensate Drain Socket up to the stop, no more than 35mm of pipe should be inserted into Condensate Drain Socket. -
Page 21: Right Hand Units
Right Hand Units Other than the H200 all units are supplied as Left Handed units and they can be reconfigured on site to Right Hand units using the onboard controller. Left Right Hand Hand Left / Right Hand Drain Connection & corresponding Ducting Connections Handing Change For units other than the HRV20;... -
Page 22: Blanking Plug
Blanking Plate fitted to Condensate Outlet Condensate Outlet Blanking Plug The Blanking plug must be fitted to the unused condensate outlet. EXTRACT FROM DWELLING - This duct port is connected to the ducting that carries waste air from the ‘Wet Rooms’... -
Page 23: Hrv20 Handing Change
HRV20 Handing Change Left Right Hand Hand Left / Right Hand Drain Connection & corresponding Ducting Connections Fit hose clamps around both Condensate Drain Sockets, ensuring they are pushed over the lip and aligned with recess in sheet metal casing. Insert the condensate drain pipe into the right hand Condensate Drain Socket up to the stop, no more than 35mm of pipe should be inserted into the Condensate Drain Socket. - Page 24 Use the on-board controller to change from LH to RH; see section Setup Sub Menu; item 5 Use a permanent marker to identify the handing of the unit on the Port Identification and Handing Label affixed to the top of the unit. 230V~ EXTRACT SUPPLY...
-
Page 25: Horizontal Unit(S)
Horizontal Unit(s) H200 The H200 is only available with one port configuration. Condensate Drain Highlighted Condensate output is a Ø21.4mm plastic pipe positioned on the end of the unit. Drain pipe must be fitted to the unit with a removable fitting. -
Page 26: Ducting Connections
Ducting Connections The HRV unit has a labels with the icons indicating which port is which. Read and observe the Warnings, Safety Information and Guidance. It is very important that ducting is connected to the correct ports in line with the icons below. Port Designations EXTRACT FROM DWELLING - This duct port is connected to the ducting that carries waste air from the ‘Wet Rooms’... -
Page 27: Wiring Access
Wiring Wiring Access All wiring must conform to current I.E.E. Wiring Regulations and all applicable national standards and Building Regulations. Read and observe the Warnings, Safety Information and Guidance. With the exception of the HRV20 and HRV10 all units use the same Electronics Terminal Enclosure. -
Page 28: Switching & Controls
Switching & Controls The Switched Live (LS1, LS2) Boost(s) must be supplied via the same circuit as used to power the unit. A 3 (LS1 only) or 4 (LS1 &LS2) pole local isolator must be installed. The Boxed Relay (Part No. TP505) may be required to switch from other circuits. - Page 29 Switch Defaults SW1 - Volt Free - Kitchen Boost. SW2 - Volt Free - Wet Room Boost. SW3 - Volt Free - SUMMERboost Control. Switch 3 SUMMERboost Switch 2 Wet Room Kitchen Volt Free Switch Inputs Switch Live 2 Switch Live 1 Switch Defaults LS1 - 230V~ - Kitchen Boost LS2 - 230V~ - Wet Room Boost...
- Page 30 Any of these switch arrangements can be used in switch inputs SW1 to SW3 depending on their configuration and the type of MVHR. 1 2 3 Volt-free boost switching of MVHR using TP522 Latching SUMMERboost® switch. single-pole switches TP502, TP503, TP507 and / or TP500/TP501 Humidistat.
-
Page 31: External Sensors
Switch Positions TP508 Three Position Rotary Switch 1 - Setback Speed 2 - Continuous Speed 3 - Boost Speed For the unit to immediately change speed when the switch is operated Set S1-1 to a Kitchen or Wet Room Boost switch. -
Page 32: Analogue Output
Analogue Output OP1 will normally be at a logic of 1 and change to 0 when the filters need replacing. OP2 will normally be at a logic of 1 and change to 0 if either of the fans have failed. In the 0 state the circuit can drive low an input of 5V, up to 10mA. -
Page 33: Duct Heater
Duct Heater If a Duct Heater is required it must be fitted to the From Atmosphere ducting. Ducting Layout To ensure From Atmosphere air is thoroughly mixed with air heated by the duct heater; ducting must be fitted using two 90° bends and the dimensions below. Left Hand Vertical HRV Shown Duct heater to be installed in accordance with the manufacturers instructions Sensor Installation... -
Page 34: Duct Heater Set Point
Duct Heater Set Point With the TJK10K sensor positioned as shown, the duct heater set point must be set to 6˚C using the potentiometer on the front electrical cover of the duct heater. Wiring Installer to ensure correct rated Fuse is fitted and used. Duct Heater ⏚... -
Page 35: Commissioning
Commissioning Once installation of the HRV is complete the ventilation system will need to be commissioned and setup using aura-t controller, Other than the H200 all units are fitted with an on board aura-t. The aura-t™ on board controller is a programmable touch screen controller which monitors and displays the status of a HRV unit. -
Page 36: Run Mode
Gives access to: Eco Mode Switch setup, Summer Bypass, 0-10v Inputs (Room Sensors), Passcode settings, HRV handing settings , Frost setup. Run Mode The passcode is always required to edit fan speeds and is optional for protection of the Setup-Sub-Menu settings. Passcode - 3333 Passcode Screen The aura-t™... -
Page 37: Status Icons
Status Icons If the fan speed is being controlled by an external switch, a sensor or the timer this is indicated by an icon beneath the speed selection buttons being visible. The icons are as follows: An external switch is active and is controlling a function of the unit. The timer is active and is keeping the HRV at Speed 1. -
Page 38: Timer Mode
Timer Mode The controller has a seven day, four events per day timer. The timer is used to automatically change the HRV speed to Setback, Speed 1 at programmed times. An additional function of the timer is that when it activates Setback there is an option to engage Boost Inhibit. - Page 39 Second Press of Timer Tab Displays HRV runtime. Updates displayed fan speeds; used during fan speed cloning. Exit tab to Run Mode...
-
Page 40: Fan Commission
Fan Commission If constant volume fans are fitted to the unit the fan speeds will be displayed as either: • m3/hr • • l/s to 0.1 resolution Fan Commission Mode is entered by pressing the Fan Button for 5 seconds whilst in Run Mode. A flashing item on the screen indicates it is being edited. -
Page 41: Cloning
Cloning Cloning allows the commissioned fan speeds to be copied from one unit to another the using an external aura-t; for connection details refer to the manual supplied with the aura-t. Enter Fan Commission Mode by pressing the Fan button for 5 seconds whilst in Run Mode. The HRV’s fan speeds will be displayed. -
Page 42: Timer Setup
Timer Setup Timer setup is achieved in three steps 1 Day Selection 1. Tap the Timer Mode tab to enter the Timer Mode menu. 2. Tap the Timer Setup Key to commence setup. 3. A ring around the day selected will blink. Change the day that the timers are to be edited by using the Arrow Keys. - Page 43 3 Copy Timers or Exit Timer Setup 1. The flashing Copy icon indicates the option to copy just edited settings to another day. 2. Tap the Enter Key to commence copy procedure. 3. Tap the Exit key to start editing another day’s times or press a second time to exit to Run Mode. 4.
-
Page 44: Timer Defaults
Timer Defaults Event timings: The Speed 2 cannot be set earlier than Speed 1. Events where Speed 1 and Speed 2 are identical are ignored by the timer. Event Days Speed 1 Speed 2 00:00 06:30 08:30 12:00 13:30 18:00 22:30 00:00 00:00... -
Page 45: Controller Setup
Controller Setup Setup menu Enter key. Exit Key. Tap the Setup Menu tab to enter the Setup Menu All the editable settings in the Controller Setup menu are accessed in the same way. Menu navigation is achieved by first Setting Selection and then Editing. Setting Selection Arrow keys are used to select a setting, the setting will flash. -
Page 46: Setup Sub Menu
Setup Sub Menu Enter key. Exit Key. Long Press the Setup Menu tab to enter the Setup Sub Menu, if the Pass code is enabled enter the passcode. The order in which editable settings are displayed is as follows. 1. Eco Mode 2. -
Page 47: Switch Setup Menu
Switch Setup Menu In this menu the installer can configure the function of the HRV unit’s switch inputs S1, S2, S3, LS1 & LS2 (see HRV Product Manual for details) Enter key. Exit Key. Switch Setup menu active. All switch inputs to the HRV unit; S1, S2, S3, LS1 & LS2 can be assigned any of the following functions. Kitchen Boost, Speed 3. -
Page 48: 0-10V Inputs (Room Sensors)
0-10V Inputs (Room Sensors) The 0-10V inputs control fan speed. High Speed Low speed Sensor Set Point Set Point Sensor Min Point High Max Point There are 4 room sensors connections available; each Sensor has two configuration screens, each pair of screens is displayed sequentially. -
Page 49: Passcode Enable / Disable
Set Point High; the upper threshold where the fan speed will go to Speed 3 or Speed 4 depending on the range selected on the previous screen. Sensor Max 10V The above is repeated for Sensors 2, 3 and 4. Passcode Enable / Disable Tap Enter key to edit state. -
Page 50: Frost Setup
Frost Setup This screen is used to select between unbalanced Frost Protection, where only the supply fan stops (default) or balanced where both fans stop. Balanced Frost Protection is for use in properties with an open flue fireplace. Use the Arrow buttons to select between supply fan or both fans. -
Page 51: Default Settings
Default Settings The HRVs are delivered with default factory settings these are detailed below. Constant volume (AR) units will have different flow rate defaults dependant on the performance of their fans. Configurable Item SPEED 1 Setback Supply 25 % Extract 25 % SPEED 2 Continuous Supply... - Page 52 Configurable Item Room Sensor 3 Enable/Disable Enabled Room Sensor Type Sensor Min Point 0V 0000 Set point Low 0060 Set point High 0070 Sensor Max Point 10V 0100 Room Sensor 4 Enable/Disable Enabled Room Sensor Type Sensor Min Point 0V 0000 Set point Low 0800...
-
Page 53: Modbus Configuration Reset
Modbus Configuration Reset There are a number of settings which are adjustable via Modbus, but could be left in a state where it is not possible to adjust them via any other controller. If the Modbus master has been disconnected from the unit it is possible to reset these settings back to default settings by switching DIP Switch 1 to the ON position and cycling the power to the unit. -
Page 54: Maintenance
Maintenance Routine Maintenance All ventilation units require periodic maintenance. Routine maintenance, apart from filter changes, must only be carried out by a suitably qualified and competent person. WARNING: The unit uses a ~230V supply and contains rotating mechanical parts. ISOLATE the unit from mains power supply and allow sufficient time for all moving parts to stop before undertaking any Servicing or Maintenance. -
Page 55: Hrv20
HRV20 Front Cover Removal ISOLATE the unit from mains power supply and allow sufficient time for all moving parts to stop Loosen the two corner screws located on the bottom front of the unit Completely remove the centre screw. Completely remove Front Cover top cap nuts. -
Page 56: Filter Replacement
The connected controller will indicate filter change required in line with the Filter Change Interval settings. Replacement Filters are available from Titon Direct. www.titondirect.co.uk Filters should be replaced with like for like components. Following filter replacement the HRV controller's Filter Warning should be reset, refer to Product Manual of controller for details. - Page 57 HRV20 Titon HRV20 Q Plus Filters are available in two grades G4 x 2 and G4 + F7. Filter media should be replaced like for like. When replacing G4 + F7 filters make a note of the relative positions of the filters before removing.
- Page 58 This unit should be returned to your distributor or to a local recycling service. Respect the local environmental rules. MARKETING DIVISION 894 The Crescent, Colchester Business Park, Colchester, CO4 9YQ Tel: +44 (0) 1206 713800 Fax: +44 (0) 1206 543126 Email: ventsales@titon.co.uk Web: www.titon.com...
-
Page 59: Service Record
Service Record Serviced By Company Name Date Notes... - Page 60 Installed by: ©2023 TITON DO 5837 Issue 02...
Need help?
Do you have a question about the HRV1.3 Q Plus and is the answer not in the manual?
Questions and answers