Table of Contents
Advertisement
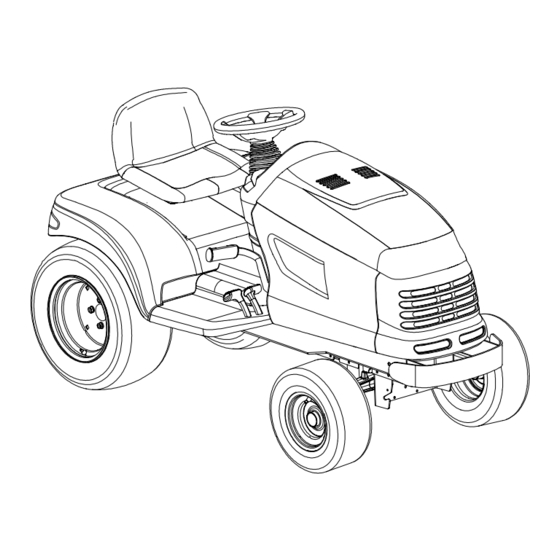
OPERATOR'S MANUAL
3000
TRACTOR
Model 3184
IMPORTANT: READ SAFETY RULES AND INSTRUCTIONS CAREFULLY
Warning
: This unit is equipped with an internal combustion engine and should not be used on or
near any unimproved forest-covered, brush-covered or grass-covered land unless the engine's
exhaust system is equipped with a spark arrester meeting applicable local or state laws (if any). If a
spark arrester is used, it should be maintained in effective working order by the operator. In the State
of California the above is required by law (Section 4442 of the California Public Resources Code).
Other states may have similar laws. Federal laws apply on federal lands. A spark arrester for the
muffler is available through your nearest engine authorized service dealer or contact the service
department, P.O. Box 368023 Cleveland, Ohio 44136-9723.
CUB CADET P.O. BOX 368023 CLEVELAND, OHIO 44136-9723
FORM NO. 770-10290
(9/99)
Advertisement
Table of Contents

Subscribe to Our Youtube Channel
Related Manuals for Cub Cadet 3184


Summary of Contents for Cub Cadet 3184
- Page 1 Other states may have similar laws. Federal laws apply on federal lands. A spark arrester for the muffler is available through your nearest engine authorized service dealer or contact the service department, P.O. Box 368023 Cleveland, Ohio 44136-9723. CUB CADET P.O. BOX 368023 CLEVELAND, OHIO 44136-9723 FORM NO. 770-10290 (9/99)
-
Page 2: Table Of Contents
TABLE OF CONTENTS TRACTOR AND DECK PREPARATION ......2 IMPORTANT SAFE OPERATION PRACTICES ..... 3 CALLING SERVICE INFORMATION . -
Page 3: Section 2: Important Safe Operation Practices
As with any type of power equipment, carelessness or error on the part of the operator can result in serious injury. This lawn mower is capable of amputating hands and feet and throwing objects. Failure to observe the following safety instructions could result in serious injury or death. -
Page 4: Slope Operation
• Never leave a running machine unattended. Always turn off blade(s), place transmission in neutral, set park brake, stop engine and remove key before dismounting. • Turn off blade(s) when not mowing. • Stop engine and wait until blade(s) comes to a complete stop before (a) removing grass catcher... - Page 5 • Use extra care with grass catchers or other attachments. These can change the stability of the machine. • Keep all movement on the slopes slow and gradual. Do not make sudden changes speed direction. Rapid engagement or braking could cause the front of the machine to lift and rapidly flip over backwards which...
- Page 6 • To reduce fire hazard, keep the machine free of grass, leaves or other debris build-up. Clean up oil or fuel spillage. Allow machine to cool at least 5 minutes before storing. • Before cleaning, repairing inspecting, make certain the blade and all moving parts have stopped.
-
Page 7: Section 3: Calling Service Information
Operator’s Manual. The information on the model plate is very important if you need help from your dealer or the Cub Cadet customer support department. Every tractor has a model plate. The model plate is located on the right frame rail behind the right front tire. -
Page 8: Section 5: Safety Labels Found On Your Unit
MOVE THROTTLE CONTROL TO MID POSITION AND TURN KEY OFF. POSITION INDICATOR TO ENSURE SAFE AND PROPER OPERATION OF TRANSMISSION, ONLY USE CUB CADET 737-3120 - 1 QUART 737-3121 - 1 GALLON READ OPERATOR'S WARNING AVOID SERIOUS INJURY OR DEATH •... - Page 9 SECTION 5: SAFETY LABELS FOUND ON YOUR UNIT SAFETY GRAPHIC - LOCATED ON TOP OF CHUTE OPENING OF DECK HANDS AND FEET SAFETY GRAPHIC – LOCATED ON DEFLECTOR CHUTE SAFETY GRAPHIC – LOCATED ON RIGHT SIDE OF DECK SAFETY GRAPHIC – LOCATED ON LEFT SIDE OF MOWER DECK Figure 2 (cont.)
-
Page 10: Section 6: Controls
SECTION 6: CONTROLS Parking Brake Lever PTO Switch Brake Pedal Reverse Pedal Forward Pedal Center Lift Height Indicator Ignition/Light Switch Transmission Release Rod Transmission Oil Fill/Dipstick * Steering Wheel and Seat Removed For Clarity (Not Shown) Figure 3 Fuel Fill Cap Cup Holder Hydraulic Lift Lever Cruise Control Lever... - Page 11 NOTE: References to LEFT and RIGHT indicate that side of the tractor when facing forward while seated in the drivers seat. Reference to FRONT indicates the grille end of the tractor; to REAR, the drawbar end. Steering Wheel The steering wheel is centered on the dash panel.
- Page 12 Ignition / Light Switch To prevent accidental starting and/or battery discharge, remove the key from the ignition switch when the tractor is not in use. The combination lights and ignition switch has four positions. Figure description of each position. On/Lights Start Figure 8 Transmission Release Rod...
-
Page 13: Hour Meter
If the oil level is within the operating range, and the light remains on, contact your Cub Cadet dealer. Low Fuel Indicator The Low Fuel indicator is part of the indicator light pod on the dash panel. -
Page 14: Section 7: Operation
This tractor is equipped with a safety interlock system for the protection of the operator. If the interlock system should ever malfunction, operate the tractor. Contact your authorized Cub Cadet Dealer. The safety interlock system prevents the engine from cranking starting unless brake pedal depressed, and the PTO is “OFF”. -
Page 15: Driving The Tractor
• Place the PTO switch in the “OFF” position. Place the throttle control lever between the “MID” and “FAST” positions. Then turn the ignition key to the “OFF” position. • Remove the key from the ignition switch. Driving The Tractor WARNING: Avoid sudden starts, excessive speed and... -
Page 16: Stopping The Tractor
Before operating the tractor on any slope, walk the slope to look for possible hazards such as rocks. mounds, ruts, stumps or other surface irregularities which could cause the tractor to be upset. Back the tractor with attachment up the steepest portion of each slope you intend to work. -
Page 17: Section 8: Adjustments
SECTION 8: ADJUSTMENTS Seat Adjustment WARNING: Do not adjust the seat when the tractor is moving. Adjusting the seat while the tractor is moving could cause the operator to lose control of the tractor. To allow for the comfort of the operator, an easy to operate adjustable seat is a feature of this tractor. - Page 18 Turning Radius Adjustment This tractor is equipped with power assisted steering which is set at the factory. The turning radius should be equal for both left and right hand turns. If adjustment is necessary please con- tact your authorized Cub Cadet dealer.
-
Page 19: Section 9: Maintenance
SECTION 9: MAINTENANCE Maintenance Chart Operation to be performed Grease front wheel bearings Grease L/R steering knuckles Grease front pivot axle Check engine oil level Change engine oil and filter Check transmission oil level Change transmission oil filter Change transmission oil Check air cleaner &... -
Page 20: Lubrication Illustration
LUBRICATION ILLUSTRATION Cub Cadet 251H EP Grease or equivalent No. 2 lithium grease Engine Oil: See Figure 24 on page 30 Transmission Oil- Cub Cadet Drive System Fluid Plus - ONLY Oil Can (High quality lubricating oil) -
Page 21: General Battery Information
Accessing Engine Compartment The engine compartment can be accessed by lifting the hood upward from the recessed notches of the side panels and tipping the hood forward. If greater access is required, the tractor is equipped with quick release side Lift Hood Here Turn Flip up... -
Page 22: Battery Removal
Battery Removal The battery is located under the dash panel in the frame pedestal. To remove the battery: • Open the tractor hood by lifting it at the notches in the side panels. • Remove the upper baffle of the bulkhead from the front of the dash panel by lifting upward on the locking tab on each side of the... -
Page 23: Tire Inflation
• Left headlight — appoximately 1/4 turn counterclockwise. • Right headlight — approximately 1/4 turn clockwise. Push the bulb inward and turn counterclockwise to remove from the socket. Align a locking post of the bulb base with the notch in the socket, then push the bulb inward and turn clockwise to lock With... - Page 24 For best results, fill to the “FULL” mark on the dipstick as opposed to adding a given quantity of oil. Always check the level on the dipstick before adding more oil. See Figure 18. Refer to the Lubrication Illustration for information regarding the proper type of oil to add to the transmission case.
-
Page 25: Electrical Box
gasket contacts the filter base on transmission housing; tighten the filter an additional 1/2 turn. • Clean area around Transmission Oil Fill/Dipstick to prevent debris from entering the transmission case. • Remove the dipstick and SLOWLY pour oil into the oil fill tube. Fill the transmission case until the oil level reaches the “FULL”... -
Page 26: Off-Season Storage
Always use the same capacity fuse for replacement. Refer Specifications Chart. If the electrical system does not function, check the fuses. To replace a fuse, note the position of the fuse and pull the old fuse from the electical box. Compare the suspect fuse with Figure 21 to determine if is good or bad. -
Page 27: Section 10: Engine Information
SECTION 10: ENGINE INFORMATION KOHLER CO. FEDERAL AND CALIFORNIA EMISSION CONTROL SYSTEMS LIMITED WARRANTY UTILITY AND LAWN AND GARDEN ENGINES The U.S. Environmental Protection Agency (EPA), the California Air Resources Board (CARB), and Kohler Co. are pleased to explain the Federal and California Emission Control Systems Warranty on your utility/lawn/garden equipment engine (herein engine). -
Page 28: Checking Engine Oil Level
LIMITATIONS This Emission Control System Warranty shall not cover any of the following: (a) repair or replacement required because of misuse or neglect, improper maintenance, repairs improperly performed or replacement not conforming to Kohler Co. specifications that adversely affect performance and/or durability and alterations or modifications not recommended or approved in writing by Kohler Co.,... -
Page 29: Adding Engine Oil
Before checking the oil level, clean the area around the oil level dipstick to prevent debris from entering the crankcase. See Figure 23. Always keep the oil level between the “FULL” and the “ADD” marks on the dipstick. See Figure 22. When checking the oil level, the engine must be cold, the dipstick must be withdrawn and wiped clean, then... -
Page 30: Spark Plugs
See (Figure 24), VISCOSITY CHART, below for the proper type of oil. Above +32° F SAE 10W30 SAE 10W40 Below +32° F SAE 5W20 SAE 5W30 Figure 24 The oil filter is located behind the left side panel and is mounted on the engine. - Page 31 To remove the spark plugs, always use a spark plug wrench. Check the after every hours operation. Replace a defective plug with a new plug. Set the spark plug gap at .030 inch. Tighten the plug to 18-22 ft-lbs. See your authorized dealer for the correct replacement plug.
- Page 32 Servicing The Paper Element Inspect an replace the paper element as necessary. See Figure 26. • Loosen the air cleaner cover knob and remove the cover. • Loosen and remove the element cover wing nut. • Remove element cover by lifting straight up.
-
Page 33: Section 11: Mower Deck
SECTION 11: MOWER DECK Deck Leveling Adjustments The 44" mower deck is equipped with ground following front caster wheels and is designed to be operated with caster wheels ground. However, to ensure an even cut on all types of terrain, the mower deck should be properly leveled. - Page 34 Turn the hex lock nut upward (tighten) on the threads of the lift rod to raise the left side of the mower deck. Turn the lock nut down (loosen) on the threads to lower the left side of the mower deck.
-
Page 35: Setting The Cutting Height
• Loosen the hex jam nuts and lock washers on the front lift rod. • From the front of the tractor, turn the front hex lock nuts clockwise to raise the front of the deck, or counterclockwise to lower the front of the deck. - Page 36 Removal and Installation of Mower Deck Place the tractor and mower deck on a firm and level surface having enough room to accomodate the deck and tractor. WARNING: Before begin- ning removal, or installation of the deck, place the PTO switch in the “OFF”...
- Page 37 LH Lift LH Lift Link Notch Slot VIEWED FROM RIGHT SIDE Lift Stop Bracket Release Tab Figure 36A Hold Lift Down Upward Figure 36B Swing Lift Rod Forward Figure 36C LH Lift Link Locked VIEWED FROM RIGHT SIDE Figure 36D Use the hydraulic lift to fully raise the LH and RH lift links (See Fig- ure 37).
- Page 38 Latch Receiver Quick Latch Rod Slots Front Lift Bracket/Rod Ass’y. Figure 39 From the left side of the tractor, slide the mower deck out from under the tractor. B. Installation of Mower Deck NOTE: The LH lift link must be raised to provide clearance for sliding the mower deck under, or out from under, the tractor.
- Page 39 Use the tractor lift system lever to lower the lift links. Unlock the left lift link by sliding the left lift rod fully rearward in the slot of the lift link (See Figure 42). LH Lift LH Lift Link Figure 42 From the front of the tractor, slide the outer pins of the front lift bracket into the latch receiver...
- Page 40 13. Slide the deck drive shaft fully onto the PTO shaft of the tractor (See Figure 45). The auto-lok col- lar of the drive shaft should snap into the locked position when the shaft is properly positioned on the PTO shaft. PTO Shaft Deck Drive Auto-Lok...
- Page 41 When reinstalling the blades, be sure they are installed so that the wind wings are pointing upward toward the top of the deck. Tighten the nuts to 90 to 110 ft-lbs. (122 to 149 N·m). After replacing the blades, apply grease to the exposed threads at the bottom of the spindle bolts to prevent rust buildup.
- Page 42 C. Spindle Belt Replacement A worn spindle belt will affect the quality of cut from the mower deck and should be replaced. Referring to Figures 48, 50 and 52, replace the spindle belt as follows: NOTE: Clean any accumulated grass clippings from the mower deck before beginning belt replacement .
- Page 43 Remove the two hex flange lock nuts and carriage bolts securing the right side of the gear box mounting bracket to the deck plate (See Figure 51). Gear Box Carriage Bolts and Hex Flange Mtg. Bracket Lock Nuts Drive Pulley Spindle Belt Figure 51 Lift gear...
- Page 44 Mowing With Deck A. Normal Mowing WARNING: To avoid possi- ble injury, never direct the discharge material toward bystanders or allow anyone near the machine while operation. Although the area has been supposedly cleared of for- eign objects, small objects may be picked up and dis- charged by the mower.
- Page 45 plug upward so that the hooks engage the deflector hinge rod (See Figure 54). Push the mulching plug fully downward and lower the chute deflector. To remove the mulching plug, raise the chute deflector and lift the mulching plug upward, then outward to disengage from the deck.
-
Page 46: Section 12: Trouble Shooting
SECTION 12: TROUBLE SHOOTING Possible Cause Hard To Start No fuel in fuel tank or carburetor Fuel ine or carburetor clogged Fuel filter plugged Water in fuel Choked improperly. Flooded engine Defective ignition or loose wiring Defective battery Spark plug dirty or improperly gapped Engine Operates Irregularly or Knocks Engine incorrectly timed Spark plug dirty;... -
Page 47: Section 13: Optional Equipment
However, later you may wish to obtain optional equipment or accessories. These items and other allied equipment can be purchased from, and installed by, your authorized Cub Cadet dealer. This tractor can be used for many different types of work, and because it is called on to operate under many different conditions, a variety or equipment is available to adapt it to the requirements of the user. -
Page 48: Section 14: Specifications
Transmission ........Hydrostatic Transmission Oil ....Cub Cadet Drive System Fluid Plus Transmission Oil Capacity . -
Page 49: Section 15: Slope Gauge Warning
SECTION 15: SLOPE GAUGE WARNING: Do not mow on inclines with a slope in excess of 15 degrees (a rise of approximately 2-1/2 feet every 10 feet). A riding mower could overturn and cause serious injury. If operating a walk- behind mower on such a slope, it is extremely difficult to maintain your footing and you could slip, resulting in serious injury. -
Page 51: Limited Warranty - Commercial Use
CUB CADET CORPORATION MANUFACTURER’S ONE YEAR LIMITED WARRANTY (COMMERCIAL USE) The limited warranty set forth below is given by CUB CADET CORPORATION (“CUB CADET”) with respect to new merchandise purchased and used in the United States, its possessions and territories. - Page 52 The provisions as set forth in this Warranty provide the sole and exclusive remedy arising from the sale. CUB CADET shall not be liable for incidental or consequential loss or damages including, without limitation, to any claim for loss of profits, loss of savings or revenue, loss of the use of the...
-
Page 53: Limited Warranty - Residential Use
(3) years for Series 2000 products manufactured after August 1, 1997 for residential users, commencing on the date of original purchase or lease and CUB CADET will, at its option, repair or replace, free of charge, any PTO clutch or mounting hardware found to be defective in material or workmanship provided this product has been operated and maintained as set forth above. - Page 54 CUB CADET. During the period of the Warranty, the exclusive remedy is repair or replacement of the product as set forth above.
-
Page 56: Section 16: Quick Reference Parts
PTO Belt (set of 2) Part Number 737-3030A (10W30) 737-3049 (5W30) KH-47-083-03 FOAM KH-24-083-02 PRE-CLEANER KH-12-050-08 759-3336 Cub Cadet Drive System Fluid Plus 737-3120 - Quart 737-3121 - Gallon 923-3014 44” Mower Deck 759-3939 (3) 44” Mower Deck 954-3098 (1) 954-3084...
Need help?
Do you have a question about the 3184 and is the answer not in the manual?
Questions and answers