Table of Contents
Advertisement
OPERATOR'S MANUAL
3000
TRACTOR
Model 3205
IMPORTANT: READ SAFETY RULES AND INSTRUCTIONS CAREFULLY
Warning
: This unit is equipped with an internal combustion engine and should not be used on or
near any unimproved forest-covered, brush-covered or grass-covered land unless the engine's
exhaust system is equipped with a spark arrester meeting applicable local or state laws (if any). If a
spark arrester is used, it should be maintained in effective working order by the operator. In the State
of California the above is required by law (Section 4442 of the California Public Resources Code).
Other states may have similar laws. Federal laws apply on federal lands. A spark arrester for the
muffler is available through your nearest engine authorized service dealer or contact the service
department, P.O. Box 368023 Cleveland, Ohio 44136-9723.
CUB CADET P.O. BOX 368023 CLEVELAND, OHIO 44136-9723
FORM NO. 770-0836B
(9/98)
Advertisement
Table of Contents

Subscribe to Our Youtube Channel
Related Manuals for Cub Cadet 3205


Summary of Contents for Cub Cadet 3205
- Page 1 Other states may have similar laws. Federal laws apply on federal lands. A spark arrester for the muffler is available through your nearest engine authorized service dealer or contact the service department, P.O. Box 368023 Cleveland, Ohio 44136-9723. CUB CADET P.O. BOX 368023 CLEVELAND, OHIO 44136-9723 FORM NO. 770-0836B (9/98)
-
Page 2: Table Of Contents
SECTION 1: TABLE OF CONTENTS PAGE IMPORTANT SAFE OPERATION PRACTICES ..... . 2 SAFETY LABELS FOUND ON YOUR UNIT ......7 TABLE OF CONTENTS. - Page 3 • Clear the area of objects such as • Do not operate the machine while rocks, toys, wire, etc., which could under the influence of alcohol or be picked up and thrown by the drugs. blade. A small object may have •...
- Page 4 2. SLOPE OPERATION • Avoid starting or stopping on a slope. tires lose traction, Slopes are a major factor related to disengage the blade(s) and proceed loss of control and tip-over accidents slowly straight down the slope. which can result in severe injury or death.
- Page 5 • Remove key when machine is • Keep all nuts, bolts and screws tight unattended to prevent unauthorized to be sure the equipment is in safe operation. working condition. • Never tamper with safety devices. 4. SERVICE Check their proper operation •...
-
Page 6: Calling Service Information
Manual. The information on the model plate is very important if you need help from your dealer or the Cub Cadet customer support department. • Every tractor has a model plate. The model plate is located on the right frame rail behind the right front tire. -
Page 7: Safety Labels Found On Your Unit
SECTION 5: SAFETY LABELS FOUND ON YOUR UNIT IGNITION STOP WARNING AVOID SERIOUS INJURY OR DEATH STARTING INSTRUCTIONS • GO UP AND DOWN S L O P E S , N O T A C R O S S . 1. -
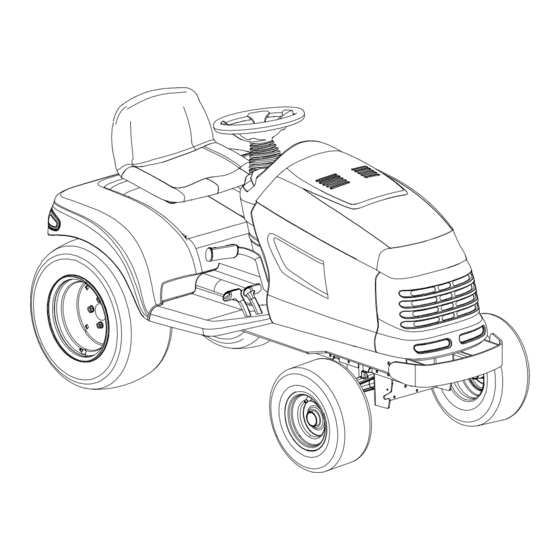
Page 8: Controls
SECTION 6: CONTROLS (Not Shown) Figure 3 Parking Brake Lever Fuel Fill Cap PTO Switch Cup Holder Brake Pedal Hydraulic Lift Lever Reverse Pedal Steering Wheel Tilt Lock Forward Pedal Cruise Control Lever Ignition/Light Switch Choke Lever Center Lift Height Indicator Throttle Lever Transmission Release Rod Seat Adjustment Lever (Not Shown) - Page 9 NOTE: disengage the cruise control. The References to LEFT and brake pedal must be fully depressed to RIGHT indicate that side of the tractor activate the safety interlock switch when facing forward while seated in when starting the tractor. the drivers seat. Reference to FRONT indicates the grille end of the tractor;...
- Page 10 Ignition / Light Switch Fuel Fill Cap To prevent accidental starting and/or The fuel fill cap is located on the battery discharge, remove the key fender to the left of the seat. from the ignition switch when the Cup Holder tractor is not in use.
- Page 11 Check the coolant level and pressure could result in clean radiator screen. If the light stays severe engine damage. on, contact your Cub Cadet dealer. The oil pressure indicator is part of the Battery Charge Indicator indicator light pod on the dash panel.
-
Page 12: Operation
Unscrew operate the tractor. Contact your the fuel cap and fill tank from an authorized Cub Cadet Dealer. The approved gasoline container. safety interlock system prevents the engine from cranking starting... - Page 13 • Place the PTO switch in the “OFF” • Slowly depress the forward control position. Place the throttle control pedal until the desired speed is lever in the “SLOW” position and achieved. allow the engine to idle for about • Lightly push the cruise control lever one minute.
- Page 14 • Pull the PTO switch to the “RUN” discharged by the mower. position. • Advance the throttle lever to the This tractor can be equipped with one operating speed (full engine speed). of Cub Cadet’s high quality mowing...
-
Page 15: Adjustments
The following information will area a second time to get a clean cut. be helpful when using a Cub Cadet following practices will help mowing deck with your tractor. eliminate streaking: For best results it is recommended • Mow the area more often so the that the first two laps should be cut grass doesn’t get too tall and heavy. - Page 16 Steering Wheel Tilt Adjustment Steering Axle WARNING: Do not adjust Hex Lock Nut the steering wheel when the tractor is moving. Adjusting the steering wheel while the tractor moving could Tie Rod cause the operator to lose Hex Jam Nut control of the tractor.
-
Page 17: Maintenance
Change air cleaner † † † paper cartride Change Coolant Every 400 hrs.-Contact your Cub Cadet dealer ‡ Change oil and filter after first 8 hours † More often under dusty conditions †† Clean every 25 hours or more often under dusty or dirty conditions... -
Page 18: Lubrication Illustration
SECTION 10: LUBRICATION ILLUSTRATION Cub Cadet 251H EP Grease or equivalent No. 2 lithium grease Engine Oil: See Figure 27 on page 28 Transmission Oil-See your Cub Cadet Dealer Oil Can (High quality lubricating oil) - Page 19 Accessing Engine Compartment panels. To remove the quick release side panels (see Figure 16): The engine compartment can be accessed by lifting the hood upward • Open the hood by pulling up. from the recessed notches of the side • Flip quick release fasteners up and panels and tipping the hood forward.
- Page 20 Battery Removal Frame Pedestal The battery is located under the dash panel. The top of the battery can be accessed by lifting the hood, removing the upper bulk head and reaching Battery between the bulk head and the dash panel. There is a rubber strap holding the battery in place.
- Page 21 • All batteries discharge during • Pull both locking tabs away from storage. Keep the exterior of the light bulb and pull wire harness battery clean, especially the top. A away. See Figure 19. dirty battery will discharge itself • Remove the light bulb from the more rapidly.
- Page 22 Tire Inflation Check the oil level of the transmission case before each use to see that it is Keep the pneumatic tires properly filled to the correct level. Before inflated. Over-inflation will cause checking the transmission oil level, operator discomfort. Under-inflation clean the area around the Transmis- will cause short tire life.
- Page 23 WARNING: The oil fill plug/ NOTE: Do not reuse the transmission dipstick must be installed oil. Contaminated transmission oil can securely into the fill tube at damage the hydro transmission. all times when the engine is Please dispose of used oil operating.
- Page 24 Be sure all fittings are free from dirt and paint so the lubricant is certain to enter the bearing. Open Relay Using a pressure lubricating gun, always force the lubricant through the full length of each bearing until it emerges at the end, carrying with it the worn lubricant and any dirt that may have entered the bearing.
-
Page 25: Engine Information
WARNING: Never store the • Remove the fuel cap and siphon the the bulk of the fuel into an approved tractor with fuel in the tank container. Then run the engine until indoors poorly it starts to falter and use the choke ventilated enclosures, where to keep the engine running until all fuel fumes may reach an... - Page 26 (d) If you have any questions regarding your warranty right and responsibilities, you should contact Kawasaki Motors Corp., U.S.A., Consumer Services Department, 5080 36th Street S.E., Grand Rapids, MI 49512, 616-949-6500 or in the case of California residents, you may contact the California Air Resources Board, 9528 Telstar Avenue, El Monte, California 97731.
- Page 27 Cleaning The Engine WARNING: Keep the muf- This tractor has a liquid-cooled engine. fler area clean. Before running Air must be able to circulate freely the engine, clean the muffler through the engine radiator. Keep this area to remove all combusti- area free of accumulated dirt and ble debris.
- Page 28 Adding Engine Oil • Remove the oil filler cap from the oil fill tube and SLOWLY pour in oil. Fill the crankcase until the oil level Oil Filler Cap Radiator Cap reaches the “FULL” mark on the (Next to Air Filter) dipstick.
- Page 29 Run the engine for a few minutes to • Apply a light coating of clean oil on the gasket of the new oil filter. allow the oil in the crankcase to warm Thread the filter on by hand until up. Warm oil will flow more freely and the gasket contacts the oil filter carry away more of the engine adapter, then tighten the filter an...
- Page 30 Changing The Air Cleaner • Remove the aircleaner cover knobs and cover. • Remove the foam precleaner by Knobs sliding it up off the paper element. • Wash the precleaner in warm water Washers with detergent. Rinse the precleaner thoroughly until all traces of the Air Cleaner detergent are eliminated.
- Page 31 Engine Cooling System Hot Weather Operation This engine is equipped with a highly If the lowest ambient temperature will efficient pressurized cooling system not fall below 32°F, distilled water with using a thermostat to maintain an corrosion and rust inhibitor additives is optimum operating temperature.
- Page 32 • Visually check coolant level in Bottom of radiator. The coolant level must be Filler Neck maintained at the bottom of the filler neck. • Periodically check the recovery tank for cracking and damage. Proper operation of the cooling system requires that the coolant level be maintained between the HIGH “H”...
-
Page 33: Trouble Shooting
SECTION 12: TROUBLE SHOOTING Possible Cause Possible Remedy Hard To Start No fuel in fuel tank or carburetor Fill the tank with fuel. Check the fuel line, carburetor and fuel filter. Fuel ine or carburetor clogged Clean the fuel line and carburetor with a commercial carburetor cleaner. -
Page 34: Optional Equipment
However, later you may wish to obtain optional equipment or accessories. These items and other allied equipment can be purchased from, and installed by, your authorized Cub Cadet dealer. This tractor can be used for many different types of work, and because it is called on to operate under many different conditions, a variety or equipment is available to adapt it to the requirements of the user. -
Page 35: Specifications
Transmission ........Hydrostatic Transmission Oil ....See your local Cub Cadet Dealer Transmission Oil Capacity . -
Page 36: Quick Reference Parts
SECTION 15: QUICK REFERENCE PARTS Description Part Number Engine Oil 737-3029 (SAE 30) 737-3030A (10W30) 737-3049 (5W30) Air Filter CARTRIDGE KM-11013-2139 FOAM KM-11013-2114 PRE-CLEANER Engine Oil Filter KM-49065-2071 Spark Plug KM-BMR4A Transmission Oil Drive System Plus See your local Cub Cadet dealer Transmission Oil Filter 923-3014... -
Page 37: Slope Gauge
SECTION 16: SLOPE GAUGE WARNING: Do not mow on inclines with a slope in excess of degrees (a rise of approximately 2-1/2 feet every 10 feet). A riding mower could overturn and cause serious injury. If operating a walk- behind mower on such a slope, it is extremely difficult to maintain your footing and you could slip, resulting in serious injury. -
Page 40: Limited Warranty
This limited warranty for residential users, covers any defect in materials or workmanship in your Cub Cadet equipment for two years from the date of purchase for the first user purchaser. We will replace or repair any part or parts without charge through your authorized Cub Cadet dealer.
Need help?
Do you have a question about the 3205 and is the answer not in the manual?
Questions and answers