
Related Manuals for Waterfall Audio Elora Evo LR


Summary of Contents for Waterfall Audio Elora Evo LR
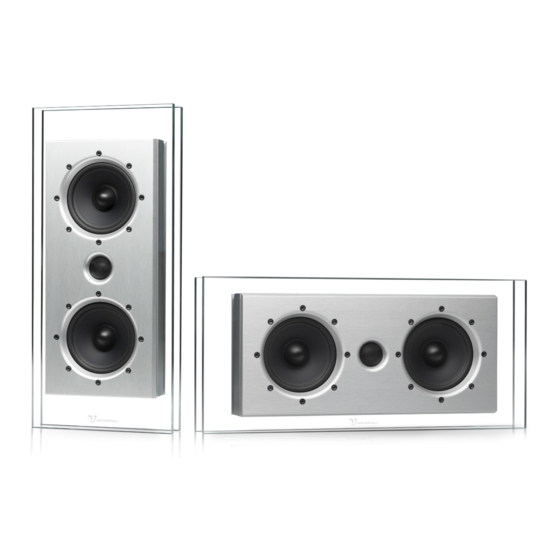
- Page 1 M A D E I N F R A N C E Elora Evo LR Elora Evo Center INSTRUCTIONS MANUAL COMPACT SPEAKER ELORA EVO - CENTER & LR...
- Page 2 INFORMATIONS & OPERATING INSTRUCTIONS MUST BE CONSULTED BEFORE USE. TO BE KEPT AND PASSED ON IN THE EVENT OF RESALE. Thank you for choosing Waterfall Audio speakers. Our deliberate choice for aesthetics and performance constantly guides us towards cutting-edge technologies...
- Page 3 ELORA EVO CENTER INSTALLATION WITH WALL BRACKET (included) The speaker's diffusion parameters allow it to be installed at different heights depending on your installation and integration criteria. The minimum possible height of the bottom of the speaker in relation to the floor is 600mm, the maximum is 1500mm (see next page for the positioning of the wall bracket).
- Page 4 = distance floor/ Distance bottom of fixing holes speaker / floor (in mm) (in mm) Wall bracket 1057 1000 1157 1100 1257 1200 1357 1300 1457 1400 1557 Floor 1500 1657 STEP 1 The speaker weighs 7kg. It is your responsibility to ensure that this load can be accepted and to define the appropriate technical solution...
- Page 5 ELORA EVO CENTER ON WALL INSTALLATION WITH VESA SUPPORT 75cm (not included) If the speaker is to be positioned at a height (over 2 m), we recommend using a compatible VESA75 stand to orientate it towards the listener and maintain optimum frequency response. The rear of the Elora Evo Center speaker has a VESA75 footprint.
- Page 6 STEP 1 Insert the screws into the wall to attach the bracket. Wire up the loudspeaker (make sure to respect the + and - polarities). Attach it to the VESA bracket using the 4 screws on the back of the speaker, Make sure that the speaker cable is not trapped and that the cables do not come into contact...
- Page 7 ELORA EVO CENTER INSTALLATION ON SHELF STAND (optional) The Elora Evo Center has an optional shelf stand for installation on a flat surface such as a low cabinet or shelf. The diffusion parameters allow positioning at different heights depending on your installation and integration criteria. The minimum possible height from the bottom of the shelf stand to the floor is 200mm;...
- Page 8 STEP 1 Remove the 2 screws at the back of the speaker. Place the shelf stand in front of the 2 holes and replace the screws. Make sure it is firmly attached to the speaker. STEP 2 Wire the loudspeaker (make sure that the + and - polarity are correct).
- Page 9 ELORA EVO LR ON WALL INSTALLATION WITH WALL BRACKET (INCLUDED) The speaker's diffusion parameters allow it to be installed at different heights depending on your installation and integration criteria. The minimum possible height from the bottom of the speaker to the floor is 900mm;...
- Page 10 = distance Distance bottom of floor/mounting holes speaker/floor (in mm) (in mm) Wall Bracket 1269 1000 1369 1100 1469 1200 1569 1300 1669 1400 1769 Floor STEP 1 The speaker weighs 7 kg. It is your responsibility to ensure that this load can be accepted and to define the appropriate technical solution for fixing the speaker to the wall.
- Page 11 VESA75 support to orientate it towards the listener and maintain optimum frequency response. The rear of the Elora Evo LR speaker has a VESA75 footprint. Example shown here with a Lindy 40875 bracket and a 12° angle. Depending on the type of bracket, it may be necessary to use the optional spacer for cable routing (consult us if necessary).
- Page 12 STEP 1 Insert the screws into the wall to attach the bracket. Wire up the loudspeaker (make sure to respect the + and - polarities). Attach it to the VESA bracket using the 4 screws on the back of the speaker. Make sure that the speaker cable is not trapped and that the cables do not come into contact with a metal...
- Page 13 ELORA EVO LR INSTALLATION ON SHELF STAND (optional) The Elora Evo LR has an optional shelf stand for placement on a flat surface such as a low cabinet or shelf. The diffusion parameters allow positioning at different heights depending on your installation and integration criteria.
- Page 14 STEP 1 Remove the 2 screws at the back of the speaker. Place the shelf stand in front of the 2 holes at bottom of speaker and replace the screws Make sure it is firmly attached to the speaker. STEP 2 Wire the loudspeaker (make sure that the + and - polarity are correct).
-
Page 15: Connection To Your Amplifier
Never connect two speakers in parallel (or in series) on the same channel. Never connect your speakers to the mains The "Waterfall Audio" cable is made from very high quality deoxygenated copper that is particularly well suited to your speakers. It is available from your dealer. - Page 16 SET UP & CONFIGURATION IN HOME CINEMA MODE Your A/V processor has a "Sub Pre Out" output, connect it via the modulation cable (not supplied) to one of the two "Low level Input" inputs on your subwoofer (either L or R). If it has an XLR output, connect it via an XLR cable (not supplied) to the XLR input on your subwoofer.
- Page 17 SET UP OF YOUR WATERFALL SUBWOOFER • Switch "24-12-LFE" to the LFE position (note: on LFE the FREQ button is inactive, the crossover frequency is generated by the processor). • Adjust the volume ("LEVEL") as required • PHASE: depending on the processor's bass management settings and certain distance parameters, phase inversion (180°) may be necessary.
- Page 18 HIFI SET-UP AND CONFIGURATION (amp with PRE-OUT outputs) Connect the PRE OUT outputs of your stereo amplifier to the two "Low Level Input" inputs of the subwoofer amplifier. Do not use the Hi Level Inputs. Connect the speakers, making sure that the polarity is correct. Never connect two speakers in parallel on the same channel.
- Page 19 HIFI SET-UP AND CONFIGURATION (amplifier without PRE-OUT outputs) Speaker Speaker SET UP OF YOUR WATERFALL SUBWOOFER • Switch "24-12-LFE" to position 12dB • Adjust the FREQ knob towards 2H as shown in the diagram • PHASE: 180° position • Adjust the volume (”LEVEL”) to your liking - 18 -...
- Page 20 Waterfall amplifiers have a 2 years warranty (parts & service). Check more on www.waterfallaudio.com (warranty section). THIS DOCUMENT MUST BE PROVIDED IN THE EVENT OF RESALE WATERFALL AUDIO ZA les praderies - 83 570 Carcès - France waterfallaudio.com Made in France, 5 years warranty on speakers, 2 years warranty on amplifiers (parts& service).
Need help?
Do you have a question about the Elora Evo LR and is the answer not in the manual?
Questions and answers