
Related Manuals for Munters HM3 Humimax


Summary of Contents for Munters HM3 Humimax
- Page 1 Original instructions User manual HM3 Humimax™ Evaporative humidifier/cooler TEN-HM3-B1506 © Munters Europe AB 2015...
-
Page 3: Table Of Contents
4.11 Connection of Modbus TCP/IP 12 Contact Munters ......communication ...... -
Page 4: Introduction
1.2 Warranty The warranty is based on the terms of sale and delivery of Munters. The warranty is not valid if repairs or modifications are carried out without the written agreement of Munters, or if the unit does not operate under the conditions agreed with Munters. -
Page 5: Conformity With Directives And
Remove all packaging material from the unit, and make sure that no damage has occurred during ■ transportation. Any visible damage must be reported in writing to Munters within 3 days and prior to installation of ■ the unit. Dispose of the packaging material according to local regulations. -
Page 6: Safety
Highlights supplementary information for optimal use of the unit. 2.2 Intended use The unit delivered by Munters must only be used for the treatment of air. This includes cooling and humidifying the air. Any other use of the unit, or use which is contrary to the instructions given in this manual, can cause personal injury and damage to the unit and other property. - Page 7 HM3 Humidifier W W W ARNING! ARNING! ARNING! Before doing any service or maintenance work on the unit make sure that all electrical equipment has been disconnected from the power supply, and secured against reconnection. The unit is connected to high voltage which can cause serious injury or death.
-
Page 8: Product Design
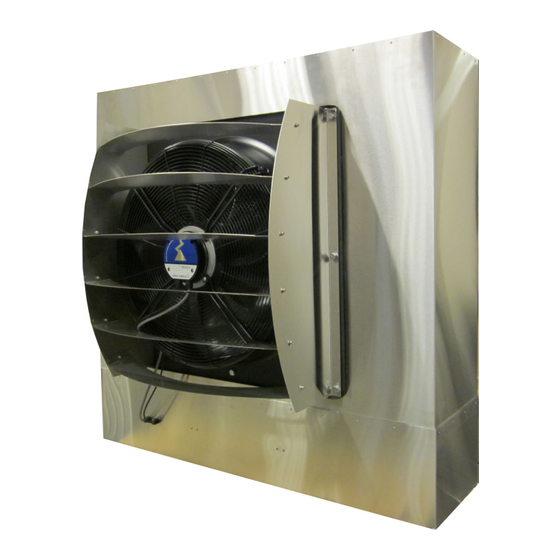
3 Product design 3.1 Product description The Munters Humimax maintains a required humidity or temperature, depending on the selected operation mode and the technical possibilities. The main components are a stainless steel casing, an evaporative humidification pad and a high performance fan for which the speed is regulated to achieve the selected setpoint. -
Page 9: Function
HM3 Humidifier 3.3 Function The unit can be started directly from the control panel, by a weekly schedule in the controller or by a remote switch. It can as standard be connected to a Modbus TCP/IP or RS485 communication network, and optionally through BACnet. -
Page 10: Installation
HM3 Humidifier 4 Installation 4.1 Safety W W W ARNING! ARNING! ARNING! The unit must never be connected to a voltage or frequency other than that for which it was designed. Refer to the unit label. Line voltage that is too high can cause an electrical shock hazard and damage to the unit. Sharp steel edges on the unit can cause cuts. -
Page 11: Install The Unit On The Consoles
HM3 Humidifier 3. Non solid walls have to be reinforced to carry the weight of the unit. For weight information, see 8.1, Dimensions and weight. 4. The safety of the installation must always be verified before operation. NOTE! The unit must be positioned level within 2° in both directions. Unit A (mm/inch) B (mm/inch) -
Page 12: Electrical Connections
HM3 Humidifier CA UTION! UTION! UTION! Do not install the unit above any electrical or other moisture sensitive equipment. 3. Remove the bottom plate from the unit. 4. Attach the unit to the consoles with the included screws, nuts and washers. 5. -
Page 13: Remote On/Off Switch Connection
HM3 Humidifier 4.7 Remote On/Off switch connection To use remote start when the humidifier is in Auto mode, an external switch can be connected to the controller. Figure 4.2 Connection of remote switch Connect a normally open (NO) switch to terminals X3 and M, see Figure 4.2 . 4.8 Humidity/temperature sensor connection CA UTION! UTION! -
Page 14: Connection Of Bacnet Communica
HM3 Humidifier 1. Connect the wires between the connector and the sensor, Pin 1 = -RH, Pin 2 = -T, Pin 3 = +RH 2. Note the jumper cable between +RH and +T 3. Attach the terminal (2) to the connector (1) 4. -
Page 15: Connection Of Control System Hmi
HM3 Humidifier 4.12 Connection of control system HMI INFO ALARM DOWN ENTER Figure 4.4 Climatix control system HMI Connect the display plug to the socket marked HMI on the back of the humidifier. Install the HMI-holder in a suitable position. Position the HMI so that the status indication LED is visible. -
Page 16: Water Supply And Drain
HM3 Humidifier 4.13 Water supply and drain Connect the supplied flexible hose to the unit, and to the mains water supply through the water filter and the shut-off valve. The valve is delivered together with the fitting for a 1/2" pipe. The minimum water pressure is 1 bar, maximum pressure 8 bar. - Page 17 HM3 Humidifier Figure 4.6 Chloride tablet dosing system Install the bromide chloride tablet dosing system DT1: Attach the bracket in the holes of the frame underneath the evaporative pad. ■ Position the doser so that the bottom of the container is approximately 5 mm/0.2 inch above the bottom ■...
-
Page 18: Operation
HM3 Humidifier 5 Operation 5.1 HMI Operation The Human Machine Interface (HMI) is used to display values and parameters, and to input settings and commands to the control system. INFO ALARM DOWN ENTER Action Function Press Scroll up or increase an input value. Press and hold Press and hold for more than 1.5 second enables the acceleration function to roll up or increase the value rapidly. -
Page 19: Hmi Light Indications
HM3 Humidifier 5.2 HMI Light indications Indication Function INFO Blinking green StdBy, Start-up/Stop sequence, Override, Fanoverrun, Constant green Run mode Constant orange Alarm/Immediate stop Blinking Wiring test mode green/orange Blinking red/orange Configuration mode ALARM Blinking red Indicates active and unacknowledged alarm exists. Constant red Indicates active alarms exist but all alarms have been acknowledged. - Page 20 HM3 Humidifier Position Icon Explanation Key INFO Key ALARM Key ESC Indicates there are characters not shown in this line. If a string is longer than the length of the line, the “...” will be displayed at the end of the line. If this line is highlighted, it will scroll automatically character by character.
-
Page 21: Settings
HM3 Humidifier 5.4 Settings The following examples show how to change settings in the menus. If there is an input value in a line, the whole line will be highlighted when the line is selected. Press ENTER, the input value will be highlighted allowing the user to change the value using the UP and DOWN keys. -
Page 22: Pre-Start Checks
4. Set the batch drain according to the recommended interval for your water quality. In cases with a high level of organic dust in the air the batch drain interval time must be adjusted, see Table 5.4. The factory setting is 2.5 hours interval. Water treatment can be necessary in some cases, contact Munters for more information. -
Page 23: Controller Menus
HM3 Humidifier 5.7 Controller menus 5.7.1 Start page NOTE! The contents of the menus can vary depending on the unit configuration. All settings and changes are done on the control system HMI. Press the “INFO” button to go to the Main index. Go back one page using the “ESC”... -
Page 24: Main Index
HM3 Humidifier 5.7.2 Main index Main index Operating mode ► Display and set system status, 5.7.4, Operating mode Temperature ► Display/set operational values in cooler mode, 5.7.5, Temperature and humidity Humidity ► Display/set operational values, 5.7.5, Temperature and humidity Global functions ►... -
Page 25: Operating Mode
HM3 Humidifier 5.7.4 Operating mode To display system operational status, go to Main index>Operating mode. Operating mode Menu items depend on unit configuration Act Op Status Unit status (Off, Run, Manual run, Stop Alarm/Emergency) Act Op Mode Actual operation mode Op Mode Switch Set the unit in manual On/Off or Auto for time schedule or remote start. -
Page 26: Temperature And Humidity
HM3 Humidifier 5.7.5 Temperature and humidity Temperature Temperature Sensor Actual temperature value from the sensor. Temperature Setpoint Change setpoint value for the unit in cooler mode. Cooler Current output from cooling regulator Setpoints/settings ► Go to menu for humidity and temperature setpoints and settings. Humidity Humidity Sensor Current humidity value from the sensor. - Page 27 HM3 Humidifier ►Setpoints/settings Menu items depend on unit configuration. Loop Controllers* ► Settings for Loop Controllers Drain Timer Shutdown delay after no need for humidification. Factory setting 24 hours Run dry protect.* Time for pump run dry protection. Factory setting 5 minutes Supply valve off delay* Delay for valve off after level full.
-
Page 28: Global Functions
HM3 Humidifier 5.7.6 Global functions For alarm handling, go to Main index>Global functions. Global functions Alarm handling ► Read and acknowledge alarms Manual mode* Indicates if some function is manually forced Man.mode, Alm* Manual mode alarm On/Off Set I/O to Auto* Forces all functions to Auto Run Indicator* On/Off... - Page 29 HM3 Humidifier ►Configuration Config Download or Done/Man Unit size 10000/5000/2000 System Type Humidifier/cooler Global functions ► Go to menu Options ► Go to menu ConfigOptions Factory setting, do not change. Restart controller Restarts the controller and sets the current parameters to active ►►Global functions General: Unit system...
- Page 30 HM3 Humidifier ►►Options Flow Indicator Yes/No BMS StandBy Yes/No Leakage detector Yes/No Leakage Valve Yes/No Fire alarm Yes/No Emergency stop Yes/No Aux Alarm Input No/1 Alarm/2 Alarm Restart controller Restarts the controller and sets the current parameters to active NOTE! When configuration is finished, always scroll to Restart the controller and press Enter to confirm.
-
Page 31: Setting On/Off Weekly Schedule
HM3 Humidifier 5.7.8 Setting On/Off weekly schedule Go to menu Main index>Operating mode>Schedule. Figure 5.2 Setting of schedule Day schedule is “Active” for the current day in the controller, and “Passive” for the other days. To set the schedule, always start at time 00.00 (midnight) for each day. NOTE! Never change Time 1, 00:00 for each day of the week. -
Page 32: Restore Saved Parameters
HM3 Humidifier Examples: Figure 5.3 Daytime operation between 8:00 and 18:00 Figure 5.4 Night operation between 18:00 and 8:00. 5.7.9 Restore saved parameters To restore parameters saved in the controller from the factory, or from the on site commissioning, go to Setup>System overview>Save/restore>Par. -
Page 33: Service And Maintenance
HM3 Humidifier 6 Service and maintenance 6.1 Safety W W W ARNING! ARNING! ARNING! Before doing any service or maintenance work on the unit make sure that the main power switch has been set to Off, and that the power plug is pulled out from the socket. The unit is connected to high voltage which can cause serious injury or death. -
Page 34: Maintenance Procedure
HM3 Humidifier 6.3 Maintenance procedure 1. Shut down the humidifier by setting the Op Mode Switch on the Start page to Off. 2. Wait until the shutdown procedure is complete, the fan has stopped rotating and the display reading for Act Op mode is Off. - Page 35 HM3 Humidifier 11. Clean under the pump where the water is pumped in with a bottle brush or similar, and make sure that the water inlet is clean. 12. If an optional air pre-filter is attached, clean it with a vacuum cleaner or with water. 13.
-
Page 36: Fault Tracing
Make sure that the humidifier is operating and that the evaporative pad is wet over its entire surface. Red Alarm lamp is flashing Alarm text in display. Rectify if possible, or contact Munters. The alarm is reset in the HMI under Main index>Global functions>Alarm handling. -
Page 37: Technical Specification
HM3 Humidifier 8 Technical specification 8.1 Dimensions and weight HM3 size 2000 5000 10000 A (mm/inch) 550/21.7 650/25.6 750/29.5 B (mm/inch) 350/13.8 350/13.8 350/13.8 C (mm/inch) 775/30.5 1275/50.2 1275/50.2 D (mm/inch) 730/28.7 730/28.7 1330/52.4 Weight dry (kg/lbs) 37/82 57/126 86/190 Weight wet (kg/lbs) 45/100 66/146... -
Page 38: Technical Data
HM3 Humidifier 8.3 Technical data HM3 size 2000 5000 10000 Airflow, maximum (m 2000 5000 10000 Airflow, maximum (cfm) 1175 2940 5885 Water tank size (litres/gallons) 7/1.8 7/1.8 13/3.4 Electrical data Rated power* (W) at 230 V 50 Hz 770/900 Rated current* (A) at 230 V 50 Hz 4.8/3.7 Rated power* (W) at 120 V 60 Hz... -
Page 39: Dimensioning
HM3 Humidifier 9 Dimensioning To calculate the level of humidity required in a room, the following parameters need to be taken into account: Ventilation airflow + leakage infiltration into the building Required room humidity (g/kg) Incoming air humidity (g/kg) △X (g/kg) Added humidity from humidifier Loss of humidity in room during process (g/h) - Page 40 HM3 Humidifier A=Added humidity △X (g/kg) T=Room temperature °C 10 to 90% is the relative humidity in the room Gray area indicates freezing condition Figure 9.1 Capacity diagram Example calculation of required humidifier airflow For premises with a total air replacement rate of twice an hour and the room volume (WxLxH)=20x40x4=3200 m This makes the ventilation airflow q =2x3200=6400 m...
- Page 41 HM3 Humidifier Cooling effect The evaporative principle also results in the humidifier having a cooling effect. The temperature reduction in the air flow is calculated by the formula: △t=2.5(△X) In the example, △t=2.5*2.8=7 °C The maximum cooling power is calculated by the formula: =2.5*△X *q*1.2/3600 cool In the example, P...
-
Page 42: Simplified Dimensioning
HM3 Humidifier 10 Simplified dimensioning This is a simplified method of estimating the required capacity. Contact your Munters representative for more information and help with the dimensioning. °C Figure 10.1 Comfort zone for humans working Example 1 Outdoor temperature: 0 °C... - Page 43 HM3 Humidifier Example 3 Outdoor temperature: –20 °C Outdoor humidity: 40 %RH Air changes: 2 per hour Desired temperature: 22 °C Desired humidity: 50 %RH Maximum permitted room volume for each model: HM3 2000 up to 270 m HM3 5000 up to 675 m HM3 10000 up to 1350 m Multiple units should be used if needed.
-
Page 44: Scrapping
HM3 Humidifier 11 Scrapping Evaporative pads and complete units must be scrapped in accordance with applicable legal requirements and regulations. Contact your local authorities. Scrapping TEN-HM3-B1506... -
Page 45: Contact Munters
BELGIUM Munters Belgium nv Blarenberglaan 21c Tel: +3215285611 Air Treatment B-2800 Mechelen service@muntersbelgium.be www.muntersbelgium.be CZECH REPUBLIC Munters CZ, organizacni slozka Slevacská 2368/68 Tel: +420 775 569 657 info@munters-odvlhcovani.cz Air Treatment CZ-615 00 BRNO www.munters-odvlhcovani.cz DENMARK Ryttermarken 4 Tel: +4544953355... - Page 48 www.munters.com...
Need help?
Do you have a question about the HM3 Humimax and is the answer not in the manual?
Questions and answers