
Related Manuals for Munters HCUw


Summary of Contents for Munters HCUw
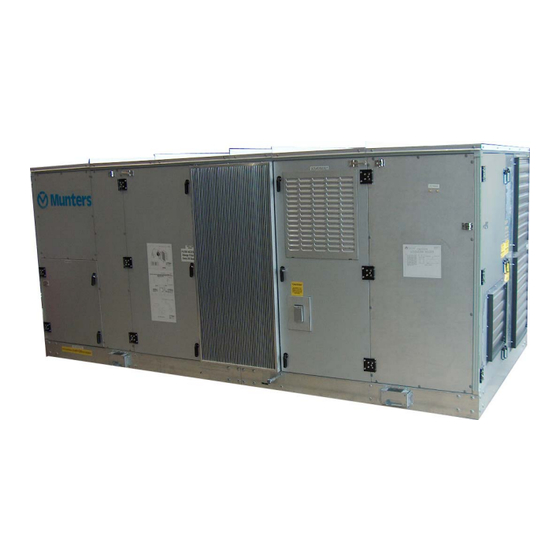
- Page 1 OPERATING & MAINTENANCE MODEL HCUw R410a Refrigerant OM 0009 - 06 Patent Nos. 6,711,907 & 6,557,365 Additional US, International and Chinese patents pending...
-
Page 2: Table Of Contents
Table of Contents Cover Sheet Table of Contents Introduction Safety Installation (pg.3) Lifting and Inspection Positioning the Unit Installing the Hoods Connecting the Supply Air Duct Connecting the Condensate Drain Electrical Connections Connecting the Control System Start-up Checks Operating Instructions (pg.6) Controls Starting the Unit... -
Page 3: Introduction
1 Introduction This manual includes installation, operation, and troubleshooting instructions for the HCU unit. The ® engineers at Munters DryCool have designed the HoneyCombe dehumidifier using state-of-the-art technology. The unit is durable, simple to operate, and needs very little maintenance. -
Page 4: Safety
2 Safety Munters is concerned about the safety of anyone who uses or services the HCU unit. Some of the parts inside the HCU can be dangerous if an untrained person tries to service the unit. Throughout this manual, we have pointed out some of the hazards that may occur in the use of the HCU. We have also listed the precautions that you should take to avoid these problems. -
Page 5: Installation
2. When the unit arrives, check it immediately for signs of shipping damage. If you do notice any damage, report it to the shipping company and to Munters right away. 3. The control enclosure is mounted behind a door on the side of the unit. The electrical controls are located directly behind the control panel door. -
Page 6: Connecting The Supply Air Duct
c. The third and fourth hoods mount under the top 2 hoods in like fashion. 3.4 CONNECTING THE SUPPLY AIR DUCT a. Duct connections must be completed according to U.M.C., A.M.C.A., S.M.A.C.N.A., and/or state and local code requirements. Refer to the plans and specifications supplied with the machine. b. -
Page 7: Connecting The Control System
incorrectly wired. 3.7 CONNECTING THE CONTROL SYSTEM The unit is controlled by a Novar IOM or Danfoss controller with relay outputs. Digital inputs monitor faults. With this method of control, the fan relay on the IOM turns the unit on. The relays on the BMS IO card call for stages of cooling, dehumidification and heating as conditions require. -
Page 8: Operating Instructions
4 OPERATING INSTRUCTIONS 4.1 CONTROLS The unit is controlled and monitored by a Novar IOM or Danfoss controller. The HCU has a microprocessor to supervise and control all internal functions. The IOM provides eight dry contact closures to control the supply fan and stages of: cooling, dehumidification, and heating as shown on the wiring diagram. - Page 9 Operation of the Carel pCO2 Microprocessor The pCO2 microprocessor has a keyboard and display to allow the operator to view the status of various functions, parameters with authorization to up to three levels of security, and to troubleshoot problems that may occur. Alarm (bell icon) - is used to view and alarm.
- Page 10 PostCool Temp: XXX.X º F Leaving Temp: XXX.X º F CURRENT GRAIN STATUS Outside: PostCool: Leaving: MISC OUTPUTS Coil Damp: ON/OFF WhlD: ON/OFF Afterheat Stage: ON/OFF Supply Heat Out: 000.0 - 100.0% When the unit is in the alarm mode, the alarm button on the CURRENT ALARMS microprocessor will be illuminated in red.
- Page 11 temperature rises above the setpoint. OUTSIDE TEMPERATURE FAN SHUTOFF ***ALARM*** Low suction pressure is indicated when the suction pressure drops below 25 psi. The compressor is locked out. LOW SUCTION PRESSURE COMPRESSOR A NO MORE ALARMS PRESS DOWN TO REVIEW PRESS ENTER TO CLEAR DATE / TIME Date / Time Settings...
- Page 12 DIGITAL INPUTS Digital inputs may be manually forced on to simulate a call from the control system to bring on any of the functions. To do this, the CONTROL STATE must be changed to MANL. Now changing the INPUT STATE to CLOSED will initiate that function. DIGITAL INPUT #1 CONTROL STATE : AUTO / MANL INPUT STATE: OPEN / CLOSED...
- Page 13 Wheel Motor fault ID13 Analog Inputs Sensor/transmitter Location Compressor A Discharge Compressor A liquid line Compressor A Suction Compressor A suction line Ambient Humidity In front of DX coil Calculated ambient grains/lb Ambient Temperature In front of DX coil Post cool temperature Centered on leaving side of DX coil Wheel leaving air temp After supply fan (no afterheat);...
- Page 14 Compressor A: 99gr When outside grains is ≥ SPACE SET POINT grains + this value, stage 1 DH will energize Compressor B: 99gr When outside grains is ≥ SPACE SET POINT grains + this value, stage 2 DH will energize DEHUM OVERRIDES When only one stage of DH control is used, a call for DH will energize Com A.
- Page 15 WHEEL CLEAN CYCLE This energizes the wheel motor and react fan to clean the wheel during long periods of off time Cycle Delay: 150 hrs Clean cycle will run when supply fan runs for this period of time without DH on Clean Time: 020 min Length of time for clean cycle...
- Page 16 Int Time: 950 sec Increasing this number makes the response slower (prevents overshoot) Deriv Time 12 sec Increasing this number makes the response faster SUPPLY HEAT OUT Variables to adjust modulation response of the condenser/react fan Band: 05 F Increasing this number widens the response band Int Time:...
- Page 17 Suct: 000 to 650 psi pressure range of gauge Disc: 000 to 650 psi COMPRESSOR SET POINT HIGH DISCHARGE PRESS Shutoff: 600 psi Compressor will lock out at this pressure COMPRESSOR SET POINT LOW SUCTION PRESS Shutoff: 025 psi Compressor will lock out if suction drops to this pressure COMP A -- CYCLE OFF LOW TEMPERATURE...
- Page 18 PRE/POST WHEEL ALARM Differential: 05.0 F Sets minimum differential between desiccant wheel entering and leaving Delay: 030 min temperature to insure wheel is turning (after associated delay) PRESSURE ALARMS Low Diff: 075 psi Compressor will lock out if diff between suction and discharge pressure is Delay:...
-
Page 19: Shut Down
LEVEL 03: 0003 Password (number) for factory access FACTORY SETTINGS Model Num: HCUb410 Set to HCU model Control Method: STD for I/O control BMS for communicating control 4.5 SHUT DOWN De-energizing output 1 on the CONTROLLER will shut the unit down. 4.6 ADJUSTING SUPPLY AIRFLOW The supply airflow is adjusted by moving the direct drive supply fan closer to or farther away from the inlet cone. -
Page 20: Maintenance
Munters dehumidifiers are designed to be very rugged and reliable. In fact, they have the lightest maintenance requirements in the industry. However, this does not mean you can skip the maintenance completely. -
Page 21: Inspecting The Ductwork
Inspect the drip tray. DX coil access door or panel (See Sect. 5.10) Every 2 Years Check This Location Grease Reactivation fan motor with lithium (See Sect. 5.6) grease (Shell Alvania or eq.) Grease Supply fan motor with lithium grease (See Sect. -
Page 22: Inspecting The Fans
Bond the torn section back together. Avoid getting the silicone on the outer or wearing portion of the seal. This can cause excess drag. Plan to replace the damaged seal as soon as possible. 5.6 INSPECTING THE FANS 1. Turn off the unit before you check the fans. After you turn the unit off, wait three minutes to allow the fans to stop spinning. -
Page 23: Electronic Controls
any of them appear excessively worn. The roller assemblies have nylon bushings and do not require lubrication and should never be lubricated. 5.9 ELECTRONIC CONTROLS 1. There is a non-fused disconnect on the control panel door under a weather proof cover. 2. -
Page 24: Inspecting The Wheel
4. Be careful to avoid damage to the seals, roll the wheel out of the cassette. Place a board at least 6 feet long from the end of the unit underneath the wheel to the roof to act as a ramp. Carefully roll the wheel down the ramp. -
Page 25: Warranty
Munters warrants all equipment manufactured by it to be free from defects in workmanship and materials for a period of one year commencing thirty (30) days from date of shipment of equipment by Munters. This warranty applies only to equipment that is properly installed, maintained and operated under normal conditions with competent supervision in accordance with the equipment instruction manual and Company recommendations, if any, made in the proposal governing purchase of said equipment. - Page 26 OPTIONAL WARRANTY Munters warrants the desiccant wheel to be free of defects in material and workmanship for a period of up to five years from the purchase date. The foregoing does not apply to: 1. Lithium Chloride wheels that have not been maintained under a Munters Service Agreement continuously throughout the five-year period;...
- Page 27 Munters with shipping charges prepaid. 4. Upon receipt of the equipment or part by Munters, the cause of the failure will be analyzed and, if equipment or part is found to be defective in workmanship or material, a credit will be issued for the cost of the replacement or repair of said equipment or part, per the terms of this warranty as set forth herein.
-
Page 28: Troubleshooting
6 TROUBLESHOOTING The HCU has state-of-the-art design, with a sophisticated control system using a microprocessor with solid-state electronics. This unit has proven to be very reliable in a wide variety of installations. Features exist that facilitate troubleshooting on the occasion that a problem occurs. 6.1 DEHUMIDIFIER Operating Principle Figure 6-1 shows how the HCU removes moisture from the air. - Page 29 The HoneyCombe® wheel has been carefully designed. The honeycomb material is nonmetallic and does not react to bacteria. The desiccant material is made of silica gel, and depends on the “adsorption” principle. As moisture collects, each particle of the gel can bond with a large number of water molecules. The process can be reversed by adding heat.
- Page 30 This model number will appear on the front of the VFD. VFD settings are shown in appendix C for the reactivation fan (2 VFD) and the condenser fan (3 VFD). Programming settings (“n” numbers) should be changed only with factory authorization. If any values need to be reset: Programming values (“n”...
- Page 31 Appendix...
-
Page 32: Troubleshooting
Appendix A Troubleshooting General Possible causes Unit will not run Carel microprocessor has an alarm (alarm button is illuminated red). Go to 6.2 for a description of all alarms. If there is no alarm light, check power to unit for correct voltage on all three phases and proper phasing. - Page 33 Appendix B Wiring Diagrams...
- Page 73 Appendix C: Reactivation Fan VFD Settings 460/3/60 460/3/60 "rdy"...
- Page 74 Appendix C: Condenser Fan VFD Settings 460/3/60 460/3/60 "rdy"...
- Page 75 USER'S MANUAL SYSDRIVE 3G3JV S E R I E S...
- Page 76 Chapter7 Maintenance Operations 7-1 Protective and Diagnostic Functions 7-2 Troubleshooting 7-3 Maintenance and Inspection...
- Page 77 Chapter 7 3G3JV Maintenance Operations 7-1 Protective and Diagnostic Functions 7-1-1 Fault Detection (Fatal Error) The Inverter will detect the following faults if the Inverter or motor burns or the internal circuitry of the Inverter malfunctions. When the Inverter detects a fault, the fault code will be displayed on the Digital Operator, the fault contact output will operate, and the Inverter output will be shut causing the motor to coast to a stop.
- Page 78 Chapter 7 3G3JV Maintenance Operations Fault Fault name and meaning Probable cause and remedy display Main circuit undervoltage Power supply to the Inverter has phase loss, power input • (UV1) terminal screws are loose, or the power cable is discon- The main circuit DC voltage nected.
- Page 79 Chapter7 3G3JV Maintenance Operations Fault Fault name and meaning Probable cause and remedy display Motor overload The load is excessive. (OL1) • The electric thermal relay Reduce the load. actuated the motor overload Decrease the Inverter capacity. protective function. • The V/f setting is incorrect.
- Page 80 Chapter7 3G3JV Maintenance Operations Fault Fault name and meaning Probable cause and remedy display An external fault was input from a multi-function input. External fault • ( E F An external fault has been Remove the cause of the external fault. ->...
- Page 81 Chapter7 3G3JV Maintenance Operations 7-1-2 Warning Detection (Nonfatal Error) The warning detection is a type of Inverter protective function that does not operate the fault contact output and returns the Inverter to its original status once the cause of the error has been removed. The Digital Operator flashes and display the detail of the error.
- Page 82 Chapter7 3G3JV Maintenance Operations Fault display Warning name and Meaning Probable cause and remedy Forward- and reverse-rotation input A sequence error has occurred. • (flashing) (EF) Check and adjust the local or remote -> The forward and reverse commands selection sequence. are input to the control circuit terminals simultaneously for 0.5 s or more.
- Page 83 Chapter7 3G3JV Maintenance Operations 7-2 Troubleshooting Due to parameter setting errors, faulty wiring, and so on, the Inverter and motor may not operate as expected when the system is started up. If that should occur, use this section as a reference and apply the appropriate measures. Refer to 7-1 Protective and Diagnostic Functions, if the contents of the fault are...
- Page 84 Chapter7 3G3JV Maintenance Operations • The frequency reference is too low. If the frequency reference is set below the minimum output frequency set in n14, the Inverter will not operate. Raise the frequency reference to at least the minimum output frequency. •...
- Page 85 Chapter7 3G3JV Maintenance Operations T h e m o t o r o n l y r o t a t e s i n o n e d i r e c t i o n . • Reverse rotation-prohibit is selected. If n05 for reverse rotation-prohibit selection is set to 1 (reverse run prohibited), the Inverter will not accept reverse-rotation commands.
- Page 86 Chapter7 3G3JV Maintenance Operations • The ambient temperature is too high. The rating of the motor is determined within a particular ambient operating temperature range. The motor will burn out if it runs continuously at the rated torque in an environment in which the maximum ambient operating temperature is exceeded.
- Page 87 Chapter7 3G3JV Maintenance Operations 7-2-9 Mechanical Vibration Mechanical system makes unusual noise. • Resonance between the characteristic frequency of the mechanical system and the carrier frequency. There may be resonance between the characteristic frequency of the mechanical system and the carrier frequency. If the motor is running with no problems and the machinery system is vibrating with a high-pitched whine, it may indicate that this is occurring.
- Page 88 Chapter7 3G3JV Maintenance Operations 7-2-12 Output Frequency Does Not Reach Frequency Reference • The frequency reference is within the jump frequency range. If the jump function is used, the output frequency stays within the jump frequency range. Make sure that the jump width settings in n49 through n50 for jump frequencies 1 and 2 and jump width in n51 are appropriate.
- Page 89 Chapter7 3G3JV Maintenance Operations 7-3 Maintenance and Inspection WARNING Do not touch the Inverter terminals while the power is being supplied. WARNING Maintenance or inspection must be performed only turning OFF the a f t e r power supply, confirming that the CHARGE indicator (or status indicators) is turned OFF, and waiting for the time specified on the front cover.
- Page 90 Chapter7 3G3JV Maintenance Operations • No dirt or dust should be accumulating on the radiation fin. • No dust should be accumulating on the vents of the Inverter. • There should be no abnormalities in the outward appearance of the Inverter. •...
- Page 91 Chapter7 3G3JV Maintenance Operations • Replacing Cooling Fan (68- or 140-mm-wide Inverters) 1. Press the and right sides of the fan cover located on the lower pa of the radiation fin in the left arrow 1 directions. Then the bo om of the Fan in the arrow 2 direction to remove the Fan as lift shown in the following illustration.
- Page 92 Chapter 7 3G3JV Maintenance Operations 3. Slide the protective tube and remove the internal connector. 4. Remove the Fan from the fan cover. 5. Mount the new Fan on the fan cover. At this time, make sure that the wind direction of the Fan will be in the direction of the heat radiation fin.
- Page 93 Chapter 9 3G3JV Maintenance Operations Chapter 9 List of Parameters...
- Page 94 Chapter 9 3G3JV List of Parameters Parame- Name Description Set- Unit Default Changes Refer- ter No. ting of set- setting during ence range ting opera- page tion Parameter Used to prohibit parameters to be written, 0, 1, 6, write-prohibit sets parameters, or change the monitor 8 , 9 selection/pa- range of parameters.
- Page 95 Chapter 9 3G3JV List of Parameters Parame- Name Description Default Changes Refer- Set- Unit ter No. ting of set- setting during ence range ting opera- page tion STOP/RESET Used to select the stop method in remote 0, 1 Key function mode with n02 for operation mode selec- selection tion set to 1.
- Page 96 Chapter 9 3G3JV List of Parameters Parame- Name Description Set- Unit Default Changes Refer- ter No. ting of set- setting during ence range ting opera- page tion Acceleration Acceleration time: The time required to go 0.0 to 0.1 s 10.0 5-14 time 1 from 0% to 100% of the maximum fre-...
- Page 97 Chapter 9 3G3JV List of Parameters Parame- Name Description Set- Unit Default Changes Refer- ter No. ting of set- setting during ence range ting opera- page tion Frequency ref- Used to set the upper and lower frequency 0 to erence upper reference limits in percentage based on limit the maximum frequency as 100%.
- Page 98 Chapter 9 3G3JV List of Parameters Parame- Name Description Set- Unit Default Changes Refer- ter No. ting of set- setting during ence range ting opera- page tion Motor protec- Used to set the electric thermal character- 1 to 60 1 min 6-14 tive time setting istics of the motor to be connected in...
- Page 99 Chapter 9 3G3JV List of Parameters Name Description Set- Unit Default Changes Ref- ram- ting of set- setting during eter range ting opera- ence tion page Multi-func- Used to select the functions of multi-function input 2 to 8, 5-18 tio n inpu t 1 terminals S2 through S5. 1 0 to (Input termi- Function...
- Page 100 Chapter 9 3G3JV List of Parameters Name Description Set- Unit Default Changes Ref- ram- ting of set- setting during eter range ting opera- ence tion page Multi-func- External ON: Output shut off (while 2 to 8, 5-18 tion input 4 base block motor coasting to a stop 10 to...
- Page 101 Chapter 9 3G3JV List of Parameters Name Description Set- Unit Default Changes Ref- ram- ting of set- setting during eter range ting opera- ence tion page Multi-func- Used to select the functions of multi-function output 0 to 7, 5-21 tionn output terminals.
- Page 102 Chapter 9 3G3JV List of Parameters Name Description Set- Unit Default Changes Ref- ram- ting of set- setting during eter range ting opera- ence tion page Frequency Used to the input characteristics of analog frequen- 0 to reference cy references. gain Gain: The frequency of maximum analog input (10 V or 20 mA) in percentage based on the maximum...
- Page 103 Chapter 9 3G3JV List of Parameters Name Description Set- Unit Default Changes Refer- rame- ting of set- setting during ence range ting opera- page tion Used to impose DC on the induction motor 0 to DC control cur- rent for braking control. Set the DC braking current in percentage Interruption DC based on the rated current of the Inverter...
- Page 104 Chapter 9 3G3JV List of Parameters Name Description Set- Unit Default Changes Refer- rame- ting of set- setting during ence range ting opera- page tion UP/DOWN com- Used to store the adjusted frequency refer- 0, 1 6-19 mand frequency ence with the UP/DOWN function. memory 0: Frequency not stored 1: Frequency stored...
- Page 105 Chapter 9 3G3JV List of Parameters Name Description Set- Unit Default Changes R e f e r - r a m e - t i n g of set- setting during ence range ting opera- page tion Error log Note: “----“ will be 6-21 displayed if no error has been recorded.
- Page 106 Appendix D: Sequence of Operation The HCUb6000 is controlled by a Novar controller with relay outputs for the following functions: 1. Fan 2. Cooling stage 1 3. Cooling stage 2 4. Dehumidification 5. Heat stage 1 6. Heat stage 2 7.
- Page 107 the Cool Stage One input signal. If the outdoor temperature is greater than the indoor temperature setpoint plus the settable Outside Temperature Override Compressor B (setpoint 18ºF), the second stage of cooling will run regardless of the cooling input signal. Outside Grain Override –...
- Page 108 Appendix E Equipment Data EQUIPMENT DATA SHEET: Nat Gas Low Heat MANUFACTURER MUNTERS DRYCOOL MODEL NUMBER HCUb6000 DESIGN DATA SUPPLY AIRFLOW (SCFM) 10,000 MAKE UP AIR VOLUME (SCFM) 5,000 SUPPLY AIR BLOWER SIZE 24"x107% SWSI TYPE/CLASS BAF / II AIR VOLUME (SCFM) 10,000 EXTERNAL STATIC PRESSURE (WG")
- Page 109 EQUIPMENT DATA SHEET: LPG Gas Low Heat MANUFACTURER MUNTERS DRYCOOL MODEL NUMBER HCUb6000 DESIGN DATA SUPPLY AIRFLOW (SCFM) 10,000 MAKE UP AIR VOLUME (SCFM) 5,000 SUPPLY AIR BLOWER SIZE 24"x107% SWSI TYPE/CLASS BAF / II AIR VOLUME (SCFM) 10,000 EXTERNAL STATIC PRESSURE (WG")
- Page 110 EQUIPMENT DATA SHEET Nat Gas High Heat MANUFACTURER MUNTERS DRYCOOL MODEL NUMBER HCUb6000 DESIGN DATA SUPPLY AIRFLOW (SCFM) 10,000 MAKE UP AIR VOLUME (SCFM) 5,000 SUPPLY AIR BLOWER SIZE 24"x107% SWSI TYPE/CLASS BAF / II AIR VOLUME (SCFM) 10,000 EXTERNAL STATIC PRESSURE (WG")
- Page 111 EQUIPMENT DATA SHEET LPG High Heat MANUFACTURER MUNTERS DRYCOOL MODEL NUMBER HCUb6000 DESIGN DATA SUPPLY AIRFLOW (SCFM) 10,000 MAKE UP AIR VOLUME (SCFM) 5,000 SUPPLY AIR BLOWER SIZE 24"x107% SWSI TYPE/CLASS BAF / II AIR VOLUME (SCFM) 10,000 EXTERNAL STATIC PRESSURE (WG")
- Page 112 EQUIPMENT DATA SHEET Electric Low Heat MANUFACTURER MUNTERS DRYCOOL MODEL NUMBER HCUb6000 DESIGN DATA SUPPLY AIRFLOW (SCFM) 10,000 MAKE UP AIR VOLUME (SCFM) 5,000 SUPPLY AIR BLOWER SIZE 24"x107% SWSI TYPE/CLASS BAF / II AIR VOLUME (SCFM) 10,000 EXTERNAL STATIC PRESSURE (WG")
- Page 113 EQUIPMENT DATA SHEET Electric High Heat MANUFACTURER MUNTERS DRYCOOL MODEL NUMBER HCUb6000 DESIGN DATA SUPPLY AIRFLOW (SCFM) 10,000 MAKE UP AIR VOLUME (SCFM) 5,000 SUPPLY AIR BLOWER SIZE 24"x107% SWSI TYPE/CLASS BAF / II AIR VOLUME (SCFM) 10,000 EXTERNAL STATIC PRESSURE (WG")
- Page 114 Appendix F Gas Afterheat...
- Page 115 GENERAL Description Models P00125000 and P00125001 duct furnaces are for use only in a Munters Corporation heating/cooling/dehumidification system. These duct furnaces are not to be used in any other system unless otherwise noted by Munters Corporation. Model P00125000 is for use with natural gas, and P00125001 is for use with propane gas only. Both models are available for single stage or two stage heating.
- Page 116 The manifold pressures are (inches-water column): Natural Gas: High fire- 3.5 Low fire- 1.0 Propane Gas: High fire- 10.0 Low fire- 3.0 The appliance and its individual shutoff valve must be disconnected from the gas supply piping system during any pressure testing of that system at test pressure in excess of 1/2 psig (3.5kPa).
- Page 117 Safety controls: NEVER BYPASS A SAFETY DEVICE. DOING SO COULD RESULT IN PROPERTY DAMAGE, INJURY, OR DEATH. Pressure switch. If the draft motor does not start, or if the flue vent is blocked, the pressure switch will prevent the ignition controls and gas valve from being energized. Limit Switch.
- Page 118 Trouble shooting: Service, maintenance, and cleaning are to be done only by a qualified service person. Thermostat calls for heat but: The exhaust blower does not start: • No power to appliance. • Lose wire, either 24 volts or 115 volts side. •...
- Page 119 Figure 1: Parts Location & Wiring Diagram Pictorial...
- Page 120 Parts List for all models: QUAN. PART PART # PER UNIT Exhaust BIower M1-100-01 Ignition Module M1-101-01 Transformer M1-102-01 Pressure Switch M1-103-01 24 Volt Relay .M1-104-01 Hot Surface Igniter M1-105-01 Flame Sensor M1-106-01 Roll Out Switch M1-107-01 Limit Switch M1-108-01 Gas Valve- Natural M1-200-01 Gas Valve-Propane...
- Page 121 PART QUAN. PART # PART QUAN. PART # P E R U N I T P E R U N I T #8 x 1/2" Self Drill M1-302-01 #10 x 5/8" Self Drill M1-301-01 Exhaust Blower M1-100-01 M1-101-01 #8 x 1 1/4" Self Drill M1-303-01 Ignition Module M1-102-01...
- Page 122 Munters Corporation Commercial Dehumidification 16900 Jordan Road Selma, Texas 78154 (800) 229-8557 www.munters.us OM 0009 – 06 6/05...
Need help?
Do you have a question about the HCUw and is the answer not in the manual?
Questions and answers