
Related Manuals for Elsner KNX RW 24 V


Summary of Contents for Elsner KNX RW 24 V
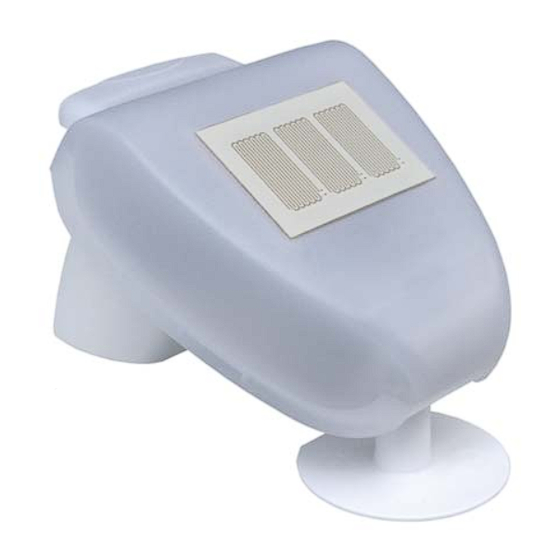
- Page 1 KNX RW Rain / Wind Sensor KNX RW 24 V No. 70127 KNX RW 230 V No. 70126 Installation and Adjustment...
-
Page 2: Table Of Contents
6.3.3. OR Logic 1 / 2 / 3 / 4 / 5 / 6 / 7 / 8 ..............21 6.3.4. Linkage inputs of OR logic ................. 21 Elsner Elektronik GmbH • Herdweg 7 • D-75391 Gechingen • Germany Rain/Wind Sensor KNX RW • from software version 1.00, ETS programme version1.1... - Page 3 The change status (software version and date) can be found in the contents footer. If you have a device with a later software version, please check www.elsner-elektronik.de in the menu area "Service" to find out whether a more up-to- date version of the manual is available.
-
Page 4: Description
1 bit or 2 x 8 bits Configuration is made using the KNX software ETS. The programme file (format VD), the data sheet and the manual can be downloaded from the Elsner Elektronik homepage on www.elsner-elektronik.de in the “Service” menu. -
Page 5: Installation And Commissioning
Installation and commissioning BCU type Own micro controller PEI type Group addresses max. 254 Allocations max. 255 Commmunication objects Heating rain sensor approx. 1,2 W (230 V and 24 V) Measurement range wind 0...70 m/s Resolution (wind) <10% of the measured value Accuracy (wind) ±25% at 0...15m/s, at an angle of attack of 45°, pole mounting... -
Page 6: Location
Elsner Elektronik is not liable for any changes in norms and standards which may occur after publication of these operating instructions. - Page 7 Installation and commissioning Fig. 3 When wall mounting: flat side on wall, crescent- Collar shaped collar upward. Fig. 4 When pole mounting: curved side on pole, collar downward. Collar Fig. 5 Different mounting arms are available from El- sner Elektronik as additional, optional accesso- ries for flexible installation of the weather station on a wall, pole or beam.
-
Page 8: View Of Rear Side And Drill Hole Plan
Installation and commissioning Fig. 7 Example use of the hinge arm mounting: Fitting to a pole with worm drive hose clips 2.3.2. View of rear side and drill hole plan Fig. 8 a+b Drill hole plan Dimensions of rear side of housing with bracket. -
Page 9: Preparing The Sensor
Installation and commissioning 2.3.3. Preparing the sensor Unsnap cover and remove upwards Fig. 9 Screw-on cover (230V device) Cover with rain sensor 3) Cover Snaps Bottom part of housing The sensor cover snaps in on the left and right along the bottom edge (see Fig.). The cover of the 230V model is also screwed on top. -
Page 10: Pcb Layout
Installation and commissioning 2.3.4. PCB Layout 230 V AC version Fig. 11 1) Cable connection to the rain sensor in the housing cover 2) Opening for the cable for the voltage supply 3) Tension clamp for voltage supply (230 V AC), suitable for massive conductors of up to 1.5 mm²... -
Page 11: Mounting The Sensor
Installation and commissioning 24 V DC version Fig. 12 Slot for cable connection to the rain sensor in the housing cover Tension clamp for voltage supply (24 V DC/20 V AC). Massive conductors of up to 1.5 mm² or conductors with fine wires. -
Page 12: Notes On Mounting And Commissioning
Addressing of the device at the bus Fig. 14 With the 230V model, screw the cover on to the underpart, to prevent unauthorised or ac- cidental opening. DANGER! There is a risk to life from the live voltage on a 230 V device! •... -
Page 13: Maintenance
Maintenance DANGER! Risk to life from live voltage (mains voltage)! • With the 230V model, bus addressing via the programming key should only be done by an accredited electrician. • Do not touch any components on the circuit board while pressing the key. -
Page 14: Transmission Protocol
Transmission protocol 5. Transmission protocol Units of measurement: Wind in metre per second 5.1. List of all communication objects Abbreviations EIS types: Switching1/0 Floating point value 8 bit value Abbreviations flags: Communication Read W Write Transmit Name Function flags type Wind force measured value Output C R T... - Page 15 Transmission protocol Name Function flags type Wind threshold value 3 Decrement C R W Wind threshold value 3 Switching output C R T Wind threshold value 3 Switching output C R W block Wind sensor Disruption Output C R T AND Logic 1 Switching output C R T...
- Page 16 Transmission protocol Name Function flags type OR Logic 4 8 bit output A C R T OR Logic 4 8 bit output B C R T OR Logic 5 Switching output C R T OR Logic 5 8 bit output A C R T OR Logic 5 8 bit output B...
-
Page 17: Setting Of Parameters
Setting of parameters 6. Setting of parameters 6.1. General settings Wind force Measured value • do not send • send cyclically • send on change • send on change and cyclically send cyclically every 5 sec … 2 h (only if sending “cyclically”) From change in % 1 …... -
Page 18: Threshold Values
Setting of parameters Rain Switching output is with rain 0 • 1 Switching output sends • not • on change • on change to 1 • on change to 0 • on change and cyclically • on change to 1 and cyclically •... - Page 19 Setting of parameters Type of threshold change • Absolute value with a 16 bit communication object • Increment / decrement with one communication object • Increment / decrement with two communication objects Step size 0,1 m/s … 5 m/s; 1 m/s (only if sending „Increment/decrement“) Hysteresis of the threshold value in % 0 …...
-
Page 20: Logic
Setting of parameters 6.3. Logic Communication objects logic inputs do not release • release AND Logic Logic 1 / 2 / 3 / 4 / 5 / 6 / 7 / 8 not active • active Transmission delay of the switching 5 sec …... -
Page 21: Linkage Inputs Of And Logic
Setting of parameters if logic = 0 object B value 0 … 255 Communication objects • in case of the change of logic AND Logic 1 A and B sends • in case of the change of logic to 1 •... -
Page 22: Or Logic 1 / 2 / 3 / 4 / 5 / 6 / 7 / 8
Setting of parameters 6.3.3. OR Logic 1 / 2 / 3 / 4 / 5 / 6 / 7 / 8 1. / 2. / 3. / 4. Input • do not use • all switching events which the sensor pro- vides (see “Linkage inputs of the OR logic”) Logic output sends •... - Page 23 Elsner Elektronik GmbH Control and Automation Technology Herdweg 7 D – 75391 Gechingen Phone +49 (0) 70 56 / 93 97-0 info@elsner-elektronik.de Germany +49 (0) 70 56 / 93 97-20 www.elsner-elektronik.de...
Need help?
Do you have a question about the KNX RW 24 V and is the answer not in the manual?
Questions and answers