
Subscribe to Our Youtube Channel
Related Manuals for PICARRO PI2114


Summary of Contents for PICARRO PI2114
- Page 1 PI2114 Analyzer for H User Manual Picarro Inc. 3105 Patrick Henry Drive Santa Clara, CA 95054, USA Phone: +1 408 962 3944 • Fax +1 408 962 3200 www.picarro.com Document Number 40-0047 Rev. D...
- Page 2 NOTICES DISCLAIMER AND RESERVATION OF RIGHTS Picarro has prepared this manual solely for the information and use by its customers as a guide for the selection, installation, operation, and maintenance of the products described.
- Page 3 Contact Information General Technical Support: Email: support@picarro.com Phone: +1 408 962 3991 European Technical Center: Email: support@picarro.com Phone: +31 85 888 1650 Customer Service: Email: orders@picarro.com Phone: +1 408 962 3992 PI2114 User Manual P/N 40-0047 Rev D...
-
Page 4: Table Of Contents
Setting Up a Monitor, Keyboard and Mouse ..........29 OPERATE THE ANALYZER ................. 31 Startup Procedure ..................31 Using the GUI ....................31 The Data Viewer (Main Screen) ..............33 Shutdown Procedure ................... 38 Recovery from Power Outages ..............40 P/N 40-0047 Rev D PI2114 User Manual... - Page 5 14. LIMITED WARRANTY ..................71 MEASUREMENT STATUS MESSAGES ..........73 MODBUS COMMUNICATION ............75 B.1 Configuring for Modbus Communication ............75 B.2 Modbus Data Registers Overview and Setup ..........77 B.3 Modbus Register Maps Overview ..............78 PI2114 User Manual P/N 40-0047 Rev D...
- Page 6 B.4 Input Register Map ..................79 B.5 Discrete Input Register Map ................85 B.6 Holding Register Map ..................87 B.7 Coil Register Map ................... 88 B.8 Gas ID Map ..................... 91 P/N 40-0047 Rev D PI2114 User Manual...
-
Page 7: Introduction To Technology
In the cavity, a series of mirrors reflects the infrared light through the sample, increasing the path length. For a Picarro cavity of only 25 cm in length, the effective path length of the cavity can be over 20 kilometers. -
Page 8: Relating Ring-Down Time To Absorption Intensity
As the light circulates in a cavity with a gas sample, the molecular absorption by the gas results in a decrease of the light intensity. P/N 40-0047 Rev D PI2114 User Manual... -
Page 9: Converting Absorption Intensity To Concentration
Picarro instruments gather measurements from an “empty” cavity by switching the light to wavelengths that are not absorbed by the target molecules. The analyzer subsequently measures ring-down times at wavelengths that are absorbed by the target gas. -
Page 10: Spectral Precision And High Sensitivity Measurements
Picarro analyzers calculate the baseline underneath a poorly resolved peak by modeling the absorption peaks from other surrounding molecules and subtracting contributions from neighboring peaks to the absorption intensity. - Page 11 For precise pressure control, the cavity pressure is monitored using a high- linearity pressure transducer. The system computer uses this pressure data in a feedback loop to control proportional valves that adjust the inlet and outlet gas flow of the cavity. PI2114 User Manual P/N 40-0047 Rev D...
-
Page 12: Conventions
CAUTION alerts you of a potential danger to equipment or to the user. CAUTION WARNING indicates an imminent danger to the user. WARNING REMINDER is a helpful hint to procedures listed in the text. REMINDER P/N 40-0047 Rev D PI2114 User Manual... -
Page 13: Acronyms
” (as in 1/4”) Inches °C degrees Celsius ‰ per mil centimeters CRDS Cavity Ring-Down Spectroscopy Graphical User Interface Water Hydrogen Peroxide Hotbox millimeters Parts Per Billion Parts Per Million Remote Terminal Unit (Modbus) Warm box PI2114 User Manual P/N 40-0047 Rev D... -
Page 14: Safety
4. SAFETY General Safety CDRH Certification This Picarro Analyzer complies with 21 CFR Chapter 1, sub-chapter J, and is classified as a Class 1 laser system when all panels and covers are on. CE Certification This Picarro Analyzer complies with the European standards and the instrument is affixed with a CE label. -
Page 15: Laser Safety
WARNING area using appropriate laser-safety glasses. The following Laser Safety Labels are affixed to the inside of the analyzer: Figure 4: Laser Safety Label PI2114 User Manual P/N 40-0047 Rev D... -
Page 16: Warning Label Locations
WARNING Warning Label Locations The warning labels are located in the following positions. Figure 3: Warning-labels on top Front Figure 4: Warning labels on rear panel P/N 40-0047 Rev D PI2114 User Manual... - Page 17 Figure 5: Warning labels inside Front The inside of the analyzer should not be accessed under normal operation. Only remove the top cover when replacing the filter (see Section 13.2, Filter Replacement). PI2114 User Manual P/N 40-0047 Rev D...
-
Page 18: Unpacking The Analyzer
5. UNPACKING THE ANALYZER Inspect the Shipping Boxes Picarro products are inspected and tested before leaving the factory. Their packing containers have been designed to keep the equipment safe from damage during transit. Inspect the condition of the boxes upon arrival. The larger box includes the analyzer and most of the accessories. - Page 19 For External Solenoid Valves Nut (1) and For connecting input line to analyzer INPUT Ferrules (2) Document Packet Includes this manual, PI2114 Service Manual, PI2114 Installation Qualification/Operational Qualification Protocols and Instructions, and Certificate of Compliance. Table 3: Box Two: Vacuum Pump and Accessories...
-
Page 20: Analyzer Overview
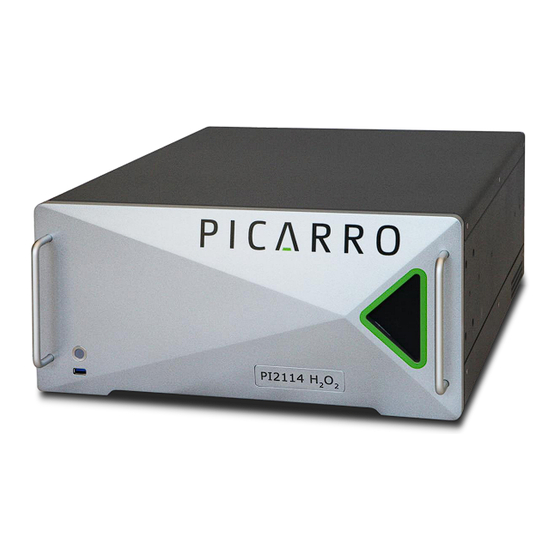
6. ANALYZER OVERVIEW Intended Use The Picarro PI2114 Hydrogen Peroxide Analyzer is designed for the accurate measurement of residual vaporized hydrogen peroxide, H , in units of parts per billion (ppb). The unit uses cavity ring-down spectroscopy and wavelength monitoring to facilitate precise and continuous monitoring of vaporized hydrogen peroxide. -
Page 21: Analyzer Back Panel
DVI-I, DVI-D, and DisplayPort. Ground Ground lug (if needed). Serial Port Connect for digital data streaming. See Service Manual for configuration instructions. Analog Outputs Connect for analog signal streaming. See Service Manual for configuration instructions. PI2114 User Manual P/N 40-0047 Rev D... -
Page 22: External Vacuum Pump
Table 5: Vacuum Pump Features Feature Description Vacuum Inlet Connect to the vacuum port on the analyzer. Exhaust Port Pump output (see pump manual). Power Switch On/Off switch for the pump. Power Connector Connect to AC power. P/N 40-0047 Rev D PI2114 User Manual... -
Page 23: Analyzer Specifications
Power Requirements 100–240 VAC, 47–63 Hz (auto-sensing), < 260 W start up (total): 110 W (analyzer), 35 W (pump) at steady state Minimum Rated 10A @115VAC Circuit Amperage 5A @230VAC Liquid Ingress None Protection PI2114 User Manual P/N 40-0047 Rev D... -
Page 24: Installation
This document (also referred to as “IQ/OQ”) provides instructions and the NOTE method of documentation to verify that the Picarro PI2114 has been installed and operates in accordance with the requirements of Picarro Instruments. Using this analyzer in a manner not specified by Picarro may result in damage to the analyzer and render it unsafe to operate. - Page 25 Ambient Operating Worst-case environmental limits Temperature (unless otherwise specified) Using this analyzer in a manner not specified by Picarro may result in damage to the analyzer and render it unsafe to operate. WARNING PI2114 User Manual P/N 40-0047 Rev D...
-
Page 26: Install The Analyzer And Vacuum Pump
Use only the AC power cables supplied with the analyzer or a similarly rated cable. Check with Picarro technical support if you have questions about power cable replacement. An inadequately rated power cable can result in equipment CAUTION damage. -
Page 27: Connect The 4-20Ma Signal Output
1000.0 100.0 100.0 1000.0 To change this configuration, or to use one of the other outputs, see the PI2114 Service Manual. To connect to the output: 1. Using your fingers, pull the 4–20 mA terminal connector straight back away from the analyzer. -
Page 28: Connecting To The Analyzer Inlet
Connect to the inlet of the analyzer using ¼" OD PTFE or PFA tubing using the supplied plastic ¼" PFA inlet nut and ferrules. When using compressed gases, follow all appropriate safety conventions, including use of eye protection, physical restraint of cylinders, etc. WARNING P/N 40-0047 Rev D PI2114 User Manual... -
Page 29: Setting Up A Monitor, Keyboard And Mouse
2. Connect a mouse to one of the available USB ports. 3. Connect a monitor to one of the monitor ports. The analyzer will detect the connection and adjust the resolution to match the monitor. PI2114 User Manual P/N 40-0047 Rev D... - Page 30 4. Connect the monitor to a power source. 5. Turn on power to the monitor. P/N 40-0047 Rev D PI2114 User Manual...
-
Page 31: Operate The Analyzer
Using the GUI Operating the system through the graphical user interface (GUI) requires a monitor, keyboard, and mouse (see page 29). When the device is first powered on, the analyzer first displays the Home Screen. PI2114 User Manual P/N 40-0047 Rev D... - Page 32 Copy validation reports or user history to a USB drive. Config Perform configuration tasks (see Service Manual). Service Perform service tasks (for trained personnel only). Power Off Shutdown and power off the analyzer (user name and password required). P/N 40-0047 Rev D PI2114 User Manual...
-
Page 33: The Data Viewer (Main Screen)
O in real time. Figure 14: Menu Bar Data Viewer Digital Readouts Status Panel Alarms Panel Measurement Status Quit Button Data Controls Data Buffer Menu Bar The menu bar gives access to the following features: PI2114 User Manual P/N 40-0047 Rev D... - Page 34 Cavity temperature in • Cavity pressure in torr If you are signed in, you can show or hide this panel using the View menu. Alarms Panel Monitor the status of the internal alarms: P/N 40-0047 Rev D PI2114 User Manual...
- Page 35 Red: Reached alarm thresholds (not cleared). To view or change the H or H O alarm set points: 1. Click on the colored indicator next to the gas name to display the Setting Alarm dialog. PI2114 User Manual P/N 40-0047 Rev D...
- Page 36 The Data Keys available depend on your login role: technicians and operators have fewer options than administrators. (If you are not logged in, you will not be able to change the data key.) P/N 40-0047 Rev D PI2114 User Manual...
- Page 37 To lock or unlock the time axes of the graphs during zooming, select that menu item in the View menu (you must be logged in). Measurement Status The Measurement Status box displays all the analyzer status messages. Typical messages are as follows: PI2114 User Manual P/N 40-0047 Rev D...
-
Page 38: Shutdown Procedure
Shutdown Procedure To shut down the analyzer using the GUI: 1. From the Users menu, choose User Login. 2. Enter your Username and password and click OK. P/N 40-0047 Rev D PI2114 User Manual... - Page 39 2. Wait until the status indicator on the front of the analyzer turns off. 3. Turn off the pump. Do not turn off the pump while the analyzer is operating. This could damage the instrument. CAUTION PI2114 User Manual P/N 40-0047 Rev D...
-
Page 40: Recovery From Power Outages
When the power returns after an unplanned outage, the analyzer will restart automatically. If short power outages will be a routine operating environment, Picarro recommends using power conditioning or an uninterrupted power supply to help prevent damaging to the operating system or other software corruption that may occur with repeated crashes. -
Page 41: User Management
User management settings are available from the Tools menu in the Data Viewer: 1. In the Data Viewer, from the Users menu, select User Login. 2. Login as an administrator (default user name is admin; default password is admin). PI2114 User Manual P/N 40-0047 Rev D... -
Page 42: Manage User Accounts
The default user names that are shipped with the analyzer are tech, operator, and admin. The default passwords are tech, operator, and admin, respectively. User names and passwords are both case sensitive. NOTE P/N 40-0047 Rev D PI2114 User Manual... - Page 43 Passwords are case sensitive. Additional rules for passwords can be set in the User Policies tab (see page 45). 5. In the Confirm Password field, re-enter the password. 6. Click Next to save the password. PI2114 User Manual P/N 40-0047 Rev D...
- Page 44 4. Click OK to confirm the action. To Add a User: 1. In the User Management window, click the User Accounts tab. 2. Click Add User; this will display the Add User screen. Figure 22: Add User P/N 40-0047 Rev D PI2114 User Manual...
-
Page 45: Set User Policies
This will not impact existing passwords. Password expiration When selected, any passwords that reach the selected maturity will expire. Any user signing in with an expired password will be required to create a new password. PI2114 User Manual P/N 40-0047 Rev D... -
Page 46: View User History
Figure 24: User History Tab 2. Click the < and > buttons to navigate through the history (if the button is grayed out, then there are no additional pages). P/N 40-0047 Rev D PI2114 User Manual... - Page 47 4. To copy the user history onto a USB drive, click Download. This will direct you to the File Manager, which will prompt you to login again. See page 48 for details on copying files from the analyzer. PI2114 User Manual P/N 40-0047 Rev D...
-
Page 48: File Manager
Once you are signed in, the File Manager will look something like this: Figure 25: File Manager Above the left column, the label will read either User History or Validation Report; Click this label to switch to the other type of file. P/N 40-0047 Rev D PI2114 User Manual... -
Page 49: Mounting A Usb Flash Memory Drive
10.3 Mounting a USB Flash Memory Drive Some users may wish to extract instrument data to a password-protected thumb drive. While the PI2114's Linux system does not support the functionality to enter in a thumb drive's password on the computer itself, it NOTE does support the use of thumb drives with external pin pads on them. -
Page 50: Copying A File
4. When you are done copying files, click Unmount to unmount the USB drive. 5. Remove the USB drive from the device. 6. If using a password-protected USB flash memory drive, follow the manufacturer’s instructions to lock the drive. P/N 40-0047 Rev D PI2114 User Manual... -
Page 51: Troubleshooting
This section lists problems that may occur during installation and operation of the analyzer, and step-by-step procedures that will provide resolution in most cases. If these instructions do not solve the problem, contact Picarro Technical Support. (Please see Page 3 for Contact Information.) 11.2 Analyzer Will not Turn On... - Page 52 Check for leaks in the vacuum line between the analyzer and the pump. • Ensure that the vacuum pump is turned on and running. • When measuring flow from a gas cylinder or bottle, ensure the regulator is set to the proper pressure (2–3 psi). P/N 40-0047 Rev D PI2114 User Manual...
-
Page 53: Gui Does Not Update Graphs During Operation
2. Dry the filter by running Clean Dry Air (CDA) through the analyzer. If the analyzer functions normally after drying, a filter replacement is not necessary. If drying the filter does not fix the problem, replace the filter. See (see Section 13.2, Filter Replacement). PI2114 User Manual P/N 40-0047 Rev D... -
Page 54: Unusual Measurements Or Slow Response Time
10V/m (per IEC 61326-1-2013) may degrade the performance of the analyzer below its normal operating specifications. If possible, relocate the instrument or take measurements when the interfering equipment is not in use. P/N 40-0047 Rev D PI2114 User Manual... -
Page 55: Instrument Validation
2–3 psi (0.1–0.2 bar) of line pressure. • Sufficient tubing to connect the regulator(s) to the instrument. We recommend using ¼" OD PTFE or PFA tubing when working with PI2114 User Manual P/N 40-0047 Rev D... -
Page 56: Safety
• Suitable adjustable or fixed wrenches for making gas-line connections. Please contact Picarro for further information about the supplies and accessories required for instrument validation. 12.3 Safety At the concentrations used here, methane poses zero health, reactivity, or flammability risks. - Page 57 Cylinders page. Use this page to specify the concentrations and uncertainties of the cylinders being used in this procedure. On subsequent uses, the system will remember the saved values and skip directly to the Zero-Air Measurement step. Figure 29: Edit Cylinders PI2114 User Manual P/N 40-0047 Rev D...
- Page 58 Cylinder and verify the settings for the cylinders being used in this procedure (see steps 5–7). 9. Select the zero-air cylinder from the Select Cylinder list. 10. Open the valve on the zero-air cylinder. P/N 40-0047 Rev D PI2114 User Manual...
- Page 59 Measurement When the measurement is complete, the system will prompt you: Figure 32: Measurement Done dialog 13. Click OK to proceed to the next step, Calibrant 1 Preparation. Figure 33: Calibrant 1 Preparation PI2114 User Manual P/N 40-0047 Rev D...
- Page 60 INLET. • Refer to Section 7.3 for information on connecting to the INLET. After the last cylinder has been measured, the system will prompt you to sign in again as a digital signature. P/N 40-0047 Rev D PI2114 User Manual...
- Page 61 Login to display the validation results. Figure 36: Validation Results 22. Click OK to clear the dialog and view a preview of the Validation Report. Figure 37: Validation Report PI2114 User Manual P/N 40-0047 Rev D...
-
Page 62: Example Of Results From Validation
H (methane produces spectra 70-fold weaker) these standards are comparable to 0, 100, 715, and 1430 ppb of H in terms of their utility in evaluating the fundamental performance characteristics of the instrument. P/N 40-0047 Rev D PI2114 User Manual... - Page 63 Figure 38: Validation Report, page 1 PI2114 User Manual P/N 40-0047 Rev D...
-
Page 64: If The Analyzer Does Not Pass
If the analyzer did not pass and there is no discrepancy between the nominal values of the calibrants in the report and the values of the cylinders used during validation, contact Picarro. (Please see Contact Information on Page 3.) P/N 40-0047 Rev D... -
Page 65: Maintenance
13. MAINTENANCE 13.1 Overview Picarro analyzers require minimal service or maintenance. Except for changing a particulate filter and cleaning, the analyzer is not user serviceable. 13.2 Filter Replacement Gasses are filtered by two in-line, sub-micron particulate filters before reaching the measurement cavity. Only one of these filters, the outer filter, is user- serviceable. - Page 66 8. Use a 2mm hex wrench to remove the top lid’s six M3 x 6mm socket flathead screws (three screws per side). Figure 40: Lid Screws Lid Screws (right side) 9. Lift the top cover off the analyzer. This will reveal the bulkhead foam and filter cover. P/N 40-0047 Rev D PI2114 User Manual...
- Page 67 11. Use the " wrench to loosen the jam nut enough that the filter cover can slide free (about 1 full turn should be enough). Jam Nut Figure 43: Loosening the Jam PI2114 User Manual P/N 40-0047 Rev D...
- Page 68 13. Use the needle nose pliers to hold the filter while using the " wrench to unscrew the Output Filter Nut. (Once loosened with the wrench, it may be easier to unscrew the nut by hand.) P/N 40-0047 Rev D PI2114 User Manual...
- Page 69 18. Remove the new filter from its packaging. 19. Thread the output end of the new filter (the end with the wide flange) into the Output Filter Nut until finger tight. Be careful to avoid cross- threading. PI2114 User Manual P/N 40-0047 Rev D...
-
Page 70: Cleaning
28. Use the 2mm hex driver to fasten the lid to the analyzer with the six lid screws (three on each side). 13.3 Cleaning Clean the outside of the analyzer with a clean dry cloth. Only certified service technicians should access or clean the inside of the analyzer. P/N 40-0047 Rev D PI2114 User Manual... -
Page 71: Limited Warranty
Picarro repair or replace such defective Product or credit the Purchaser’s account, whichever Picarro may elect in its sole discretion. If it is found that any Product has been returned which is not defective, the Purchaser will be notified, and such Product returned at the Purchaser’s expense. - Page 72 The following warranty conditions shall apply to all Picarro, Inc. products unless amended by a written instrument signed by a duly authorized officer of Picarro: ADJUSTMENT – No electrical, mechanical, or optical adjustments to the product(s) are permitted. PARTS AND LABOR - New or factory-built replacements for defective parts will be supplied for twelve (12) months from date of shipment of the product.
-
Page 73: Measurement Status Messages
The valve control system is allowing flow through the analyzer and is stabilizing the pressure inside the cavity. Pressure Locked The valve control system has stabilized the pressure inside the cavity. Pressure Unlocked Purge Complete PI2114 User Manual P/N 40-0047 Rev D... - Page 74 The temperature of the “warm box” (WB – the Temperature Locked: WB chamber containing the electronics and wavelength monitor) is stable. Temperature Unlocked: HB Temperature Unlocked: WB Uploading warmbox cal to Entering warming state. DAS… Warming… P/N 40-0047 Rev D PI2114 User Manual...
-
Page 75: Modbus Communication
If a Modbus button does not appear in the Configuration menu, then Modbus communications must be enabled before Modbus can be configured. Please contact Picarro Technical Support for assistance in enabling this feature. (See NOTE Contact Information on Page 3.) 2. - Page 76 Modbus Disabled on Configuration Screen *If the Modbus button does not appear on the configuration screen, it means that feature has not been enabled. Contact Picarro Technical Support for assistance in enabling Modbus. 3. From the Modbus Settings window (Figure 52), you can configure: •...
-
Page 77: Modbus Data Registers Overview And Setup
This section describes the basic types of MODBUS data registers and setup information. Table 16: MODBUS Register Types Name Size Access Input Register 16 bits Read-only Holding Register 16 bits Read-write Discrete Input 1 bit Read-only Coils 1 bit Read-write PI2114 User Manual P/N 40-0047 Rev D... -
Page 78: Modbus Register Maps Overview
If a user tries to read a register address outside of maximum register memory map, the request will return an exception. For example, reading address 156 for coil register will return exception code “0x02” (Illegal address). • System time is in "milliseconds Since 0001-01-01 AD". P/N 40-0047 Rev D PI2114 User Manual... -
Page 79: Input Register Map
B.4 Input Register Map Most of the readings in Picarro analyzer are the float type and need 32-bit data. Each parameter utilizes 2 registers, out of which the first one will be storing MSB and the second one will be storing the LSB of the float number. - Page 80 44-45 , max (full float Value is set at 200 ppm scale range) 46-47 , min float Value is set at 0 48-49 Reserved 50-51 Reserved 52-53 Reserved 54-55 Reserved 56-57 Reserved P/N 40-0047 Rev D PI2114 User Manual...
- Page 81 Reserved 72-73 Reserved 74-75 Reserved 76-77 Reserved 78-79 Reserved 80-81 Reserved 82-83 Reserved 84-85 Reserved 86-87 Reserved 88-89 Reserved 90-91 Reserved 92-93 Reserved 94-95 Reserved 96-97 Reserved 98-99 Reserved 100-101 Reserved 102-103 Reserved PI2114 User Manual P/N 40-0047 Rev D...
- Page 82 210-211 Outlet Valve float counts 212-213 Instrument cal float slope, H 214-215 Instrument cal float offset, H 216-217 User cal slope, float 218-219 User cal offset, float 220-221 Instrument cal float slope, H P/N 40-0047 Rev D PI2114 User Manual...
- Page 83 User cal slope, float 234-235 User cal offset, float 236-237 Reserved 238-239 Reserved 240-241 Reserved 242-243 Reserved 244-245 Reserved 246-247 Reserved 248-249 Reserved 250-251 Reserved 252-253 Reserved 254-255 Reserved 256-257 Reserved 258-259 Reserved PI2114 User Manual P/N 40-0047 Rev D...
- Page 84 ERROR = 2 • NO_SUDO_USER_PRIVILEGE = 3 • NO_USER_EXIST = 7 • USERNAME_PASSWORD_INCORRECT = 9 • USER_DISABLED = 10 • ADMIN_RIGHT_REQUIRES = 11 • PASSWORD_LENGTH_ERROR = 12 • PASSWORD_FORMATE_ERROR = 13 • PASSWORD_REUSE_ERROR = 14 P/N 40-0047 Rev D PI2114 User Manual...
-
Page 85: Discrete Input Register Map
B.5 Discrete Input Register Map All entries are floats unless otherwise noted. NOTE Table 18: Discrete Input Registers Address Description Pressure locked Cavity temperature locked Warm box temperature locked Reserved Reserved Reserved Reserved Reserved Reserved Reserved PI2114 User Manual P/N 40-0047 Rev D... - Page 86 Address Description Reserved Reserved Reserved Reserved Reserved Reserved Reserved Reserved Reserved Reserved Reserved Reserved Reserved Reserved Reserved Reserved Reserved P/N 40-0047 Rev D PI2114 User Manual...
-
Page 87: Holding Register Map
User data 11 Float 222-223 User data 12 Float 224-225 User data 13 Float 226-227 User data 14 Float 228-229 User data 15 Float 230-231 User data 16 Float 232-233 User data 17 Float PI2114 User Manual P/N 40-0047 Rev D... -
Page 88: Coil Register Map
2. Set user name and password holding register. User logout (Coming in near future) Get User data 1 Set User data 1 Get User data 2 Set User data 2 P/N 40-0047 Rev D PI2114 User Manual... - Page 89 Set User data 9 Get User data 10 Set User data 10 Get User data 11 Set User data 11 Get User data 12 Set User data 12 Get User data 13 Set User data 13 PI2114 User Manual P/N 40-0047 Rev D...
- Page 90 0 (for example reading NOTE address 0 for coil register). • If user tries to read address outside of maximum register memory map, request will be exception (for example reading address 156 for coil register). P/N 40-0047 Rev D PI2114 User Manual...
-
Page 91: Gas Id Map
The Gas ID input registers return a two-digit code to identify the gas species being measured. Table 21: Gas ID Map Address Species Description Water Ammonia Hydrogen sulfide Carbon dioxide Methane Carbon monoxide Acetylene Ethylene Nitrous oxide Formaldehyde Hydrogen fluoride Oxygen Hydrogen chloride Ethane Hydrogen peroxide PI2114 User Manual P/N 40-0047 Rev D...
Need help?
Do you have a question about the PI2114 and is the answer not in the manual?
Questions and answers